Tag Archives: NanaBread

I don’t know how this happened.

Remember my post from 2 weeks ago? The one with the pineapple update? The update where I said we probably had at least 4-6 weeks until harvest? Well, we went to Austin last weekend to visit the kids and came home to this:

Pineapple Harvest 6

I don’t know how this happened. They went from firm, mostly green and this:

Pineapple Close-Up - Aug2013

to completely, thoroughly golden-yellow ripe in 4 days. FOUR DAYS!

Side by Side Comparison - 4 days

I can only attribute it to:
A.) four days of intense Houston heat, followed by
B.) a good solid day of rain during drought conditions, and
C.) my lack of experience growing pineapples (even with 15+ plants)

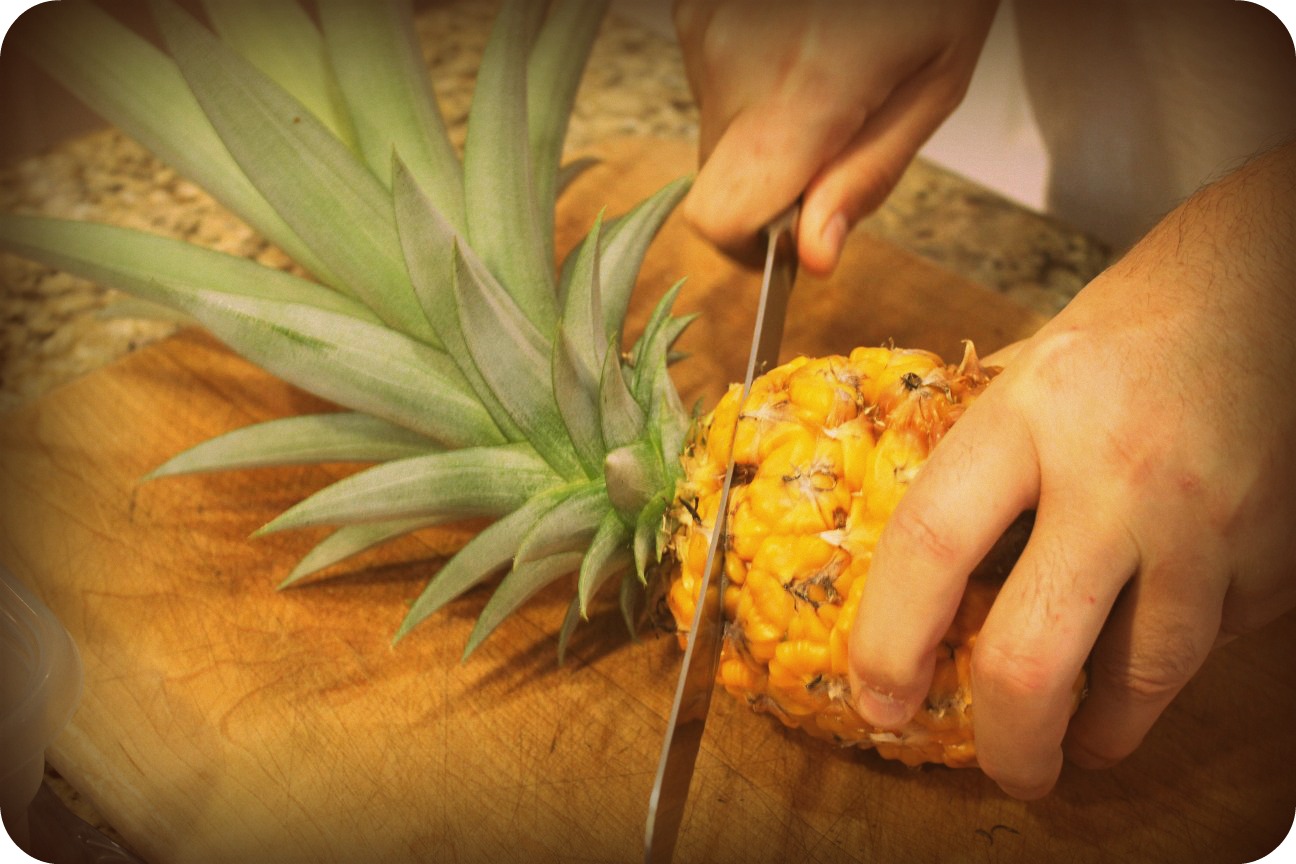
We had no choice but to harvest them before they got too ripe, which was disappointing because we really had hoped the kids would be here to participate. Instead, The Complete Package & I cut them down. No kids; no celebration.

Pineapple Harvest 1

Pineapple Harvest 2

Here’s a peek behind the curtain at how we’ve accumulated so many pineapple plants over the past few years. Each plant, while it’s fruiting, puts off several shoots (ratoons) that can be removed and replanted to form new plants. Each of our four fruiting plants put off at least 2 to 3 ratoons.

Pineapple Harvest 3

Pineapple Harvest 4

I’m no math whiz, but if each pineapple plant produces 3 ratoons PLUS a pineapple fruit, that means you now potentially have FOUR (4) additional future pineapple plants, because you can replant the ratoons and replant the top off the pineapple fruit. We started six years ago with the top of a pineapple plant we’d bought at the grocery store. We now have over 15 plants because we keep re-potting the ratoons & pineapple tops. I joke about our mini-plantation, but it’s actually kind of true. They’re taking over our back porch. Two years ago, we harvested one lonely but gorgeous pineapple. This year, we got this:

Pineapple Harvest 5

Which brings me to our new little gadget I just have to show off. My friend Kirsten of Comfortably Domestic (my sister from another mister) and her four boys were so excited about our pending pineapple harvest, they sent us the new OXO ratcheting pineapple corer & slicer. Oh, baby!

Pineapple Harvest 2013- Ready to Cut

To use it, lop the top off your pineapple, leaving about 3/4″ so you can replant it later and become a semi-obsessed mini-plantation pineapple farmer like me.

Pineapple Harvest 2013- Lop off the top

We set the pineapples into a mixing bowl to capture any juice so I could make marmalade (always thinking ahead), then TCP set about coring those golden puppies. The OXO pineapple corer tore right through each pineapple in seconds.
It was amazing to watch and surprisingly fun to use.

Pineapple Harvest 2013- OXO Pineapple Corer & Slicer

Did I mention it ratchets? You don’t have to turn the bowl or move the pineapple or anything! Just twist the handle on top and it ratchets after each cut until it reaches the bottom. Once done, you simply pull the rings right out of the shell. That’s right – I said rings!

Pineapple Harvest 2013- Rings on the Slicer

It cuts the entire pineapple into perfectly even rings. Shut up! I know!

Pineapple Harvest 2013- Perfectly Sliced Rings

We set aside one tub of rings for Jonah Bear & Lilly Bug, since they both said they’d like to recreate our pineapple upside-down cake from the 2011 harvest, and poured most of the pineapple and juice into the Dutch oven to make my first ever batch of pineapple upside-down marmalade (pineapple, brown sugar & maraschino cherries). With that, there was only one last task to conquer.

Remember that post I mentioned in the first paragraph? The one where I said we probably had a few weeks until harvest? Well, I may have mentioned in that post that I’d also like to make fruity cocktails with this batch of pineapples. And since the OXO corer/slicer did such a nice job of creating the perfect vessel, there was just one last thing to do.

Pineapple Harvest 2013- Pina Colada Fixings

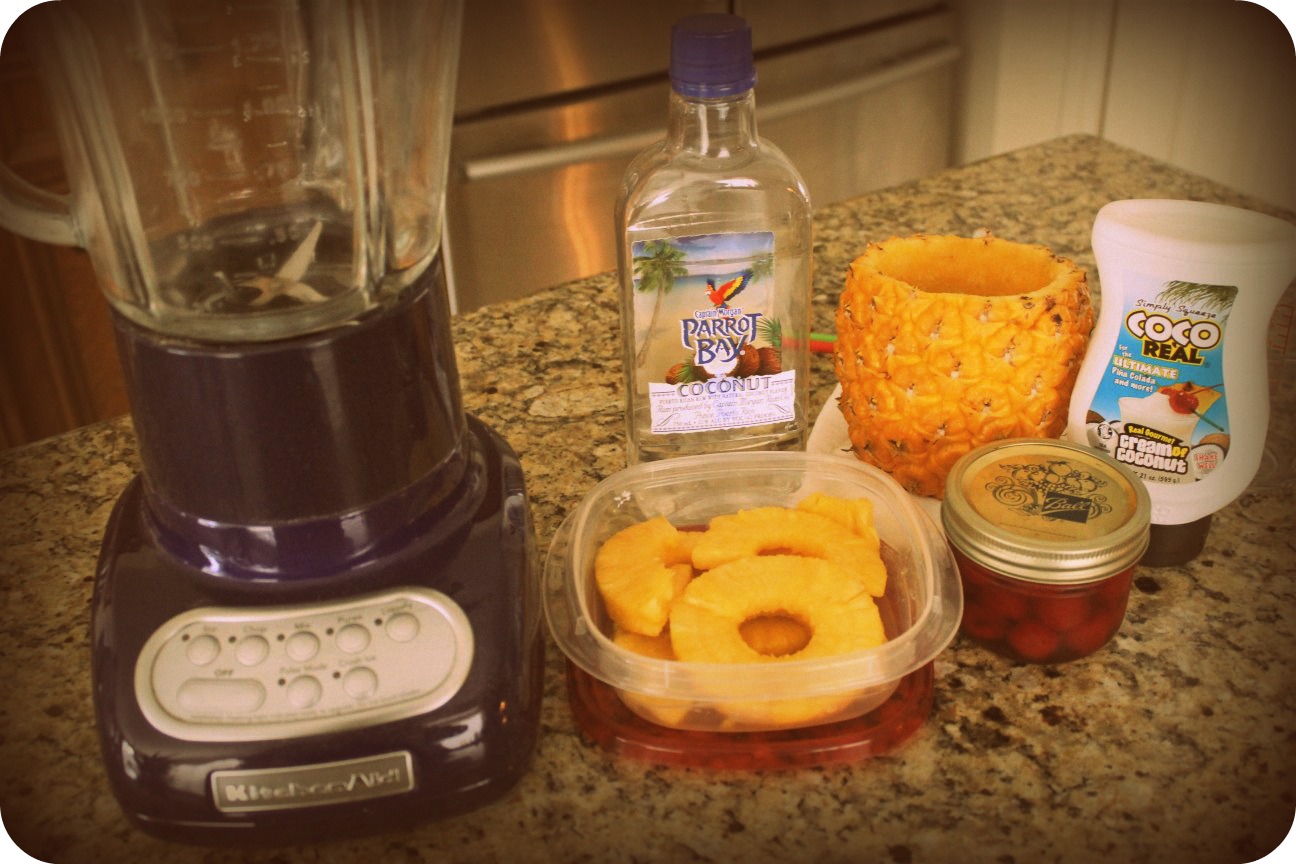
You should know me well enough by now to know that I never turn down a fruity ‘pinkies up’ frou-frou girly cocktail. So here’s to you, and here’s to friends who send friends kitchen gadgets, and here’s to the great pineapple harvest of 2013.

Pineapple Harvest - Pina Colada

Oh, and just in case you’d like to join me:

Pineapple Harvest 2013  - Pina Colada Recipe

25 Comments

Filed under Family Stuff, Food & Recipes, Things I Love

Pineapple Update!

Our pineapple babies are growing nicely. I realized it’s been forever since my last update, and I thought you’d like to see how they’re doing. This year, we have four. FOUR! Well, four actual fruits. We’re currently up to eight pots and over a dozen plants. If you add in the ratoons (offshoots) that will have to be replanted soon, we’re up to 25+ potential pineapple plants. It’s practically a mini-plantation now. Watch your back, Dole. I’m coming for you.

Pineapple Collage - Aug2013

In my head I call them Eenie, Meenie, Miney & Mo. This is Mo (below).

Pineapple Close-Up - Aug2013

Judging by our last pineapple harvest in 2011, I’m guessing these are still at least 4-6 weeks from fully ripe which means late September or possibly even early October. But that’s okay, because we got another surprise this month – a new batch of bananas – and they’ll be ripe at about the same time.

Bananas - Aug2013

{sniff….sniff…} I smell daiquiris!

21 Comments

Filed under Miscellaneous Thoughts, Things I Love

Can It: Black & Blue Jam

Black & Blue Jam - Label Shot

Jam. It’s my jam. I love making it, which is convenient because I love eating it. There’s something magical about canning your own jam. When I open my pantry and see that Jelly Shelf with jars stacked high, I feel I’ve accomplished something. When I take a jar of homemade jam to my grandkids I feel like I’m sharing something homemade and wholesome. It’s a love that goes back to my own grandmother and memories of sitting on the steps of her root cellar, waiting anxiously to see what she might retrieve. It’s memories of my own mother baking homemade bread on glorious summer canning days, smearing warm slices of that bread with jelly foam and passing them out like Christmas presents. Magical.

When my Big Sister and I road-tripped up to Mom’s last month, I was fortunate to find gorgeous fresh blackberries and blueberries and saved them just for this – Black & Blue Jam. The combination of these two berries, blended into a rich, deep purple jam – well, it just sings to me and stirs some deep-seeded joy from my past as well as a fervent passion for the buttered toast in my future.

Black & Blue Jam - Berries in the Pot

Black & Blue Jam
7 cups fresh blueberries & blackberries, washed & stems removed
1/4 cup fresh squeezed lemon juice
3 boxes (1.75 ounces each) powdered pectin
10 cups granulated sugar
1 teaspoon real unsalted butter
6 pint or 12 half-pint canning jars
new lids & rings for each jar

In a large heavy saucepan, combine the berries and lemon juice. Cook over medium heat, stirring often, until the berries are soft and have released most of their juice, approximately 30-45 minutes. (Hint: I like to take an old-fashioned potato masher to mine after about 20 minutes to help extract the juice.) Add the pectin to the sugar and stir to combine, then gradually add the sugar to the berries, stirring constantly to prevent lumps. Drop in the butter and continue to cook, again stirring often, until the sugar has completely dissolved and the mixture has started to thicken. Using a big soup spoon, skim off any foam or bubbles from around the edge of the pan and save it in a bowl for jelly foam toast later. It’s a jam canner’s reward for a job well done.

Turn off the heat. If you dislike seeds (I do), place a strainer over another large pan and ladle the jam into a strainer, pressing the jam through using a flexible silicone spatula. Place your sterilized canning jars close to the pot. Using a canning funnel, ladle the jam into jars, leaving 1/4″ to 1/2″ of space at the top. Once filled, use a damp paper towel to thoroughly wipe the rim of each jar, removing any jam that may have spilled over.

In a heat-proof bowl, place new canning lids (I alternate them – one face up, one face down – to keep them from sticking together) and cover them with boiling water. Let them sit for 3-4 minutes, then carefully remove them one at a time, shaking off any excess water, placing one onto each jar. Screw a ring on firmly, but not so tight that it won’t turn at all, and set them aside until all are done.

I use this handy silicone canning basket when I can anything. It allows me to lower & raise jars without any slips or accidents, and is heat-proof so it stays in the pot the entire time without melting. Process your jam jars in a hot water bath for 15 minutes (half-pints) or 20 minutes (pints). If you’re unfamiliar with water bath processing, check out this tutorial.

Jelly Collage

In my house, jam isn’t ‘done’ until it’s properly labeled. I may be slightly obsessed with creating cute labels for all my jams & jellies. It’s my creative process. Once your jars are properly labeled, you’re free to box them for storage, stack them on a pantry shelf, or pass them out to friends and family. Homemade jam makes excellent gifts. And speaking of gifts, there’s just one more to enjoy before you go – that bowl of jelly foam on warm buttered toast.

Black&Blue Jam Collage

Oh, Mom. I cannot thank you enough. {hugs}

For more on home canning, visit http://www.freshpreserving.com/getting-started.aspx

26 Comments

Filed under Food & Recipes, Things I Love

“The Heat is On” Spicy PB Shortbreads

Heat Is On PB Shortbreads -Title Shot

I love peanut butter. This one time, in high school, a friend’s dad got me to run 5 miles for a giant jar of it on a dare. It was 1980, and there was a peanut butter shortage. I did what I had to do.

Fast forward to June of this year, when I attended the BlogHerFood conference in Austin. I had the best time and met so many fabulous food bloggers, but I was also fortunate to meet some really nice people from companies represented at the event like Adam Shapiro from Peanut Butter & Co.

Adam & I sat at the same breakfast table the first morning of the conference, but didn’t get a chance to talk. Later that weekend, I bumped into him again and got a chance to strike up a conversation and share how much I love their peanut butter (most especially their Dark Chocolate Dreams – it’s sin in a jar). Adam asked if I’d heard about their new flavor – The Heat is On. It’s a crazy blend of peanut butter and spicy chilies.

When I say crazy, I mean crazy genius. We talked about the standard things that came to mind, like using it in a peanut satay or in a dipping sauce for egg rolls or dumplings. But as we were talking, I kept thinking about what it would be like in a cookie. Specifically, a peanut butter shortbread cookie dipped in chocolate.

Adam was intrigued by the idea. Enough so that he offered to send me some peanut butter to play with. This was truly one of the greatest and most unexpected pleasures of attending my first food blogging conference – connecting with fascinating people you’d never have a chance to meet otherwise and sharing a passion for food. True to his word, here’s what Adam sent:

PB&Co Box

Not just one jar, but an entire box of various Peanut Butter & Co flavors. I was simultaneously stunned and thrilled. He even included a jar of the Dark Chocolate Dreams. What a guy! Lilly Bug (our granddaughter) immediately fell in love with the dark chocolate peanut butter. She’s a girl after her Nana’s heart. Jonah Bear (our grandson) loved the maple. He’s a pancake kind of dude, so that’s not really surprising. Personally, I went into that jar of Cinnamon Raisin Swirl with a spoon and almost didn’t come back out. I’m officially obsessed with it.

PB&Co The Heat is On

But this spicy The Heat is On is what inspired these cookies. This richly roasted peanut butter combined with a spicy blend of heat is as bold as it is fun. It’s just spicy enough to feel the burn spread across your palate, but not so spicy you’re running for a glass of water. It’s a party in a jar, and now it’s a party in a cookie. And all because I stepped out of my comfort zone and initiated a conversation with a super guy who just happened to work for a peanut butter company that I love.

The Heat is On Peanut Butter Shortbreads – for Adam
3/4 cup (1 1/2 sticks) unsalted butter, softened
1/4 cup ‘The Heat is On’ spicy peanut butter
1/4 cup plain crunchy peanut butter
1/2 cup brown sugar, packed
2 tablespoons honey or agave nectar
1/2 teaspoon pure vanilla extract
2 1/3 cups all-purpose flour
1/4 teaspoon table salt

In a large mixing bowl, combine the butter and peanut butter, beating with an electric mixer until well blended. Add the brown sugar, honey or agave nectar and vanilla extract, beating until combined. Sift together the flour and salt and add it slowly to the butter mixture, beating until the flour is fully absorbed.

Heat Is On PB Shortbreads - Pressed with a Glass

To press with a glass for a decorative cookie:
Scoop enough dough into the palm of your hand to form a ball roughly the size of a golf ball. Line a cookie sheet with a Silpat baking mat or parchment paper. Space the balls of cookie dough about 2″ apart and press with the bottom of a decorative glass. If the glass tries to stick to the dough, dip it in granulated sugar.

Heat Is On PB Shortbreads - Slice & Bake style

To use the slice & bake method:
Shape the cookie dough into a log and roll in plastic wrap, twisting the ends to seal them shut. Refrigerate at least one hour, then unwrap and slice into 1/4″ slices. Place the cookies 1″ apart on a lined cookie sheet.

To bake:
Pre-heat your oven to 275F. Place your oven rack in the middle portion of the oven, and bake the cookies for 40 minutes. Remember – everyone’s oven is different and some run hotter than others. Start checking the cookies at 30 minutes. If you gently press the center of the cookie and it gives a little, let them stay in a few minutes longer. I baked mine for exactly 40 minutes.

Remove from the oven and allow them to cool on the baking sheets until completely cooled. Store in an airtight container for up to one week. If you want to kick it up a notch, consider dipping them in chocolate. I did. #NoRegrets.

Heat Is On PB Shortbreads - Dipped Close-Up

To dip in chocolate:
I let the cookies cool overnight to make sure they were completely cooled. Next, combine 1/2 cup dark chocolate chips with 3/4 cup milk chocolate chips and set them over a double-boiler to melt. Once melted, whisk until the chocolate mixture is perfectly smooth, with no lumps. Scrape the chocolate into a small glass or ramekin and dip each cookie individually, placing them on waxed paper to set.

Heat Is On PB Shortbreads - Drizzed in Chocolate

In a rush? You can scrape the melted chocolate into a zippered plastic food storage bag, press it all down to one corner of the bag, and snip the corner off. Using a quick back & forth method, drizzle the cookies until all are decorated. Then squeeze some into your mouth for good measure, and throw away the used bag. After that, it’s just a matter of waiting for the chocolate to set up, if you can wait that long. I’ve never been good at waiting, especially with cookies.

Heat Is On PB Shortbreads - Final Close-Up

Tip: If you live in a warm, humid climate like I do (hello, Houston), spread your waxed paper onto a cookie sheet before you dip or drizzle your cookies with chocolate. Once done, you can pop the entire pan into the fridge for 30 minutes or the freezer for 10 minutes to help the chocolate firm up.

Note: This recipe is adapted from a shortbread recipe at Living Tastefully. This post is not sponsored by Peanut Butter & Co. As stated above, the company provided me with a box of product to sample. All opinions (and drooling) are my own. Special thanks to Adam Shapiro of Peanut Butter & Co for his generosity.

29 Comments

Filed under Food & Recipes, Things I Love

A Week at My Mom’s

That's my niece, capturing the excitement of our road trip to Mom's.

That’s my niece, capturing the excitement of our road trip to Mom’s.

Hello, everybody… I’m back! My week-long visit to Mom’s was most excellent. I picked up Big Sis and her daughter in Dallas and we beat cheeks north to avoid the thunderstorms that chased me from Houston all the way to Mom’s. From my door to Mom’s is about 9 to 10 hours, which made for a long drive, but it allowed us to get an early jump on Saturday morning. To add to our excitement, Sister #4 drove up from Dallas late Friday night to join us for our first weekend because in our family, the more = the merrier.

Saturday morning started with a trip to the farmers market in Fort Smith, which totally blew my mind. The variety and quality we found was shocking and wonderful, and this from someone who visits farmers markets in Houston and Austin. I’m telling you, these folks weren’t messing around. We hit that market like we were preparing for the apocalypse and ate like kings off our bounty for an entire week. We had bags upon bags of field peas, carrots, kale, squash, heirloom tomatoes, okra, Asian eggplants, honey, homemade bread and more. In fact, Big Sis and I ended up bringing some goodies home. She ended up with kale, carrots and assorted other veg. I brought back peaches, blackberries, blueberries and Thai bird chilies. Win/win all the way.

We also hit a vintage flea market at the fairgrounds and picked up a few great pieces for great prices. I bought vintage kitchen utensils and pans for blog props (of course), including an antique cake comb for my friend and fellow blogger Anne of From My Sweet Heart. She should be getting that box any day now. Then it was on to Van Buren for lunch and more antiquing. So fun!

Overall, our week consisted of way too much really good food, including that Blackberry Cake I made for Berry Week. It died a noble death. We also whipped up a few cocktails, got in a few rounds of croquet when the oppressive Oklahoma heat wasn’t trying to kill us, played more than a few board games chased with a few rounds of Mexican Train dominoes, and tackled some crafting. (I tried to crochet but failed miserably.) There were also visits from our Baby Sister and her son as well as a day spent with our oldest niece. Mostly, our week can be summed up as: we spent our week running Mom ragged by dragging her to every antique and quilt shop within a 100 mile radius. And it was glorious.

Here are a few snaps of our week in the country.

Typical sunset over Mom's place in the country.

Typical sunset over Mom’s place in rural eastern Oklahoma.

One of the many cottontail bunnies that live in Mom's yard and terrorize her attempts at gardening.

One of the many cottontail bunnies that live in Mom’s yard and terrorize her attempts at gardening. It’s a good thing they’re cute.

Mom's yard is covered in these bushes - nicknamed Rose of Sharon.

Mom’s yard is covered in althea bushes – nicknamed Rose of Sharon.

Mockingbird eggs - there were four in that nest by the time we left.

Mockingbird eggs – there were four in that nest by the time we left.

A day trip to White Rock Mountain for a picnic lunch.

A day trip to White Rock Mountain for a picnic lunch.

Mom at the overlook gate at White Rock Mountain.  I'm comin', Ma!

Mom at the overlook gate at White Rock Mountain. I’m comin’, Ma!

Mom, Big Sis & my niece checking out the cliffs at White Rock Mountain.

Mom, Big Sis & my niece checking out the cliffs at White Rock Mountain.

34 miles to Fort Smith, Arkansas where I spent my formative years.

34 miles to Fort Smith, Arkansas where we spent our formative years.

Big Sis & my niece check out the treacherous drop at the overlook.

Big Sis & my niece check out the treacherous drop at the overlook.

A perfect peck of peaches from Poteau, Oklahoma. Gorgeous!

A peck of perfect peaches from Poteau, Oklahoma. Gorgeous!

What to do with a peck of perfect peaches - preserve!

What to do with a peck of perfect peaches? Preserve!

There was much, much more to our week – most of which I did not photograph because I was too busy enjoying it. We took a day trip to Eureka Springs, which was lovely and included a stop at an old favorite – Bubba’s Barbeque.

Photo of Bubba's taken by my Big Sister

Nothing says pulled pork like the pink pig at Bubba’s. Photo taken by Big Sis & used with her permission.

In the end, we had a lovely week and were thoroughly exhausted by the time we all got home; I can only imagine how tired Mom must have been. We totally wreaked havoc on her quiet country life for an entire week, but we had such fun doing it. We did it all – from feeding fruit to the cows to playing croquet with the bunnies. Our hearts and stomachs were full, even if our wallets were significantly lighter after all that shopping. Still, it was so worth it.

Since my niece kicked off this story, I’ll let her finish it. Even though she’ll most likely be horrified. Sorry, K. When you pose around a blogger, things happen.

The End.

The End.

19 Comments

Filed under Family Stuff, Travel Tales

My Favorite New Salad: CousCous

Couscous - Banner Shot - Inside NanaBread's Head

I am addicted to couscous. I blame my little sister (aka #4). She’s the one who first introduced me to it, and since then I have come to love it beyond words. It’s hard to even pinpoint what I love most. Maybe it’s the couscous grain itself – so buttery and delicious. Or perhaps it’s the combination of fresh & dried fruits; it does pair my favorite tart dried cherries, cranberries and apricots with the sweetness of fresh melons. Or maybe it’s the nuts? That’s a strong possibility, since toasty roasted pistachios, walnuts & pecans are showcased.

Couscous - Ingredients - Inside NanaBread's Head

Who am I kidding? It’s all of it, tossed together to create a sweet & savory, soft & crunchy perfection you just can’t find in other salads. And the best part is that you can customize it to include any of your personal favorites. My little sister loves to add pomegranate seeds. I adore it with the fresh melon and dried papaya. Any way you choose to make it, be forewarned – once you try it, you may never stop obsessing over it. Trust me.

NanaBread’s Easy CousCous:
1 cup water
1 pinch of table salt
1 tablespoon agave nectar or honey
1/8 teaspoon ground cinnamon
4 tablespoons butter
1 cup uncooked couscous
1/2 cup dried cranberries
1/2 cup dried papaya, diced
1/2 cup dried apricots, diced
1/2 cup dried, pitted tart cherries
1/2 cup fresh honeydew melon, diced
1/2 cup fresh cantaloupe, diced
1/2 cup roasted & salted pistachios
1/2 cup toasted pecans
1/2 cup toasted walnuts
zest & juice of one orange

In a saucepan, combine the water, salt, agave, cinnamon and butter; stir over medium-high heat until the water mixture comes to a boil. Quickly add the couscous and stir constantly for one minute, to prevent the couscous from sticking. Cover tightly with a lid, turn off the heat, and let it sit for 5 minutes.

While the couscous is resting, chop your fruits and nuts into roughly the same size pieces and place them in a large mixing bowl; toss with the juice and zest of one orange. Once the couscous is ready, fluff it with a fork and pour it over the fruits and nuts; toss to thoroughly combine.

Couscous - Close-Up - Inside NanaBread's Head

Let the mixture sit at room temperature for at least 30 minutes before serving. Leftover couscous should be refrigerated in an airtight container and should keep for at least 4-5 days. I don’t think mine will last that long. Not even close. Nope. Not at all. Not sharing, either. Nuh-uh. {going back for more}

14 Comments

Filed under Food & Recipes

Berry Week: Annie’s Blackberry Cake

Blackberry Cake - InsideNanaBreadsHead

Hooray for summer berries and Berry Week! Fresh produce from the farmers market is one of my favorite things about summer and each year I look forward to hitting all the fruit stands. Fresh berries, peaches, watermelon and all those glorious veggies make me happy to my core.

This week, our Theme Weavers band of bloggers is taking on summer’s bounty with Berry Week. Contributions include pies, cakes, cocktails and breakfast treats so stay tuned and plan to visit all this deliciousness.

Berry Week Logo

Monday:
Kirsten @ Comfortably Domestic – Fresh Strawberry Pie
Madelyn @ La Petite Pancake – Berry Sangria

Tuesday:
Anne @ From My Sweet Heart – Summer Berry Terrine with Mascarpone
Jeanne @ Inside NanaBread’s Head – Annie’s Blackberry Cake (below)

Wednesday:
Lauren @ Grier Mountain – Vanilla Gelato with Peach-Blueberry Compote
Kat @ Tenaciously Yours – Strawberry Smash

Thursday:
Megan @ Country Cleaver – Strawberry Basil Sorbet Bellini
Haley @ Girly Girl Cooks – Strawberry-Rhubarb Stuffed French Toast

Friday:
Christina @ Buffy & George – Raspberry & Cherry Pie (gluten-free crust)
Beka @ Kvetchin’ Kitchen – PNW75 Berry Cocktail
Monica @ The Grommom – Papaya-Berry Crisp (gluten-free)

Saturday:
Madeline @ Munching in the Mitten – Cherry Clafoutis
Allison @ Decadent Philistines – Raspberry Marshmallows (2 ways)

Blackberry Cake & Vintage Square Cakestand - Inside NanaBread's Head

Now let’s talk cake! I am a self-proclaimed Pie Girl. Basically, it’s because I despise dry, over-frosted cake. Yuck. I’d rather skip dessert all together than eat dry cake. Luckily, this is not that cake.

I first got this recipe from my dear friend Annie. We worked together in an elementary school front office for years and became soul sisters. She shared this gem with me and I shared it with my mom and sisters. Now it’s a family favorite. Best of all, it’s incredibly easy to make and absolutely packed with blackberry flavor. I know some people hate the M word (rhymes with hoist) so I’ll refrain. Just know that this cake is the furthest thing from dry.

Annie’s Blackberry Cake

For the cake:
1 box white ‘super moist’ cake mix (18 ozs.)
1 box black raspberry or raspberry Jell-O (3 ozs.)
1 cup vegetable or canola oil
1/2 cup milk
4 whole eggs
4 Tablespoons seedless blackberry jam
1 cup fresh or frozen blackberries
1 cup sweetened coconut
1 cup chopped pecans

For the Whipped Cream Frosting:
2 cups heavy whipping cream, chilled
1/4 to 1/2 cup granulated sugar (to taste)
1 teaspoon pure vanilla extract
3 tablespoons seedless blackberry jam
fresh blackberries for garnish

To Make the Cake:

Pre-heat your oven to 350F. The original recipe called for three 8″ round pans for a layer cake. I used a vintage square tube pan I found at an antique shop last summer, but you could also bake this cake in a 13″ x 9″ rectangle pan (even easier). Generously grease & flour your baking pan(s) and set them aside.

Next, put the coconut & pecans into a food processor and pulse until both are well combined and ground into small pieces; set those aside, as well.

Combine the cake mix, dry Jell-O powder, oil, milk and blackberry jam in a large bowl and beat with a mixer until thoroughly combined. Add the eggs one at a time, beating after each addition. Gently fold in the berries, coconut and pecans until evenly distributed. Pour the batter into your pan(s) and spread it into a smooth, even layer.

Bake at 350F until a toothpick inserted near the center of the cake comes out clean. My square tube pan took 40 minutes. A 13″ x 9″ square should take 25-30 minutes, and three round layers should take 20-25 minutes. As with all recipes, baking time may vary depending on your oven, so keep an eye on it for the last 10 minutes and check it often with a toothpick. Once it’s done, remove from the oven and allow to cool in the pans until cool to the touch.

To Make the Whipped Cream Frosting:

While your cake is cooling, place your mixing bowl and beaters in the refrigerator and chill for at least 15-20 minutes. Once chilled, remove from the fridge and add the cream, sugar, vanilla and jam to the bowl. Beat on medium-high to high speed just until firm peaks form.

If your cake is still warm to the touch, put your prepared whipped cream in the fridge and wait until the cake is completely cooled to prevent your cream from melting. Once the cake is cool, you’re ready to frost.

For my tube pan cake, I used a serrated knife to cut the cake into two even layers. If you use a 13″ x 9″ pan, simply top with whipped cream frosting and sprinkle with fresh berries. For a layer cake, stack one layer at a time onto a serving plate and fill with 1/2″ of the whipped cream, then top with last of the whipped cream and fresh berries. I had extra berries, so I tossed them with some sugar and used them between my layers as well.

Because of the whipped cream frosting, this cake must be refrigerated. It’s also best when eaten within 48 hours. That’s one of the reasons my family makes this for family gatherings. It’s a lot of cake to consume for two people in one weekend. If that’s an issue, you might consider baking this as cupcakes and freezing them un-frosted. Then when you need a cake fix, you can thaw as many as you want/need and make just enough whipped cream for those few.

If you’re thinking “I’m not really a blackberry fan” then try it with raspberries or strawberries. Don’t like pecans? Substitute toasted almonds. Allergic to nuts? Leave them out! I draw the line at coconut. It’s just too good to leave it out, but if you have to I promise to look the other way. It’s not brain surgery – just cake. Tweak it any way you like. Food should be fun, so play with it!

Now all that’s left to do is to dig in. My cake is going to Mom’s house. Luckily, she’s a good sharer. Speaking of sharing, here… I saved you a piece.

Blackberry Cake - A Slice - Inside NanaBread's Head

Note: This recipe was adapted from a copy of a recipe taken from an old unspecified spiral-bound cookbook. It is credited to Billie Kendrick of Springdale, Arkansas. Her original recipe called for a heavy fudge-like frosting made with one pound of confectioner’s sugar. Since I’m not a buttercream fan, my family and I opt for a lighter whipped cream topping. I also took the liberty of adding blackberry jam to the cake batter for extra flavor. My heartfelt thanks go to Ms. Kendrick for her perfect summer berry confection and to my sweet friend Annie who was kind enough to share it. XOXO

28 Comments

Filed under Blogger Collaborations, Food & Recipes

Cherry Almond Shortbread Cookies

This year’s Bake Sale for Beka (aka Cookies for Crohn’s) was a great success, raising $1,680 for the Crohn’s & Colitis Foundation of America. Wahoo! Great job and high fives to all the bakers, bloggers & bidders who participated!

Cherry Almond Shortbreads - Inside NanaBread's Head

My contribution to this year’s bake sale was these luscious Cherry Almond Shortbread Cookies – so buttery and delicious! My winning bidder was Taryn from the Pacific northwest (Seattle area). To my surprise, she bid a whopping $60.00 for four dozen of my shortbreads. Thank you so much, Taryn! I hope you and your friends and family enjoy them!

Now that they’re baked and shipped, I thought I’d share them here so you can make them as well. And trust me – if you love buttery shortbread cookies, dried cherries and pecans, you ARE going to want to make them. This recipe has been doubled so that it makes approximately 5 to 6 dozen cookies, depending on how big you cut them. Mine were approximately 1 1/2″ squares and made 6 dozen.

NanaBread’s Cherry Almond Shortbread Cookies
adapted from The Grand Central Baking Book (Classic Buttery Shortbread)

3 cups all-purpose flour
1 cup Bob’s Red Mill Almond Meal (almond flour)
1 1/2 cups powdered (confectioner’s) sugar
1/2 teaspoon salt
4 sticks (2 cups) unsalted butter, room temp
2 teaspoons pure vanilla extract
2 teaspoons pure almond extract
1 1/2 cups dried tart cherries
1 1/2 cups whole almonds, toasted
granulated sugar, to sprinkle on top

Pre-heat your oven to 375F. While your butter is softening, spread the flour, almond meal and almonds onto a silpat or parchment lined baking sheet and toast in the oven for 10-15 minutes, or until the flour just starts to take on some light color and the almonds are fragrant. Remove from the oven and allow to cool to room temperature.

Reduce your oven temperature to 325F.

In a food processor, combine the dried cherries and cooled almonds. Pulse until both are chopped into small chunks. Don’t pulse too long, or you’ll end up with cherry/almond paste. Set aside.

In a mixing bowl, combine the toasted flour and almond meal, the powdered sugar, salt and cherry/almond mixture; whisk to combine.

Using a stand mixer with a paddle attachment, beat the softened butter on medium speed until smooth and creamy (2-3 minutes). Reduce the speed to low and add the vanilla and almond extracts, beating just until combined. Slowly add in the dry ingredients and mix until thoroughly combined.

Line a jelly roll pan with parchment or a silpat mat. Scrape the dough onto the pan and with lightly floured fingers or a flat spatula, spread the shortbread dough into the pan, working it all the way out to the corners. To get a nice even layer, place waxed or parchment paper on top of the dough and use a rolling pin.

Cherry Almond Shortbreads - Pressing Into Pan - Inside NanaBread's Head

If you don’t have a rolling pin, lay some waxed or parchment paper on top of the cookie dough then top with a second cookie sheet or jelly roll pan and press to form a nice even layer. Peel the paper off and sprinkle lightly with granulated sugar, then pop the pan in the freezer to chill for 20-30 minutes.

Next, use a bench scraper (my favorite tool) or a metal pancake spatula to score the cookies into squares. I like to hold the bench scraper vertically and press until I feel it hit the bottom of the pan. (Because the bench scraper has a fairly sharp edge, just be sure not to press so hard that you damage your silpat mat!)

Cherry Almond Shortbreads - Cutting into Squares - Inside NanaBread's Head

Once the cookies are scored, place the baking sheet into the oven on the middle rack and bake for 40-45 minutes (time may vary depending on how hot your oven gets – each oven is a little different). When the shortbread is firm to the touch in the middle of the pan and the cookies are a light golden brown, they’re done. Remove from the oven and allow then to cool 15-20 minutes, then use your bench scraper or spatula to re-cut the cookies along your score lines.

Cherry Almond Shortbreads - Out of the Oven - Inside NanaBread's Head

Once they are completely cool, you can remove them from the pan and layer them with parchment or waxed paper into an air-tight container. These will stay fresh for about 2 weeks at room temperature, or up to one month in your fridge.

Cherry Almond Shortbreads - Cut into Squares - Inside NanaBread's Head

Love chocolate? Then why not dip them? For that first Bake Sale glamour shot, I dipped a few cookies in dark chocolate. For Taryn, my winning bake sale bidder, I created a variety pack of white, milk and dark chocolate dipped (1 dozen ea.) as well as one dozen plain so she could enjoy them in their pure just-baked form.

Cherry Almond Shortbreads - Dipped in Chocolate - Inside NanaBread's Head

Have mercy – the dark chocolate coated are my personal favorite. What a winning combo! Now I just have to hope they make it to the west coast without all that gorgeous Guittard chocolate melting. I packed them in an insulated lunch cooler with those blue ice freezer packs, so keep your fingers crossed.

Note to Self: Next year, don’t dip anything in chocolate. It’s summer, dummy.

18 Comments

Filed under Blogger Collaborations, Food & Recipes

It’s time! Bake Sale for Beka time!

Bake Sale logo courtesy of Megan @CountryCleaver

Bake Sale logo courtesy of Megan @CountryCleaver

Update: The Bake Sale for Beka is now closed. I’d like to thank Taryn L. from the Seattle area for placing the winning bid on my Cherry Almond Shortbread Cookies – a whopping $60! This year’s Bake Sale raised almost $1,700 for the Crohn’s & Colitis Foundation of America. Unbelievable, and completely impossible without the support of our friends, family and bake sale bidders. So thank you from the bottom of my heart for helping us help Beka reach her goal!

We’ve waited so patiently and it’s finally here! The Bake Sale for Beka, also known as Cookies for Crohn’s, kicks off this morning and I’m so excited to be participating! As I mentioned earlier, I’m donating four dozen Cherry Almond Shortbread Cookies dipped in chocolate. What kind of chocolate, you ask? Well, whatever chocolate the winning bidder chooses, of course!

Win my cookies, and you can pick whichever rich Guittard chocolate enrobes them – white, milk or dark. But wait, did you just say you’d pick all three? Well then, place the winning bid on my cookies and tell them you’d like them as a ‘variety pack’ and that’s exactly what you’ll get! I’ll stop at nothing to raise more money for Beka and the Crohn’s & Colitis Foundation of America!

To recap – that’s four dozen handmade shortbread cookies chock full of toasted almonds, dried Michigan cherries and real butter, dipped in the chocolate of your choice. Heck, I may even throw in a jar of homemade jam for the lucky winner. It’s insanity! So what are you waiting for? Go bid on these beauties!

Cherry & Almond Shortbreads - Inside NanaBread's Head

To browse the mouth-watering line-up of goodies donated by 35+ food bloggers from across America, visit our hostess with the mostess – Megan at www.countrycleaver.com. Her Bake Sale for Beka post outlines the on-line bidding guidelines and instructions you need to make sure a box of baked goods arrives on YOUR doorstep. You do want fresh-baked cookies on your doorstep, right? So let’s DO this and help put Crohn’s & Colitis in our rear-view mirror.

7 Comments

Filed under Blogger Collaborations, Food & Recipes

Random Thoughts Thursday

It’s early Thursday morning and I desperately need coffee. So while I’m making a cup, feel free to browse a few random things that came up this week.

1. Bake Sale for Beka (aka Cookies for Crohn’s)
My friend Megan from Country Cleaver is hosting this amazing on-line bake sale benefitting the Crohn’s & Colitis Foundation of America for the second year running. I’m participating again by baking four dozen of these Cherry Almond Shortbread Cookies dipped in dark Guittard chocolate. Holy yum!

Cherry & Almond Shortbreads - Inside NanaBread's Head

Made with flour & almond meal, dried Michigan cherries, toasted almonds & real butter these shortbread cookies stand on their own without any chocolate. But what fun is that? Seriously, when things can be dipped in dark chocolate, they absolutely should be. If these beauties have captivated you, you can bid on them! If you win, I’ll ship 4 dozen directly to your home, dipped in whichever type of chocolate you prefer – white, milk or dark. Winner’s choice.

To bid or browse the other selections generously donated by a plethora of fabulous food bloggers go to Megan’s website THIS SATURDAY, JUNE 22, 2013. That’s right, folks… this is a one day on-line auction benefiting the Crohn’s & Colitis Foundation and celebrating Beka’s first half-marathon for the cure. For the record, on a scale of 1 to 10, Beka is a 15 kind of amazing. So mark your calendar and drop in on the Bake Sale for Beka to watch the bidding shenanigans. And if you end up with the winning bid on my cookies, I might just throw in a jar of homemade jelly. It’s been known to happen.

2. The Complete Package went to the Republic of Texas motorcycle rally in Austin and all we got were photos & disco light sabers.
Okay, that’s true but not entirely true. TCP (my beloved) DID attend the ROT Rally in Austin where his girlfriend (if I may brag a bit) took first place in the Metric Customs category. Yes, I refer to his motorcycle as his girlfriend. Here’s a snap in case you’re curious about her. Meh; she’s okay I guess. :)

TCP's Honda Fury

Each year, on Friday evening, participants in the motorcycle rally ride from the Austin fairgrounds into downtown in a bike parade that stretches more than 10 miles. MILES, people. And each year, My Baby and I take the grandkids downtown to watch the parade so they can see their Papi ride in. They get the biggest kick out of seeing him in the parade. It’s his rock star moment.

After he gets downtown and parks, we all walk Congress looking at the motorcycles and snapping photos. Here are a few from last Friday night. This first one is of Jonah Bear & Lilly Bug with ‘The Cat Lady’. She’s really popular.

ROT Rally 2013 - Jonah & Lilly with Cat Lady

ROT Rally 2013 - Strolling on Congress

ROT Rally 2013 - State Capitol

3. I took the kids back to Springdale Farm.
Remember last week when I mentioned I had the privilege of visiting Springdale Farm for the U.S. Farmers & Ranchers Alliance dinner as part of the BlogHer Food conference? It was a wonderful, magical night under the stars and trees.

Springdale Farm - US Farmers & Ranchers Dinner

I enjoyed it so much I vowed to bring My Baby and the kids for a visit, and last Saturday we did just that. Despite the heat, the kids had a great time and enjoyed walking the farm, spotting fresh vegetables, and picking out some to take home. In case I haven’t been clear in past posts, I L-O-V-E a good farmer’s market or farm stand and Springdale Farm is now one of my favorites. If you’re in Austin, please visit and support a local farmer. Food doesn’t get any fresher.

Lilly & The Chickens - Springdale Farm

Jonah & Lilly - walking the herb garden at Springdale Farm

Farm Stand at Springdale

Ever wondered what an artichoke looks like when it’s left to bloom? Well now you know. You’re not going to see that in a grocery store, folks!

Artichoke Blooms - Springdale Farm

We also attempted to take Jonah & Lilly on a mural hop around Austin. More on that later, but here’s a glimpse of what we did before we died of heat stroke.

Lilly & Jonah at Austin Mural

4. Nothing rocks summer like the glitter polish.
It started with pale pink glitter polish over raspberry red and it has now morphed into pale teal glitter over a dark teal base. For a girl who doesn’t usually paint her nails, I’m totally digging the disco glitter. Hello summer!

The Megan - Teal Sparkle Nails

5. Don’t forget this weekend’s Bake Sale for Beka on-line auction!
I mean it, people. Buy my cookies and I’ll make it worth your time & money. We’re talking FOUR DOZEN HANDMADE FROM SCRATCH COOKIES and homemade jam or jelly. If I could ship a puppy, I would. I’m not above bribery. Whatever it takes. Just bid. It’s for a good cause and there are cookbooks & cookies to be had. LOTS of cookies. For a preview, CLICK HERE.

BakeSale4Beka

25 Comments

Filed under Blogger Collaborations, Family Stuff, Food & Recipes, Miscellaneous Thoughts, Things I Love