Tag Archives: mason jars

Can It: Black & Blue Jam

Black & Blue Jam - Label Shot

Jam. It’s my jam. I love making it, which is convenient because I love eating it. There’s something magical about canning your own jam. When I open my pantry and see that Jelly Shelf with jars stacked high, I feel I’ve accomplished something. When I take a jar of homemade jam to my grandkids I feel like I’m sharing something homemade and wholesome. It’s a love that goes back to my own grandmother and memories of sitting on the steps of her root cellar, waiting anxiously to see what she might retrieve. It’s memories of my own mother baking homemade bread on glorious summer canning days, smearing warm slices of that bread with jelly foam and passing them out like Christmas presents. Magical.

When my Big Sister and I road-tripped up to Mom’s last month, I was fortunate to find gorgeous fresh blackberries and blueberries and saved them just for this – Black & Blue Jam. The combination of these two berries, blended into a rich, deep purple jam – well, it just sings to me and stirs some deep-seeded joy from my past as well as a fervent passion for the buttered toast in my future.

Black & Blue Jam - Berries in the Pot

Black & Blue Jam
7 cups fresh blueberries & blackberries, washed & stems removed
1/4 cup fresh squeezed lemon juice
3 boxes (1.75 ounces each) powdered pectin
10 cups granulated sugar
1 teaspoon real unsalted butter
6 pint or 12 half-pint canning jars
new lids & rings for each jar

In a large heavy saucepan, combine the berries and lemon juice. Cook over medium heat, stirring often, until the berries are soft and have released most of their juice, approximately 30-45 minutes. (Hint: I like to take an old-fashioned potato masher to mine after about 20 minutes to help extract the juice.) Add the pectin to the sugar and stir to combine, then gradually add the sugar to the berries, stirring constantly to prevent lumps. Drop in the butter and continue to cook, again stirring often, until the sugar has completely dissolved and the mixture has started to thicken. Using a big soup spoon, skim off any foam or bubbles from around the edge of the pan and save it in a bowl for jelly foam toast later. It’s a jam canner’s reward for a job well done.

Turn off the heat. If you dislike seeds (I do), place a strainer over another large pan and ladle the jam into a strainer, pressing the jam through using a flexible silicone spatula. Place your sterilized canning jars close to the pot. Using a canning funnel, ladle the jam into jars, leaving 1/4″ to 1/2″ of space at the top. Once filled, use a damp paper towel to thoroughly wipe the rim of each jar, removing any jam that may have spilled over.

In a heat-proof bowl, place new canning lids (I alternate them – one face up, one face down – to keep them from sticking together) and cover them with boiling water. Let them sit for 3-4 minutes, then carefully remove them one at a time, shaking off any excess water, placing one onto each jar. Screw a ring on firmly, but not so tight that it won’t turn at all, and set them aside until all are done.

I use this handy silicone canning basket when I can anything. It allows me to lower & raise jars without any slips or accidents, and is heat-proof so it stays in the pot the entire time without melting. Process your jam jars in a hot water bath for 15 minutes (half-pints) or 20 minutes (pints). If you’re unfamiliar with water bath processing, check out this tutorial.

Jelly Collage

In my house, jam isn’t ‘done’ until it’s properly labeled. I may be slightly obsessed with creating cute labels for all my jams & jellies. It’s my creative process. Once your jars are properly labeled, you’re free to box them for storage, stack them on a pantry shelf, or pass them out to friends and family. Homemade jam makes excellent gifts. And speaking of gifts, there’s just one more to enjoy before you go – that bowl of jelly foam on warm buttered toast.

Black&Blue Jam Collage

Oh, Mom. I cannot thank you enough. {hugs}

For more on home canning, visit http://www.freshpreserving.com/getting-started.aspx

Advertisement

26 Comments

Filed under Food & Recipes, Things I Love

Apple Pie Moonshine

Apple Pie Moonshine - Inside NanaBread's Head

Sounds good, right? And it is. This was yet another gift from our recent Hoegarden weekend. I had bookmarked a recipe for Apple Pie Moonshine months ago with the hope of trying it some day. When we picked our ‘Lowdown Hoedown’ theme for this year’s shenanigans, it seemed like perfect timing so I fired off an e-mail to my Big Sis with the short & simple message “We should totally make this for Hoegarden!”

One of the many things I love about having four sisters is that we never have to twist arms to get someone to participate in things like this. Big Sis was all in. She agreed to source some vintage jars from Mom’s barn and take on the role of Head Moonshiner. I would act as Chief Brainstormer, equal financial partner and creative director (which put me in charge of packaging & tags).

Somewhere our relatives are nodding and saying “See, Hank… I told you they were hillbillies.”

This recipe made a lot of hooch – 7 quarts in all. Big Sis packaged it into Mason jars and I whipped up some cute tags in honor of our theme. Every good hillbilly knows the only appropriate wrapping for a jar of hooch is a brown paper bag, so we went there because our Momma taught us not to half-ass anything. Here’s how the finished jars turned out.

Apple Pie Moonshine - Packaged - Inside NanaBread's Head

This is not your typical moonshine that doubles as paint stripper. First of all, it’s not nearly as strong as traditional moonshine. Because of the cider and fruit juice, this version is slightly sweet, incredibly smooth and resembles spiked apple cider much more than paint solvent. And it is good. Really, really good.

Big Sis’s “Make Ya’ Holler” Apple Pie Moonshine
1 gallon of spiced apple cider
1 gallon of apple juice
8-10 cinnamon sticks
1 1/2 cups granulated sugar
1 1/2 cups brown sugar
1 large bottle (750ml) of good vodka*
7 quart-size Mason jars with new lids

In a large stock pot, combine all ingredients EXCEPT for the vodka. Cook over medium-high heat, stirring often, until the mixture comes to a boil. Shut off the heat and allow the mixture to cool completely. Once cooled to room temperature, stir in the vodka and ladle it into sterilized canning jars. Drop one of those used cinnamon sticks into each jar, wipe the rim of the jar with a clean damp cloth and top with a sterile canning lid & ring.

Caution: Big Sis says this stuff will knock your head off if you try it right away, and no one wants that. Instead, seal it up and let it sit for 3-4 weeks to mellow. You’ll be glad you did. When we cracked that first quart at Hoegarden, you could sip it straight from the jar it was so smooth. I think Big Sis could have a brilliant future as a moonshiner if she wanted.

Apple Pie Moonshine can be served hot or cold, as a mixer or straight up. Since it was chilly for Hoegarden and Sister #4 built a glorious fire in the fire pit, we chose to add a quart of it to a half-gallon of apple cider and serve it hot like a toddy. And it rocked that toddy. If it had been sweltering, I could picture this stirred into a pitcher of freshly brewed iced tea with fresh sliced apples. Yum.

Apple Pie Moonshine - Finished - Inside NanaBread's Head

Disclosure: Full credit for this recipe goes to Mallory Jane of Hayseed Homemakin’ blog. Mallory Jane makes hers with *everclear* (pure grain alcohol at 190 proof), which can be really expensive and hard to find. We substituted a good quality vodka, which worked really well and significantly lowered the alcohol content (to 80 proof). To see the Hayseed Homemakin’ version, click rat-cheer. Thank you, Mallory Jane, for sharing your recipe and putting the hooch in our hoedown.

39 Comments

Filed under Food & Recipes, Hoegarden Weekends

Aunt Teenie’s 14-Day Sweet Pickles


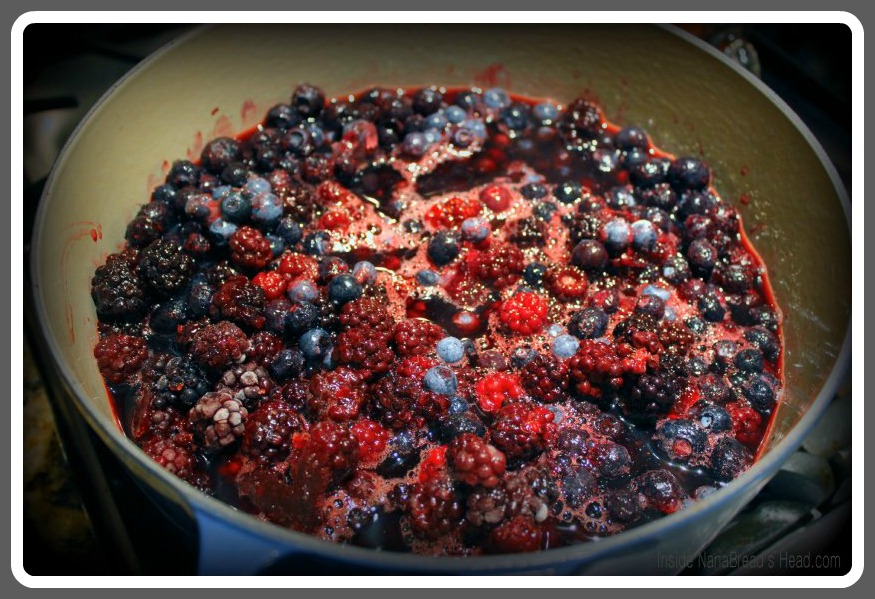
If you read my last post, you’ll know I’ve been on a real canning bender lately. I canned raspberry jam, red plum jam, and peach & cherry marmalade. What can I say? When I jump on a project, I jump on a project. My last canning goal was to make a mess of sweet pickles using a recipe that has been in The Complete Package’s family for more than 40 years. Heck, it may be even longer than that. There is some debate about whether these pickles came from Aunt Una (on my mother-in-law’s side of the family) or Aunt Teenie (on my father-in-law’s side of the family). The sad truth is, both of these sweet ladies passed years ago and no one quite remembers any more. Not that it really matters, but I’ll thank both of them just in case. TCP remembers these as Aunt Teenie’s pickles, so that’s what we’re going with. Whomever started this little slice of sweet pickle heaven has my undying devotion. I simply LOVE this recipe. I’ll warn you… it takes almost two weeks to complete this process, but there’s really very little effort involved. It’s all in the “sitting” with this recipe. You’ll understand what I mean as we go through the steps below. Stick with me. It’s worth it.

Here’s what you’ll need:
clean canning jars, with lids & rings
large ceramic mixing bowls (not metal)
2 gallons of sliced pickling cucumbers
1 gallon of cold water
2 cups of pickling salt (do not used iodized salt)
1 small jar of alum (approx. .5 ounces)
12 cups of white vinegar
14 cups of sugar
2 tablespoons of celery seeds
6-8 cinnamon sticks
1 jar of pickling spice (1.5 ounces)

First, cucumbers go for a 7-day swim in the briny sea.

Start with the brining process:
Place your sliced cucumbers into ceramic mixing bowls (do not use metal bowls). In a large saucepan, heat 1 gallon of water and add 2 cups of pickling salt. Bring to a boil and pour over cucumbers until they are completely covered. The recipe says to let the cucumbers sit in this brine untouched for 7 days. I’ll be honest. Mine started getting a little foamy and funky at 5 days, so I poured it off and covered them with a fresh batch of brine. If yours don’t get too funky, let them sit untouched for the full 7 days. (The funk may have been caused by our Houston humidity.) On the eighth day, drain the cucumber slices. Return them to the ceramic bowls and cover them with boiling water (no salt added). Let them soak for another 24 hours.

Next, soak the cucumbers in alum & water:
Alum keeps your pickles from getting soggy or mushy. It’s an important step, as you want your sweet pickles to have a little crunch when you bite into them. So… on Day 9, drain the cucumber slices again and return them to the bowls. In a large saucepan, heat 1 gallon of water to a boil. Add the jar of alum and stir to dissolve. Pour the alum water over the cucumbers and let them sit for another 24 hours. See what I mean about time versus effort? This recipe is not a lot of work, but it does take time. And it’s so worth it.

After their long swim, they get 4 days in pickling spices.

Next, prepare the pickling syrup:
On Day 10, drain the alum water off the cucumber slices and rinse them thoroughly in cold, clean water. Drain them and return them to the ceramic bowls. In a large saucepan, bring the vinegar, sugar, celery seed, cinnamon sticks and pickling spices to a boil, stirring occasionally. Pour over the drained cucumber slices, making sure the cinnamon sticks are divided equally among the bowls. For the next four days, strain the syrup off the cucumbers into a large saucepan (I set a colander into my pot) and bring the syrup back to a rolling boil. Pour over the cucumbers and allow them to sit for 24 hours. Again, you’ll do this each day for 4 days. On the fourth day of pickling, you’re ready for your jars.

You won't believe how good these smell after 4 days!

Canning your sweet pickles:
On Day 14, strain the pickling syrup off the cucumbers into a saucepan. Bring the syrup back to a rolling boil. While the syrup is heating, sterilize your canning jars (either in boiling water, or in your dishwasher if you have a sterilize setting). Dry your jars and set them onto a large kitchen towel. Fill each jar to within 1/2″ of the top rim and pack them in. I like to use my fingers to press them into the jars. I try to put one cinnamon stick from the pickling syrup into each jar, but that’s optional. Once the syrup is boiling, use a ladle to fill each jar – just until the cucumber slices are covered. Using a clean, damp rag, wipe off the top edges of the jars to make sure they are clean. Place your canning lids in a clean bowl and cover them with boiling water for at least 5 minutes. Remove one lid at a time, pat it dry with a clean paper towel, and set it on top of the jar. Place a canning ring over the lid and screw it on until it fits firmly, but there’s still just a smidge of wiggle room. In other words, don’t crank it down until the jar almost cracks. Continue to fill, clean and seal each jar until all pickles are used. If you get to the end and don’t have enough to fill an entire jar, don’t panic. Just put the end of the pickles in a jar and put that jar into the refrigerator for snacking.

A canning sling makes the water bath process much easier.

Finally, finish your jars in a hot water bath:
You’ll need a tall stock pot for this step. To judge if your pot is deep enough, set your tallest jar into the pot. You should be able to fill the pot with enough water to cover the jars by at least 3/4″ above the top rim. If you’ve used multiple sizes of jars, start by processing the tallest jars first and graduate down in size. This way, as the water boils and evaporates, you won’t have to keep adding more water. If at any time during the water bath process you find your jars peeking out of the water, add enough to bring it back to 3/4″ or more above the rims. Your jars need to be submerged in order for them to seal properly. Once you’re ready to go, fill your stock pot with water and turn it to high, bringing the water to a gentle boil. If you have a canning sling, set a few jars into the sling and lower it slowly into the water bath. I keep a one-cup measuring cup & a bowl handy in case I need to remove excess water once the jars go in. Once they are submerged, set a kitchen timer for 20 minutes. If you don’t have a canning sling, you can use those silicone-tipped kitchen tongs but I would practice lifting jars with them before you get started. It can be tricky.

After the water bath:
Once your 20 minutes are up, carefully remove the jars from the hot water bath. I fold a towel in half and place it right next to the stove (but away from the flame) so I can move the jars from the water straight onto a towel to dry. After I remove each batch of jars, I give the tops a wipe with a paper towel to remove excess water on the lids. Continue to process your jars until they are all done. I like to leave at least 2-3″ between the jars while they’re cooling so they get better air circulation and cool more quickly. I also tighten the rings at this point.

Waiting for “the ping”:
If you’ve done all this correctly, your last step is waiting for the ping. If you’ve canned before, you’ll know what I mean. If you’re new to this, I’ll explain. As your jars cool, the lids will form a vacuum seal. That seal is what keeps your food from spoiling. As that vacuum occurs, you should hear a loud pop or ping as the lid flexes. That ping means it’s working. It’s a good thing. A ping is a very good thing. Occasionally, you will get a jar that seals without a ping, so here’s how to test for a good seal. Once your jars have completely cooled, touch them lightly in the center of the lid. If you press gently and you feel the lid move or hear it pop, you did not get a good seal. If, however, you press lightly and the lid feels very slightly indented and there’s no movement or sound, you have successfully sealed your jars. Don’t panic if your jars didn’t seal. This happened to me with some of my jars of jam. Just check the rings to see if they are on firmly but not cranked down hard. Make sure your water bath is still boiling and there is enough water to still cover your jars, and process again. It won’t hurt to leave them in a little longer if you’re using large jars like quarts. Just put them back in and leave them for 30 minutes this time. Check to make sure the water in the pot covers the lids by at least 3/4″ and try, try again.

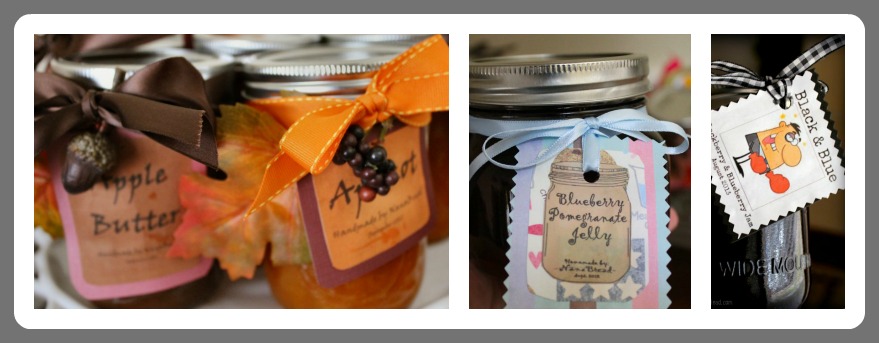
Custom stickers are a great way to label your jars.

One last tip about labeling:
Office supply stores carry packages of “make your own” stickers. The package I bought had five sheets of sticker paper. Each sheet was 8 1/2″ x 11″. I created a quick Word document and pasted in a photo to create my own custom labels. It’s a colorful and fun way to label your new goodies. If that’s too crafty for you, you can still use my old method – masking tape & a Sharpie. Don’t laugh. It works.

I know this sounds like a lot of instruction, but I hope you won’t let the length of this post keep you from canning your own sweet pickles. In all honesty, most of this post is about the process of canning, not the actual recipe. If you’re a home canning expert, you’ll be able to rip through these in no time. If you’re a beginner, just take your time, read the entire post once or twice to get comfortable with the process, then jump in. Once you start eating your own homemade jams, jellies and pickles, I guarantee you’ll be glad you tried it. Good luck, and happy canning!

52 Comments

Filed under Family Stuff, Food & Recipes

Lost in a jam session & can’t stop. Please send help…and toast or biscuits!

Raspberry and red plum and blackberry...oh my!

Last month, fellow blogger Kirsten at Comfortably Domestic posted several stories about the jam she was canning. Strawberry, to be exact. Since then, I’ve had jelly on my brain (figuratively, of course). I used to can things every summer but that was years ago when we still lived in Owasso, Oklahoma. Summers there were not as unbearable as they are here. Once we moved to Houston, the heat and humidity killed my desire to can anything, since it required hours spent over a hot stove. Then I saw Kirsten’s strawberry jam, and became a woman obsessed. She planted a seed; a crazy demon jelly seed. Suddenly, I couldn’t walk past fruit without imagining it cooked into jelly or jam and packed into cute little Mason jars. Heaven help me; I do love a Mason jar.

Enter the $1.00 raspberry sale at my local grocery store. As we walked into the produce department, I was slapped in the face by a poster board sign that read “Raspberries – $1.00 a box!” Yeah, you bet your sweet ass it deserved an explanation point, Mr. Produce Stocker Man. Those little boxes have been going for $4.00 all summer. Naturally, I grabbed 10 boxes and thought about grabbing 10 more. Thanks to a spontaneous intervention from The Complete Package, I stuck with the original 10. But as soon as we got home, I broke out the sugar, pectin and jars and got to work. As I said, I was a little jelly obsessed.

Sweet little jars of fruity goodness; labels are print-your-own stickers

This past weekend, TCP and I stopped in at my favorite fruit stand – Froberg Farms in Manvel, Texas. I love this place more than I love chicken-fried steak. Someday I’ll take my camera out there and share it with you. Where else can you walk out with an entire brown paper bag packed full of freshly picked produce for around $20? It’s incredible. We love to stroll slowly through all the gorgeous produce, dried beans, canned fruits and vegetables. They also sell little fried pies, whole pies, farm eggs and fresh milk. AND they have a little trailer outside that sells all kinds of fabulous, smoky meats. This place is crazy wonderful.

Clockwise: Grandma, Mom, Big Sis & NanaBread

When I saw fresh red plums, I immediately grabbed a big bag full, and again we raced home to make jam. Red plum jam. I don’t know why, but it reminds me of Grandma Montgomery, who died when we were young. She had the most magical root cellar stocked with jars of homemade jams, jellies, pickles and canned veggies. Oh, how I loved the smell of that root cellar. Here’s a photo of her sitting with Mom as we all ate berries and ice cream. I love this old photo of us on Grandma’s porch. I’ve often wondered what Big Sis was thinking at that precise moment. She looks stunned & I look happy. I probably stole her last strawberry. Sorry, Sis. If it’s any consolation, I’m the one with the embarrassing ice cream beard. But I digress; back to jelly!

Old-fashioned red plum jam - it's seriously good stuff!

There’s no real recipe for jelly or jam. It’s just fruit, the right amount of sugar, and some fruit pectin. In fact, pectin manufacturers have made it so easy, they’ve printed a how-to which includes the proper fruit-to-sugar ratios inside the pectin box. How easy is that? The real key is in preserving it. I went old-school and used sterilized canning jars and a boiling hot water bath. If done correctly, jars of jam processed this way can have a shelf life of years instead of months. If you don’t want to process your jars in a water bath and preserve them for all eternity, Ball now makes plastic containers with screw-top lids. You can’t store this jam in your pantry, but you can certainly keep it in your fridge or freezer. Kirsten posted a great freezer jam recipe on her blog with a full-color photo tutorial. Please check it out. So now that my raspberry and plum jams are packed away, I’m eyeing a recipe for peach marmalade I got from a friend a few years ago. Peaches, oranges and maraschino cherries all cooked into a gorgeous, sticky marmalade. Oh, my. I may just have to do it. I should do it. I must do it!

Speaking of my canning bender… do you know what else I used to can years ago? Spicy sweet pickles. And do you know what’s brewing in my kitchen right now? Homemade spicy sweet pickles. It’s been at least 20 years since I’ve made them, but when we found some beautiful pickling cucumbers at Froberg’s last week, I decided to make them again. They’re from an old family recipe that has been passed down through TCP’s family for at least 3 generations. How good are they? Good enough that every time we eat another brand, we look at each other and say, “they’re good, but they’re not Aunt Teenie’s sweet pickles.” Which brings us to a recipe card mystery, a little family controversy, and my next post – Aunt Teenie’s Sweet Pickles: are they or aren’t they? Stay tuned!

Coming soon: spicy sweet pickles from an old family recipe

10 Comments

Filed under Family Stuff, Food & Recipes

Things I Love, Volume 2: Mason Jars

The Pioneer Woman’s story on Mason jars this week struck a chord with me (www.thepioneerwoman.com). I love mason jars. I grew up in a home where canning took place every summer as our favorite fruits and vegetables came into season. My mother loved to garden, and we always had the freshest summer foods on our table. She had her own miniature orchard with peach, apple and plum trees, as well. And for a while, even grew Concord grapes on a trellis that ran the length of our back fence. Mom is what you’d call a renaissance woman. She’s a very clever and resourceful girl. I have fond memories of her making her own wine with all that fruit, too. When we picked too much to consume, she would freeze or can it for later. We’d have “canning days” where we’d wash, peel, snap, shuck and slice everything we could get our hands on until it was all packed away for later. My mother made every kind of pickle known to man as well as pickled jalapenos, okra and beets. She packed tomatoes in jars whole, crushed and cooked into spaghetti sauce and salsa. We had peaches, applesauce, apple pie filling, and more. You name it; she canned it.

Of all the things she canned, my favorite was jelly day. On jelly day, Mom would bring out the big soup pot and load it with the fruit of the day. Once she had that going, she would start a loaf or two of homemade bread. She makes really good bread. She had the five of us washing and sterilizing jars while everything bubbled and baked. Just as the bread came out of the oven, the jelly would be cooked down and ready for jars. If you’ve ever made your own jelly, you know you have to skim all the foam off the surface of the fruit before you spoon it into the jars. Mom would use a big metal spoon and carefully scrape the foam into a bowl. Once she was done, my sisters and I would butter up some warm bread and slather on the jelly foam. Oh, hallelujah for sweet and fluffy jelly foam! As a child, I had two favorite kitchen pleasures – licking the beaters and making jelly foam sandwiches on warm fresh bread. Have mercy.

Thanks to Mom, I have a deeply rooted love of canning jars. I have an entire cabinet in my kitchen full of them – all shapes and sizes. It pains me deeply to put any jar in the recycling bin. It really does. I can’t let them go. They’re like family pets or small children. They should be treasured. I use them for storing leftovers, collecting change from my pockets, storing rice and grains in my pantry and everything in between. I’ve been known to drop votive candles into smaller jars and use them when the power goes out. Did you know you can also wrap wire around the top of small jelly jars, drop in a lighted votive candle and hang them from trees or light fixtures for parties? It’s simple and lovely.

Those old-school jars with the spring hinge lids are the ones I love the best. I recently found lime curd on the clearance rack at the Williams Sonoma outlet for $2.97 a jar. I bought two. It’s not that I’m a big fan of lime curd; I just had to have the jars it came in. I’ll eventually use the lime curd, but the jars are the real treasure here. I love to use them around the house. I keep a large one in my spice cabinet filled with kosher salt. I love that my old measuring spoon set fits perfectly in the hinge on the side (very convenient). I also keep one in the laundry room to hold colorful clothespins. I love keeping things in clear glass jars. It’s a functional and homey way to decorate any shelf. You never have to wonder where something is. I’m thinking that one of my new lime curd jars will be used as my button jar in the sewing room. I may fill the other one with dark chocolate peanut M&M’s. I will fill them, display them, and love them proudly.

Things I Love - Canning Jars with Spring Hinge Lids

5 Comments

Filed under Family Stuff, Things I Love