Category Archives: Food & Recipes

Food is an important part of our family. I don’t believe in “secret recipes.” If I make it, I’ll share it. And if you like it, I hope you’ll share it, too.

Vintage Vanilla Wafer Cake

This is not just a story about a recipe – it’s about a quest. A search and conquer mission. Okay, there IS a recipe, but it’s also about the journey to get here.
vanilla-wafer-cake-sliced

When The Complete Package and I moved to the Austin area last spring, we discovered Opie’s Barbecue in Spicewood, Texas. On a whim, he grabbed a slice of what they called Coca Cola Cake and a new obsession began. Each time we visited, he would look for the cake on the dessert rack, and most of the time it was sold out. Life can be cruel, and missing this cake became a constant topic for him, just as Opie’s famous butterbeans became for me (sold Friday-Sunday only; dine-in only; no whining allowed).

Because the cake became so elusive, I began to dig for recipes. Searches for Coca Cola Cake resulted in chocolate sheet cakes with fudge frosting, which is the traditional Texas way. Those cakes, however, did not resemble Opie’s version in the least. The cake TCP pined for tasted of vanilla, coconut and pecans. It was sold by the slice and slathered in cream cheese frosting. No chocolate. No fudge. No hope in sight. Then I ran across a blog post about a trip through Spicewood and a coca cola cake that prompted the writer to share a memory of her grandmother’s old-fashioned vanilla wafer cake. She included a family recipe, and that’s where I decided to begin.

The first time I made the cake, I followed the recipe exactly and the result was brickish. Too dense, too sweet, and no hint of coca cola anywhere, thus leading to further confusion about why Opie’s would call it such. The second time I made it, I scaled back on the sugar and liquids, reduced a Coke in a saucepan to create a syrup, and glazed the warm bundt with coke syrup before frosting. Result – still brickish, still too heavy, and slightly soggy from the syrup. Two fails in a row, but my mama didn’t raise a quitter.

On my third attempt, I went a completely different route. What the cake lacked was lift. Soft, fluffy lift. It was at that moment that it struck me. What if I added a plain yellow cake mix to the otherwise traditional ingredients? What if I gave up on the cola aspect all together and focused on keeping it simple? Could I use that dusty can of coconut milk in my pantry to boost the overall flavor? What was there to lose in trying? Sometimes one must be bold, or at least willing to fail. Again & again.

The surprising part is that it worked. Not just worked, though. It was delicious. So much so that The Complete Package declared it a winner. And that’s how we came to create our own version of this vintage Vanilla Wafer Cake with a modern twist. Thank you, Betty Crocker.

This comes together quickly, so pre-heat your oven, grease/flour your bundt pan, gather your ingredients and let’s get started.
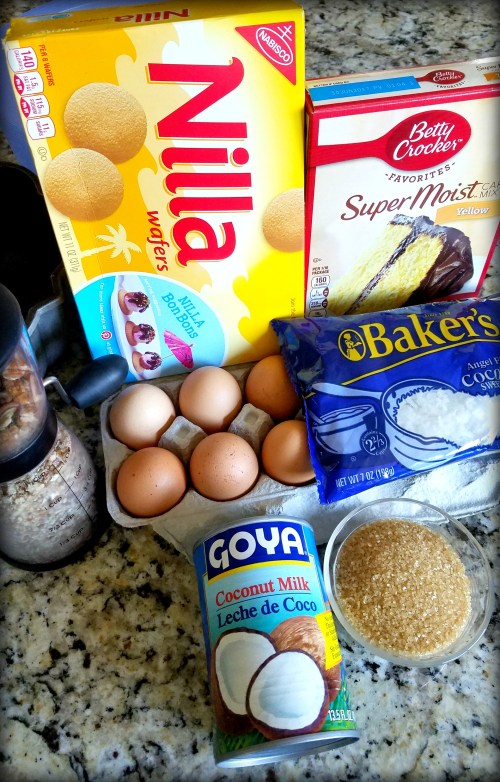
vanilla-wafer-cake-ingredients

NanaBread’s Vanilla Wafer Cake:

  • 1 box (11 ozs.) Nilla Wafers, crushed
  • 1 bag (7 ozs.) shredded, sweetened coconut
  • 1 1/2 cups pecan pieces
  • 1 box (15.25 ozs.) yellow cake mix
  • 6 whole eggs
  • 1 can (13.5 ozs.) coconut milk  (not reduced fat)
  • 1 teaspoon vanilla bean paste or vanilla extract
  • 1/2 cup raw or granulated sugar (I used raw)

Pre-heat your oven to 350F. Grease and flour a bundt pan and set it aside.

In a food processor, combine the vanilla wafers, coconut and pecans. Pulse until blended to the consistency of coarse sand and no large chunks remain.
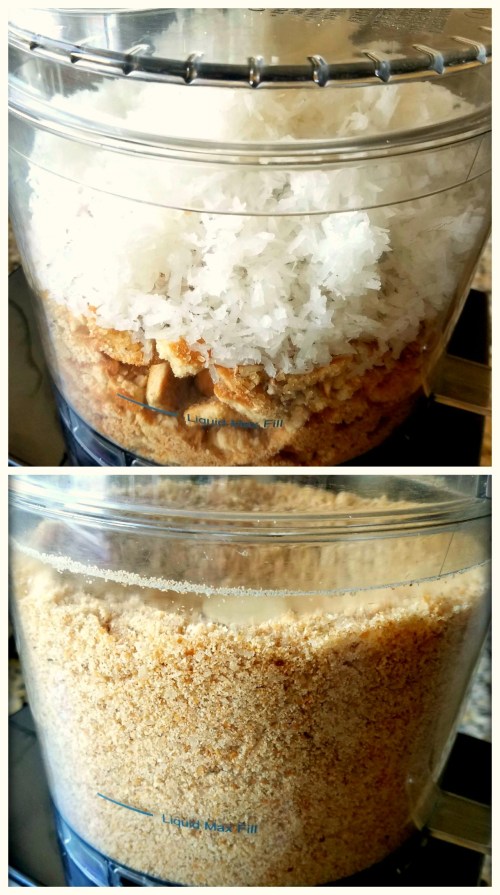
vanilla-wafer-cake-processor-collage

Pour the crumb mixture into a large mixing bowl and add the cake mix, eggs, coconut milk, vanilla and sugar. Just dump it all in there. No need to be delicate.

vanilla-wafer-cake-dry-wet

Grab a spatula and stir to combine (no mixer needed), just until all ingredients are moistened. Pour into your prepared bundt pan and smooth out the top.

vanilla-wafer-cake-ready-to-bake

Bake at 350F for 30-35 minutes, or until a toothpick comes out clean or with a few small crumbs. Keep an eye on it near the end. You don’t want to over-bake this one. Remove from the oven and allow it to cool in the pan for 15 minutes, then invert onto a cake plate and allow it to cool completely.

vanilla-wafer-cake-naked-bundt

I swear, your house will smell like heaven right about now. This cake is good enough to eat as is, but I think we all know everything’s better with cream cheese frosting. I like to keep mine simple.  In a small mixing bowl, combine one 8-oz package of cream cheese and 1/2 a stick of unsalted butter. Allow both to rest at room temperature until softened. Add 1 teaspoon vanilla extract or vanilla bean paste (my favorite), and 1/2 to 1 cup of powdered sugar, depending on how sweet you like it. Whisk until smooth and put it in a bag for piping.

Want a quick tip for piping frosting? I do it with a Ziploc freezer bag. Simply take a quart freezer bag and put your hand inside. Then put your hand & the bag down into a tall drinking glass and remove your hand. Then fold the edge of the bag over the rim of the glass. It keeps the bag upright while you fill it.
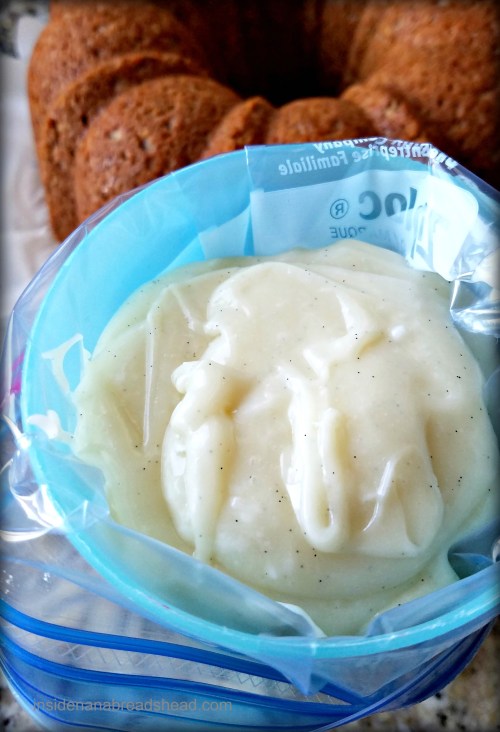
vanilla-wafer-cake-frosting-in-the-bag

Fold the edges of the bag up, press out the air, and seal the bag. If you have time to kill before your cake is cool, simply pop the bag back into the refrigerator. When you’re ready, snip the corner off and you’re ready to pipe. I love this time saver.
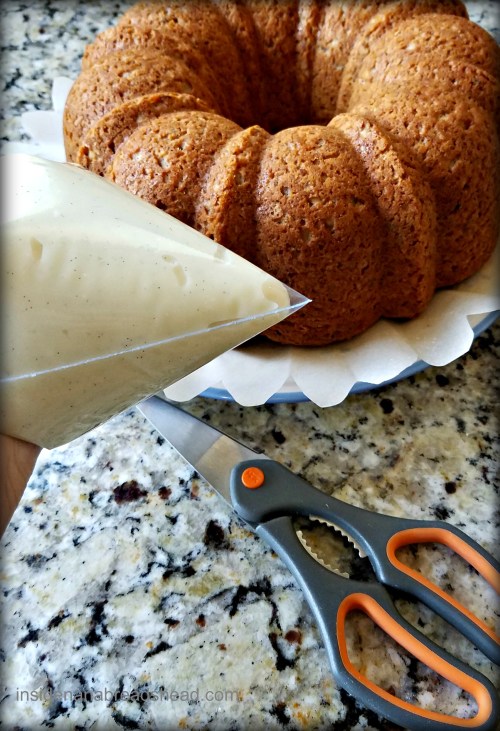
vanilla-wafer-cake-piping-bag-trick

I like to use a sheet of parchment paper to keep excess frosting from running off the cake plate after it’s piped. You’ll see what I mean in a second. Twisting the top of the bag to press the frosting down to the corner, start piping in the center of the bundt and work your way from inside to outside around the entire cake.
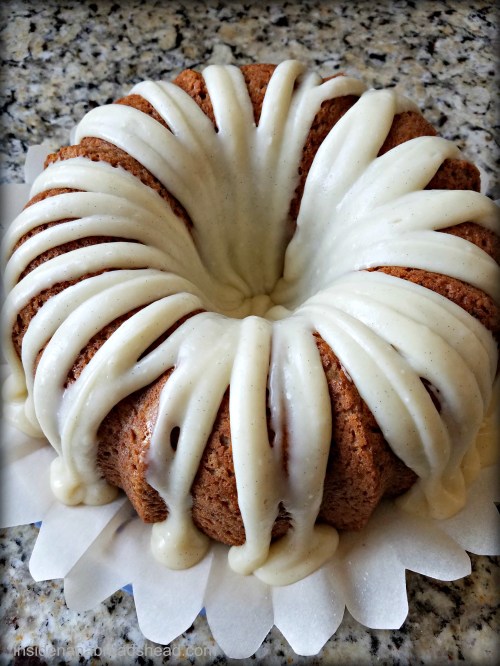
vanilla-wafer-cake-cream-cheese-frosting

I’m not playing when it comes to cream cheese frosting. I put it on thick, and I make sure there’s excess frosting in the middle, just in case I want more. And I always want more.

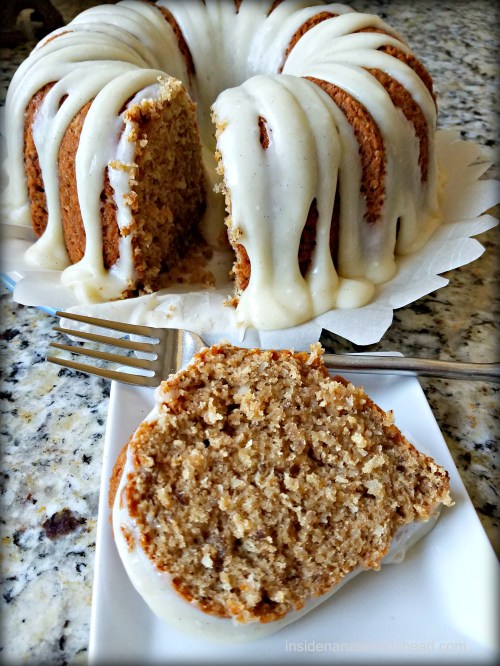
vanilla-wafer-cake-sliced

So simple, y’all. And so flavorful. And look at that lift! This one’s a keeper.

Sorry, Opie. I’ll gladly stand in line for your beautifully smoked meats, your creamy tater tot casserole, and your dine-in only butterbeans every weekend, but I’ll be having dessert at home from now on. Care to join me?

36 Comments

Filed under Food & Recipes, Things I Love, Travel Tales

Caramel Pear Crumb Bars for a Cure

Caramel Pear Crumb Bars - OXO Cookies for Kids Cancer 2015

Each year, OXO does the most wonderful thing – they donate a great deal of money to Cookies for Kids Cancer. And each year, they invite bloggers to bake for the cause by donating $100 for every original recipe created and posted using OXO products and cookies for the cure. This year, bloggers were offered an opportunity to receive one of three baking sets: cookies, brownies or cupcakes. I applied for the brownie set and was thrilled to learn I was selected. Once I learned it was in the mail, all I could think of was caramel pear or apple blondies. Day and night, night and day, I dreamed of caramel and fruit and crumbs.

OXO Brownie Set Collage

The OXO Brownie Set Included:
OXO Non-Stick Pro 9×13 Cake Pan
OXO Brownie Spatula
OXO Baker’s Dusting Wand

The non-stick pro baking pan is amazing. It’s 13″ by 9″ and super sturdy, with double wall construction for extra insulation and a cool diamond pattern textured bottom for extra browning surface which paired really well with the copious quantities of butter and brown sugar in these caramel pear crumb bars. Have you seen the new gold-tone iPhone6? It’s got nothing on this sexy pan.
I’m sure you can tell where my priorities lie. (with the cookies)

Caramel Pear Crumb Bars - OXO 13x9 Pan

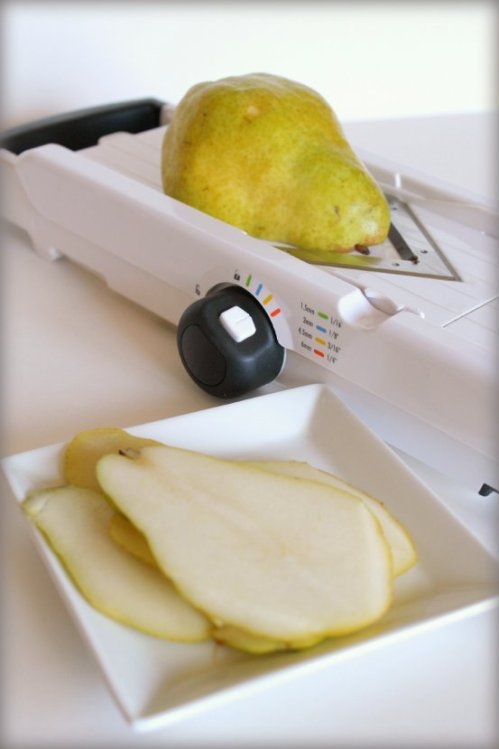
But let’s get to those sweet bars before the drool shorts out your keyboard. They actually started with another of my favorite OXO kitchen tools – the mandolin.
I used it to shave a big, fat, juicy pear into even slices.

Caramel Pear Crumb Bars - OXO Mandolin

From there, I lined that pretty pan with parchment paper and gave it a light spritz of baking spray. The dough for these bars comes together quickly in a food processor, so it only takes a few pulses until your pressing it into a pan. Oh, how I love easy. Just press the shortbread base into the pan, then top with sliced pears (or apples), drizzle with half a jar of caramel (yes, half a jar) and dot with the crumb topping like this.

Caramel Pear Crumb Bars - OXO - Ready for the Oven

Once they’re baked to a gorgeous golden brown and your neighbors are clawing to get in because they smell so amazing, pull them out and let them cool.

Caramel Pear Bars - Ready to Serve

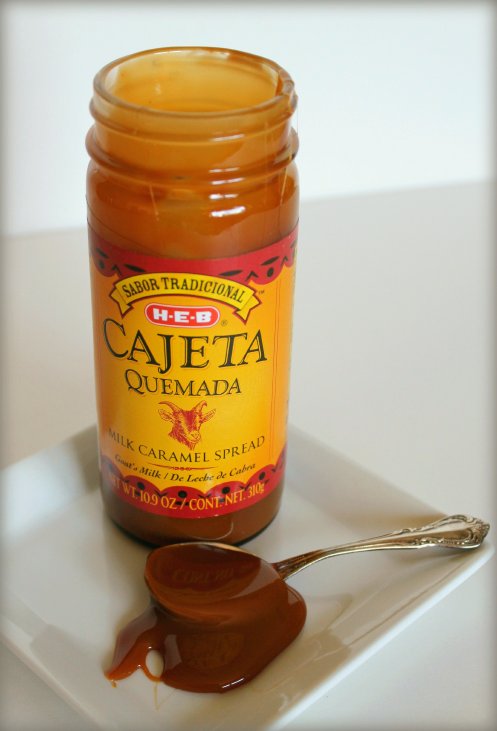
When they’re mostly cool but still a little warm and gooey, drizzle them with more caramel. YES, MORE CARAMEL! I love this thick goat’s milk cajeta.

Caramel Pear Crumb Bars - Cajeta from HEB

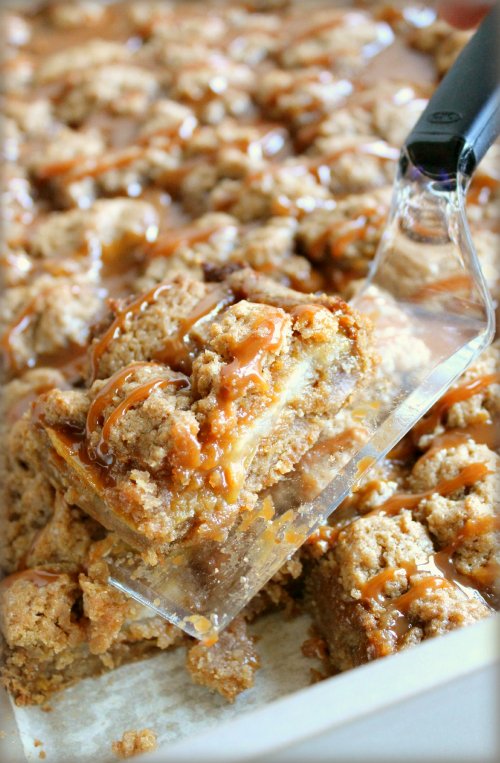
Using this slick OXO Brownie Spatula made serving a breeze. It has a beveled edge that cuts the bars as well as serves them. I’ve said it a million times, but I’ll say it again – I love OXO’s devotion to smart design.

Caramel Pear Bars - OXO Server

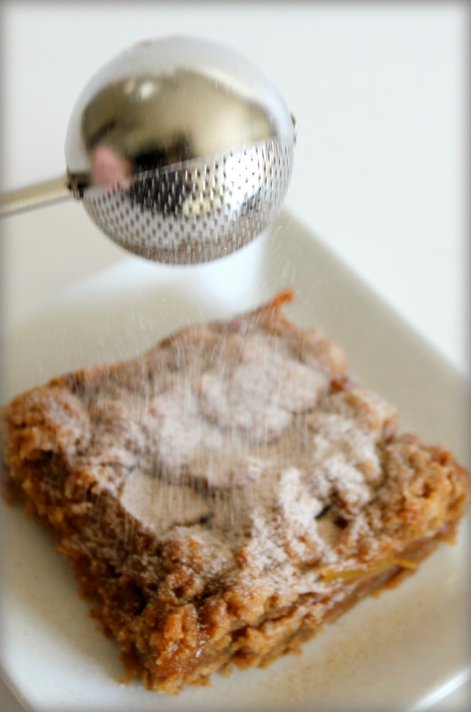
Mmm… I wish you could smell the butter, brown sugar, pears and caramel. If I could bottle this as a cologne, I’d be filthy rich. To serve these, I mixed cinnamon with powdered sugar and sifted it like fresh fallen snow over those glorious craggy crumbs. Have mercy.

Caramel Pear Crumb Bars - OXO Sifter - Cinnamon Powdered Sugar

That little sifting wand is nifty. Twist the handle to open; twist to close; shake. It’s a lot of fun. And versatile. It also doubles as a tea infuser. Fill with loose leaf tea, twist to close, and dunk it in your mug. Hey… a cup of tea would be perfect with these bars! (heh heh…see what I did there?)

NanaBread’s Caramel Pear Crumb Bars
(makes one 13″ x 9″ pan or 12 large bars)

Shortbread Base:
1 cup unsalted butter, at room temp
2/3 cup dark brown sugar, firmly packed
1/2 teaspoon salt
1 teaspoon vanilla extract
1 1/2 teaspoons ground cinnamon
2 cups all-purpose flour

Fruit Layer:
1-2 large pears (or apples), peeled & thinly sliced or chopped
1 tablespoon granulated sugar
1/2 teaspoon ground cinnamon

Topping:
1 cup all-purpose flour
1 stick of cold butter, diced
1/4 cup brown sugar, packed
Pinch of salt
4-5 tablespoons buttermilk (or regular milk)
One jar (10 ozs.) of your favorite caramel, cajeta or dulce de leche
3 tablespoons powdered sugar + 1/2 teaspoon cinnamon (optional)

Pre-heat the oven to 350F. Line a 9” x 13” baking pan with parchment, then coat lightly with baking spray.

In a food processor, add the butter, brown sugar, salt, vanilla, cinnamon and flour for the shortbread cookie base. Pulse until it forms large crumbs that press together well. Press the crumbs into the pan in an even layer.

Slice or chop the pears or apples into even pieces and toss or sprinkle with the sugar and cinnamon for the fruit layer. Spread evenly across the top of the cookie base. Drizzle with half the jar of caramel sauce.

In the food processor, combine the topping ingredients and pulse until it forms a thick dough. Pinch into marble-size chunks and scatter them over the fruit.

Bake for 35 minutes, until the top starts to brown around the edges and you can see the caramel bubbling. Cool until barely warm to the touch before drizzling with additional caramel. Just before serving, dust with powdered sugar and cinnamon (optional).

Caramel Pear Crumb Bars - OXO Cookies for Kids Cancer Recipe

Not pictured but also fabulous – serving these warm with vanilla ice cream.

And now, a word from our sponsor. Just kidding, but this bears mentioning.

– Cookies for Kids’ Cancer is a recognized 501c(3) public charity duly incorporated under the laws of the state of New Jersey. Your donations are tax-deductible to the fullest extent allowable by law. 100% of proceeds raised by Cookies for Kids’ Cancer fund pediatric cancer research.
– OXO will be donating $100 to Cookies for Kids’ Cancer for each blog post dedicated to this campaign in October (up to our $100,000 commitment*.)
– *In 2015, OXO will donate up to $100,000 to Cookies for Kids’ Cancer through product proceeds, bake sale matches and other fundraising efforts

Cookies for Kids Cancer Logo

Special thanks to OXO and their Blogger Outreach Program. This post is not a paid advertisement. I am not compensated for this recipe or blog post, but did receive the Brownie Baking Set at no charge to play with. All opinions are my own, and my opinion is that I will never stop loving OXO and their remarkable products. OXO rocks.

To learn more about the OXO Bloggers Outreach Program, OXO Blogger Outreach Program.
To learn more about Cookies for Kids Cancer and how you can participate, Cookies for Kids Cancer Foundation.

15 Comments

Filed under Blogger Collaborations, Food & Recipes

Honey Oat PB Cinnamon Swirl Bread

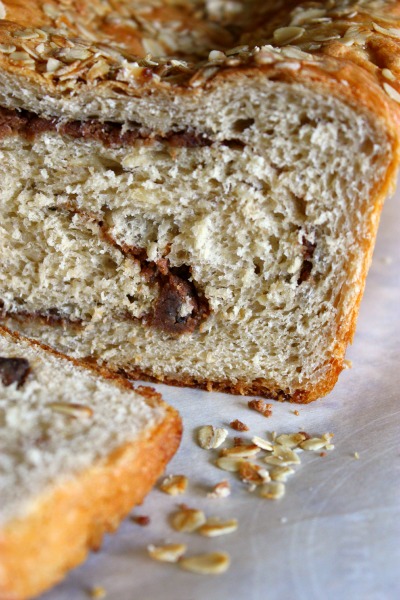
Honey Oat PB Swirl Bread - Sliced

Warm cinnamon-scented carbs… is there anything better?

I finally got back into the kitchen this week and baked up a recipe for my friends at Peanut Butter & Co. This time, they challenged Yum Squad members to see what we could come up with given any two jars of their peanut butter and a bag of Bob’s Red Mill old-fashioned oats. Two of my favorite things. My first instinct was a cookie, but I made a pledge to overcome my fear of killing yeast doughs by facing them head-on, so I tackled a sticky, yummy yeast bread with a cinnamon raisin peanut butter swirl.

I decided to use oatmeal in the dough, so I started by heating milk, water, salt, honey, butter and oats on the stove. The oats are not really cooked, just softened.

Plumped & Softened Oats - PB Swirl Bread

Once the milk & oats mixture was cooled, I added the yeast and let it sit until it was foamy and fragrant. When yeast blooms, it is fabulous to see and smell.

Growing Yeast - PB Swirl Bread

Once we had a full-blown yeast party, I blended in the eggs and added bread flour with a secret twist – Peanut Butter & Co. powdered peanut butter. I used their chocolate version. If you’ve ever wondered if you can toss powdered peanut butter into baked goods, the answer is yes! Just 3 tablespoons sifted into the flour added the perfect hint of peanut butter flavor to compliment the filling.
Do you have to use it? No. But if you can, do.

Liquids with eggs & PB flour added - PB Swirl Bread

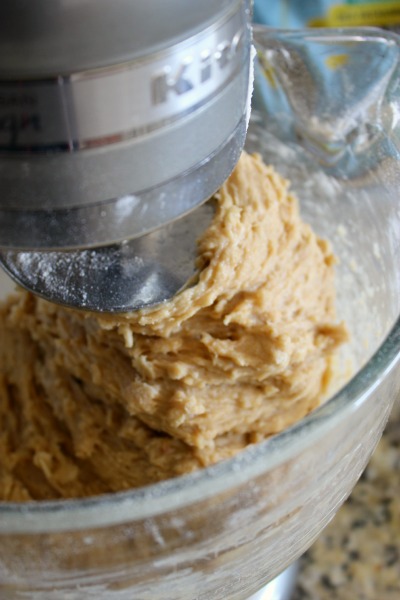
Dough is ready! - PB Swirl Bread

Finished Dough ready to rise - PB Swirl Bread

Once the dough was mixed, I covered it in plastic wrap and a towel and let it nap in a sunny window. When it was doubled in bulk, I divided the dough into two equal rectangles, smeared half a jar of cinnamon raisin swirl peanut butter over each, sprinkled them generously with a raw sugar and ground cinnamon mixture and rolled them cinnamon roll style.

Divide & Roll - PB Swirl Bread

Cinnamon Raisin PB Layer - PB Swirl Bread

Look at that gorgeous cinnamon raisin swirl peanut butter layer. I could almost eat it just like this. Next, sprinkle with raw sugar and cinnamon.

Cinnamon Sugar Sprinkle - PB Swirl Bread

Instead of individual rolls, I dropped them into buttered loaf pans and let them rise again. All I could think was “slice it, butter it, and toast it on a griddle” so I went with loaves. Two gorgeous, pillowy loaves. I wish you could smell them.

Rolled & In The Pans - PB Swirl Bread

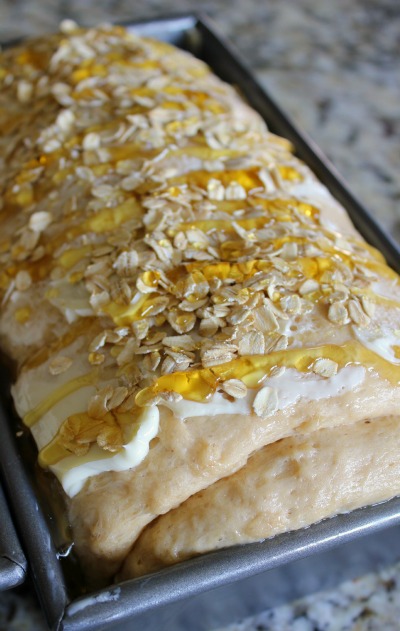
Finally, just before I popped them in the oven, I rubbed on a little softened butter, sprinkled on some additional oats (oh, how I love these oats!) and finished with a drizzle of local honey. Just because.

Dressed & Ready to Bake - PB Swirl Bread

Now, I know what you’re thinking. ‘Yeast breads are hard. Yeast is too easy to kill. Yeast bread recipes take too long to make.’ I feel ya’ and I was with you until very recently. The truth is, yeast breads DO take longer to make due to all that rising, but don’t be fooled – they are EASY to make. I swear it.

NanaBread’s Honey Oat PB Swirl Bread:
(makes two 10″ loaves)

1 cup milk (I used 2%)
1 cup water
1/2 teaspoon salt
1/2 cup honey
1/4 cup raw sugar (or brown sugar)
1 cup Bob’s Red Mill old-fashioned oats, uncooked
1/2 cup (1 stick) unsalted butter
3 of those little foil envelopes of rapid-rise yeast
4 whole eggs, at room temperature
3 tablespoons Peanut Butter & Co PB powder (optional)
4 to 4 1/2 cups bread flour
1 jar (16 ozs.) Peanut Butter & Co cinnamon raisin swirl PB
1/2 cup raw sugar + 1 tablespoon ground cinnamon, blended

Topping:
1/2 stick of butter, softened to room temperature
2-3 tablespoons Bob’s Red Mill oats
2-3 tablespoons local honey

In a small saucepan, combine the milk, water, salt, honey & raw sugar. Cook over medium-low heat, stirring often to keep the honey from burning, until the mixture begins to bubble and foam around the edges. Add the old-fashioned oats and continue to cook for 2-3 minutes. Give them a stir, remove from the heat, and add the stick of butter. Allow this mixture to cool to 110F.

While the liquids are cooling, sift two cups of flour with the peanut butter powder and set it aside. Measure an additional 2 1/2 cups of flour and have it standing by.

When the milk and oat mixture is cooled to 110F, add the yeast and allow it to sit for at least 10-15 minutes, or until the mixture is bubbly and frothy. With your paddle attachment on and your mixer at low speed, blend in all four eggs.

Start adding the flour with the powdered peanut butter first, about 1/2 cup at a time, until almost blended. Switch to the bread hook attachment and start adding additional flour until the dough is thick but not dry and tries to climb over the top of your dough hook. I used 4 1/2 cups total, but you may need more or less.

Once blended, stop the mixer and scrape down the sides of the mixer and dough hook. Place the dough in a buttered or oiled bowl, cover with plastic wrap and a kitchen towel, and set it in a sunny window to rise.

When doubled in bulk, divide the dough into two equal portions. On a piece of buttered parchment paper, shape each half of the dough into a rectangle as wide as your loaf pan. Spread on half the jar of peanut butter, working it out close to the edges. Sprinkle with half the raw sugar & cinnamon mixture, then roll like a jelly roll and place into your buttered loaf pans. Cover with plastic wrap and allow them to rise until doubled again.

Pre-heat your oven to 350F. Rub the top of each loaf with softened butter, then sprinkle with oats and drizzle with honey. Place the loaf pans on a parchment-covered baking sheet (in case of spillage during baking) and bake for 15 minutes uncovered. After 15 minutes, tent the loaves with foil and bake an additional 15-20 minutes, or until the loaves are risen, browned and make a hollow thump noise when you tap them. Remove from the oven and cool in the pans for 20 minutes, then turn out onto cooling racks to finish cooling (at least one hour).

I’m embarrassed to admit I avoided yeast dough for too long. So if you like hot buttered carbs as much as I love hot buttered carbs, promise you’ll tackle a yeast bread soon. Today, maybe. You can do it. I believe in you.

Honey Oat PB Swirl Bread - CloseUp

Note: As a member of the Peanut Butter & Co Yum Squad, I am occasionally given jars of peanut butter (and sometimes additional products like the Bob’s Red Mill old-fashioned oats in this recipe) to play with. What I choose to do with them is up to me. I am not compensated for the recipes or the posts.
If I like it, I share it. It’s just that simple.

YumSquad-Banner-Oatober-02

15 Comments

Filed under Blogger Collaborations, Food & Recipes

Peanut Butter & Co Plays Two Ways

Confession: I once jogged 5 miles for a big jar of peanut butter.
It was my junior year of high school and a friend’s dad bet he could train me to run 5 miles. My first thought was “Joke’s on you, suckah! I don’t run unless my butt’s on fire.” My second was “What’s in it for me?” His bait: a giant jar of peanut butter. This will date me, but it was 1980 and there was a nation-wide peanut butter shortage. As a PB junkie, I was game. After a few weeks of training, I ran that 5 miles and claimed my prize. Then, because I have 4 sisters, I promptly hid it under a pile of laundry in my room because a.) kids never touch laundry, b.) I didn’t care to share, and c.) see above re: peanut butter shortage.

If any sisters are reading this, I apologize. It was a dark time for peanut butter lovers and I went into “every man for himself” mode. I did what I had to.

Peanut Butter & Company recently issued a Mystery Ingredient Challenge to members of its Yum Squad. Sign up, and they would send you not only the peanut butter to play with, but a secret ingredient. Until your box arrived, you would have no idea what your mystery ingredient might be.

Here’s the peanut butter I chose to play with for this challenge:

PB&Co - White & Dark Chocolate Peanut Butters

And here’s my mystery ingredient:

PB&Co - Secret Ingredient - Espresso Powder

If you know me, you know I’m a coffee lover. I don’t function in the morning until I’ve quaffed my first cup, so this secret ingredient was perfect for me. Pinterest has been taunting me with scones lately and I found myself craving warm, flaky layers. So the first thing I made was a two-tone layered scone based on the America’s Test Kitchen cream scone recipe.

PB&Co - Two-Tone Scones2 - March 2015

NANABREAD’S TWO-TONE CHOCOLATE PEANUT BUTTER SCONE

For the white chocolate peanut butter layer:
1 cup all-purpose flour
3 tablespoons sugar
1/2 tablespoon baking powder
3 tablespoons butter, cut into small cubes & chilled
3 tablespoons White Chocolate Wonderful peanut butter
1/2 to 2/3 cup heavy whipping cream, as needed

Place all ingredients except the cream in a food processor and process for 6-8 pulses. Turn the processor on and slowly add enough cream until the dough sticks together and starts to form a ball. It should be the consistency of a soft biscuit dough. Scrape the dough out onto a floured surface and knead a few times, forming it into a square about 3/4″ thick.

For the dark chocolate peanut butter layer:
1 cup all-purpose flour
2 tablespoons sugar
1/2 tablespoon baking powder
1 tablespoon Medaglia D’Oro instant espresso powder
1/2 cup semi-sweet miniature chocolate chips
3 tablespoons butter, cut into small cubes & chilled
3 tablespoons Dark Chocolate Dreams peanut butter
1/2 to 2/3 cup heavy whipping cream, as needed

Place all ingredients except the cream in a food processor and process for 6-8 pulses. Turn the processor on and slowly add enough cream until the dough sticks together and starts to form a ball. It should be the consistency of a soft biscuit dough. Scrape the dough out onto a floured surface and knead a few times, forming it into a square about 3/4″ thick.

To layer, make sure each square of dough is the same size. Brush the top of the dark chocolate dough with a little cream and place the white chocolate layer on top. Press gently and square up the sides, then set aside while you make the glaze.

For the espresso glaze:
2 tablespoons heavy whipping cream, chilled
1 teaspoon Medaglia D’Oro instant espresso powder
1 tablespoon honey or agave nectar
2 tablespoons raw or Demerara sugar crystals, to sprinkle on top

In a small bowl, combine the cream, espresso powder and honey or agave. Whisk until smooth.

Pre-heat your oven to 425F and prepare an 8″ square baking pan by spraying it lightly with baking spray or lining it with parchment paper. Using a large kitchen knife or a bench scraper, cut the layered scone dough into equal pieces (I cut mine into 3 rows of 3 for 9 smallish scones). Place them in the baking pan so that the sides are just touching. Using a pastry brush, brush the entire surface of the scones with a thick coating of glaze, then sprinkle generously with raw sugar crystals. Bake for 14-18 minutes, or just until a toothpick comes out clean. I don’t like dry scones, so I tend to take mine out of the oven when there are still a few small crumbs sticking to that toothpick. Serve warm from the oven with a pat of butter and a hot cup of coffee. Man, I wish you could smell these.

PB&Co - Two-Tone Scones1 - March 2015

“But NanaBread… that recipe only used 3 tablespoons of each peanut butter. What else can we make with all of the ooey gooey peanut butter goodness left in those jars?” Well, I’m glad you asked, because (and I love to say this)…

BUT WAIT… THERE’S MORE!

I also made a layered peanut butter parfait using both White Chocolate Wonderful and Dark Chocolate Dreams peanut butter AND my beloved secret ingredient espresso powder. That’s right, folks! It’s a parfait of chocolate espresso cake layered with creamy peanut butter custard and topped with espresso whipped cream and cake crumbs. SHUT THE FRONT DOOR!

PB&Co - Chocolate Espresso PB Parfaits - Trio

NANABREAD’S TWO-WAY PEANUT BUTTER ESPRESSO PARFAIT

For the cake:
1 box (15.25 ozs) Betty Crocker Triple-Chocolate cake mix
1 1/4 cup water
1/2 cup canola oil
3 large eggs
1 tablespoon Medaglia D’Oro instant espresso powder

Whisk all ingredients until smooth and pour into a prepared 13″ x 9″ baking pan. Bake according to the directions on the cake mix box, just until a toothpick comes out clean. Remove from the oven and set aside to cool.

For the peanut butter custard:
1 box (4.6 ozs.) Jell-O Cook & Serve vanilla custard mix
2 cups milk (I used 2%)
1 tub (8 ozs.) mascarpone cheese (or cream cheese)
1/2 cup each of White Chocolate Wonderful & Dark Chocolate Dreams

In a saucepan, combine the vanilla custard powder and milk and whisk until combined. Cook over medium-high heat, whisking frequently, until the mixture is thick and bubbly. Remove from the heat and allow it to cool, then transfer to a bowl, cover with plastic wrap and refrigerate until completely chilled.

Once chilled, divide the custard equally into two bowls. Add half of the mascarpone (4 ozs.) and one type of peanut butter to each bowl. Whisk until smooth and keep refrigerated until assembly.

For the espresso whipped cream:
1 cup heavy whipping cream, chilled
1 teaspoon Medaglia D’Oro instant espresso powder
1 teaspoon vanilla extract
2-3 tablespoons sugar, to taste

In a mixing bowl, combine all of the ingredients. Whip with an electric mixer until it thickens and holds stiff peaks. Scrape it into a plastic bag and press all the air out, and place in the refrigerator until needed.

To assemble, cut the cooled cake into circles the size of the glass you’re serving these in. Start by placing a layer of cake, then spoon in the dark chocolate peanut butter custard. Top it with a another layer of cake, followed by the white chocolate peanut butter custard. Continue to layer until each glass is full, then snip the tip off that plastic bag and pipe a layer of espresso whipped cream on top. To finish, crumble leftover cake scraps over the top of each parfait. Keep refrigerated until ready to serve.

PB&Co - Chocolate Espresso PB Parfaits - Close-Up

I made these in two sizes – small 8-oz disposable cups for ‘party-size’ servings and large 20-oz iced tea glasses for ‘I’m alone watching a movie in my pj’s and no one can see me’ servings. As I’ve said before, this blog is a no judgement zone. These were so good, Jonah Bear & Lilly Bug didn’t come up for air.

Me: “Is it good? Do you like it?”
Them: Nod vigorously; keep shoveling
Verdict: The proof is literally in the pudding.

PB&Co - Chocolate Espresso PB Parfaits - Mine

Special thanks to Peanut Butter & Co for sending me a big ol’ box of fun for their Mystery Ingredient Challenge. They were kind enough to provide multiple jars of peanut butter and a jar of espresso powder at no cost to me, and I had a ball playing with it. To clarify, as a member of the Peanut Butter & Co Yum Squad, I am not compensated in any way. I just love the product and enjoy experimenting with it. To find out more about the many fabulous flavors they sell, CLICK HERE.

YumSquad-Banner-MysteryIngredient-espresso

11 Comments

Filed under Blogger Collaborations, Food & Recipes, Things I Love

OXO offers pans now? YES!

We all know OXO makes a million fabulous kitchen gadgets, and I’ve made no bones about the fact that I use mine with enthusiasm. They are some of my favorites because of three key things:

1. they’re thoughtfully designed,
2. they’re well constructed & durable, and
3. they’re always affordable

When OXO launches something new, my ears perk up. When they announced they were launching a new line of pots & pans, my jaw dropped. And when they then offered members of their Blogger Outreach Program the chance to possibly test drive one, I jumped at the chance. With both feet. Receiving the e-mail that I’d been selected to receive my pan of choice was like opening presents on Christmas morning. I was giddy. Openly, gleefully giddy.

Here it is, y’all – My Precious.

OXO - 12 Inch Non-Stick Skillet - With Text

It’s sturdy. A little on the heavy side, but WOW is it solid. My first test was a simple soft fried egg. Nothing tests a new non-stick pan like a delicate egg. Result: so slippery, it sent my fried egg spinning when I swirled the pan. Also impressive was the heat distribution of the skillet due to the hard-anodized aluminum construction of the pan and that built-in heat disc in the bottom. Smart.

OXO - 12 Inch Non-Stick Skillet - Bottom

I also like the rise and slope on the sides of this skillet. The rolled edge is high enough to contain bubbly sauces and perfectly pitched to slide those early morning omelets onto a plate, even before you’ve had your coffee. It also allows sauces to be expertly poured. Again, smart design.

OXO - 12 Inch Non-Stick Skillet - Coating

My ultimate test for a new non-stick pan is caramel – hot, gooey, sticky thermonuclear caramel. To put my pan to the test, I opted for a baked caramel apple pancake. It starts on the stove and finishes in the oven, so it was a perfect way to test this pan. And since this skillet can take oven temperatures up to 430F, you can fearlessly go from stove to oven.

Baked Apple Pancake - Browned Butter & Brown Sugar

I started with butter and brown sugar and let it heat up to see if it would stick. I was surprised at how easily I could move the caramel around the pan without anything sticking. As it got hotter and hotter, I kept moving it around with a silicone spatula. As you can see from the photo, it didn’t stick at all and moved easily around the pan.

Baked Apple Pancake - Easy Caramel

While the sugar was caramelizing, I peeled and sliced 3 apples. I like firm, sweet apples like Gala, Pink Lady or SweeTangos. Cored and sliced into even pieces (about 1/4″ thick), they’re ready to roll.

Baked Apple Pancake - Apples1

Baked Apple Pancake - Apples2

Tip: remove the skillet from the heat while you add the apple slices. It takes a few minutes to get them arranged to look pretty, and removing the pan from the heat keeps your caramel from burning while you work.

Baked Apple Pancake - Apples in Caramelized Butter & Sugar

Because I prefer firm apples, I like to pop them in the oven and let them bake 5-10 minutes before adding the pancake batter. Once the caramel is bubbling and the apples are toasty, I remove the pan from the oven and pour the batter evenly over the top. It goes back into the oven for 12-15 minutes, or until the pancake is just set and firm. Confession: I love bubbly edges on pancakes.

Baked Apple Pancake - Pancake Batter - Post-Bake

You know it’s done when you can gently press on the surface of the pancake and it bounces back. It’s better to take this one out a little early than to over bake it, so keep an eye on it during that last few minutes.

Now for the tricky part – flipping it out of the pan. I flipped mine immediately after I took it out of the oven and got a caramel burn on my wrist, so in retrospect, I’d wait 5-10 minutes and let it cool next time. I need to learn to be patient when pancakes are involved. To flip mine, I placed a piece of parchment over the pancake, then set a plate on top of that. Using a folded kitchen towel, I grabbed the skillet on both sides instead of the handle and gave it a quick flip.

The true moment of truth is when you lift the skillet. That’s when you see if your pan is a hero or a zero based on how many apple slices are stuck to the pan. Here’s what I got. You be the judge.

Baked Apple Pancake - Flipped & Flawless

Booyah, baby! Look at that gorgeous golden caramel apple beauty.

Want to see what the skillet looked like? I expected it to be coated in a thick, deeply entrenched layer of molten sugar but this is what I saw.

Baked Apple Pancake - Sticky Caramel Goo

This is the part where I’d usually mutter bad words and grab a scouring pad. Oh, OXO… how I test thee. Instead, I ran a little hot water in the skillet and let it sit for a minute while I grabbed plates, forks and syrup. To my surprise, the remaining crusty sugar wiped right out. No scrubbing. No sweating. No cursing. It seriously wiped right out with a paper towel. Way to go, OXO. You win again. And technically, I win too.

OXO - 12 Inch Non-Stick Skillet - Handle

Final Thoughts:
1. This is my new favorite skillet. For real.
2. The size (at 12″) is great for just about any task.
3. It is well constructed and sturdy, which I expect from OXO.
4. It browned evenly and held heat beautifully, which is a must for me.
5. OXO says this skillet is dishwasher safe, but I always hand wash non-stick pans because I’m a big ol’ chicken.
6. This skillet is on the heavy side, which may prove hard to handle for someone who’s older, younger or has problems handling heavier pots or pans. If heft isn’t an issue, you’ll love it.
7. Overall rating – two thumbs way up. I’ll be using this pan for years to come.

If you’d like to take a shot at this easy baked caramel apple pancake, here’s how you can recreate it at home.

2 cups baking mix (Bisquick or my favorite – Pioneer Buttermilk Baking Mix)
2-3 tablespoons raw (or granulated) sugar
1 pinch of salt
3 large eggs
1 teaspoon vanilla extract
2/3 to 1 cup low-fat buttermilk (can sub regular milk)
2-3 large apples – peeled, cored & cut into 1/4″ slices
6 tablespoons unsalted butter
1/2 cup brown sugar

Pre-heat the oven to 375F.
In a large mixing bowl, combine the baking mix, raw or granulated sugar, salt, eggs, vanilla & buttermilk. Whisk until smooth. Batter should be a little on the thin side, like crepe batter. Set aside to rest, and start on your apples. Peel, core and slice the apples. Heat your non-stick skillet over medium-high heat, then add the butter and brown sugar. Stir until the sugar melts and the mixture begins to bubble. Remove from heat and arrange your apple slices. Pop the skillet into a hot oven for 10-12 minutes, or until the caramel mixture is bubbling furiously around the edges. Remove the skillet from the oven and pour the pancake batter evenly over the top. Return to the oven and bake just until the pancake is set, approximately 12-15 minutes. Remove from the oven and allow your pancake to cool for 5-10 minutes before flipping.

To flip, invert a plate larger than the skillet over the top, place one hand firmly on top of the plate, grab the handle with a dish towel and flip quickly. If you’re not a confident or expert flipper, invert the plate over the skillet, then place a kitchen towel folded lengthwise across the skillet. Place one hand on each side of the skillet, grabbing the plate with your thumbs and using your fingers to grab the skillet. Either way, flip quickly.

Note: if you’re using an older non-stick skillet that doesn’t release as well, run a silicone spatula around the edge of the skillet to help the pancake release prior to flipping. If you’re still left cursing your old ratty non-stick, consider acquiring one of these new OXO beauties. You will not regret it.

For this apple pancake, I made a simple cinnamon cream syrup.

1/2 cup real maple syrup
1/2 cup heavy whipping cream
1/2 teaspoon ground cinnamon

Heat all 3 ingredients in a small saucepan over medium-high heat, whisking often, until the mixture comes to a rolling boil. Remove from heat and transfer to a small pouring pitcher. Serve hot.

Baked Caramel Apple Pancake - Breakfast is Served

Disclaimer: This OXO 12″ non-stick skillet was provided to me free of charge by the OXO Blogger Outreach Program so that I could play with it and share my experience. All opinions are my own, and are my honest take on it. Have you tried OXO yet? Which are your favorite OXO products? To learn more about OXO cookware, CLICK HERE.

4 Comments

Filed under Blogger Collaborations, Food & Recipes, Things I Love

#OXOTurkeyDay – Dinner For Two

OXO TurkeyDay - Title Shot

There are very few brands I love unconditionally. OXO is one of them. Their products are not only well made, but thoughtfully designed. This year, OXO is celebrating Turkey Day by sharing an array of Thanksgiving-friendly products via their Blogger Outreach Program, which I’m proud to be part of.

Tools in the #OXOTurkeyDay kit included the following:

OXO TurkeyDay - Tool Collage2
Left to Right: The most amazing twine dispenser (twine included), a non-slip butter dish with cover, a thoughtfully designed turkey baster with an angled neck & counter rest to prevent drips (and cleaning brush), and the turkey lifter that makes transferring your bird from pan to serving platter a snap.

OXO TurkeyDay - Tools Collage1
Left to Right: That twine dispenser I’m in love with (did I mention that?), a better look at the bird lifter’s design, and a fat separator only a gravy hoarder can truly appreciate. If only it worked on my thighs.

I started by tackling the bird. Since it’s just the two of us at home, The Complete Package picked out a lovely organic chicken that came in at around 4 pounds. Perfect! After the bird was properly cleaned & prepped, I broke out that twine dispenser and trussed her like 50 Shades of Prey. From there, I stuffed softened butter and fresh sage leaves under the skin, massaged more butter onto the outside, and gave her a generous sprinkle of kosher salt mixed with freshly ground black pepper and ground poultry seasoning.

OXO Turkey Day - Chicken Prep Collage

You know what I love most about preparing a turkey at Thanksgiving? Fresh sage. If you can get your hands on some, use it. Those frosted velvet leaves are so fragrant and wonderful. It’s the stuff Turkey Day dreams are made of.

#OXOTurkey Day - Fresh Sage

Next up was my mother-in-law’s easy cornbread dressing recipe. We make it every year without fail – come hell or high water. Some people insist on green bean casserole. Some go nuts without their beloved yams or cranberry sauce.
For us, it’s not Thanksgiving without Louise’s cornbread dressing.

#OXOTurkeyDay - Dressing Collage

The Complete Package has certain ideas about Thanksgiving dinner that are set in stone. His mother’s dressing is one. Mashed potatoes with gravy is another. I use thin-skinned white potatoes and leave the skins on. I like the rustic, vitamin-rich goodness of potatoes with the skins on. My secret is to add 2-3 tablespoons of Fage 0% fat-free Greek yogurt, real butter and a dash of milk. Perfect. Every. Time. My tool of choice is an old-fashioned hand masher. I also tried out the new OXO butter dish. It’s made with a sturdy non-slip metal base and has a clear acrylic cover that keeps funky fridge odors at bay. If you have fridge funk, that is. I’m not judging. This is a judgement-free blog. No judging here.

OXO Turkey Day - Mashed Potato Collage

In our house, every drop of bird broth is reserved for the most coveted of condiments – gravy. I looked forward to testing out the OXO fat separator, and it didn’t disappoint. Once the bird was baked, we poured the drippings & broth through the removable strainer and the separator did the rest. The red silicone stopper prevents spills and pops out easily when you’re ready to pour. Like all OXO products, the measurement markings are A+ here. I love that OXO uses bold, colorful markings for aging far-sighted Nanas like me.

OXO TurkeyDay - Gravy Collage

My last side dish was bacon-wrapped green bean bundles. These are so easy! Just blanch fresh green beans for 3-5 minutes in boiling salted water, then plunge them in ice, pat dry with paper towels, and wrap with bacon. I used a thick-sliced hickory smoked bacon. I also sprinkled half of the bundles with a coarsely ground black pepper to add so zing, because bacon & black pepper are BFFs. For real.

OXO TurkeyDay - Green Bean Bundle Collage

We also grabbed a few cornmeal rolls from the freezer (thank you Kirsten at Comfortably Domestic) and a jar of my homemade cherry, pear & apple cranberry sauce. The Complete Package needs gravy. I need my cranberries.
For me, it’s just not Thanksgiving without cranberry sauce.

OXO TurkeyDay - Finished Dinner

Start to finish, I had dinner on the table in 3 hours. Not bad for a table for two of all our Thanksgiving favorites with leftovers. You HAVE to have leftovers for the sandwiches alone. Am I right? Yes? Don’t leave me hanging, people.

OXO TurkeyDay - Finished Dinner2

My deepest thanks to the fine folks at OXO for providing all the tools we needed for our holiday feast. Now here’s a quick rundown of the recipes shown above.

Louise’s Easy Cornbread Dressing:
1 envelope (6 ozs.) Pioneer yellow cornbread mix
1 envelope (6 ozs.) Pioneer buttermilk biscuit mix
milk, eggs & oil – as directed on the above packages
Pam cooking spray to coat the baking pan
1 cup minced celery
1/2 cup minced white or yellow onion
2 tablespoons unsalted butter
1 can (10 ozs.) condensed cream of chicken soup
1 box (32 ozs.) low-sodium chicken broth (see below)
1/2 teaspoon poultry seasoning
1 teaspoon fresh sage, minced
salt & pepper to taste

Dump the cornbread and biscuit mixes into a large mixing bowl and add the eggs, milk & oil listed on the package instructions for both mixes. Whisk until smooth and pour into a lightly sprayed 8″ x 8″ baking pan. Bake at 375F until a toothpick comes out clean and the top is lightly browned. Remove from the oven & allow to cool to room temperature. Using a knife, score the cornbread into 1″ pieces and dump them into a large mixing bowl.

In a small skillet or pan, saute the celery and onion in 2 tablespoons of butter until lightly browned and translucent. Pour over the cornbread cubes and add the undiluted chicken soup and seasonings. Add enough chicken broth to create a moist but not soggy cornbread mixture (approx. 1 to 1 1/2 cups, then save the rest for gravy). Spoon into a lightly sprayed baking pan and bake at 350F for 30-45 minutes, or until the top starts to brown lightly. Serve hot.

NanaBread’s Simple Mashed Potatoes:
6-8 small white potatoes, scrubbed
2-3 tablespoons Fage 0% fat-free Greek yogurt
2-3 tablespoons unsalted butter
a splash of milk, if needed
salt & pepper to taste

Place washed whole potatoes into a saucepan and cover with water. Cook over medium heat until you can pierce the potatoes with a paring knife, and the knife goes easily through the cooked potatoes. Drain & return to the pan. Add the yogurt, butter and salt & pepper and mash with a potato masher or heavy fork until mostly smooth. If they are a little dry, add a splash of milk. Keep warm until everything else is ready.

Easy Poultry Gravy:
3 tablespoons butter or canola oil
3-4 tablespoons all-purpose flour
2-3 cups broth from your baked bird, or boxed broth from above
salt & pepper to taste
1/8 teaspoon poultry seasoning

In a saucepan over medium heat, add the butter and flour, whisking until smooth and slightly browned (3-5 minutes). Slowly whisk in the chicken/turkey broth and whisk until smooth. Continue to cook over medium heat, whisking often to prevent lumps. Season with salt, pepper and poultry seasoning and keep warm until all else is ready.

Bacon-Wrapped Green Bean Bundles:
1 pound of fresh green beans
12 slices of hickory smoked thick-cut bacon
1 teaspoon salt
coarsely ground black pepper, optional

In a saucepan, add enough water to fill the pan half-full. Add one teaspoon of salt and bring the water to a boil. Snap the stem ends off the green beans, then blanch them for 3-5 minutes in the boiling salt water. Remove from the boiling water and plunge them into a bowl of ice water to stop the cooking process. Drain and pat dry on paper towels, then divide them into four piles. Gather each pile into a bundle and wrap with 3 slices of bacon. Line a baking pan with aluminum foil, and arrange your bundles in the pan. Sprinkle with black pepper, if desired. Bake at 425F on the middle rack until the bacon is throughly cooked and starts to brown. If needed, fold the foil over the exposed green beans to keep them from overcooking. Once the bacon is done, remove from the oven and keep warm.

NanaBread’s Sage & Butter-Basted Bird:
1 whole chicken (mine was 4 pounds)
1/2 stick of butter, softened to room temperature
8-10 fresh sage leaves
1 teaspoon kosher salt
1/2 teaspoon freshly ground black pepper
1/2 teaspoon McCormick poultry seasoning
1 to 2 cups chicken broth, for the roasting pan
string to truss the bird

Begin by removing the chicken from the package and rinsing it thoroughly under lukewarm water. Pat dry with paper towels and place on a cutting board. Using cotton twine, tie the wingtips under the bird and tie the drumsticks together at the ankles. Run your fingers under the skin of the bird to loosen it, then rub at least half the softened butter under the skin, covering as much ground as you can. Gently place the whole sage leaves under the skin, then massage the bird with the remaining butter. Mix the salt, pepper & poultry seasoning and sprinkle it all over the bird. Place in a roasting pan and add the chicken broth. Cover and bake at 375F for 30 minutes, then uncover and bake an additional 20-30 minutes until nicely brown and the bird reaches 165F with an instant read meat thermometer. Baste once or twice when the bird is uncovered, and she’ll come out gorgeous.

For Kirsten’s Cornmeal Buns, click here. She made them as burger buns, but they are also fabulous as knotted dinner rolls. They’re my favorite.

So now you know our Thanksgiving favorites. What are yours? Do you have traditional dishes you prepare each year, or do you like to wing it (turkey pun) and try new things? Share here! You never know when your old family favorite might become someone else’s new family favorite. If you’ve posted them on your own blog, be sure to leave a link in your comment so we can all click over.

Happy #OXOTurkeyDay to one and all,
Jeanne

23 Comments

Filed under Blogger Collaborations, Food & Recipes

Simple Apple, Pear & Cranberry Pie

Hello, Fall. I’ve missed you terribly. You didn’t write. You didn’t call.

Apple Pear Cranberry Pie - Inside NanaBread's Head

I love fall fruits, especially apples and pears. Earlier this week, a blogger tweeted that she’d just tried her first SweeTango apple and it blew her mind. She mentioned her favorite apple had always been the honeycrisp, and that’s what caught my attention. Honeycrisps are my favorite apple, too. So my next visit to the grocery store, guess what I looked for? You got it. And was she right? You betcha. Crisp, super sweet and beautifully colored, I’m afraid these are going to become my new apple obsession. They are spectacular. Pie worthy, in fact.

Apple Pear Cranberry Pie - The Fruit

For this pie, I sliced my apples thin and my pears even thinner. I usually like a big chunky apple pie, but for this one, I wanted thin slices piled high and dotted with dried cranberries. The heart wants what the heart wants.

Apple Pear Cranberry Pie - Sliced Fruit

Here’s food for thought… I watched an episode of Cook’s Illustrated on PBS and they used fruit pectin powder to thicken a peach pie. Say what? Now I’ve used pectin for years when canning fruit, but it never occurred to me to bake with it. Makes sense, if you think about it, so I decided to try it with this one. And since I used instant tapioca granules to thicken my peach pie this summer, I wondered what would happen if I did both. For science. Why not, right?

Apple Pear Cranberry Pie Thickeners

Combining apple juice, sugar, instant tapioca, pectin & vanilla extract, I made a slightly thick, gently sweetened, vanilla-kissed filling that paired perfectly with the apples and pears and created a nice balance for the tart cranberries. Once the mixture was thickened, I just poured it over the fruit and tossed it to coat. So quick and simple. The tapioca still looks a little cloudy here, but don’t worry – it’s clear and unrecognizable once it’s baked.

Apple Pear Cranberry Pie - Fruit & Thickeners

After that, it’s just dough, butter, blah blah PIE! Man, how I love pie. But seriously, there’s only one pie dough recipe for me, and it’s Kirsten’s ‘No Excuses Pie Dough’ from ComfortablyDomestic.com. Once you make this one, nothing less will do. I make it in batches, wrap it in plastic, seal it into heavy bags and pop it in the freezer so I can produce pies on a whim. And that’s another reason I love this recipe – Kirsten’s dough freezes beautifully.

Apple Pear Cranberry Pie - Kirsten's Pie Dough

Just thaw, roll on a floured surface, and pop it in a pie tin. And then concentrate on stuffing every last bit of that filling into that shell. Top with a fat, rustic lattice, crimp the edges, brush with melted butter and sprinkle generously with raw sugar crystals. Easy, right?

Apple Pear Cranberry Pie - Ready for Baking

It really is easy. The only hard part is the waiting – for it to come out of the oven when it smells so amazing, for it to thicken and cool, for dinner to end so you can cut it. It’s always the waiting part that gets me.

Apple Pear Cranberry Pie - Warm from the Oven

NanaBread’s Apple, Pear & Cranberry Pie:
1 recipe for Kirsten’s ‘No Excuses’ pie dough
1 1/2 pounds (3 large) SweeTango apples
1 1/2 pounds (3 large) Star Krimson red pears
1/2 to 2/3 cup Craisins dried cranberries (to taste)
1 cup apple juice or apple cider
3 tablespoons quick-cook tapioca granules
1 tablespoon powdered fruit pectin
1/2 to 2/3 cup granulated sugar (to taste)
1/2 teaspoon pure vanilla extract
1/2 stick unsalted butter, melted
2 tablespoons raw sugar granules

Start by making the pie dough and chilling it in the refrigerator for at least 2 hours or the freezer for 30 minutes. While your dough is chilling, prep your fruit and filling.

Peel, core and thinly slice the apples and pears. I sliced my pears a little thinner than the apples since they take a little longer to bake. Place in a large mixing bowl and sprinkle in the dried cranberries.

In a small saucepan, combine the apple juice or cider, tapioca granules, pectin and sugar. Cook over medium-low heat, whisking often, until the sugar is melted and the mixture begins to bubble. Turn off the heat and whisk in the vanilla extract.

Remove the pie dough from the fridge and roll out a bottom crust, placing it gently into the pie tin. Roll a top crust and cut into wide strips (1 1/2″) so you can form a rustic lattice top.

Pour the filling over the fruit and toss to thoroughly coat all the fruit. Spoon it into the pie shell, pressing it gently into the crust to compact the fruit. Lattice the pie dough strips onto the top of the pie, then roll the lower crust edges around the edge of the pie tin and crimp all around.

In a small bowl, melt the butter and brush the entire crust. If there is melted butter left, simply pour it over the top of the pie. Sprinkle the entire pie with the raw sugar granules.

Bake in a pre-heated oven (375F) for 45-60 minutes, turning every 20 minutes, until light golden brown. Watch it once it starts to brown. Everyone’s oven is different, and yours may take more or less time depending on how hot it runs. Once golden brown, remove the pie from the oven and allow it to cool completely before serving (4-6 hours).

Apple Pear Cranberry Pie - Cut Pie - Inside NanaBread's Head

This pie was so good! It’s going on my ‘must make’ list for the holidays now. I might even rank it above all former apple pie recipes as my new favorite. Maybe even above most other pies in general. It’s definitely invited for Christmas.

Sorry, Pumpkin Pie. I’m breaking up with you.

It’s not you. It’s me.

15 Comments

Filed under Food & Recipes, Things I Love

‘Not A Recipe’ Donuts

'Not a Recipe' Donuts - Mini M&Ms - Inside NanaBread's Head

Blogger friends and I are always sending each other links to recipes found on Pinterest. Sometimes it’s because ‘OMG you need to make this!’ and other times it’s because ‘OMG why would anyone make this?!’ Example: the cake made by layering Twinkies into a pan and covering them with frozen strawberries and Cool Whip. I’m not saying which category that one fell in, but it does bring up a comment frequently heard in foodie circles:

“If you start with a mix or packaged food, it’s not a recipe. It is a creation.”

I get it. I didn’t hand craft a donut dough for these. I started with a can of refrigerated biscuits. Which brings up another comment frequently heard in non-foodie circles:

“Ain’t nobody got time for that.”

My position is firmly on top of the fence. A good 80-90% of what I make is from scratch, but sometimes quick and easy is what we need. And these are easy. Incredibly, beautifully easy and perfect for those Saturday mornings when all you want is a big cup of coffee and to get breakfast on the table in a hurry.

NanaBread’s ‘Not A Recipe’ Donuts:
one can (16.3 ounces) Grands Butter Flaky Biscuits
canola oil for frying
miniature chocolate chips (2 cups, divided)
miniature M&M candies (1 cup)
heavy whipping cream (2 tablespoons)
unsalted butter (1 tablespoon)

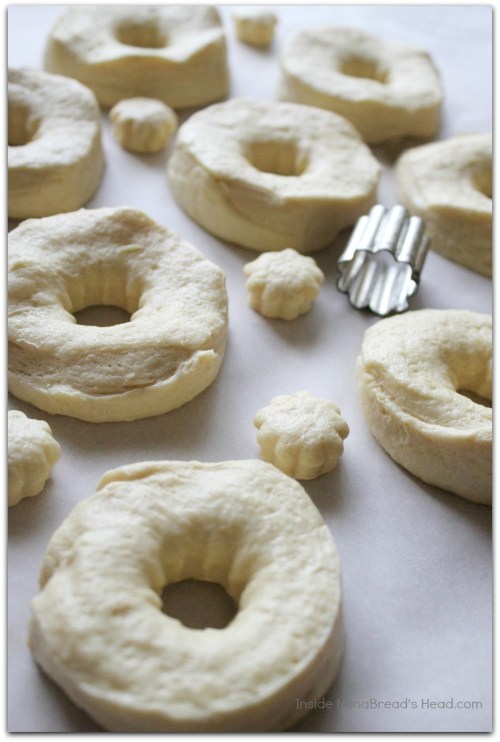
Start by heating 2″ of canola oil to 325F in a deep, heavy pot. While your oil is coming to temperature, unwrap your can of biscuits and cut center holes.

'Not a Recipe' Donuts - Ready to Fry - Inside NanaBread's Head

Fry until golden brown, turning once. Remove to paper towels and repeat until all donuts are fried. Cronut? We don’t need no stinkin’ cronuts!

'Not a Recipe' Donuts - Fried to a Golden Brown - Inside NanaBread's Head

Now you could shake a little powdered sugar over these to get them in your pie hole quicker, but I wanted chocolate. Don’t judge. We all have those days.

'Not a Recipe' Donuts - Toppings - Inside NanaBread's Head

I put one cup of miniature M&Ms on a saucer and one cup of miniature chocolate chips on another. The remaining cup of chocolate chips went into a bowl with the heavy whipping cream and butter, then into the microwave for 90 seconds. Once melted and whisked, I had a bowl of glossy, gorgeous ganache to dip my golden orbs in. No, not THOSE golden orbs, silly! These.

'Not a Recipe' Donuts - Ganache Glazed - Inside NanaBread's Head

Plain chocolate glazed are yummy, but chocolate on chocolate is crazy good.

'Not a Recipe' Donuts - Mini Chips - Inside NanaBread's Head

The key is to dip the donut into the ganache, then let it sit for a few minutes. It gives the ganache time to set up a little before dunking them into toppings. It also gives you time to lick the chocolate off your fingers.

What? Where are all the donut holes? I don’t know what you’re talking about.

'Not a Recipe' Donuts - Is Eight Enough - Inside NanaBread's Head

Okay, so I ate the donut holes. Someone had to. Please forgive me blah blah blah, I beg of you. Would it help if I bribed you with a donut?

'Not a Recipe' Donuts - I saved you one at Inside NanaBread's Head

You’re right. I have no shame.

21 Comments

Filed under Food & Recipes

OXO’s #WhatAGrillWants – and what this girl wants is some smokey meat, sweet corn & fried green tomatoes

What’s missing from my website? Please don’t say humor, good writing or appetizing recipes. What I was shooting for is ads. There are none on my blog. It’s a personal choice made when I started blogging four years ago, and one I’ve stuck with since. It’s not a monetary or political issue, it’s just that I started blogging to share with friends and family, and ads never felt appropriate.

What you will see – products I occasionally share for one reason only – because I love them. OXO is one brand I stand firmly behind. Their products are well made, sturdy, easy to use and affordable. Because OXO supports the blogging community and blogs of all sizes, they created the Blogger Outreach Program. As a part of this program, I am occasionally selected to try random products. This month, it was OXO’s ‘What A Grill Wants’ collection.

OXO - What A Grill Wants Project

Included in package:
1 pair of 16″ grilling tongs
1 meat tenderizer
1 silicone basting brush
1 dressing shaker
1 corn stripper

That the box arrived just prior to the July 4th weekend was a bonus. We immediately plotted our attack. First up was playing with the corn stripper.

OXO Corn Stripper - What A Grill Wants

We started by grilling ears of fresh Texas sweet corn. Char = flavor.

OXO Corn Stripper & Grilled Corn - What A Grill Wants

Once they were cooled, The Complete Package grabbed that stripper and put her to work. The key was to start at one end apply the proper amount of pressure. {cue the uncontrollable giggling}

OXO Corn Stripper Collage

The Complete Package’s Review: (Overall Grade = C+)
1. He wasn’t sure it was any easier or quicker than using a knife.
2. The cutting blade tended to clog, which meant you had to stop & clear it.
3. Because one end was open, kernels tended to fall out constantly.
4. Cut kernels tended to be more pieces than whole kernels.
5. Pluses: OXO’s quality is always high & the ergonomics were good.

My Review: (Overall Grade = B)
1. I thought it WAS quicker than using a knife.
2. I also had issues with the blade area clogging occasionally.
3. A cap would be nice, as I somehow dumped corn all over the counter.
4. I had no issues with cutting whole kernels because I applied more pressure.
5. I love the size – it fits easily in your palm for ease of use.

What I also found was that the OXO corn stripper tended to remove ALL of the corn from the cob, while a kitchen knife tended to just shear off the tops of each kernel. This photo illustrates what I mean.

OXO Corn Stripper Comparison - Stripper vs Knife - What A Grill Wants

The cob in the front was denuded with a chef’s knife. You can see the flat surfaces of the cut kernels where the bottoms of the kernels are still attached. The cob in the back was cleaned with the OXO corn stripper, and you can clearly see that the entire kernel is missing. All that remains is the fibrous walls surrounding each kernel. Less waste and more volume of corn was a plus for me.

What did we do with all that cut corn? We made kicked-up creamed corn.

Grilled Creamed Corn

TCP’s Creamed Corn:
2 cans (15 ounces) sweet creamed corn
2 cups roasted sweet corn, stripped from the cob
4 tablespoons unsalted butter
2 tablespoons sugar
kosher salt & fresh cracked black pepper, to taste

Combine all ingredients; simmer over medium heat until warm.

Now, I’m not usually a fan of creamed corn because it tends to be mushy and flavorless, but this was really good. The char and flavor of the roasted corn really shines, and I found myself basically eating it right out of the pan with a spoon. I have no shame when it comes to corn, and I am unapologetic about it.

The Complete Package also broke in those 16″ tongs by grilling a pair of pork tenderloins. There’s something about meat smoked over post oak lump charcoal that touches my very soul. TCP’s pork tenderloin turns out juicy, smokey and perfect every time. For me, the mark of good smoked meat is that it needs no sauce and this needed nothing short of a napkin and some personal restraint.

TCP's Smoked Pork Tenderloin

TCP’s Smoked Pork Tenderloin:
3 pounds pork tenderloin, trimmed
Morton’s Nature’s Season Salt
Hungarian paprika
post oak hardwood lump charcoal

Start by removing the pork tenderloin from the package and rinsing them thoroughly. Pat dry with paper towels and remove any fat or silver skin. Sprinkle the meat liberally with Nature’s Season Salt and paprika.

TCP starts the smoker by stacking oak lump charcoal into a chimney and lighting it. When it is white-hot, he pours it into the smoker section of our grill along with a metal pan of hot water to create humidity. He then opens the grill vents on the opposite side of the grill to pull the smoke through the smoker. Placing the pork tenderloin over indirect heat, he smokes the pork for approximately 90 minutes at 250F, flipping once at the halfway mark, until the internal temperature reaches 160F. Removing it from the grill, he then wraps it in aluminum foil and allows it to rest on a cutting board on the kitchen counter for 30 minutes. Then it’s just a matter of slicing and serving. To sauce or not to sauce is a personal matter, but this pork needs no adornment.

OXO 16 Inch Tongs - Great Length for Grilling - What A Grill Wants

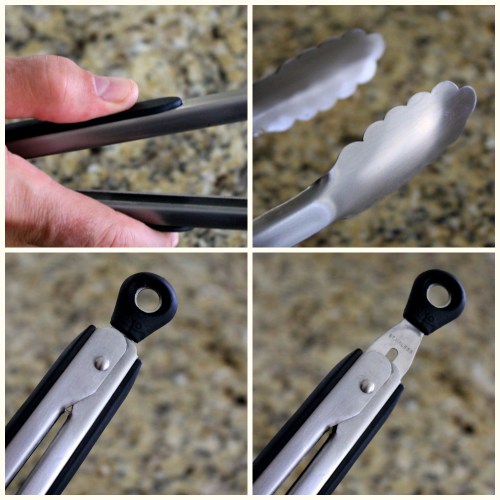
TCP’s Review of the 16″ grilling tongs: (Overall Grade: A+)
1. He loved the longer length, as it kept him from burning himself.
2. The silicone grips with thumb indention provided great grip.
3. The scalloped edges of the tongs provided a better grip on food items.
4. He loved the easy to use lock/unlock mechanism at the back of the tongs.

OXO 16 Inch Tongs Collage

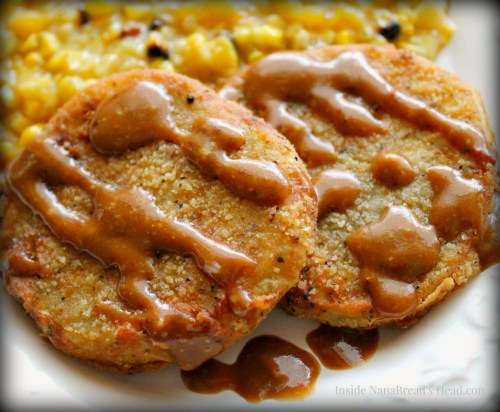
In addition to the smoked pork and creamed corn, I also made fried green tomatoes. Please tell me you’ve had these before. It’s a southern favorite, and a clear sign that summer is upon us.

Fried Greed Tomatoes - Golden Brown
To make, start with firm green (unripe) tomatoes. Big slicing tomatoes work best. Here’s what you’ll need.

Fried Green Tomatoes - What You'll Need

NanaBread’s Fried Green Tomatoes:
2 large green tomatoes
2 cups all-purpose flour
1 tablespoon Morton’s Nature’s Season Salt
1/2 teaspoon freshly cracked black pepper
1 cup milk (whole or 2%)
canola oil, for frying

Wash the tomatoes, remove the core, and cut into 1/3″ slices.

Fried Green Tomatoes - Remove the Core

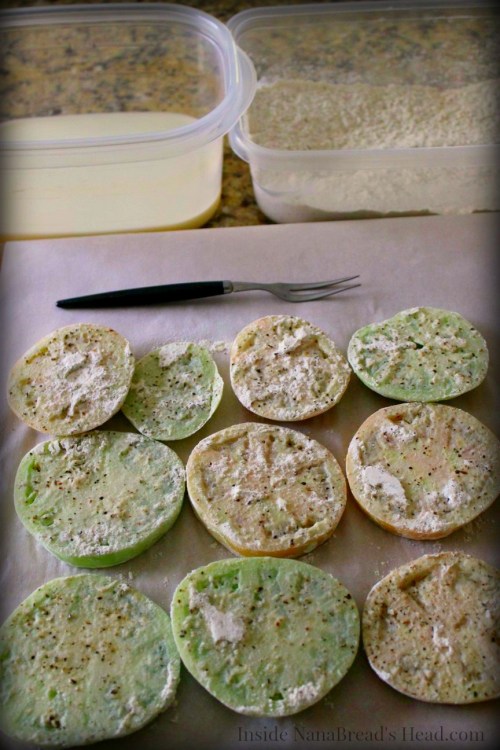
In a mixing bowl, combine the flour, season salt and pepper; whisk until well blended. Dredge each slice of tomato in the flour mixture, coating both sides, and lay them on a sheet of parchment or waxed paper. Once all slices are dredged, allow them to sit for 10-15 minutes to absorb the flour.

Fried Green Tomatoes - First Dredge in Flour

After 10 to 15 minutes, the flour on the tomatoes will look damp. When it does, pour the milk into a container for the second flour dredge.

Fried Green Tomatoes - Dredged

Dip each slice into the milk, then into the flour mixture for a second coat. Tap your fork on the side of the flour container to shake off any excess flour.

Fried Green Tomatoes - Dredge Collage
Place the freshly dredged tomatoes back onto the parchment paper, until all slices are coated twice. Why coat them twice? Well, the first coating of flour is not enough to adequately cover the tomatoes and keep them from splattering when fried. The second coat, along with the milk bath, creates a thick coating to help protect the tomatoes inside and create a crispy, crunchy coating.

Once your tomatoes are coated, add about 1/2″ of canola oil to a large skillet. Heat on high until the oil is shimmering and blazing hot. Carefully lower a few tomato slices into the oil (don’t crowd the skillet) and fry until the edges are clearly golden brown, then flip and fry until the second side is golden. Remove to paper towels and keep warm until all are fried. Serve immediately.

This time, we used the OXO dressing shaker to make a balsamic vinaigrette to drizzle over the finished tomatoes. It was a good call. While the tomatoes were frying, TCP whipped up a quick dressing.

OXO Salad Shaker - Balsamic Vinairgrette Ingredients

The OXO dressing shaker made this come together in a snap. Because volume measurements are printed on the side of the shaker, you can measure directly into the container. The one cup capacity is perfect for a quick vinaigrette of balsamic vinegar, olive oil, Dijon mustard, garlic and a pinch of salt.

OXO Salad Shaker - CloseUp

From there, you just screw on the lid, close the pour vent on top, and give it a good shake. We both loved this salad dressing shaker. And because the pour top seals to keep it closed, you can store unused dressing in the shaker. Just pop then entire thing into the fridge. (Overall Grade = a solid A.)

Fried Green Tomatoes - Finished with Balsamic Dressing

So we used our new OXO tongs to grill up some pork tenderloin, used the corn stripper to make quick work of grilled corn for creamed corn, and whipped up a quick vinaigrette for our fried green tomatoes. OXO delivered what they always do – fun, function, and affordability. It’s not only #WhatAGrillWants, it’s what THIS GIRL wants. Now if you’ll excuse me, there’s a plate of grilled goodness with my name on it. Hello, Summer!

Fried Green Tomatoes - Finished Meal

Special thanks to OXO for sending ‘What A Grill Wants’ products for me to play with via their Blogger Outreach Program. I was under no obligation to blog about these products, but because we love OXO & their products, I chose to share. All opinions are my own, as always.

6 Comments

Filed under Food & Recipes, Things I Love

Blackberry Cheesecake Swirl Ice Cream

Blackberry Cheesecake Ice Cream with Mini-Mallows - Inside NanaBread's Head

Know how I know it’s almost summer? The “101 Favorite Recipes” lists start flying around the internet. Last weekend it was Memorial Day Must-Haves. Soon it will be “Fourth of July Favorites”. Today, we’re getting a jump on summer with a celebration of ice cream. Jenni Fields, author of Pastry Chef Online has invited bloggers to join her for Ice Cream Tuesday – Marshmallow Edition. The marshmallow twist can take any form – a fluff topping, stacked on or stirred in, or incorporated right into an ice cream base. Anything goes!

Luckily, I have a secret weapon in my back pocket – Allison, my foodie friend who makes homemade marshmallows. We’re talking serious combinations like honey latte, pina colada, and the latest batch she sent – blackberry sage. For my ice cream, I started by cutting her full-size marshmallows into teeny tiny baby marshmallows. Man, I wish you could taste these blackberry beauties.

Photo from my Instagram feed @HeyNanaBread

Photo from my Instagram feed @HeyNanaBread

It was a no-brainer to pair these puppies with my homemade blackberry jam.
A cheesecake ice cream base, with its slightly tart bite, is a perfect match for Allison’s luscious marshmallows and the sweetness of blackberry jam.

I love it when a plan comes together. Granted, most people don’t have handmade blackberry marshmallows lying around, so fret not – this ice cream, even without pretty marshmallows, is still worthy of any summer party. And there’s no shame in a store-bought bag of mini-mallows. I buy them, too.

Blackberry Cheesecake Ice Cream - So Good - at Inside NanaBread's Head

If you love cream cheese like I love cream cheese, you’re going to love this ice cream. If you like a thick layer of cream cheese on a warm bagel, this one will make your heart sing. The combination of cream cheese, kefir and buttermilk will give you all the tang you crave, and then some.

If, however, you are more of a no-bake cheesecake person who prefers a higher fruit to cream cheese ratio, you can adapt this recipe to lessen the twang. I’ll post a note at the end of the recipe and tell you how to tone it down.

Blackberry Cheesecake Ice Cream - 8

NanaBread’s Blackberry Cheesecake Ice Cream:
1 package (8 ozs.) cream cheese, softened to room temperature
1/4 cup kefir OR plain thick Greek yogurt
1/4 cup sugar
a pinch of salt
1/2 teaspoon almond extract
1 box (3.4 ozs.) instant cheesecake pudding mix
2 cups heavy whipping cream
1 cup buttermilk (low-fat is fine)
1/3 cup + 3 tablespoons of your favorite blackberry jam
1/2 cup mini-marshmallows (optional)

In the bowl of an electric mixer, combine the cream cheese, kefir or yogurt, sugar, salt, almond extract and dry pudding mix. Beat on medium speed until thoroughly combined. Reduce speed to low and slowly add the whipping cream, buttermilk and 3 tablespoons of the blackberry jam (for color). Beat just until combined and smooth, then scrape the mixture into an electric ice cream maker. Process according to the manufacturer’s instructions, or until the ice cream thickens to a perfect frozen soft-serve consistency.

If you are adding mini-marshmallows, stir them in now.

Into a freezer-safe container with a tight-fitting lid, pour half of the ice cream base and spread to a smooth layer with a rubber spatula. Add the 1/3 cup of blackberry jam and spread into an even layer. Top with the remaining ice cream base and seal the container. Pop it into the freezer for at least 2 hours to set.

Substitutions for a lighter, less twangy cream cheese base:
1. Swap a light berry flavored yogurt for the kefir or plain Greek yogurt.
2. Use vanilla pudding mix in place of the cheesecake pudding.
3. Substitute 2% or whole milk for the buttermilk.

If you’re not into blackberries, this recipe would also rock with raspberry, blueberry or cherry jam. If you really want to go big, leave out the jam all together and add a layer of caramel, fudge sauce and nuts for a Turtle Cheesecake Ice Cream. Personally, I’m really digging the blackberry combo.

Blackberry Cheesecake Ice Cream - Ice Cream Tuesday - Inside NanaBread's Head

But wait… there s’more! Check out these Ice Cream Tuesday posts:
Posts go live throughout the day. If at first you don’t connect – try, try again!

Jenni @ Pastry Chef Online:
Strawberry Cheesecake Ice Cream with Key Lime Marshmallow Swirl

Karen @ Pint-Sized Baker:
Frozen Coconut S’Mores Bars

Dionne @ Try Anything Once Culinary:
Strawberry Ice Cream with Marshmallow Swirl and Toasted Walnuts

Liz @ That Skinny Chick Can Bake:
Fudge-Topped Marshmallow Ice Cream

Betsy @ Desserts Required:
Kahlua Marshmallows/Marshmallow Sauce

Stacy @ Food Lust People Love:
No-Churn Coffee Amaretto Ice Cream with Almond Marshmallows

Kirsten @ Comfortably Domestic:
Traverse City Cherry Cordial Frozen Yogurt

Donna @ Cookistry:
Strawberry Marshmallow Ice Cream

Allison @ Decadent Philistines Save the World:
Horchata Ice Cream with Mocha Mallow Swirl

Sophia @ NY Foodgasm:
Princess Badass Vanilla with Bourbon Cherries & Marshmallow Fluff

Jenni's Ice Cream Tuesday -Mallow Week logo

19 Comments

Filed under Blogger Collaborations, Food & Recipes