Know how I know it’s almost summer? The “101 Favorite Recipes” lists start flying around the internet. Last weekend it was Memorial Day Must-Haves. Soon it will be “Fourth of July Favorites”. Today, we’re getting a jump on summer with a celebration of ice cream. Jenni Fields, author of Pastry Chef Online has invited bloggers to join her for Ice Cream Tuesday – Marshmallow Edition. The marshmallow twist can take any form – a fluff topping, stacked on or stirred in, or incorporated right into an ice cream base. Anything goes!
Luckily, I have a secret weapon in my back pocket – Allison, my foodie friend who makes homemade marshmallows. We’re talking serious combinations like honey latte, pina colada, and the latest batch she sent – blackberry sage. For my ice cream, I started by cutting her full-size marshmallows into teeny tiny baby marshmallows. Man, I wish you could taste these blackberry beauties.

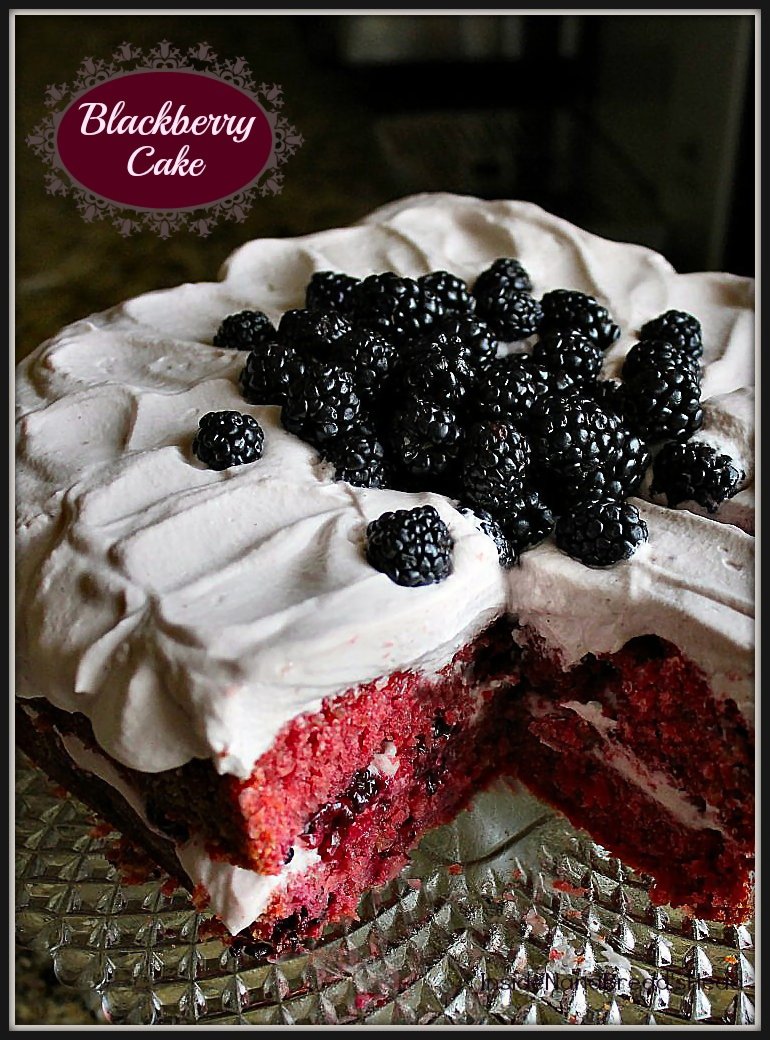
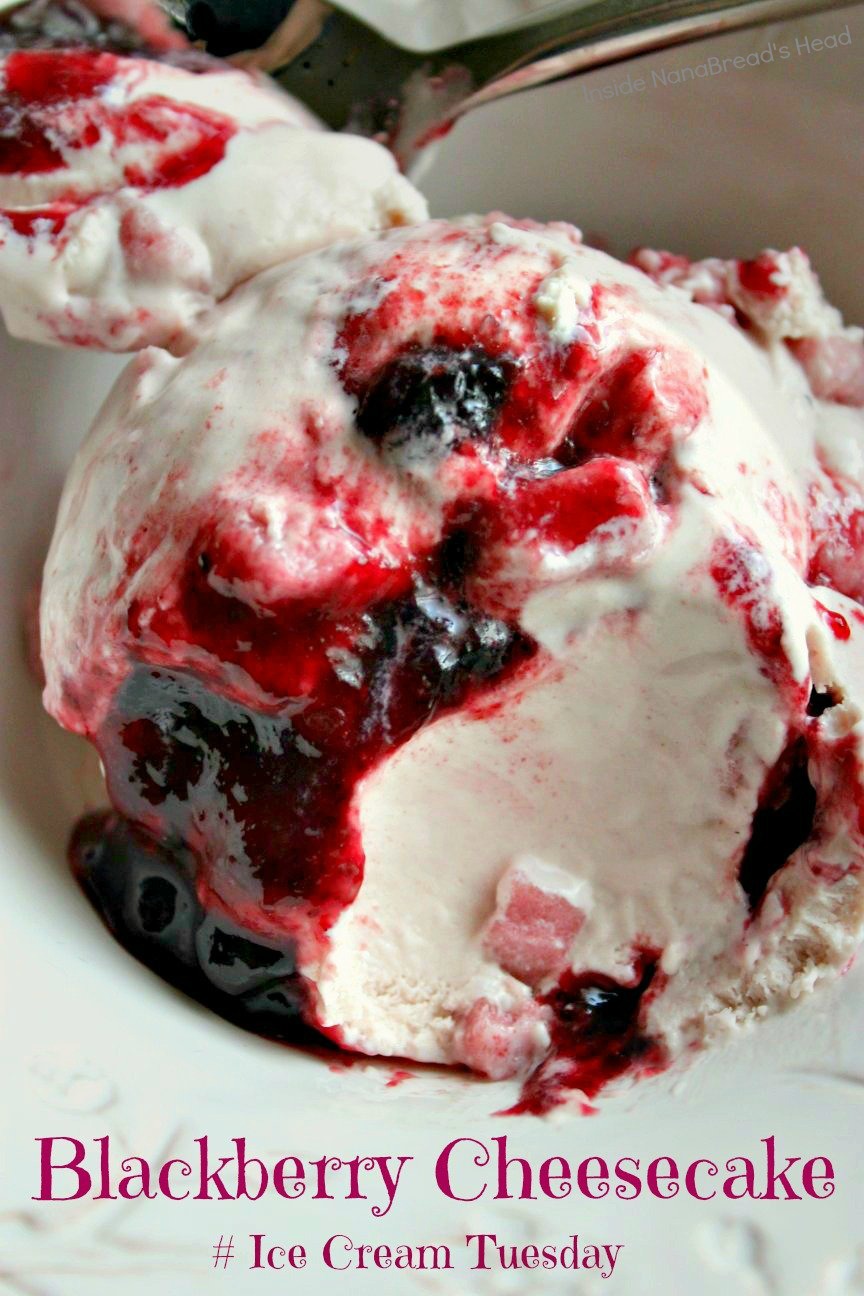
Photo from my Instagram feed @HeyNanaBread
It was a no-brainer to pair these puppies with my homemade blackberry jam.
A cheesecake ice cream base, with its slightly tart bite, is a perfect match for Allison’s luscious marshmallows and the sweetness of blackberry jam.
I love it when a plan comes together. Granted, most people don’t have handmade blackberry marshmallows lying around, so fret not – this ice cream, even without pretty marshmallows, is still worthy of any summer party. And there’s no shame in a store-bought bag of mini-mallows. I buy them, too.

If you love cream cheese like I love cream cheese, you’re going to love this ice cream. If you like a thick layer of cream cheese on a warm bagel, this one will make your heart sing. The combination of cream cheese, kefir and buttermilk will give you all the tang you crave, and then some.
If, however, you are more of a no-bake cheesecake person who prefers a higher fruit to cream cheese ratio, you can adapt this recipe to lessen the twang. I’ll post a note at the end of the recipe and tell you how to tone it down.

NanaBread’s Blackberry Cheesecake Ice Cream:
1 package (8 ozs.) cream cheese, softened to room temperature
1/4 cup kefir OR plain thick Greek yogurt
1/4 cup sugar
a pinch of salt
1/2 teaspoon almond extract
1 box (3.4 ozs.) instant cheesecake pudding mix
2 cups heavy whipping cream
1 cup buttermilk (low-fat is fine)
1/3 cup + 3 tablespoons of your favorite blackberry jam
1/2 cup mini-marshmallows (optional)
In the bowl of an electric mixer, combine the cream cheese, kefir or yogurt, sugar, salt, almond extract and dry pudding mix. Beat on medium speed until thoroughly combined. Reduce speed to low and slowly add the whipping cream, buttermilk and 3 tablespoons of the blackberry jam (for color). Beat just until combined and smooth, then scrape the mixture into an electric ice cream maker. Process according to the manufacturer’s instructions, or until the ice cream thickens to a perfect frozen soft-serve consistency.
If you are adding mini-marshmallows, stir them in now.
Into a freezer-safe container with a tight-fitting lid, pour half of the ice cream base and spread to a smooth layer with a rubber spatula. Add the 1/3 cup of blackberry jam and spread into an even layer. Top with the remaining ice cream base and seal the container. Pop it into the freezer for at least 2 hours to set.
Substitutions for a lighter, less twangy cream cheese base:
1. Swap a light berry flavored yogurt for the kefir or plain Greek yogurt.
2. Use vanilla pudding mix in place of the cheesecake pudding.
3. Substitute 2% or whole milk for the buttermilk.
If you’re not into blackberries, this recipe would also rock with raspberry, blueberry or cherry jam. If you really want to go big, leave out the jam all together and add a layer of caramel, fudge sauce and nuts for a Turtle Cheesecake Ice Cream. Personally, I’m really digging the blackberry combo.
But wait… there s’more! Check out these Ice Cream Tuesday posts:
Posts go live throughout the day. If at first you don’t connect – try, try again!
Jenni @ Pastry Chef Online:
Strawberry Cheesecake Ice Cream with Key Lime Marshmallow Swirl
Karen @ Pint-Sized Baker:
Frozen Coconut S’Mores Bars
Dionne @ Try Anything Once Culinary:
Strawberry Ice Cream with Marshmallow Swirl and Toasted Walnuts
Liz @ That Skinny Chick Can Bake:
Fudge-Topped Marshmallow Ice Cream
Betsy @ Desserts Required:
Kahlua Marshmallows/Marshmallow Sauce
Stacy @ Food Lust People Love:
No-Churn Coffee Amaretto Ice Cream with Almond Marshmallows
Kirsten @ Comfortably Domestic:
Traverse City Cherry Cordial Frozen Yogurt
Donna @ Cookistry:
Strawberry Marshmallow Ice Cream
Allison @ Decadent Philistines Save the World:
Horchata Ice Cream with Mocha Mallow Swirl
Sophia @ NY Foodgasm:
Princess Badass Vanilla with Bourbon Cherries & Marshmallow Fluff
![]()