Tag Archives: Theme Weavers

Pizza Week: Pepperoni Rolls Two Ways

Pizza Week Calzones - Cut - Vertical

It’s hard to compete with pizza places – they’re fast, cheap and sometimes a little too convenient, if you know what I mean. How does any parent compete with a $5 pizza from Little Caesar’s? We can’t, really. But we CAN make easy pizzas at home. Are these going to pass for gourmet? No way! But that’s not what I’m going for here. For Pizza Week, I’m shooting for quick and easy.

TIP: I use frozen bread dough. You can make your own, but I’m a confirmed yeast slayer so prepared frozen dough works for me. To thaw it more quickly on a cold day, spray the inside of a gallon zip bag then insert 2 loaves of frozen dough and seal the bag shut. Place the bag on an electric heating pad turned to high heat and cover the dough & heating pad with a thick towel. Every once in a while, check to see how it’s progressing and flip the bag over.

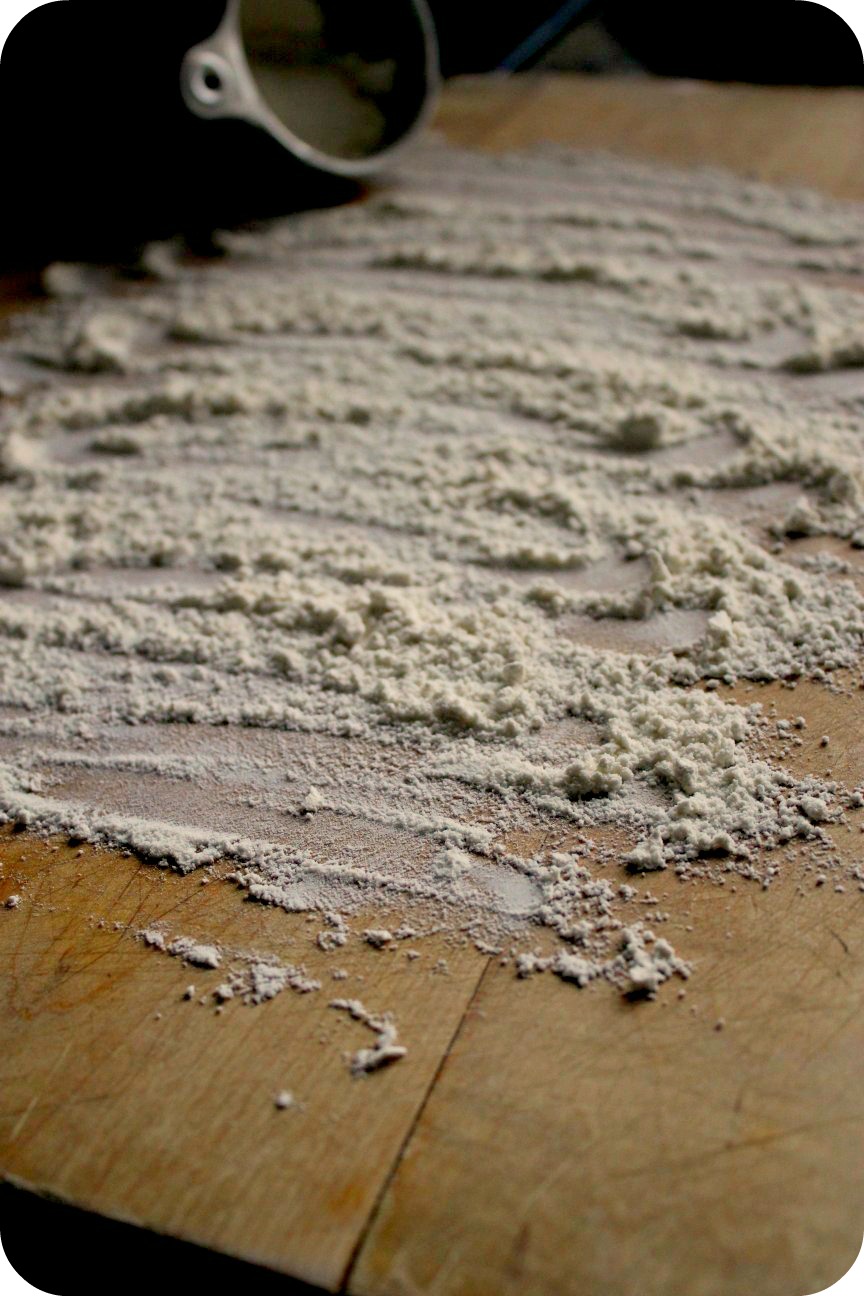
Once the dough is soft and warm, flour your cutting board or work surface. I always get excited when a board gets floured. A myriad of warm and wonderful goodies begins right here.

A Floured Board - Inside NanaBread's Head

Place your bread dough onto a floured board, and using your fingertips, gently press the dough into a rectangle (roughly 8″ x 12″). Cover it with a lightweight kitchen towel and allow it to rest for 10-15 minutes. When it is well rested, grab a rolling-pin and roll the dough into a larger rectangle (about 12″ x 18″).

Pizza Week - Bread Dough

I like a simple sauce on my pizza, so a small can of tomato sauce with Italian herbs & spices blended in is perfect for me. I usually throw in a little garlic salt and hot chili flakes, as well as an extra pinch of dried oregano, but that’s optional. When you’re ready to assemble, lay out your toppings and get busy. Here’s how I put together an easy Pepperoni & Mushroom Calzone.

Pizza Week Calzones - Collage

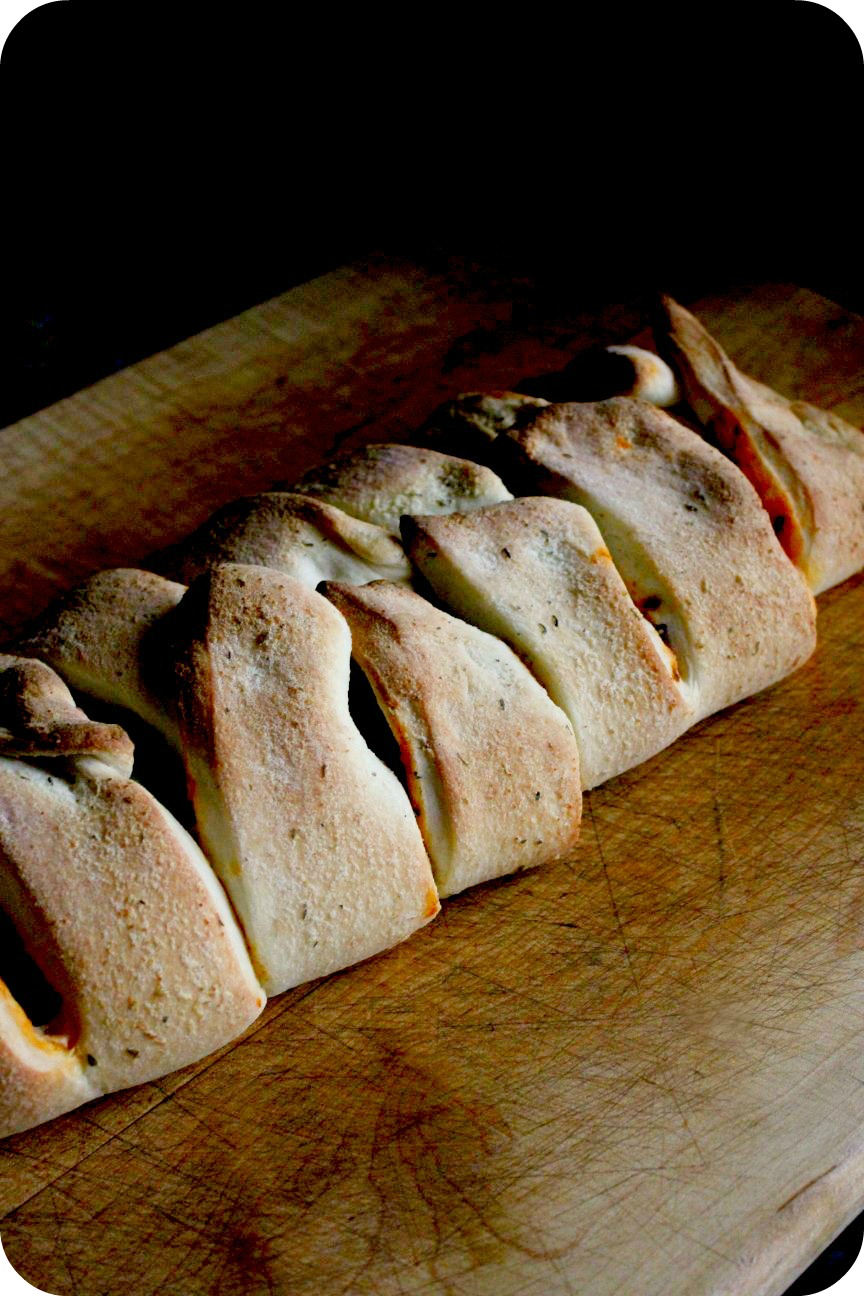
Top to Bottom: a little sauce, provolone, pepperoni, button & baby bella mushrooms sauteed in butter, Italian 5-cheese blend & parmesan; stretch out the sides of the dough & cut with pizza cutter; pinch together ends, brush with olive oil (or see below) & bake until golden.

Want to blow your family’s mind? Melt half a stick of butter, throw in a little garlic salt & oregano and then brush it all over the top of your calzone just before you pop it in the oven. Bake until golden brown, then remove from the oven and allow it to cool for 5-10 minutes before slicing. Soft, gooey pizza has to be one of the greatest things to ever come out of an oven. Can I get an amen?

Pizza Week Calzones - Vertical

Pizza Week Calzones - Cut - Horizontal

Okay… so everyone loves pizza, but sometimes we don’t have time to make bread dough or wait for it to rise. Here’s my second version of quick pizza rolls – wonton-style. These could not be simpler. You’ll need a package of wonton wrappers (produce section), a package of string cheese, a package of pepperoni, a small bowl of water and a frying pan with about 3/4″ of canola or vegetable oil.

Pizza Rolls - Wonton Style - Collage

The key to these is that small bowl of water. Use the water to ‘paint’ the edges of the wonton wrappers. It acts as glue and causes the cornstarch coating on the wrappers to seal these puppies shut, which is really important when you drop them into hot oil. If yours start to peel open again, just dip your finger in water and stick it back together again. Fry in hot oil (325F) until golden brown, then remove to paper towels to cool. Presto! Pizza Rolls!

Pizza Rolls - Wonton-Style & Ready to Serve
I like to serve these with warm marinara. Again, I usually toss in some oregano and chili flakes. I like my marinara zippy. If you like your cheese ooey and gooey, just microwave these for 30-45 seconds just before serving.

Pizza Rolls - A Perfect Bite

Ready for MORE pizza? Check out our merry band of Theme Weavers and their gooey contributions to Pizza Week:

Monday:
Carrie @ Bakeaholic Mama – Pizza Dough & a King Arthur Flour giveaway

Tuesday:
Kat @ Tenaciously Yours – Zorbaz Taco Pizza
Kirsten @ Comfortably Domestic – 30-Minute Cornmeal Pizza Crust

Wednesday:
Megan @ Country Cleaver – Proscuitto & Pear Pie
Madelyn @ La Petite Pancake – Tangy BBQ Chicken Pizza

Thursday:
Beka @ Kvetchin’ Kitchen – Clam & Bacon Pizza
Monica @ The Grommom – Pesto & Roasted Veggie Pizza on Gluten-Free Crust

Friday:
Jeanne @ Inside NanaBread’s Head – that’s me!
Lauren @ Climbing Grier Mountain – Caramelized Onion, Sausage, and Barbecue Pizza with Ranch Dressing
Kirsten @ Comfortably Domestic – Greek Pizza

PizzaWeekBadge

Honorable Mentions: The following are blog posts I’ve drooled over on other blogger’s websites. While not a part of our Pizza Week shenanigans, they are definitely worth a mention.

Megan @ Country Cleaver – Carnitas Pizza with Mango Margaritas

Carrie @ Bakeaholic Mama – Jalapeno Popper Buffalo Chicken Pizza

Lauren @ Climbing Grier Mountain – Pot Roast Naan Pizza with Caramelized Onions & Fontina

Anne @ From My Sweet Heart – Sausage, Egg & Cheese Breakfast Pizza

Michelle @ Brown-Eyed Baker – Pizza Dip

Christina @ Dessert For Two – Chocolate Raspberry Dessert Pizza

Bev @ Bev Cooks – Simple Tandoori Chicken Naan Pizza

Advertisement

13 Comments

Filed under Blogger Collaborations, Food & Recipes

Pie Week: Black & White Coconut Tart

The Theme Weavers are ringing in the holidays with PIE WEEK. Wahoooooo! I love pie. Love, love, love it. It’s my favorite of all of the Food Groups – Pie, Bacon, Cheese, Chocolate & Booze. If only we could all be in one room so we could face plant into all the glorious pies to be featured this week, it would be a dream come true. Also dreamy, this gorgeous Black & White Coconut Tart.

Black & White Coconut Tart - Banners

It starts with Kirsten’s ‘No Excuses’ pie dough recipe, pre-baked into the perfect vessel. Then it gets a schmear of hot fudge sauce (it’s okay… just breathe) and a luscious layer of coconut cream. Finally, it’s crowned with glorious mounds of whipped cream and toasted coconut. Have I mentioned that I love pie?

Let’s start at the beginning – a very good place to start. Pie dough. When I say this one is easy, I’m not joking. Made in the food processor, it’s ready in a flash and flawless every single time. It’s the only recipe I use.

Black & White Coconut Tart - Kirsten's Pie Dough

For this tart, I chose to use a vintage 8″ square baking tin I found while antiquing with Kirsten last May. Using the pan reminds me of her and proves two points – 1. food = love and 2. blogging friends are real (and are lots of fun).

Black & White Coconut Tart - Fitting Dough to Pan

One of my favorite pie tools – a pizza cutter. I love a good sharp edge when working with pie dough. There’s no better example of that than this next shot, where I decide to make a fancy braided edge for my tart. Curse you, Pinterest!

Black & White Coconut Tart - Braid Collage

Did I just hear you say “Whatever!”? Oooo… I’m gonna… Ha! Not really. Truth is, this trick is not as complicated as it looks. I found the key is pinching the ends together and pressing them into the countertop to anchor the strands. From there, it’s just a regular braid. When you’re done, pinch the other ends together to seal the deal, then apply it to the tart with a little egg white as glue.

Black & White Coconut Tart - Egg Wash Glue

Once applied, press gently to make sure it’s stuck, then pop then entire thing into the freezer for half an hour. Why? Because a frozen pie shell bakes much better than a room-temperature pie shell. More flaky layers; less shrinkage. After 30 minutes, remove it from the freezer, line it with parchment paper and fill it with dried beans or pie weights to keep the crust from falling into the pan while it bakes. My tip: cut two paper strips to create a sling instead of trying to fold parchment into the corners. Ain’t nobody got time for that!

Before (L) and after (R) - the beans keep the dough in place.

Before baking (L) and after (R) – the beans keep the dough in place.

Bake in a hot oven until it’s a light golden brown, then allow it to cool for at least 15 minutes with the beans still in place. After 15 minutes, you can lift out the beans and allow the tart shell to cool completely. If you plan to put your dried beans back in the pantry for soup later, be sure to let them cool completely before you seal them into a container. If you don’t, they’ll create steam in the container which will cause them to mold later.

While my tart shell was chilling, I made a batch of coconut custard from the America’s Test Kitchen Family Cookbook. I chose this filling because it used coconut milk for extra flavor, which was a good call – it’s dreamy. Cooked on the stove, it comes together quickly. The hardest part is resisting the urge to eat it while it cools. Once it’s done and slightly cooled, the trick is to cover it with plastic wrap so it doesn’t get that tough pudding skin layer on top. Two words that should never be used together – pudding & skin.

Black & White Coconut Tart - Coconut Custard

So now you have a baked & cooled tart shell and a cooled custard. What’s next? Assembly! First up is a layer of your favorite fudge sauce, then a thick layer of coconut custard, and finally a piped dome of whipped cream sprinkled with lightly toasted coconut. Licking the spatula is highly recommended.

Black & White Custard Tart - Filling Collage

Days like this make me happy to be one of those people who plays with their food. This one was fun to put together. Have you ever made anything that turned out so perfectly you thought, “Man, I hate to cut this!” Yeah, me neither.

Black & White Coconut Tarts - A Slice

NANABREAD’S BLACK & WHITE COCONUT TART:

One recipe of No Excuses Pie Dough (use half, freeze half for later)
One batch of America’s Test Kitchen Coconut Cream Pie custard:

  • 1 14-oz. can coconut milk (not cream of coconut)
  • 1 cup whole milk
  • 1/3 cup shredded coconut
  • 2/3 cup sugar (divided in half)
  • 1/4 teaspoon salt
  • 5 large egg yolks
  • 1/4 cup cornstarch
  • 2 tablespoons unsalted butter (cold & diced)
  • 1 1/2 teaspoons pure vanilla extract

One batch of stabilized whipped cream topping:

  • one pint heavy whipping cream
  • 1/4 cup sugar
  • 1 heaping tablespoon instant vanilla pudding powder

One cup of your favorite hot fudge sauce (at room temperature)
One cup lightly toasted unsweetened coconut flakes, for garnish

To make the pie shell:
Roll the pie dough out and place in a lightly sprayed pie or tart pan. Flute or attach a decorative edge, then freeze for 30 minutes. Remove from the freezer, line the pie shell with parchment paper, fill with pie weights or dried beans, and bake at 400F for 15-20 minutes, or until the edge is a light golden brown. Remove from the oven and cool 15-20 minutes, then lift out the paper & beans and allow it to cool completely.

To make the custard:
In a heavy saucepan, bring the coconut milk, whole milk, shredded coconut, 1/3 cup of sugar and salt to a gentle bubble, stirring often. In a separate bowl, whisk together the egg yolks, remaining 1/3 cup sugar, and cornstarch until smooth. Slowly ladle about 1/2 cup of the hot custard into the egg yolk mixture, whisking vigorously to avoid lumps. Once combined, whisk the egg yolk mixture into the pan of custard and whisk to combine. Continue to simmer over medium-low heat until the custard begins to thicken. Whisk in the vanilla extract and turn off the heat. Move to a cold burner and allow it to cool for 15 minutes, then cover with plastic wrap and allow it to cool, covered, until it comes to room temperature.

To make the whipped cream topping:
In the bowl of a stand mixer, combine the heavy cream and sugar. Whisk on high until the cream just begins to thicken. Sprinkle in the instant vanilla pudding powder and continue to whisk until stiff peaks form. Scrape into a piping bag with a large star tip and keep refrigerated until ready to use.

To assemble the tart:
Spread a 1/4″ to 1/2″ layer of your favorite hot fudge sauce into the tart shell, spreading it an even layer. Gently spoon the coconut custard onto the fudge sauce layer and spread it into an even layer. Top with whipped cream and shaved coconut and chill until ready to serve. Makes four large servings or six smaller ones, if baked in an 8″ x 8″ square pan as seen above. Keep refrigerated.

Black & White Coconut Tarts - My Slice

Before you face plant into that last shot, be sure and check out these Theme Weavers and their crusted contributions to Pie Week:

Monday, Nov. 18:
Kirsten @ Comfortably Domestic – Mile High Apple Pie
Anne @ From My Sweet Heart – Cranberry Cherry Ricotta Pie
Haley @ The Girly Girl Cooks – Coconut Cream Pie
Katie @ The Hill Country Cook – New Mexico Apple Pie

Tropical Tuesday, Nov. 19:
Mads @ La Petite Pancake – Pineapple Pie
Monica @ The Grommom – Papaya Pie
Jeanne @ Inside NanaBread’s Head – Black & White Coconut Tart (that’s me!)

Wednesday, Nov. 20:
Kat @ Tenaciously Yours – Grandma’s Chocolate Pie
Carrie @ Bakeaholic Mama – Chocolate Cream Pie
Kirsten @ Comfortably Domestic – Maple Sweet Potato with Swiss Meringue

Thursday, Nov. 21:
Shanna @ Pineapple and Coconut – Boozy Pumpkin Eggnog Pie
Carrie @ Bakeaholic Mama – Sweet Potato Tartlets
Christina @ Buffy and George – Deep Dish Apple Pie

Friday, Nov. 22:
Madeline @ Munching in the Mitten – Sweet Potato Pie
Allison @ Decadent Philistines Save the World – Refrigerator Pumpkin Porter Chocolate Pie with Toasted Pumpkin Porter Marshmallow “Meringue”
Lauren @ Climbing Grier Mountain – Mini Butternut Squash Glazed Pie Stacks with Marshmallow Frosting

Saturday, Nov. 23:
Megan @ Country Cleaver – Biscoff Pie with Whiskey Mallow Fluff
Kirsten @ Comfortably Domestic – Berry Cherry Pie
Shanna @ Pineapple & Coconut – Persimmon & Pear Brandy Pie with Vanilla Bean Crumble

OLYMPUS DIGITAL CAMERA

32 Comments

Filed under Blogger Collaborations, Food & Recipes

Pumpkin Week: Hazelnut Pumpkin Waffles with Cinnamon Honey Butter

Pumpkin Hazelnut Waffles - Title Text

Pumpkin – most people either love it or hate it. I am firmly in the ‘love it’ camp. It’s one of the things I love best about fall. When All Things Pumpkin bombard Pinterest & Twitter full force, I know cooler weather is on the horizon. So hang on to your butts, because the Theme Weavers are celebrating all things orange and tasty with Pumpkin Week and an array of our fall favorites.

“We’re staying up late telling scary stories, and in the morning I’m making waffles!” Donkey from Shrek. These gorgeous pumpkin waffles are laced with toasted hazelnut meal, buttermilk and a hint of fall spice. Seriously, friends… if we just had smell-a-vision, you’d be clamoring to get over here for breakfast. They smell HEAVENLY! And I’ll use any excuse to break out our vintage waffle maker (circa 1982). Don’t laugh; it works. But before we do anything, we need to plug in the waffle maker and let it start getting good and hot.

Pumpkin Hazelnut Waffles - Our Vintage Waffle Iron

Please don’t laugh at my waffle maker. She may not look like much, but she’s a beast. And for the record, she’s not dirty, she’s just well-seasoned. While the waffle maker heats up, let’s prep the ingredients. I like to start with the wet stuff.

Pumpkin Hazelnut Waffles - Wet Ingredients

Then I toast the hazelnut meal in a non-stick skillet and toss it in with all the dry ingredients. Don’t be like me and forget the brown sugar until the last possible second (hence the golden brown blob in the photo below). If you think food bloggers are miraculously flawless and free of mistakes, you are quite mistaken. Trust me – I screw up all the time. I just don’t show you that part.

Pumpkin Waffles - Dry Ingredients Collage

Once your wet and dry ingredients are ready to go, take those egg whites and beat the tar out of them. We have one of those awesome KitchenAid stick blenders with a whip attachment that makes short work of this step. If you don’t have one yet, you should think about it. They are the Mighty Mouse of kitchen tools. When your egg whites hold firm peaks, they’re ready to roll.

To blend all of this into pumpkin perfection, whisk the dry ingredients in a large bowl. In a separate bowl, whisk your wet ingredients (except for those egg whites). Then invite the wet ingredients to play with the dry ingredients and blend them together with a whisk until they’ve all gotten to know one another better. Then it’s time to fold in those fluffy, snow-capped egg whites. Just remember – they’re sensitive. Fold slowly so you don’t scare the fluff out of them. Patience pays off in fluffy waffles here.

Pumpkin Waffle - Egg White Collage

When your batter is blended, it’s time to start makin’ the waffles. I always spray my hot waffle iron with a little of that canned cooking spray before the first waffle hits the pan, just to be safe, because no one wants to sit in the floor and cry when the first one refuses to release and burns. No one.

Remember when I said food bloggers make mistakes? Well, here’s your peek behind the curtain. Proof that I’m just like you (if you like to slop your waffle batter onto the machine and say ‘Sure…that looks like enough. Why not?’).

Pumpkin Hazelnut Waffles - Over Run

It’s not tragic or anything, it just takes longer to clean up. So for my waffle maker one cup minus 2 tablespoons = the perfect amount of batter for one waffle. I can’t speak for your waffle maker, so you’ll just have to get in there and give it a shot. If yours do run over, though, please promise you’ll tweet me a quick pic, because that would make me feel SO much better. #WaffleWrecks

Pumpkin Hazelnut Waffles - Just Out of the Waffle Iron

Hello, Gorgeous! So my first waffle may have been a mess, but when the second one came out PERFECT, you can bet your sweet bippy I did a happy dance. If you’re happy & you know it clap your hands {clap! clap!}

So let’s talk toppings. These waffles are so rich and fragrant, they just need a little something sweet on top. I chose cinnamon honey butter. Because butter is a given. Adding cinnamon and honey (or agave if you like) just brings it all in for a big group hug. I make it the night before and chill it so it’s scoopable. Yum.

Pumpkin Waffles - Honey Butter Collage

When that scoop of honey butter starts to melt into a hot waffle, I promise your eyes will roll back in your head and your heart will beat a little faster. And the only thing better than one hot waffle with honey butter is a big pile of them. You can poke me with a fork now; I’m done.

Pumpkin Hazelnut Waffles - Waffles with Cinnamon Honey Butter

NanaBread’s Hazelnut Pumpkin Waffles:
4 large eggs, separated
1 cup buttermilk + 1 cup vanilla milk
OR 1 cup buttermilk + 1 cup of whole milk
1 cup canned pumpkin puree (not pumpkin pie mix)
6 tablespoons unsalted butter, melted
1 teaspoon pure vanilla extract
1/2 cup Bob’s Red Mill hazlenut meal
2 cups all-purpose flour

1/3 cup brown sugar, packed
2 1/4 teaspoons baking powder
1 teaspoon baking soda
1/2 teaspoon salt
2 teaspoons ground cinnamon
1 teaspoon ground ginger
1/4 teaspoon ground cloves

Pre-heat your waffle iron while you mix up your waffles. To make, blend the egg yolks (egg whites come in later), buttermilk and milk, pumpkin, melted butter and vanilla in a bowl and whisk until well blended. In a non-stick skillet, toast the hazelnut meal over medium-low heat until it just starts to take on some color and smells robust and fragrant. Toss it into a large mixing bowl and add the flour, baking powder, baking soda, salt and spices. Whisk to combine. Add the wet ingredients to the dry ingredients and whisk until thoroughly blended.

In a deep mixing bowl, beat the egg whites until they form and hold firm peaks. Using a rubber spatula, gently fold the egg whites into the waffle batter. I like to scrape to the bottom of the bowl and flip it once very gently, then turn the bowl a quarter turn and repeat the process until you can no longer see streaks of egg whites (see photo above). Once blended, you’re ready to bake.

Lightly spray your hot waffle iron with cooking spray. Depending on the size of your waffle iron, spread one cup of batter (if your waffler makes one waffle) or up to two cups (if your waffler makes 4 smaller waffles). It truly depends on your machine, so use a little caution on that first one and adjust as needed until the batter spreads to all edges without running over. When done, remove from the waffle iron and place it on a ceramic plate; cover with a clean kitchen towel to keep them warm while the others bake. My old-school Belgian Waffler made seven waffles. Two died immediately and the others were frozen for later. These will keep in the fridge for 3-5 days or in the freezer (wrapped in waxed paper and placed into air-tight freezer bags) for up to six weeks.

Cinnamon Honey Butter:
1/2 stick of butter, softened
1 cup of your favorite local honey (or agave nectar)
1 teaspoon ground cinnamon

Beat together until smooth and creamy. Scrape into an airtight container and chill until needed. To use, simply scoop a tablespoon on top of a toasty warm waffle and enjoy. So good, y’all. So, so good.

Pumpkin Hazelnut Waffles - Digging In

Before I go, don’t forget to drop in on our other Pumpkin Week participants:

Monday
Kirsten @ Comfortably Domestic – Pumpkin Cinnamon Rolls

Beka @ Kvetchin’ Kitchen – Pumpkin Streusel Bread

Tuesday
Carrie @ Bakeaholic Mama – Pumpkin Pie Macarons

Jeanne @ Inside NanaBread’s Head – Look, Ma! I made waffles!

Wednesday
Megan @ Country Cleaver – Mini No-Bake Bourbon Pumpkin Cheesecakes with Crumble Topping

Allison @ Decadent Philistines – Pumpkin Marshmallows & Pumpkin Spice Syrup

Shanna @ Pineapple & Coconut – Creamy Maple Bacon Pumpkin Risotto

Thursday
Anne @ From My Sweet Hear – Pumpkin Doughnuts with Cream Cheese Icing & Candied Pepitas

Kat @ Tenaciously Yours – Marbled Pumpkin Gingersnap Tart

Madelyn @ La Petite Pancake – Pumpkin Spice Cake with Maple Frosting

Friday
Madeline @ Munching in the Mitten – Savory Pumpkin Tart

Lauren @ Climbing Grier Mountain – Pumpkin Mousse with Candied Squash

Kirsten @ Comfortably Domestic – Pumpkin Kiss Cookies

Saturday
Beka @ Kvetchin’ Kitchen – Pumpkin Scones

Monica @ The Grommom – Pumpkin Ice Cream

Pumpkin Week Badge

Note: this recipe is adapted from Smitten Kitchen.

34 Comments

Filed under Blogger Collaborations, Food & Recipes

Berry Week: Annie’s Blackberry Cake

Blackberry Cake - InsideNanaBreadsHead

Hooray for summer berries and Berry Week! Fresh produce from the farmers market is one of my favorite things about summer and each year I look forward to hitting all the fruit stands. Fresh berries, peaches, watermelon and all those glorious veggies make me happy to my core.

This week, our Theme Weavers band of bloggers is taking on summer’s bounty with Berry Week. Contributions include pies, cakes, cocktails and breakfast treats so stay tuned and plan to visit all this deliciousness.

Berry Week Logo

Monday:
Kirsten @ Comfortably Domestic – Fresh Strawberry Pie
Madelyn @ La Petite Pancake – Berry Sangria

Tuesday:
Anne @ From My Sweet Heart – Summer Berry Terrine with Mascarpone
Jeanne @ Inside NanaBread’s Head – Annie’s Blackberry Cake (below)

Wednesday:
Lauren @ Grier Mountain – Vanilla Gelato with Peach-Blueberry Compote
Kat @ Tenaciously Yours – Strawberry Smash

Thursday:
Megan @ Country Cleaver – Strawberry Basil Sorbet Bellini
Haley @ Girly Girl Cooks – Strawberry-Rhubarb Stuffed French Toast

Friday:
Christina @ Buffy & George – Raspberry & Cherry Pie (gluten-free crust)
Beka @ Kvetchin’ Kitchen – PNW75 Berry Cocktail
Monica @ The Grommom – Papaya-Berry Crisp (gluten-free)

Saturday:
Madeline @ Munching in the Mitten – Cherry Clafoutis
Allison @ Decadent Philistines – Raspberry Marshmallows (2 ways)

Blackberry Cake & Vintage Square Cakestand - Inside NanaBread's Head

Now let’s talk cake! I am a self-proclaimed Pie Girl. Basically, it’s because I despise dry, over-frosted cake. Yuck. I’d rather skip dessert all together than eat dry cake. Luckily, this is not that cake.

I first got this recipe from my dear friend Annie. We worked together in an elementary school front office for years and became soul sisters. She shared this gem with me and I shared it with my mom and sisters. Now it’s a family favorite. Best of all, it’s incredibly easy to make and absolutely packed with blackberry flavor. I know some people hate the M word (rhymes with hoist) so I’ll refrain. Just know that this cake is the furthest thing from dry.

Annie’s Blackberry Cake

For the cake:
1 box white ‘super moist’ cake mix (18 ozs.)
1 box black raspberry or raspberry Jell-O (3 ozs.)
1 cup vegetable or canola oil
1/2 cup milk
4 whole eggs
4 Tablespoons seedless blackberry jam
1 cup fresh or frozen blackberries
1 cup sweetened coconut
1 cup chopped pecans

For the Whipped Cream Frosting:
2 cups heavy whipping cream, chilled
1/4 to 1/2 cup granulated sugar (to taste)
1 teaspoon pure vanilla extract
3 tablespoons seedless blackberry jam
fresh blackberries for garnish

To Make the Cake:

Pre-heat your oven to 350F. The original recipe called for three 8″ round pans for a layer cake. I used a vintage square tube pan I found at an antique shop last summer, but you could also bake this cake in a 13″ x 9″ rectangle pan (even easier). Generously grease & flour your baking pan(s) and set them aside.

Next, put the coconut & pecans into a food processor and pulse until both are well combined and ground into small pieces; set those aside, as well.

Combine the cake mix, dry Jell-O powder, oil, milk and blackberry jam in a large bowl and beat with a mixer until thoroughly combined. Add the eggs one at a time, beating after each addition. Gently fold in the berries, coconut and pecans until evenly distributed. Pour the batter into your pan(s) and spread it into a smooth, even layer.

Bake at 350F until a toothpick inserted near the center of the cake comes out clean. My square tube pan took 40 minutes. A 13″ x 9″ square should take 25-30 minutes, and three round layers should take 20-25 minutes. As with all recipes, baking time may vary depending on your oven, so keep an eye on it for the last 10 minutes and check it often with a toothpick. Once it’s done, remove from the oven and allow to cool in the pans until cool to the touch.

To Make the Whipped Cream Frosting:

While your cake is cooling, place your mixing bowl and beaters in the refrigerator and chill for at least 15-20 minutes. Once chilled, remove from the fridge and add the cream, sugar, vanilla and jam to the bowl. Beat on medium-high to high speed just until firm peaks form.

If your cake is still warm to the touch, put your prepared whipped cream in the fridge and wait until the cake is completely cooled to prevent your cream from melting. Once the cake is cool, you’re ready to frost.

For my tube pan cake, I used a serrated knife to cut the cake into two even layers. If you use a 13″ x 9″ pan, simply top with whipped cream frosting and sprinkle with fresh berries. For a layer cake, stack one layer at a time onto a serving plate and fill with 1/2″ of the whipped cream, then top with last of the whipped cream and fresh berries. I had extra berries, so I tossed them with some sugar and used them between my layers as well.

Because of the whipped cream frosting, this cake must be refrigerated. It’s also best when eaten within 48 hours. That’s one of the reasons my family makes this for family gatherings. It’s a lot of cake to consume for two people in one weekend. If that’s an issue, you might consider baking this as cupcakes and freezing them un-frosted. Then when you need a cake fix, you can thaw as many as you want/need and make just enough whipped cream for those few.

If you’re thinking “I’m not really a blackberry fan” then try it with raspberries or strawberries. Don’t like pecans? Substitute toasted almonds. Allergic to nuts? Leave them out! I draw the line at coconut. It’s just too good to leave it out, but if you have to I promise to look the other way. It’s not brain surgery – just cake. Tweak it any way you like. Food should be fun, so play with it!

Now all that’s left to do is to dig in. My cake is going to Mom’s house. Luckily, she’s a good sharer. Speaking of sharing, here… I saved you a piece.

Blackberry Cake - A Slice - Inside NanaBread's Head

Note: This recipe was adapted from a copy of a recipe taken from an old unspecified spiral-bound cookbook. It is credited to Billie Kendrick of Springdale, Arkansas. Her original recipe called for a heavy fudge-like frosting made with one pound of confectioner’s sugar. Since I’m not a buttercream fan, my family and I opt for a lighter whipped cream topping. I also took the liberty of adding blackberry jam to the cake batter for extra flavor. My heartfelt thanks go to Ms. Kendrick for her perfect summer berry confection and to my sweet friend Annie who was kind enough to share it. XOXO

28 Comments

Filed under Blogger Collaborations, Food & Recipes