Tag Archives: OXO products

OXO offers pans now? YES!

We all know OXO makes a million fabulous kitchen gadgets, and I’ve made no bones about the fact that I use mine with enthusiasm. They are some of my favorites because of three key things:

1. they’re thoughtfully designed,
2. they’re well constructed & durable, and
3. they’re always affordable

When OXO launches something new, my ears perk up. When they announced they were launching a new line of pots & pans, my jaw dropped. And when they then offered members of their Blogger Outreach Program the chance to possibly test drive one, I jumped at the chance. With both feet. Receiving the e-mail that I’d been selected to receive my pan of choice was like opening presents on Christmas morning. I was giddy. Openly, gleefully giddy.

Here it is, y’all – My Precious.

OXO - 12 Inch Non-Stick Skillet - With Text

It’s sturdy. A little on the heavy side, but WOW is it solid. My first test was a simple soft fried egg. Nothing tests a new non-stick pan like a delicate egg. Result: so slippery, it sent my fried egg spinning when I swirled the pan. Also impressive was the heat distribution of the skillet due to the hard-anodized aluminum construction of the pan and that built-in heat disc in the bottom. Smart.

OXO - 12 Inch Non-Stick Skillet - Bottom

I also like the rise and slope on the sides of this skillet. The rolled edge is high enough to contain bubbly sauces and perfectly pitched to slide those early morning omelets onto a plate, even before you’ve had your coffee. It also allows sauces to be expertly poured. Again, smart design.

OXO - 12 Inch Non-Stick Skillet - Coating

My ultimate test for a new non-stick pan is caramel – hot, gooey, sticky thermonuclear caramel. To put my pan to the test, I opted for a baked caramel apple pancake. It starts on the stove and finishes in the oven, so it was a perfect way to test this pan. And since this skillet can take oven temperatures up to 430F, you can fearlessly go from stove to oven.

Baked Apple Pancake - Browned Butter & Brown Sugar

I started with butter and brown sugar and let it heat up to see if it would stick. I was surprised at how easily I could move the caramel around the pan without anything sticking. As it got hotter and hotter, I kept moving it around with a silicone spatula. As you can see from the photo, it didn’t stick at all and moved easily around the pan.

Baked Apple Pancake - Easy Caramel

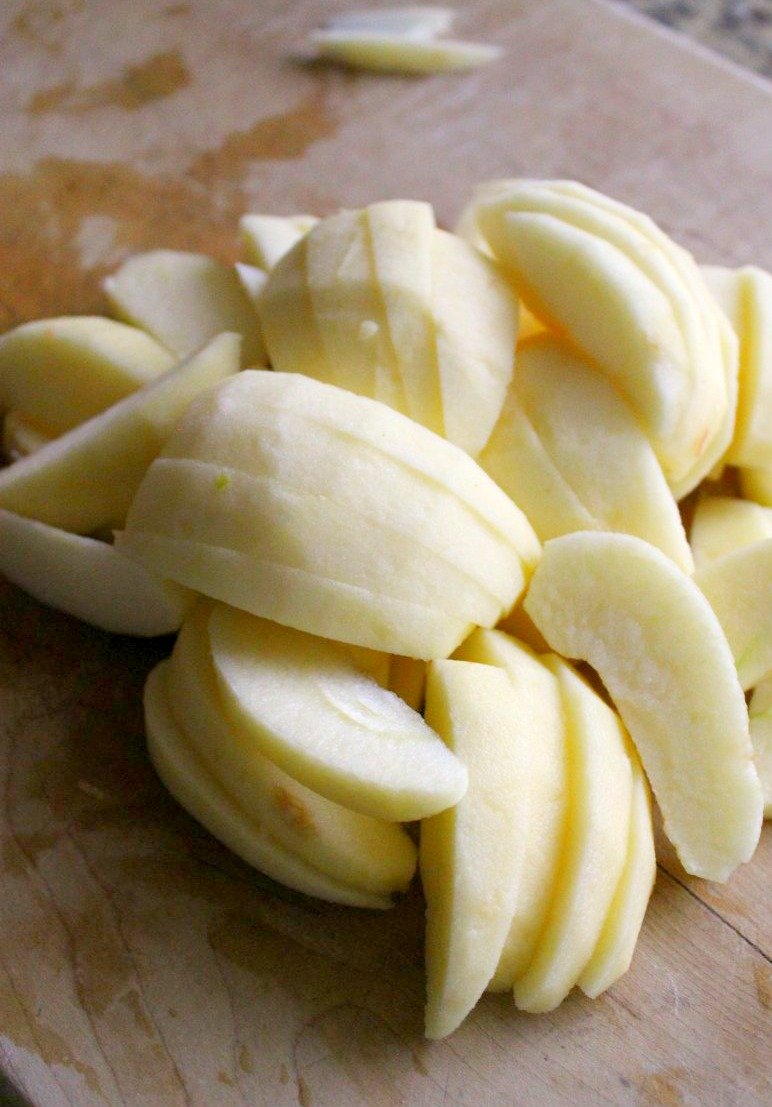
While the sugar was caramelizing, I peeled and sliced 3 apples. I like firm, sweet apples like Gala, Pink Lady or SweeTangos. Cored and sliced into even pieces (about 1/4″ thick), they’re ready to roll.

Baked Apple Pancake - Apples1

Baked Apple Pancake - Apples2

Tip: remove the skillet from the heat while you add the apple slices. It takes a few minutes to get them arranged to look pretty, and removing the pan from the heat keeps your caramel from burning while you work.

Baked Apple Pancake - Apples in Caramelized Butter & Sugar

Because I prefer firm apples, I like to pop them in the oven and let them bake 5-10 minutes before adding the pancake batter. Once the caramel is bubbling and the apples are toasty, I remove the pan from the oven and pour the batter evenly over the top. It goes back into the oven for 12-15 minutes, or until the pancake is just set and firm. Confession: I love bubbly edges on pancakes.

Baked Apple Pancake - Pancake Batter - Post-Bake

You know it’s done when you can gently press on the surface of the pancake and it bounces back. It’s better to take this one out a little early than to over bake it, so keep an eye on it during that last few minutes.

Now for the tricky part – flipping it out of the pan. I flipped mine immediately after I took it out of the oven and got a caramel burn on my wrist, so in retrospect, I’d wait 5-10 minutes and let it cool next time. I need to learn to be patient when pancakes are involved. To flip mine, I placed a piece of parchment over the pancake, then set a plate on top of that. Using a folded kitchen towel, I grabbed the skillet on both sides instead of the handle and gave it a quick flip.

The true moment of truth is when you lift the skillet. That’s when you see if your pan is a hero or a zero based on how many apple slices are stuck to the pan. Here’s what I got. You be the judge.

Baked Apple Pancake - Flipped & Flawless

Booyah, baby! Look at that gorgeous golden caramel apple beauty.

Want to see what the skillet looked like? I expected it to be coated in a thick, deeply entrenched layer of molten sugar but this is what I saw.

Baked Apple Pancake - Sticky Caramel Goo

This is the part where I’d usually mutter bad words and grab a scouring pad. Oh, OXO… how I test thee. Instead, I ran a little hot water in the skillet and let it sit for a minute while I grabbed plates, forks and syrup. To my surprise, the remaining crusty sugar wiped right out. No scrubbing. No sweating. No cursing. It seriously wiped right out with a paper towel. Way to go, OXO. You win again. And technically, I win too.

OXO - 12 Inch Non-Stick Skillet - Handle

Final Thoughts:
1. This is my new favorite skillet. For real.
2. The size (at 12″) is great for just about any task.
3. It is well constructed and sturdy, which I expect from OXO.
4. It browned evenly and held heat beautifully, which is a must for me.
5. OXO says this skillet is dishwasher safe, but I always hand wash non-stick pans because I’m a big ol’ chicken.
6. This skillet is on the heavy side, which may prove hard to handle for someone who’s older, younger or has problems handling heavier pots or pans. If heft isn’t an issue, you’ll love it.
7. Overall rating – two thumbs way up. I’ll be using this pan for years to come.

If you’d like to take a shot at this easy baked caramel apple pancake, here’s how you can recreate it at home.

2 cups baking mix (Bisquick or my favorite – Pioneer Buttermilk Baking Mix)
2-3 tablespoons raw (or granulated) sugar
1 pinch of salt
3 large eggs
1 teaspoon vanilla extract
2/3 to 1 cup low-fat buttermilk (can sub regular milk)
2-3 large apples – peeled, cored & cut into 1/4″ slices
6 tablespoons unsalted butter
1/2 cup brown sugar

Pre-heat the oven to 375F.
In a large mixing bowl, combine the baking mix, raw or granulated sugar, salt, eggs, vanilla & buttermilk. Whisk until smooth. Batter should be a little on the thin side, like crepe batter. Set aside to rest, and start on your apples. Peel, core and slice the apples. Heat your non-stick skillet over medium-high heat, then add the butter and brown sugar. Stir until the sugar melts and the mixture begins to bubble. Remove from heat and arrange your apple slices. Pop the skillet into a hot oven for 10-12 minutes, or until the caramel mixture is bubbling furiously around the edges. Remove the skillet from the oven and pour the pancake batter evenly over the top. Return to the oven and bake just until the pancake is set, approximately 12-15 minutes. Remove from the oven and allow your pancake to cool for 5-10 minutes before flipping.

To flip, invert a plate larger than the skillet over the top, place one hand firmly on top of the plate, grab the handle with a dish towel and flip quickly. If you’re not a confident or expert flipper, invert the plate over the skillet, then place a kitchen towel folded lengthwise across the skillet. Place one hand on each side of the skillet, grabbing the plate with your thumbs and using your fingers to grab the skillet. Either way, flip quickly.

Note: if you’re using an older non-stick skillet that doesn’t release as well, run a silicone spatula around the edge of the skillet to help the pancake release prior to flipping. If you’re still left cursing your old ratty non-stick, consider acquiring one of these new OXO beauties. You will not regret it.

For this apple pancake, I made a simple cinnamon cream syrup.

1/2 cup real maple syrup
1/2 cup heavy whipping cream
1/2 teaspoon ground cinnamon

Heat all 3 ingredients in a small saucepan over medium-high heat, whisking often, until the mixture comes to a rolling boil. Remove from heat and transfer to a small pouring pitcher. Serve hot.

Baked Caramel Apple Pancake - Breakfast is Served

Disclaimer: This OXO 12″ non-stick skillet was provided to me free of charge by the OXO Blogger Outreach Program so that I could play with it and share my experience. All opinions are my own, and are my honest take on it. Have you tried OXO yet? Which are your favorite OXO products? To learn more about OXO cookware, CLICK HERE.

Advertisement

4 Comments

Filed under Blogger Collaborations, Food & Recipes, Things I Love

#OXOTurkeyDay – Dinner For Two

OXO TurkeyDay - Title Shot

There are very few brands I love unconditionally. OXO is one of them. Their products are not only well made, but thoughtfully designed. This year, OXO is celebrating Turkey Day by sharing an array of Thanksgiving-friendly products via their Blogger Outreach Program, which I’m proud to be part of.

Tools in the #OXOTurkeyDay kit included the following:

OXO TurkeyDay - Tool Collage2
Left to Right: The most amazing twine dispenser (twine included), a non-slip butter dish with cover, a thoughtfully designed turkey baster with an angled neck & counter rest to prevent drips (and cleaning brush), and the turkey lifter that makes transferring your bird from pan to serving platter a snap.

OXO TurkeyDay - Tools Collage1
Left to Right: That twine dispenser I’m in love with (did I mention that?), a better look at the bird lifter’s design, and a fat separator only a gravy hoarder can truly appreciate. If only it worked on my thighs.

I started by tackling the bird. Since it’s just the two of us at home, The Complete Package picked out a lovely organic chicken that came in at around 4 pounds. Perfect! After the bird was properly cleaned & prepped, I broke out that twine dispenser and trussed her like 50 Shades of Prey. From there, I stuffed softened butter and fresh sage leaves under the skin, massaged more butter onto the outside, and gave her a generous sprinkle of kosher salt mixed with freshly ground black pepper and ground poultry seasoning.

OXO Turkey Day - Chicken Prep Collage

You know what I love most about preparing a turkey at Thanksgiving? Fresh sage. If you can get your hands on some, use it. Those frosted velvet leaves are so fragrant and wonderful. It’s the stuff Turkey Day dreams are made of.

#OXOTurkey Day - Fresh Sage

Next up was my mother-in-law’s easy cornbread dressing recipe. We make it every year without fail – come hell or high water. Some people insist on green bean casserole. Some go nuts without their beloved yams or cranberry sauce.
For us, it’s not Thanksgiving without Louise’s cornbread dressing.

#OXOTurkeyDay - Dressing Collage

The Complete Package has certain ideas about Thanksgiving dinner that are set in stone. His mother’s dressing is one. Mashed potatoes with gravy is another. I use thin-skinned white potatoes and leave the skins on. I like the rustic, vitamin-rich goodness of potatoes with the skins on. My secret is to add 2-3 tablespoons of Fage 0% fat-free Greek yogurt, real butter and a dash of milk. Perfect. Every. Time. My tool of choice is an old-fashioned hand masher. I also tried out the new OXO butter dish. It’s made with a sturdy non-slip metal base and has a clear acrylic cover that keeps funky fridge odors at bay. If you have fridge funk, that is. I’m not judging. This is a judgement-free blog. No judging here.

OXO Turkey Day - Mashed Potato Collage

In our house, every drop of bird broth is reserved for the most coveted of condiments – gravy. I looked forward to testing out the OXO fat separator, and it didn’t disappoint. Once the bird was baked, we poured the drippings & broth through the removable strainer and the separator did the rest. The red silicone stopper prevents spills and pops out easily when you’re ready to pour. Like all OXO products, the measurement markings are A+ here. I love that OXO uses bold, colorful markings for aging far-sighted Nanas like me.

OXO TurkeyDay - Gravy Collage

My last side dish was bacon-wrapped green bean bundles. These are so easy! Just blanch fresh green beans for 3-5 minutes in boiling salted water, then plunge them in ice, pat dry with paper towels, and wrap with bacon. I used a thick-sliced hickory smoked bacon. I also sprinkled half of the bundles with a coarsely ground black pepper to add so zing, because bacon & black pepper are BFFs. For real.

OXO TurkeyDay - Green Bean Bundle Collage

We also grabbed a few cornmeal rolls from the freezer (thank you Kirsten at Comfortably Domestic) and a jar of my homemade cherry, pear & apple cranberry sauce. The Complete Package needs gravy. I need my cranberries.
For me, it’s just not Thanksgiving without cranberry sauce.

OXO TurkeyDay - Finished Dinner

Start to finish, I had dinner on the table in 3 hours. Not bad for a table for two of all our Thanksgiving favorites with leftovers. You HAVE to have leftovers for the sandwiches alone. Am I right? Yes? Don’t leave me hanging, people.

OXO TurkeyDay - Finished Dinner2

My deepest thanks to the fine folks at OXO for providing all the tools we needed for our holiday feast. Now here’s a quick rundown of the recipes shown above.

Louise’s Easy Cornbread Dressing:
1 envelope (6 ozs.) Pioneer yellow cornbread mix
1 envelope (6 ozs.) Pioneer buttermilk biscuit mix
milk, eggs & oil – as directed on the above packages
Pam cooking spray to coat the baking pan
1 cup minced celery
1/2 cup minced white or yellow onion
2 tablespoons unsalted butter
1 can (10 ozs.) condensed cream of chicken soup
1 box (32 ozs.) low-sodium chicken broth (see below)
1/2 teaspoon poultry seasoning
1 teaspoon fresh sage, minced
salt & pepper to taste

Dump the cornbread and biscuit mixes into a large mixing bowl and add the eggs, milk & oil listed on the package instructions for both mixes. Whisk until smooth and pour into a lightly sprayed 8″ x 8″ baking pan. Bake at 375F until a toothpick comes out clean and the top is lightly browned. Remove from the oven & allow to cool to room temperature. Using a knife, score the cornbread into 1″ pieces and dump them into a large mixing bowl.

In a small skillet or pan, saute the celery and onion in 2 tablespoons of butter until lightly browned and translucent. Pour over the cornbread cubes and add the undiluted chicken soup and seasonings. Add enough chicken broth to create a moist but not soggy cornbread mixture (approx. 1 to 1 1/2 cups, then save the rest for gravy). Spoon into a lightly sprayed baking pan and bake at 350F for 30-45 minutes, or until the top starts to brown lightly. Serve hot.

NanaBread’s Simple Mashed Potatoes:
6-8 small white potatoes, scrubbed
2-3 tablespoons Fage 0% fat-free Greek yogurt
2-3 tablespoons unsalted butter
a splash of milk, if needed
salt & pepper to taste

Place washed whole potatoes into a saucepan and cover with water. Cook over medium heat until you can pierce the potatoes with a paring knife, and the knife goes easily through the cooked potatoes. Drain & return to the pan. Add the yogurt, butter and salt & pepper and mash with a potato masher or heavy fork until mostly smooth. If they are a little dry, add a splash of milk. Keep warm until everything else is ready.

Easy Poultry Gravy:
3 tablespoons butter or canola oil
3-4 tablespoons all-purpose flour
2-3 cups broth from your baked bird, or boxed broth from above
salt & pepper to taste
1/8 teaspoon poultry seasoning

In a saucepan over medium heat, add the butter and flour, whisking until smooth and slightly browned (3-5 minutes). Slowly whisk in the chicken/turkey broth and whisk until smooth. Continue to cook over medium heat, whisking often to prevent lumps. Season with salt, pepper and poultry seasoning and keep warm until all else is ready.

Bacon-Wrapped Green Bean Bundles:
1 pound of fresh green beans
12 slices of hickory smoked thick-cut bacon
1 teaspoon salt
coarsely ground black pepper, optional

In a saucepan, add enough water to fill the pan half-full. Add one teaspoon of salt and bring the water to a boil. Snap the stem ends off the green beans, then blanch them for 3-5 minutes in the boiling salt water. Remove from the boiling water and plunge them into a bowl of ice water to stop the cooking process. Drain and pat dry on paper towels, then divide them into four piles. Gather each pile into a bundle and wrap with 3 slices of bacon. Line a baking pan with aluminum foil, and arrange your bundles in the pan. Sprinkle with black pepper, if desired. Bake at 425F on the middle rack until the bacon is throughly cooked and starts to brown. If needed, fold the foil over the exposed green beans to keep them from overcooking. Once the bacon is done, remove from the oven and keep warm.

NanaBread’s Sage & Butter-Basted Bird:
1 whole chicken (mine was 4 pounds)
1/2 stick of butter, softened to room temperature
8-10 fresh sage leaves
1 teaspoon kosher salt
1/2 teaspoon freshly ground black pepper
1/2 teaspoon McCormick poultry seasoning
1 to 2 cups chicken broth, for the roasting pan
string to truss the bird

Begin by removing the chicken from the package and rinsing it thoroughly under lukewarm water. Pat dry with paper towels and place on a cutting board. Using cotton twine, tie the wingtips under the bird and tie the drumsticks together at the ankles. Run your fingers under the skin of the bird to loosen it, then rub at least half the softened butter under the skin, covering as much ground as you can. Gently place the whole sage leaves under the skin, then massage the bird with the remaining butter. Mix the salt, pepper & poultry seasoning and sprinkle it all over the bird. Place in a roasting pan and add the chicken broth. Cover and bake at 375F for 30 minutes, then uncover and bake an additional 20-30 minutes until nicely brown and the bird reaches 165F with an instant read meat thermometer. Baste once or twice when the bird is uncovered, and she’ll come out gorgeous.

For Kirsten’s Cornmeal Buns, click here. She made them as burger buns, but they are also fabulous as knotted dinner rolls. They’re my favorite.

So now you know our Thanksgiving favorites. What are yours? Do you have traditional dishes you prepare each year, or do you like to wing it (turkey pun) and try new things? Share here! You never know when your old family favorite might become someone else’s new family favorite. If you’ve posted them on your own blog, be sure to leave a link in your comment so we can all click over.

Happy #OXOTurkeyDay to one and all,
Jeanne

23 Comments

Filed under Blogger Collaborations, Food & Recipes

OXO’s #WhatAGrillWants – and what this girl wants is some smokey meat, sweet corn & fried green tomatoes

What’s missing from my website? Please don’t say humor, good writing or appetizing recipes. What I was shooting for is ads. There are none on my blog. It’s a personal choice made when I started blogging four years ago, and one I’ve stuck with since. It’s not a monetary or political issue, it’s just that I started blogging to share with friends and family, and ads never felt appropriate.

What you will see – products I occasionally share for one reason only – because I love them. OXO is one brand I stand firmly behind. Their products are well made, sturdy, easy to use and affordable. Because OXO supports the blogging community and blogs of all sizes, they created the Blogger Outreach Program. As a part of this program, I am occasionally selected to try random products. This month, it was OXO’s ‘What A Grill Wants’ collection.

OXO - What A Grill Wants Project

Included in package:
1 pair of 16″ grilling tongs
1 meat tenderizer
1 silicone basting brush
1 dressing shaker
1 corn stripper

That the box arrived just prior to the July 4th weekend was a bonus. We immediately plotted our attack. First up was playing with the corn stripper.

OXO Corn Stripper - What A Grill Wants

We started by grilling ears of fresh Texas sweet corn. Char = flavor.

OXO Corn Stripper & Grilled Corn - What A Grill Wants

Once they were cooled, The Complete Package grabbed that stripper and put her to work. The key was to start at one end apply the proper amount of pressure. {cue the uncontrollable giggling}

OXO Corn Stripper Collage

The Complete Package’s Review: (Overall Grade = C+)
1. He wasn’t sure it was any easier or quicker than using a knife.
2. The cutting blade tended to clog, which meant you had to stop & clear it.
3. Because one end was open, kernels tended to fall out constantly.
4. Cut kernels tended to be more pieces than whole kernels.
5. Pluses: OXO’s quality is always high & the ergonomics were good.

My Review: (Overall Grade = B)
1. I thought it WAS quicker than using a knife.
2. I also had issues with the blade area clogging occasionally.
3. A cap would be nice, as I somehow dumped corn all over the counter.
4. I had no issues with cutting whole kernels because I applied more pressure.
5. I love the size – it fits easily in your palm for ease of use.

What I also found was that the OXO corn stripper tended to remove ALL of the corn from the cob, while a kitchen knife tended to just shear off the tops of each kernel. This photo illustrates what I mean.

OXO Corn Stripper Comparison - Stripper vs Knife - What A Grill Wants

The cob in the front was denuded with a chef’s knife. You can see the flat surfaces of the cut kernels where the bottoms of the kernels are still attached. The cob in the back was cleaned with the OXO corn stripper, and you can clearly see that the entire kernel is missing. All that remains is the fibrous walls surrounding each kernel. Less waste and more volume of corn was a plus for me.

What did we do with all that cut corn? We made kicked-up creamed corn.

Grilled Creamed Corn

TCP’s Creamed Corn:
2 cans (15 ounces) sweet creamed corn
2 cups roasted sweet corn, stripped from the cob
4 tablespoons unsalted butter
2 tablespoons sugar
kosher salt & fresh cracked black pepper, to taste

Combine all ingredients; simmer over medium heat until warm.

Now, I’m not usually a fan of creamed corn because it tends to be mushy and flavorless, but this was really good. The char and flavor of the roasted corn really shines, and I found myself basically eating it right out of the pan with a spoon. I have no shame when it comes to corn, and I am unapologetic about it.

The Complete Package also broke in those 16″ tongs by grilling a pair of pork tenderloins. There’s something about meat smoked over post oak lump charcoal that touches my very soul. TCP’s pork tenderloin turns out juicy, smokey and perfect every time. For me, the mark of good smoked meat is that it needs no sauce and this needed nothing short of a napkin and some personal restraint.

TCP's Smoked Pork Tenderloin

TCP’s Smoked Pork Tenderloin:
3 pounds pork tenderloin, trimmed
Morton’s Nature’s Season Salt
Hungarian paprika
post oak hardwood lump charcoal

Start by removing the pork tenderloin from the package and rinsing them thoroughly. Pat dry with paper towels and remove any fat or silver skin. Sprinkle the meat liberally with Nature’s Season Salt and paprika.

TCP starts the smoker by stacking oak lump charcoal into a chimney and lighting it. When it is white-hot, he pours it into the smoker section of our grill along with a metal pan of hot water to create humidity. He then opens the grill vents on the opposite side of the grill to pull the smoke through the smoker. Placing the pork tenderloin over indirect heat, he smokes the pork for approximately 90 minutes at 250F, flipping once at the halfway mark, until the internal temperature reaches 160F. Removing it from the grill, he then wraps it in aluminum foil and allows it to rest on a cutting board on the kitchen counter for 30 minutes. Then it’s just a matter of slicing and serving. To sauce or not to sauce is a personal matter, but this pork needs no adornment.

OXO 16 Inch Tongs - Great Length for Grilling - What A Grill Wants

TCP’s Review of the 16″ grilling tongs: (Overall Grade: A+)
1. He loved the longer length, as it kept him from burning himself.
2. The silicone grips with thumb indention provided great grip.
3. The scalloped edges of the tongs provided a better grip on food items.
4. He loved the easy to use lock/unlock mechanism at the back of the tongs.

OXO 16 Inch Tongs Collage

In addition to the smoked pork and creamed corn, I also made fried green tomatoes. Please tell me you’ve had these before. It’s a southern favorite, and a clear sign that summer is upon us.

Fried Greed Tomatoes - Golden Brown
To make, start with firm green (unripe) tomatoes. Big slicing tomatoes work best. Here’s what you’ll need.

Fried Green Tomatoes - What You'll Need

NanaBread’s Fried Green Tomatoes:
2 large green tomatoes
2 cups all-purpose flour
1 tablespoon Morton’s Nature’s Season Salt
1/2 teaspoon freshly cracked black pepper
1 cup milk (whole or 2%)
canola oil, for frying

Wash the tomatoes, remove the core, and cut into 1/3″ slices.

Fried Green Tomatoes - Remove the Core

In a mixing bowl, combine the flour, season salt and pepper; whisk until well blended. Dredge each slice of tomato in the flour mixture, coating both sides, and lay them on a sheet of parchment or waxed paper. Once all slices are dredged, allow them to sit for 10-15 minutes to absorb the flour.

Fried Green Tomatoes - First Dredge in Flour

After 10 to 15 minutes, the flour on the tomatoes will look damp. When it does, pour the milk into a container for the second flour dredge.

Fried Green Tomatoes - Dredged

Dip each slice into the milk, then into the flour mixture for a second coat. Tap your fork on the side of the flour container to shake off any excess flour.

Fried Green Tomatoes - Dredge Collage
Place the freshly dredged tomatoes back onto the parchment paper, until all slices are coated twice. Why coat them twice? Well, the first coating of flour is not enough to adequately cover the tomatoes and keep them from splattering when fried. The second coat, along with the milk bath, creates a thick coating to help protect the tomatoes inside and create a crispy, crunchy coating.

Once your tomatoes are coated, add about 1/2″ of canola oil to a large skillet. Heat on high until the oil is shimmering and blazing hot. Carefully lower a few tomato slices into the oil (don’t crowd the skillet) and fry until the edges are clearly golden brown, then flip and fry until the second side is golden. Remove to paper towels and keep warm until all are fried. Serve immediately.

This time, we used the OXO dressing shaker to make a balsamic vinaigrette to drizzle over the finished tomatoes. It was a good call. While the tomatoes were frying, TCP whipped up a quick dressing.

OXO Salad Shaker - Balsamic Vinairgrette Ingredients

The OXO dressing shaker made this come together in a snap. Because volume measurements are printed on the side of the shaker, you can measure directly into the container. The one cup capacity is perfect for a quick vinaigrette of balsamic vinegar, olive oil, Dijon mustard, garlic and a pinch of salt.

OXO Salad Shaker - CloseUp

From there, you just screw on the lid, close the pour vent on top, and give it a good shake. We both loved this salad dressing shaker. And because the pour top seals to keep it closed, you can store unused dressing in the shaker. Just pop then entire thing into the fridge. (Overall Grade = a solid A.)

Fried Green Tomatoes - Finished with Balsamic Dressing

So we used our new OXO tongs to grill up some pork tenderloin, used the corn stripper to make quick work of grilled corn for creamed corn, and whipped up a quick vinaigrette for our fried green tomatoes. OXO delivered what they always do – fun, function, and affordability. It’s not only #WhatAGrillWants, it’s what THIS GIRL wants. Now if you’ll excuse me, there’s a plate of grilled goodness with my name on it. Hello, Summer!

Fried Green Tomatoes - Finished Meal

Special thanks to OXO for sending ‘What A Grill Wants’ products for me to play with via their Blogger Outreach Program. I was under no obligation to blog about these products, but because we love OXO & their products, I chose to share. All opinions are my own, as always.

6 Comments

Filed under Food & Recipes, Things I Love

Because sometimes you just need a giant pile of homemade potato chips

Potato chips - Finished Image with Text - Inside NanaBread's Head

Tired of reaching for stale potato chips from a greasy bag? Me, too. And it’s unnerving to read the list of preservatives on some of those bags. Am I right? Well, those days are over thanks to The Complete Package’s new toy – the OXO V-Blade Mandoline. This little guy is incredibly quick and efficient when it comes to slicing veggies. And it’s incredibly sharp.

Potato Chips - OXO Mandoline - Inside NanaBread's Head

Here’s how we sliced up a whole mess of fresh potato chips. It really could not have been any easier. To start, grab a few russet potatoes, scrub them, and peel most of the outer skin off. I like to leave a little of the potato skins for color, so I peel off every other 1/2″ or so. Give them a quick rinse and pat them dry.

Next, set up your mandoline and turn the dial to the thinnest setting. In this case, it’s 1/16th of an inch (1.5mm) for super thin & crispy chips.

OXO Mandoline - Settings - Inside NanaBread's Head

Starting at the top of the mandoline, apply a little pressure to the potato and move it back & forth across the blade. It glides so easily, it almost seems as though it’s not working, but it is. When you get down to the last inch or two of spud, grab the tool included.

OXO Mandoline Tool - Inside NanaBread's Head

I’m not sure what it’s called, but I know what it does – it keeps you from slicing your fingertips off. Just spear the end of your potato, grab the tool by the ergonomic handle, and continue slicing your potato down to the very last slice. It’s so easy, and it completely eliminates any fear you may have of working with the super sharp blades. I love that. OXO really does think of everything.

OXO Mandoline - Tool to Hold Food - Inside NanaBread's Head

When you’re done, you are left with a pile of perfectly sliced potatoes. In a million years, I could never accomplish this with a chef’s knife.

Potatoes Sliced on an OXO Mandoline - Inside NanaBread's Head

Sure, I can slice potatoes with a knife, but I can’t come anywhere close to this razor thin. I mean, c’mon. You can actually see through them. It’s amazing.

OXO Mandoline - Thin Enough To Read Through It - Inside NanaBread's Head

Once your potatoes are all sliced up, toss them into a colander and give them a thorough rinse under cold water to remove the excess starch. Spread them out onto a bed of paper towels and pat them dry.

Next, pour about 2″ of canola oil into a deep, heavy pan. Heat the oil to 350F. If you don’t have a clip-on thermometer for projects like this, I highly recommend it. I have one that can be used for frying, candy-making, you name it. And it is important to make sure the oil is hot enough. It’s what makes them crispy and keeps them from being greasy.

Once your oil hits 350F, use a slotted spoon to transfer the potatoes into the oil. This is my favorite frying tool. I found it in an antique shop years ago. If you ever run across one some day, grab it!

Perfect Frying Tool - Inside NanaBread's Head

Fry, stirring occasionally, until they are a lovely golden brown.

Frying Potato Chips - Inside NanaBread's Head

When done, lift them from the oil and allow as much oil as possible to drain off, then move them onto a paper towel lined plate to drain thoroughly. While they are still warm, sprinkle them with your favorite salt. And that’s it – you’re done!

Now grab your favorite sandwich or a hot dog, or just grab a cold drink and eat them right off the plate. Either way, they’re much tastier than chips from a bag. Let’s dig in! You grab the napkins.

Potato chips - Finished Image with Text - Inside NanaBread's Head

This is not a sponsored post. I’ve featured the OXO Mandoline because I love it and use it frequently. If you’re in the market for one, I highly recommend it. OXO’s products are well made, reliable and affordable – all things I appreciate. All opinions are my own. Pinky swear.

18 Comments

Filed under Food & Recipes, Things I Love

Cookie Week: Turtle Thumbprints

Cookie Week '12 - Turtle Thumprints - Drizzled
It’s Cookie Week! That’s great news if you’re a cookie lover; even better news if you’re a supporter of Cookies for Kids Cancer. This year, my blogging friends and I will again be baking to support this very worthy cause. For each cookie baked, sold, exchanged, or gifted Glad will donate $1 (up to $100,000). In addition, OXO (one of my favorite brands) has initiated the “OXO Matching Gift Program” and will match all proceeds from registered bake sales as part of their $100,000 pledge to Cookies for Kids Cancer. I’ve loved these brands for years, but I love them even more for their unwavering commitment to ending pediatric cancer. I’m sending a big thank you and hug to OXO & Glad.

And now on to the cookies! I chose Turtle Thumbprint Cookies this year. Risky, since I’ve never made them before, but when I saw them on Pinterest, I couldn’t resist. It’s one of my favorite flavor combinations – chocolate, caramel & toasted nuts. I love turtles – whether in cookie, brownie or ninja form. These are no exception. It all starts with a rich, truffle-like dark chocolate dough.

Dark Chocolate Thumbprint Cookies:
(adapted from The Kitchen is my Playground, and America’s Test Kitchen)

1 cup all-purpose flour
1/3 cup Hershey’s ‘Special Dark’ cocoa powder
1/4 teaspoon salt
1 stick of unsalted Land O’ Lakes butter, softened
2/3 cup sugar
1 large egg, separated + 1 extra egg white
2 tablespoons milk
1 teaspoon pure vanilla extract

1 1/4 cups toasted pecans, finely chopped
1 jar of dulce de leche caramel, for filling
6 ounces of chocolate chips, for drizzling

For the cookie dough:
Combine the flour, cocoa & salt; set aside. Using an electric mixer, cream the butter and sugar until fluffy. Add the egg yolk, milk & vanilla; mix until thoroughly incorporated. Reduce the mixer speed to low and blend in the flour/cocoa mixture. Cover with plastic wrap and refrigerate until firm (at least one hour). Once firm, scoop 1 tablespoon of dough into the palm of your hand and roll into a ball. Continue until all the dough has been rolled into balls.

Cookie Week '12 - Turtle Tumbprints - Perfectly Shaped Dough Balls

To assemble the thumbprint cookies:
Whisk both egg whites until frothy. Place the chopped pecans in a separate bowl and keep nearby. Using a fork, lower each cookie ball into the egg whites, rolling to make sure they’re completely coated.

Cookie Week '12 - Turtle Thumbprints - Finish Prep

Cookie Week '12 - Turtle Thumbprints - Egg White Wash

Remove from the egg wash and immediately drop it into the bowl of nuts. Roll or toss until the dough ball is completely coated in nuts.

Cookie Week '12 - Turtle Thumbprints - Pecan Coating

That last photo reminds me of “Where’s Waldo?” Can your find the cookie? Here’s an example of a perfectly coated cookie ball:

Cookie Week '12 - Turtle Thumbprints - A Perfectly Coated Ball

Place the cookies 2″ apart onto cookie sheets (I recommend using a silicone mat or parchment). Using your finger or a round wooden spoon handle, press a divot into the top of each cookie. The bigger the divot, the more caramel it holds.

Cookie Week '12 - Turtle Thumbprints - A Perfect Divot

Bake at 350F for 12-14 minutes, depending on your oven. You want them to just be done. Bake too long, and they’ll start to split and crack around the outside edges which will wreak havoc when you try to fill them with caramel. And we don’t want that. When they’re cooled to room temperature, grab your favorite dulce de leche caramel. I’m using this jar of unholy goodness sent to me by my friend Kat at Tenaciously Yours. It’s sea salt caramel from Trader Joe’s and it’s divine. Ima need a new jar soon. Or two. Or twelve.

Cookie Week '12 - Turtle Thumbprints - Trader Joe Caramel

Spoon just enough caramel into each cookie to fill the divot without running over the top. They get really messy when they run over the top.

Cookie Week '12 - Turtle Thumprints - Oh Sweet Caramel Goodness

Now grab your favorite milk chocolate and melt it; whisking until smooth. I like to scrape it into a plastic zip-style Glad bag so I can drizzle quickly and easily (plus it makes clean-up a snap). Just twist the baggie to press the chocolate into one corner, then snip the tip and drizzle like a pro. If you want to get all fancy-pants, you can top these with a toasted pecan. I tried it, but I’m not sure I like having my view of that sea salt caramel blocked. Caramel is meant to be seen.

Cookie Week '12 -  Finished Turtle Thumbprints

Notes from my personal experience with this recipe:
1. The dough balls (uncoated) can be made and frozen in advance in airtight freezer bags. Just thaw before coating with egg wash & nuts and baking.

2. The recipe called for regular cocoa, but I’m a dark chocolate lover so I substituted the Hershey’s Special Dark cocoa and it rocked.

2. Almonds can be substituted for pecans. And if you’re a Snickers fan, I’m betting peanuts would be pretty tasty, too.

3. The original recipe (as seen on Pinterest) called for using 14 wrapped soft caramel candies, melted down with 3 tablespoons of heavy cream. I chose the jar of sea salt caramel because I had it on hand and it’s delicious.

4. This recipe says it makes approximately 30 cookies. I tripled the recipe for a holiday cookie exchange and it worked perfectly. It made exactly 90 cookies. You’ve got to love truth in advertising.

Speaking of truth in advertising, are you familiar with the OXO brand? They make some of my favorite kitchen gadgets – including my digital scale, measuring & cooking utensils, mandolin, etc. Their Good Grips utensils are my ‘go to’ products. I love them, and that’s the truth. Last week, this box of goodies arrived via the OXO Blogger Outreach Program. It contains two OXO items that came in handy for cookie baking. Perfect timing!

Cookie Week '12 - Turtle Thumbprints - OXO Box of Love

The box included the OXO “Be A Good Cookie” spatula and the cutest set of miniature measuring cups I’ve ever seen. First, check out this spatula.

Cookie Week '12 - Turtle Thumbprints - OXO Good Cookie Spatula

Proceeds from the sale of OXO Good Cookie spatulas help support Cookies for Kids Cancer and the good work they do. If you’re looking for stocking stuffers for the cooks/bakers in your family, this is perfect. It’s a gift that keeps on giving. You know what else would make a great stocking stuffer? These adorable and highly useful miniature measuring cups. I just can’t get over these. And did I mention they nest? Love, love, love them!

Cookie Week '12 - Turtle Thumbprints - OXO Mini Measuring Cups

Stay tuned for updates all week long as other Cookie Week bakers share their holiday favorites. For instance, Kirsten at Comfortably Domestic kicked off our Cookie Week shenanigans yesterday with decorated shortbread cookies and a King Arthur Flour giveaway. You’ll want to check out that giveaway!

Other Cookie Week bloggers will include Megan at Country Cleaver, Kat at Tenaciously Yours, Mads at La Petite Pancake, Allison at Decadent Philistines Save the World, Carrie at Bakeaholic Mama, and Madeline at Munching in the Mitten.

And if you’re baking for your friends & family and would like to join our alliance to fight pediatric cancer, drop me a comment with your cookie count and we’ll include it in our total number. Help Glad & OXO and bakers everywhere support Cookies for Kids Cancer – one sweet treat at a time.

Cookies for Kids Cancer Button

Monday: Kirsten @ Comfortably Domestic – Decorated Shortbread & King Arthur Flour Giveaway

Tuesday: Mads @ La Petite Pancake – Honey-Glazed Lemon Yogurt Cookies

Wednesday: Madeline @ Munching in the Mitten – Chocolate Chunkers & Megan @ Country Cleaver – Homemade Mint Oreos & Carrie @ Bakeaholic Mama – Maple Bacon Sugar Cookies

Thursday: Allison @ Decadent Philistines – Sesame Plum Thumbprints & Kat @ Tenaciously Yours – Colossal Cookies

Friday: Carrie @ Bakeaholic Mama – Brown Sugar Toffee Cookies & Kirsten @ Comfortably Domestic – Gingersnaps

Saturday: Madeline @ Munching in the Mitten – Salted Double Chocolate Peanut Butter Cookies & Kirsten @ Comfortably Domestic – Egg Nog Logs

20 Comments

Filed under Blogger Collaborations, Food & Recipes, Things I Love

OXO Scale is a Must / Recipe is a Bust

Update: The giveaway featured in this blog is now closed. Congratulations to Allison from Arizona. It’s time to break out that Bavarian magazine you mentioned. I’d love it if you’d let me know what you make first with your new OXO Five Pound Food Scale… once you finish weighing everything you own just for fun. Congrats & happy weighing! -NB

When it comes to finding new recipes on the internet, I have this little problem. Some of the recipes that catch my attention are published in weight, not measurement. Ounces, not cups. Grams, not ounces. This poses a dilemma for me. I have no scale. I could just find a website that would do the conversion, but that could take a while. And I could just learn to do the math in my head, but that would take even longer. I was never very good at math. I helped My Baby with her 6th grade math homework years ago when The Complete Package was out of town on a business trip. She got an F. It’s a sad tale, but it’s true.

Fresh outta' the box & ready to roll - the OXO 5-Pound Food Scale


Enter the OXO 5-Pound Food Scale, part of OXO’s Healthy Eating Tools collection. Or as I call it – the scale that launched a thousand recipes. My key to unlocking weight-based recipes from around the world. The scale that converts US to metric, ounces to grams, with the touch of a button. Literally. As a brand new member of the OXO Blogger Outreach Program, OXO generously offered to send me their digital food scale. I immediately jumped for joy and here’s why:

1. the product is sent at no cost to the blogger
2. the blogger agrees to try the product at home
3. the blogger agrees to give their HONEST opinion
4. the blogger gets to keep the product, again at no cost
5. the blogger fully discloses participation in the program
6. the company provides a second unit for one lucky reader
7. there are no downsides to this program; not one!

To take this puppy out for a spin, I intentionally went back to my favorite recipe site, Tasty Kitchen, and dug up one of the recipes I shelved due to odd measurements. One that was so specifically strange it made my head spin. The recipe was for a plum cake. Since I had fresh strawberries and a new batch of homemade strawberry jam, I decided to go that route instead. It started with butter. I bake in tablespoons of butter, or sticks and half-sticks. This one called for 5 3/8 ounces of butter. Seriously. Five and 3/8 ounces. Can you grab a stick of butter and measure that without scratching your head? I can’t.


I started with one stick of butter. As you can clearly see, one stick equals 4 1/8 ounces. So I cut a little off of another stick and added it to the scale.


Presto. 5 3/8 ounces of butter at your service. Next up, sugar. I place a glass on the scale. A glass that evidently weighs 5 3/4 ounces.


No problem. Just hit the ‘zero’ button to the right of the display, and the scale resets to cancel out the weight of the container. Love that.


With the scale zeroed out, I was free to measure the required 6 ounces of sugar.


Six ounces on the button. No leveling. No guessing. Just straight up six ounces. You may be thinking, “Hold up, NanaBread. What’s with the battery symbol to the right of the 6?” That’s not a battery indicator, my friends. Let me show you.


That indicator shows the maximum range of the five pound scale. As you continue to add ingredients to your bowl, the indicator shows you how close you’re getting to the maximum limit of five pounds. Pretty convenient.


Next up was flour, so I switched to a bigger bowl. I also used a heavy bowl so I could see how the scale would react. This ceramic bowl weighs one pound, 10 ounces and change. Before adding the flour, I hit the ‘zero’ button again.


Did you notice that? The scale is reset to zero so my flour measurement is accurate, but the 5-pound scale on the right still shows the total weight so I can tell when I’m getting close to five pounds. The scale keeps track for you.


I love that I can just grab my flour canister and start dumping flour into the bowl now. No measuring cups, no concern over whether I should shake it or scrape it to level the cup. I can just dump it in until the scale hits the magic number.


Fourteen and 1/8th ounces. See what I mean about just how specific this recipe was? I’m not kidding. It said to add 14 and 1/8th ounces of flour. So I did. What I ended up with is a thick batter that looked more like cookie dough than cake batter. It tasted like cookie dough, too. Yes, I eat raw cookie dough. Don’t you?


I pressed it into a 9″x9″ square pan lined with parchment and started adding fruit. Instead of plums, I used ten ounces of fresh berries and half a pint of jam.


The strawberries were washed, hulled and chopped and scattered over the top.


The jam was spooned over the berries. Such a pretty shade of red.


Next, a crumb topping was applied about 1/2″ thick over the entire cake.


The cake was baked at 350F for about 35 minutes, until it was golden brown.


Breakfast or dessert? What would NanaBread do? She’d go with ice cream.


Now here’s a dirty little secret about food blogging. As good as this cake looked, it was as dry as sand. So dry, I think I’m calling this The Sahara Dessert. Not even ice cream could re-hydrate it. It looks fabulous, but it was almost inedible. How bad was it? The Complete Package thought that maybe we could buy a poultry injector and pump it full of vanilla pudding to moisten it up. Seriously. You know a recipe failed when the solution involves a poultry injection kit.

For all the detail in measurements, this recipe goes in the Fail Log. The most surprising part of the failure was that I added 2 ounces of orange juice that wasn’t even called for and STILL it was dry. From the berries up, it was lovely. That’s hardly a ringing endorsement. But at least I came out of this knowing that it wasn’t due to my lack of diligence in following the recipe. By golly, it called for 14 1/8 ounces, and it got it. Sometimes recipes just don’t work.

This recipe may have tanked, but the OXO scale was right on the money. I would never have attempted such a fussy recipe without it. Which is where my ray of hope springs eternal, and my new OXO scale becomes my saving grace. A few months ago, I grabbed this book off the clearance rack at a bookstore.


I was so excited. Baking is my therapy of choice. In all honesty, I gave it a quick flip-through on the way to the register, just glancing quickly at photos like this.


If you know me, you’ll understand why I couldn’t resist. I have a thing for cherries. When I got home, I sat down to peruse my $3 gem and noticed this:


Grams and ounces. Crap. Every recipe in the book is formatted just like this one. See where I’m going with this? Now that I have a new OXO food scale, I can finally tackle my baking book without reservation. A whole new collection of fabulous baked goods just opened up for me. And now it can for you, too.

OXO has generously provided a second OXO Five Pound Food Scale for one lucky reader. All you have to do is leave a comment, and this little lightweight beauty could be yours. If you’re like me, you’ll be weighing everything in your kitchen or pantry just so you can play with it. Things like this:


That’s not a tiny scale, it’s a huge tomato. And this:


Yes, it’s an orange the size of a grapefruit. This is Texas. And even this:


Yes, that’s my Pioneer Woman Cookbook. But wait! I can’t see how much Ree weighs! (Don’t you know she’d have a nervous breakdown if she heard we were weighing her on the internet?) It’s okay, Ree. It’s just the cookbook. But here’s the kicker – the OXO Five Pound Food Scale has one hidden feature I haven’t shown you yet. Are you ready for this?


The digital display pulls out so you can still read it, even when using larger bowls, platters or cookbooks. Can you believe it? I’m telling you, OXO really did think of everything. It’s why I own an entire collection of their products, all of which (with the exception of this scale) I have gladly paid for. Their stuff rocks.


When you’re done, just slide the display back in the dock and two small magnets lock it into place. A quick swipe of a Clorox wipe, and it’s ready to store.


This scale is extremely lightweight at 16 ounces and has a slim profile, so you can easily store it anywhere. Mine is resting to top of my spice bin. And because it runs on two AAA batteries (included), you can literally use it anywhere. The Complete Package has already used it to weigh envelopes so he no longer has to guess how many stamps to use. Fabulous!

Now leave a comment and tell me what recipe you’d tackle first if you had an OXO Five Pound Food Scale of your very own. If it’s one you found on the internet, feel free to share the hyperlink so we can see what inspires you. Participants must be residents of the United States due to shipping concerns. One name will be drawn at random at 12:00 Noon CST next Sunday, April 29th, 2012. That person will be notified by e-mail and will have 24 hours to respond before another name is chosen. Once a winner is confirmed, I’ll update this post.

As stated before, both scales were provided by the OXO Bloggers Outreach Program absolutely free of charge. The scale offered in this giveaway is identical to the one reviewed. OXO even included a shipping label for the winner. All they asked in return was my honest opinion, which I provided.

Now it’s time for you to weigh in. Good luck!

42 Comments

Filed under Food & Recipes, Things I Love