Tag Archives: giveaway

31 Days of Dark Chocolate Peanut Butter? Let’s make that 32.

Dark Chocolate Dreams PB Cookies & Salted Caramel Ice Cream Sandwiches

Dark Chocolate Dreams Peanut Butter. It’s the stuff dreams are truly made of, especially if you love chocolate and peanut butter like I do. Peanut Butter & Co makes one that blows my skirt up every single time I crack the lid. I’ll eat it on anything – crackers, toast, bagels, cake, waffles, a spoon, or even my finger. (Hi. My name is Jeanne, and I’ve been a peanut butter addict since forever.)

Keep reading all the way to the bottom, people. This is going to get good!

Dark Chocolate Dreams Peanut Butter Close-Up

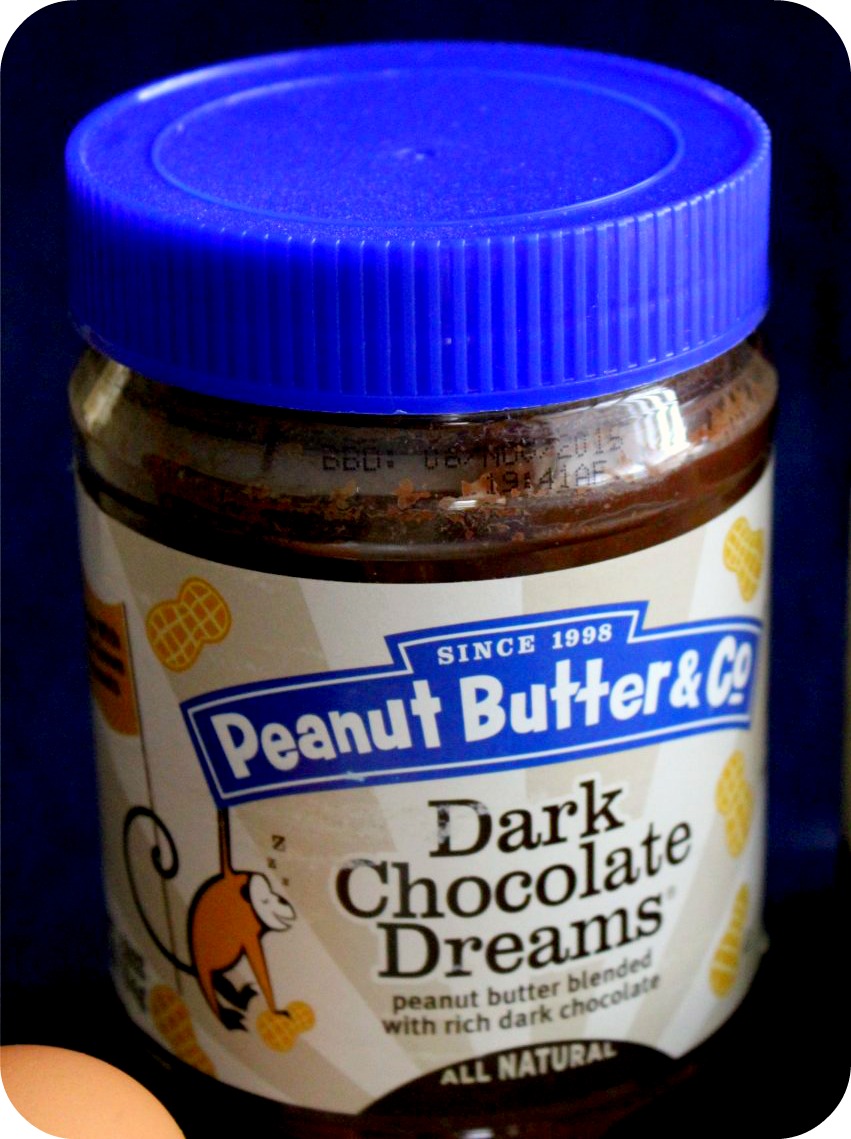
Oh, baby. This is the good stuff. It’s my super-duper favorite. For real.

Dark Chocolate Dreams Peanut Butter - One Glorious Spoonful

This week Peanut Butter & Co released a new cookbook titled 31 Days of Dark Chocolate Dreams‘. As a newly minted member of Peanut Butter & Co’s Yum Squad, I was thrilled to receive an advanced copy as well as a 28-ounce jar of Dark Chocolate Dreams to play with. Man, I love these guys. Great company, great products, and always such fun to work with. (Hi, Adam!)

Dark Chocolate Dreams Box - Instagram

The cookbook is amazing. As I flipped through it, I kept squealing “Oooo! I’ll make that! I’ll make THAT, too!” So many drool-worthy recipes to choose from. I’m seriously thinking of trying the dark chocolate peanut butter flourless cake first. Then maybe the marble pound cake. Or maybe ALL OF THEM.

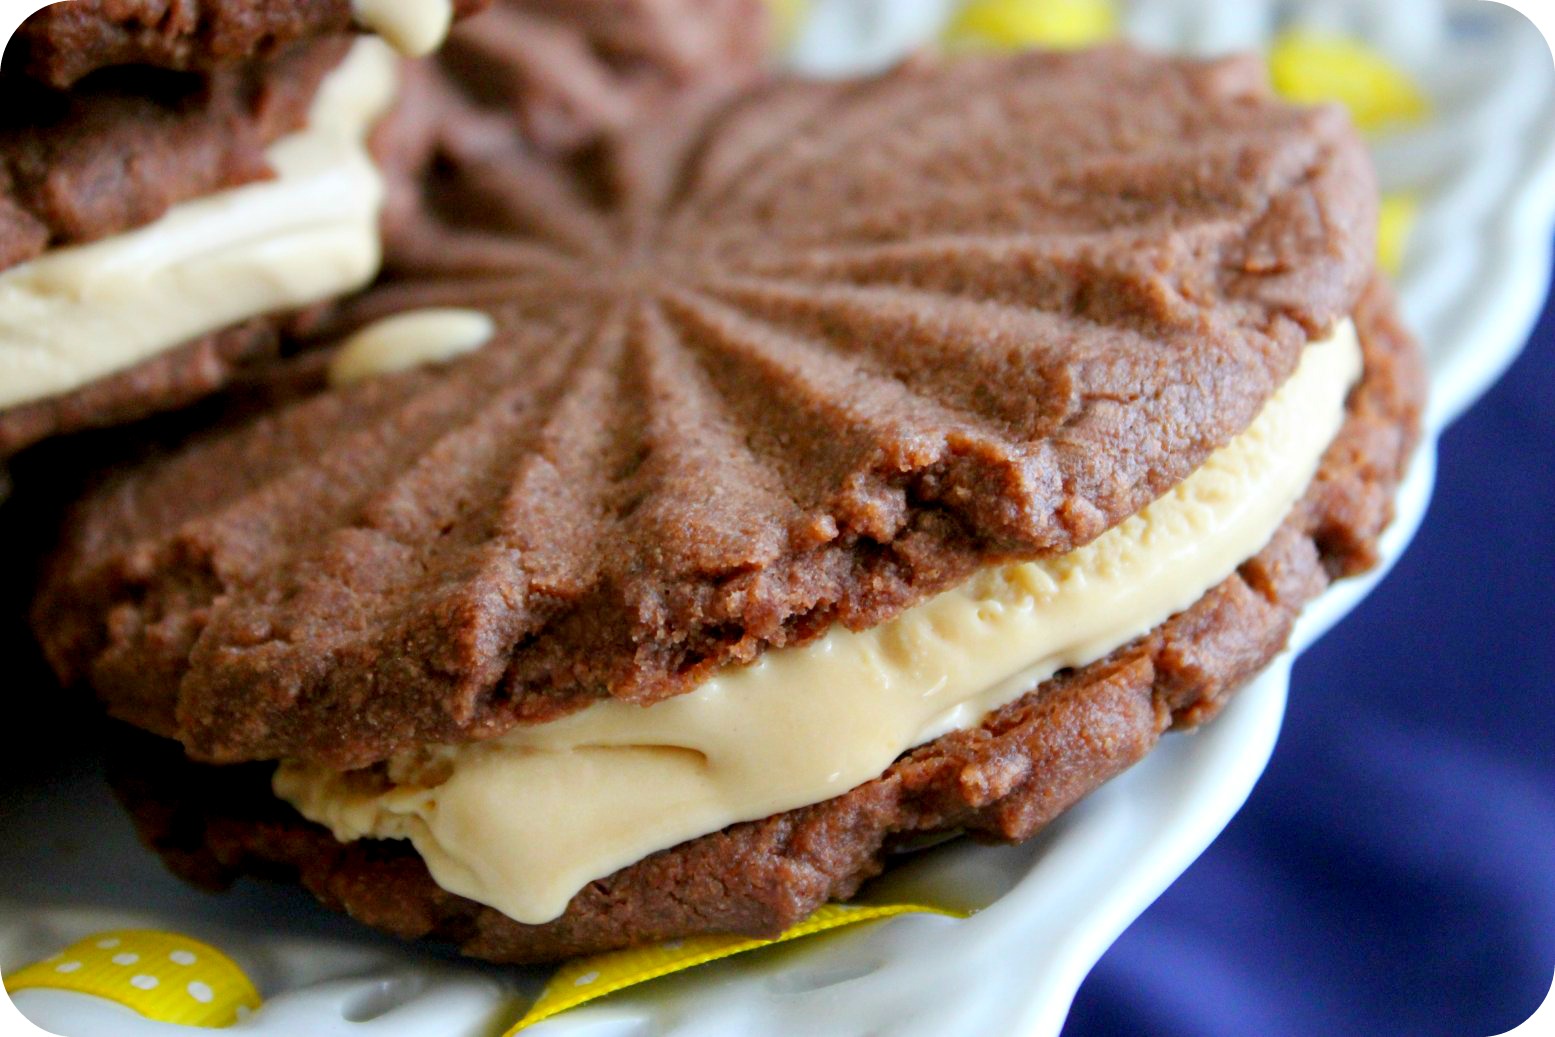
First, though, I jumped in to make a batch of my new favorite peanut butter cookies. They’re made with coconut oil instead of butter (I know… I know… I love butter, too) but the coconut oil adds great flavor and I love the texture of these. Even better, you can stuff them with Häagen-Dazs Salted Caramel Gelato and BAM! – ice cream sandwiches to die for. Let’s start with the cookies first.

Dark Chocolate Dreams PB & Coconut Oil Cookies - Ingredients

Dark Chocolate Dreams Peanut Butter & Coconut Oil Cookies
(Original recipe credit to AverieCooks.com)

3/4 cup Dark Chocolate Dreams Peanut Butter
1/2 cup organic coconut oil, softened to room temp
1 cup light brown sugar, packed
1 jumbo or large egg
1 tablespoon pure vanilla extract
1 cup + 1 tablespoon all-purpose flour
2 teaspoons cornstarch
1 teaspoon baking soda
1/4 teaspoon salt

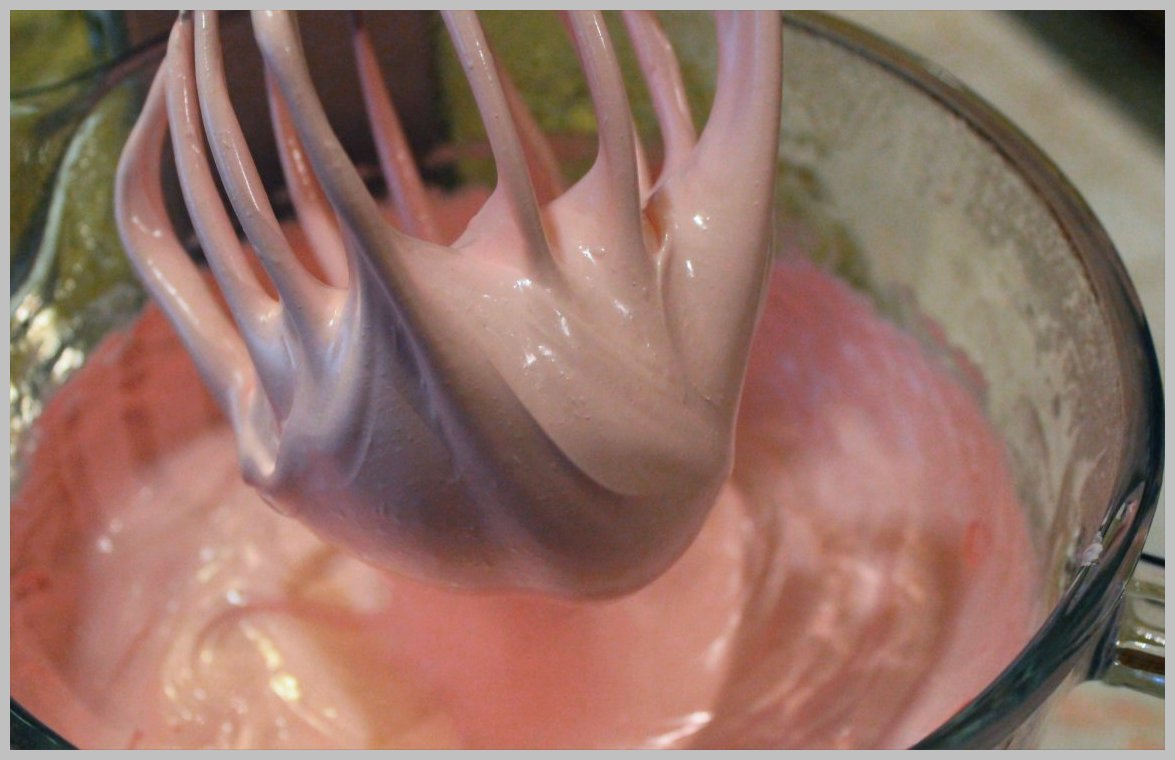
Pre-heat your oven to 350F. Make sure your coconut oil is softened to the consistency of softened butter (I had to microwave mine for 12 seconds). It sounds insignificant, but making sure your coconut oil is not too firm or too melted is key to the texture of these cookies. When you’re there, combine the peanut butter and coconut oil and beat for 3-4 minutes with an electric mixer. Scrape down the sides of the bowl, add the vanilla extract, and beat for 30 seconds more.

Stop the mixer and again scrape down the sides of the bowl. In a small mixing bowl, combine the flour, cornstarch & baking soda and whisk to combine. Add the flour in one batch to the peanut butter mixture, then on LOW speed, mix until flour is starting to incorporate and then turn the speed up to medium and beat just until the flour mixture is well combined and the dough starts to pull away from the sides of the bowl. It should look like this:

Dark Chocolate Dreams PB Cookie Dough - Perfect Consistency

If the mixture is too dry and crumbles easily, add a little more coconut oil and beat it again. If it seems too sticky and doesn’t easily form into a ball, add more flour – 1 to 2 tablespoons at a time – until your dough is the consistency of a new can of Play Dough. When it’s ready, grab a medium ice cream or cookie scoop and your baking sheets. I recommend using silicone baking mats for most baking projects. They guarantee your hard work won’t stick to the pan, causing violent bouts of cursing or childish hissy fits (or so I’ve heard).

Dark Chocolate Dreams PB Cookie Dough - Perfect Scoop

That, my friends, is a perfect scoop. To get it, I simply drag the scoop through the dough then scrape it up the side of the bowl as I remove it. See how the dough presses perfectly into the scoop? That’s when you know it’s the right consistency. Scoop onto lined baking sheets, 2″ apart so you can press them.

Dark Chocolate Dreams PB Cookies - Perfect Scoops

Note: if you don’t want to press these cookies flat for ice cream sandwiches, you can leave them like they appear in the above photo. They will take 2-3 minutes longer to bake, but result in a thicker, brownie-like cookie. For ice cream sandwiches, I pressed them with the bottom of an old glass candy dish.

Dark Chocolate Dreams PB Cookies - Pressed

I love the pattern this makes in the cookies. If you don’t have a fancy cookie press, I highly recommend flipping over old decorative bowls or glasses. If there’s a great pattern in the bottom, it can be used as a cookie press. Be adventurous and try it!

Bake at 350F for 9-10 minutes. Remove from the oven and allow the cookies to cool completely before removing them from the pans. Because I was making ice cream sandwiches with mine, I let the cookies cool completely on the pan, then popped the entire pan in the freezer to make sure they were super cold.

Dark Chocolate Dreams PB Cookies & Salted Caramel Ice Cream Sandwiches - Close-Up

For ice cream sandwiches:
Grab a pint of your favorite ice cream or gelato and let it sit out on the counter until it starts to get nice and soft (about 5 mins). I happened to have a pint of Häagen-Dazs Salted Caramel Gelato in my freezer (lucky girl!), but Ben & Jerry’s Cherry Garcia or Coffee Coffee Buzz Buzz Buzz, or any flavor you love will work.

Dark Chocolate Dreams PB Cookies - When the Magic Happens

Using the same scoop I used for the cookie dough, I placed a row of cookies ‘bottoms up’ on my tray, then placed a scoop of softened gelato in the center of each. With a flat metal spatula, aka pancake flipper, I flattened each scoop of gelato into a smooth, even layer.

Dark Chocolate Dreams PB Cookies - Topped with Gelato

Top with a second cookie and immediately wrap in plastic wrap. Pop them back into the freezer for at least 2-3 hours, or until they are frozen solid. To eat, just unwrap and dig in. If you plan to nibble them one at a time, place the wrapped ice cream sandwiches into an airtight container with a tight-fitting lid. They should keep for at least 4 weeks in your freezer. This recipe makes 16 individual cookies approximately 3″ in diameter, or 8 ice cream sandwiches.

Of course, you can also use a small cookie scoop and make these more bite-size for portion control. Or you can double the recipe and keep the baked cookies in the freezer in an air-tight container so you can enjoy them plain or build ice cream sandwiches on demand. Or just eat the cookies and wash them down with a glass of milk. That works, too. But I recommend the ice cream sandwiches. Because more is more, or something like that.

Dark Chocolate Dreams PB Cookies & Salted Caramel Ice Cream Sandwiches - Stacks & Jar

Now for the best part of this post – Peanut Butter & Co has generously offered to ship a copy of ’31 Days of Dark Chocolate Dreams’ and a 28-ounce jar of Dark Chocolate Dreams peanut butter to one lucky reader. To participate, simply leave a comment. It could be “I love peanut butter!” or “Peanut Butter & Co is awesome!” or even “I’m a cookbook hoarder.” One reader will be chosen at random, and Peanut Butter & Co will ship this tasty prize pack directly to their door. The deadline for this drawing is Friday, February 7th at 12:00 midnight, Central Standard Time, so jump on it now. Right now! What are you waiting for?!

Dark Chocolate Dreams Cookbook

If you don’t win or can’t wait to get your hands on the cookbook, you can purchase it online by clicking HERE, along with other Peanut Butter & Co goodies and peanut butter products. The Cinnamon Raisin Swirl blows my mind and Mighty Maple is both creamy and dreamy.

Disclaimer: This is not a paid post. Peanut Butter & Co sent me an advanced copy of the cookbook and a jar of peanut butter to play with, as stated above. I am a member of their Yum Squad, which is also unpaid. Put simply, I love their products, and they have occasionally sent me peanut butter to experiment with. For example, check out my ‘The Heat is On’ Spicy Peanut Butter Shortbread Cookies made with their spicy chili-laced peanut butter. As always, all opinions are my own and are not influenced in any way by the company. I just love the quality of their stuff, and enjoy sharing that joy with you.

UPDATE: Congratulations to Linda (comment #4), winner of the Peanut Butter & Co prize pack giveaway. Thanks to all who participated, and high five to Linda. You’re going to love the cookbook AND the peanut butter! -jeanne

52 Comments

Filed under Food & Recipes, Things I Love

Sweets Week: Retro Raspberry Divinity & a sweet little giveaway for bakers

Divinity - Pans & Cups

That’s right, folks – this ain’t no modern homemade marshmallow trend. We’re kickin’ it old school with divinity, baby! This raspberry version is sure to soothe your savage sugar craving. It’s retro. It’s fluffy. And it’s pretty in pink.

Valentines’ Day may be for lovers, but let’s not forget that it’s also an excuse to celebrate SUGAR. Candy, chocolates, cupcakes, creme brulee… you name it, we’ll eat it. So join my blogging friends and I as we stop lookin’ for love in all the wrong places and start rummaging through the pantry for something sweet.

It’s Sweets Week, and we’re celebrating with sweets for your sweetie pies.

When I was a kid, my mother made divinity every Christmas. I remember little balls of white fluffy confection laced with chopped pecans like it was yesterday. While most kids were getting their divinity fix from a Stuckey’s Pecan Log, our Mom was shaming other mothers by making it at home. Mom rocked the 70’s.

The Pecan Log from Stuckey's - a blast from some poor kid's past. Photo via http://brucemctague.com/pecan-logs

The Pecan Log from Stuckey’s – a blast from some poor kid’s past. Photo credit to http://brucemctague.com/pecan-logs

But this ain’t my Mama’s divinity. This version is cooler. It’s hipper. And did I mention it’s PINK? That hue is due to yet another childhood favorite – Jello. That’s right. Good old-fashioned Jello. Raspberry to be exact, although I’ve also made this with cherry and I’m pretty sure it would rock in blackberry, too.

Here’s what you’ll need:
3 cups granulated sugar
3/4 cup light (clear) corn syrup
3/4 cup water
3 egg whites
1 small (3-oz.) pkg. Jello (raspberry is shown)
3/4 cup toasted pecans, chopped
1 teaspoon vanilla extract

Start by lightly oiling an 11″ x 7″ pan, or you can use 4 miniature loaf pans like me. I sprayed them with regular Pam cooking spray, then wiped them gently with a paper towel so they were lightly oiled.

Next, combine the sugar, corn syrup and water in a medium or large saucepan (you’ll need 4-5″ of headroom, because this will come to a furious boil and rise in the pan). Set it over medium-high heat and whisk it occasionally until it reaches 260F on a candy thermometer.

Divinity - Boiling the Syrup

When the sugar syrup reaches around 200F, start your egg whites. In the bowl of an electric mixer, whip your egg whites until soft peaks begin to form.

Divinity - Whipping Egg Whites

Lower the speed and sprinkle in the Jello powder, whisking until combined.

Divinity - Adding Jello to Egg Whites

Turn the speed up to high and continue to beat until the Jello powder is incorporated and the egg whites hold their peaks.

Divinity - Egg Whites & Jello

Once the syrup mixture reaches 260F, turn the mixer to medium-low and slowly pour a thin stream of syrup into the egg whites until all of the syrup has gradually been added. DO NOT STOP THE MIXER WHILE ADDING THE HOT SYRUP MIXTURE OR YOU WILL SCRAMBLE YOUR EGG WHITES! Sorry for the drama, but it’s a divinity no-no to stop the mixer & scramble the eggs.

Divinity - Whipping in the Syrup

Once all of the syrup has been added, turn the mixer up to high and let it run for 6-8 minutes, or until the candy mixture begins to get very thick. I just set the timer and went for the full 8 minutes. Better safe than sorry, I always say.

Divinity - Ready to Spread

Turn off the mixer and remove the beater. At this point, the divinity will be thick and glossy. Using a spatula, fold in the pecans and vanilla extract by hand.

Divinity - Stir in Nuts & Vanilla

Pour the candy mixture into the prepared pan(s) and smooth evenly. If yours sets up as quickly as mine did, you may need to lightly spray your spatula or hands with additional cooking spray to keep the candy from sticking to it.

Now the hard part – set your pan(s) on a kitchen towel somewhere out of the way and let it sit for at least 6-8 hours to completely firm up. I put mine on our formal dining room table because we haven’t used it for a meal since 1992.

Once it’s set, cut into 1″ squares with a lightly oiled knife; a serrated bread knife works best. Store in an airtight container at room temperature.

Divinity - Final Cut

Fun Facts About Divinity:
1. Humidity and Divinity are not friends; they do not play well together.
2. Divinity should never be refrigerated; apparently it doesn’t like cold, either.
3. Most candy, divinity included, should not be made on a rainy day (see #1).
4. Unless they are ‘of a certain age’ your friends may not recognize divinity.
5. Just tell those friends you made ‘marshmallows with nuts’ – it’s simpler.

Recipe Credit: This appeared in Womans Day Magazine when Ronald Reagan was president. I tore it out & saved it when I was but a wee child. {cough}

Now on to the giveaway! One lucky reader will win the following baking booty in honor of Sweets Week:

Sweets Week Giveaway Bar - Vertical

This prize package includes: one copy of the Good Housekeeping Best Loved Desserts cookbook with more than 250 glorious recipes, two adorable ceramic mini-crocks in cherry red, two packages of treat wrappers by Martha Stewart, my favorite bowl-scraping silicone spatula in Valentine’s red, a sweetheart print quilted apron, and a matching kitchen towel in raspberry.

Note: My friend Katie, The Hill Country Cook, introduced me to these sweet little single-serving ceramic crocks. You’re going to love them!

To enter, simply leave a comment at the bottom of this post telling me your favorite sweet treat. This giveaway will run from 8:00am CST on Sunday, February 10th through 12:00 Noon CST on Saturday, February 16, 2013. One winner will be selected at random and notified by e-mail. If the reader selected does not respond within 48 hours, a new winner will be drawn. Participation is limited to US residents only.

THIS GIVEAWAY IS CLOSED. CONGRATULATIONS TO LAUREN GRIER, OUR WINNER! (Lauren, check your e-mail for details.)

sweetsweekbadge

Sweets Week is for sugar lovers, so drop in & check out these Sweetie Pies:

Sunday:
Retro Raspberry Divinity – Jeanne @ Inside NanaBread’s Head (that’s me!)
Red Velvet Vanilla Marble Cupcakes with Milk Chocolate Buttercream Frosting – Kirsten @ Comfortably Domestic

Monday:
Chocolate-Dipped Peanut Butter Pudding Cookies – Beka @ Kvetchin’ Kitchen
Mini Meringue Strawberry Pie – Katie @ The Hill Country Cook

Tuesday:
Chocolate Pistachio Biscotti – Madeline @ Munching in the Mitten
Samoa Crack Dip – Carrie @ Bakeaholic Mama

Wednesday:
Avocado Peppermint Chocolate Mousse – Lauren @ Climbing Grier Mountain
Cherry Garcia Chocolate Bark – Megan @ Wanna Be A Country Cleaver

Thursday:
S’Mores on a Stick – Kat @ Tenaciously Yours
White Chocolate Cupcakes with Raspberry Buttercream Frosting – Mads @ La Petite Pancake

Friday:
‘Pucker Up’ Lemon Marshmallows – Allison @ Decadent Philistines Save the World
Mini Chocolate Mousse Pies – Kirsten @ Comfortably Domestic

Saturday:
Berry Smoothie Ice Cream Pie & a Giveaway – Anne @ From My Sweet Heart

Divinity - Cake Stand

81 Comments

Filed under Blogger Collaborations, Food & Recipes

Cookie Week: Turtle Thumbprints

Cookie Week '12 - Turtle Thumprints - Drizzled
It’s Cookie Week! That’s great news if you’re a cookie lover; even better news if you’re a supporter of Cookies for Kids Cancer. This year, my blogging friends and I will again be baking to support this very worthy cause. For each cookie baked, sold, exchanged, or gifted Glad will donate $1 (up to $100,000). In addition, OXO (one of my favorite brands) has initiated the “OXO Matching Gift Program” and will match all proceeds from registered bake sales as part of their $100,000 pledge to Cookies for Kids Cancer. I’ve loved these brands for years, but I love them even more for their unwavering commitment to ending pediatric cancer. I’m sending a big thank you and hug to OXO & Glad.

And now on to the cookies! I chose Turtle Thumbprint Cookies this year. Risky, since I’ve never made them before, but when I saw them on Pinterest, I couldn’t resist. It’s one of my favorite flavor combinations – chocolate, caramel & toasted nuts. I love turtles – whether in cookie, brownie or ninja form. These are no exception. It all starts with a rich, truffle-like dark chocolate dough.

Dark Chocolate Thumbprint Cookies:
(adapted from The Kitchen is my Playground, and America’s Test Kitchen)

1 cup all-purpose flour
1/3 cup Hershey’s ‘Special Dark’ cocoa powder
1/4 teaspoon salt
1 stick of unsalted Land O’ Lakes butter, softened
2/3 cup sugar
1 large egg, separated + 1 extra egg white
2 tablespoons milk
1 teaspoon pure vanilla extract

1 1/4 cups toasted pecans, finely chopped
1 jar of dulce de leche caramel, for filling
6 ounces of chocolate chips, for drizzling

For the cookie dough:
Combine the flour, cocoa & salt; set aside. Using an electric mixer, cream the butter and sugar until fluffy. Add the egg yolk, milk & vanilla; mix until thoroughly incorporated. Reduce the mixer speed to low and blend in the flour/cocoa mixture. Cover with plastic wrap and refrigerate until firm (at least one hour). Once firm, scoop 1 tablespoon of dough into the palm of your hand and roll into a ball. Continue until all the dough has been rolled into balls.

Cookie Week '12 - Turtle Tumbprints - Perfectly Shaped Dough Balls

To assemble the thumbprint cookies:
Whisk both egg whites until frothy. Place the chopped pecans in a separate bowl and keep nearby. Using a fork, lower each cookie ball into the egg whites, rolling to make sure they’re completely coated.

Cookie Week '12 - Turtle Thumbprints - Finish Prep

Cookie Week '12 - Turtle Thumbprints - Egg White Wash

Remove from the egg wash and immediately drop it into the bowl of nuts. Roll or toss until the dough ball is completely coated in nuts.

Cookie Week '12 - Turtle Thumbprints - Pecan Coating

That last photo reminds me of “Where’s Waldo?” Can your find the cookie? Here’s an example of a perfectly coated cookie ball:

Cookie Week '12 - Turtle Thumbprints - A Perfectly Coated Ball

Place the cookies 2″ apart onto cookie sheets (I recommend using a silicone mat or parchment). Using your finger or a round wooden spoon handle, press a divot into the top of each cookie. The bigger the divot, the more caramel it holds.

Cookie Week '12 - Turtle Thumbprints - A Perfect Divot

Bake at 350F for 12-14 minutes, depending on your oven. You want them to just be done. Bake too long, and they’ll start to split and crack around the outside edges which will wreak havoc when you try to fill them with caramel. And we don’t want that. When they’re cooled to room temperature, grab your favorite dulce de leche caramel. I’m using this jar of unholy goodness sent to me by my friend Kat at Tenaciously Yours. It’s sea salt caramel from Trader Joe’s and it’s divine. Ima need a new jar soon. Or two. Or twelve.

Cookie Week '12 - Turtle Thumbprints - Trader Joe Caramel

Spoon just enough caramel into each cookie to fill the divot without running over the top. They get really messy when they run over the top.

Cookie Week '12 - Turtle Thumprints - Oh Sweet Caramel Goodness

Now grab your favorite milk chocolate and melt it; whisking until smooth. I like to scrape it into a plastic zip-style Glad bag so I can drizzle quickly and easily (plus it makes clean-up a snap). Just twist the baggie to press the chocolate into one corner, then snip the tip and drizzle like a pro. If you want to get all fancy-pants, you can top these with a toasted pecan. I tried it, but I’m not sure I like having my view of that sea salt caramel blocked. Caramel is meant to be seen.

Cookie Week '12 -  Finished Turtle Thumbprints

Notes from my personal experience with this recipe:
1. The dough balls (uncoated) can be made and frozen in advance in airtight freezer bags. Just thaw before coating with egg wash & nuts and baking.

2. The recipe called for regular cocoa, but I’m a dark chocolate lover so I substituted the Hershey’s Special Dark cocoa and it rocked.

2. Almonds can be substituted for pecans. And if you’re a Snickers fan, I’m betting peanuts would be pretty tasty, too.

3. The original recipe (as seen on Pinterest) called for using 14 wrapped soft caramel candies, melted down with 3 tablespoons of heavy cream. I chose the jar of sea salt caramel because I had it on hand and it’s delicious.

4. This recipe says it makes approximately 30 cookies. I tripled the recipe for a holiday cookie exchange and it worked perfectly. It made exactly 90 cookies. You’ve got to love truth in advertising.

Speaking of truth in advertising, are you familiar with the OXO brand? They make some of my favorite kitchen gadgets – including my digital scale, measuring & cooking utensils, mandolin, etc. Their Good Grips utensils are my ‘go to’ products. I love them, and that’s the truth. Last week, this box of goodies arrived via the OXO Blogger Outreach Program. It contains two OXO items that came in handy for cookie baking. Perfect timing!

Cookie Week '12 - Turtle Thumbprints - OXO Box of Love

The box included the OXO “Be A Good Cookie” spatula and the cutest set of miniature measuring cups I’ve ever seen. First, check out this spatula.

Cookie Week '12 - Turtle Thumbprints - OXO Good Cookie Spatula

Proceeds from the sale of OXO Good Cookie spatulas help support Cookies for Kids Cancer and the good work they do. If you’re looking for stocking stuffers for the cooks/bakers in your family, this is perfect. It’s a gift that keeps on giving. You know what else would make a great stocking stuffer? These adorable and highly useful miniature measuring cups. I just can’t get over these. And did I mention they nest? Love, love, love them!

Cookie Week '12 - Turtle Thumbprints - OXO Mini Measuring Cups

Stay tuned for updates all week long as other Cookie Week bakers share their holiday favorites. For instance, Kirsten at Comfortably Domestic kicked off our Cookie Week shenanigans yesterday with decorated shortbread cookies and a King Arthur Flour giveaway. You’ll want to check out that giveaway!

Other Cookie Week bloggers will include Megan at Country Cleaver, Kat at Tenaciously Yours, Mads at La Petite Pancake, Allison at Decadent Philistines Save the World, Carrie at Bakeaholic Mama, and Madeline at Munching in the Mitten.

And if you’re baking for your friends & family and would like to join our alliance to fight pediatric cancer, drop me a comment with your cookie count and we’ll include it in our total number. Help Glad & OXO and bakers everywhere support Cookies for Kids Cancer – one sweet treat at a time.

Cookies for Kids Cancer Button

Monday: Kirsten @ Comfortably Domestic – Decorated Shortbread & King Arthur Flour Giveaway

Tuesday: Mads @ La Petite Pancake – Honey-Glazed Lemon Yogurt Cookies

Wednesday: Madeline @ Munching in the Mitten – Chocolate Chunkers & Megan @ Country Cleaver – Homemade Mint Oreos & Carrie @ Bakeaholic Mama – Maple Bacon Sugar Cookies

Thursday: Allison @ Decadent Philistines – Sesame Plum Thumbprints & Kat @ Tenaciously Yours – Colossal Cookies

Friday: Carrie @ Bakeaholic Mama – Brown Sugar Toffee Cookies & Kirsten @ Comfortably Domestic – Gingersnaps

Saturday: Madeline @ Munching in the Mitten – Salted Double Chocolate Peanut Butter Cookies & Kirsten @ Comfortably Domestic – Egg Nog Logs

20 Comments

Filed under Blogger Collaborations, Food & Recipes, Things I Love

Good News / Bad News

It’s been one of those days. You know, the kind where you start something with the best of intentions and something else gets in the way; or you get distracted. In my case, it was less of the first and more of the latter. I’ll give you examples.

Good News – I decided to tackle my freezer; it needed to be reorganized.

Yes, that’s vodka in the top drawer. For penne. Don’t judge.


Bad New – I got distracted by what I found.

Good News – I am now infusing old frozen vanilla beans in the vodka for the win AND I found a bag of frozen dinner rolls that make the perfect winter coat for the Pumpkin Spice Kisses Megan sent me.

Kisses in frozen rolls = dessert in a pinch, literally.

Once the dough rises around the kisses, I’ll pinch them shut, bake them off, and smother them in a caramel glaze. Yes way!

Bad News – If The Complete Package doesn’t pitch in to help eat these, I’m going to be in trouble. Serious trouble. Which brings me to the…

Good News – It’s sweat pants season! Wahoo!

Cheer Sweats by Nike; love the ‘Hook ‘Em Horns’ orange

Bad News – I never finished organizing the freezer because I found the end of a bag of frozen shredded hashbrown potatoes way in the back.

Good News – I decided hashbrowns with soft-fried eggs smothered in Texas Brew Salsa was absolutely essential for today’s lunch. It was a good call.

Bad News – It was gone way too quickly, just like our Texas Brew Salsa Giveaway this week.

Good News – You still have time to enter! Comments close at 9:00pm CST Friday, October 5th so click here and leave a comment. You could win a big box of Texas Brew Salsa of your very own. And that’s always good news.

Texas Brew Salsa – it’s *that* good!

10 Comments

Filed under "Buy Local" Spotlights, Food & Recipes, Miscellaneous Thoughts

Texas Brew Salsa, a hearty breakfast and a GIVEAWAY; what a morning!

UPDATE: Congratulations to Wen, winner of our Texas Brew Salsa giveaway. Enjoy! Special thanks to Brenda Craig of Texas Brew Salsa. I very much appreciate her generous offer to make a reader’s salsa dreams come true.

Good morning, y’all. At least I hope it’s a good morning for you. If it isn’t, then maybe you should have one of these beauties for breakfast:

A Texas Howdy Breakfast with Texas Brew Salsa

Nothing gives your day a swift kick in the pants like a rib-sticking breakfast smothered in salsa, am I right? And not just any salsa – Texas Brew Salsa from right here in the heart of Texas. Created and run by local salsa magnate Brenda Craig (she’ll get a kick out of that title), it’s a great example of Texas ingenuity and creativity. And honey, Texans know salsa.

Texas Brew Salsa ingredients are roasted over an open fire for exceptional flavor. Better yet, they’re all natural. That ‘little something extra’ you’ll taste is honey. Varieties include Honey Roasted Chipotle, Honey Roasted Peach, Honey Roasted Pineapple, Honey Roasted Mango, Honey Roasted Apple Cinnamon, Hot Iron Habanero, Fire Roasted Poblano, and Fire Roasted Black Bean & Corn. Texas Brew is slightly sweet, and yet not too sweet and it’s highly addictive. We’ve tried it on just about everything – eggs, fish tacos, burgers, bean burritos and bag after bag of tortilla chips. Like I said, it’s addictive.

I took this photo; that’s why the bottom right jar has some missing. Yum.

I was introduced to Texas Brew Salsa via a blog giveaway hosted by Jen of Juanita’s Cocina. Like most of you, I enter these things thinking “I’ll never win, but what the heck; may as well try!” Well, it’s a good thing I did. A few days later, I received an e-mail from Jen saying ‘Congratulations!’ which was quickly followed by an e-mail from Brenda saying “You’re a winner – which varieties would you like to try?” In a few days, I had a big heavy box of salsa at my door. Now that’s great customer service. Here’s what I was inspired to make for you:

NanaBread’s Easy Green Chili, Cheddar & Bacon Biscuits:
1 1/2 cups buttermilk baking mix (I use Pioneer; Bisquick will work)
1/2 cup medium cheddar cheese, grated
1 Tablespoon roasted Hatch green chilies, minced
1/4 cup cooked bacon, crumbled (reserve the bacon fat)
1/2 Tablespoon bacon fat
pinch of cracked black pepper
pinch of garlic salt
2/3 cup milk
2 Tablespoons butter

Filling:
bacon, fried to perfection
sausage, fried to perfection
eggs, soft fried to perfection
salsa, fire roasted to perfection
(see the pattern here?)

Pre-heat your oven to 450F and line a baking sheet with parchment paper; set it aside. In a bowl, combine the baking mix, grated cheese, green chilies, bacon, pepper & salt; stir to combine. Gradually stir in 2/3 cup milk and blend just until the dry ingredients are incorporated; do not over mix. Using an ice cream scoop that has been lightly oiled, scoop biscuit mix onto the parchment paper. Place a pat of butter on top of each biscuit. Real butter, pretty please.

Biscuits just before they go into the oven


Bake for 15-18 minutes (depending on the size of your biscuits) or until they turn a pale golden brown. Remove from the oven and allow them to cool before slicing to prevent them from falling apart. Biscuits can be tricky like that.

Biscuits as big as your head, just out of the oven. Pretty!


Carefully slice the biscuits in half and top each half with a schmear of butter, a generous helping of bacon or sausage (or both – your choice), and a soft fried egg or two. Slather the entire pile in Texas Brew Salsa (I used the poblano).

A bacon, egg & cheese biscuit is good, but salsa makes it so much better!

This recipe makes two very large or 4 small biscuits. But this is Texas, so we make them big. Of course. I’m digging in. Would you like to join me?

You’d better be hungry; this is one big biscuit!

Now, who would like to try Texas Brew Salsa? Brenda Craig has generously offered to give away a box to one lucky reader. For a chance to win:

Leave a comment telling us what you’d make with Texas Brew Salsa or if you’d eat it straight out of the jar with a big bag of chips.

For extra entries, you may:
1. Follow Texas Brew Salsa on Facebook
2. Follow Texas Brew Salsa on Twitter
3. Follow me, NanaBread on Twitter
**NOTE: You MUST leave a separate comment stating that you have done each or any of these three things.**

This giveaway is for one variety pack of Texas Brew Salsa, including free shipping right to your door. This giveaway is open to Continental US residents only. It will run from Monday, October 1st, 2012, to 9:00 p.m., CST on Friday, October 5th, 2012. At that time, one winner will be chosen by random draw and notified by e-mail. He/she will have 48 hours to respond or another winner will be chosen. Now get to entering! You can’t win if you don’t!

Texas Brew Salsa – getcha’ some!

32 Comments

Filed under "Buy Local" Spotlights, Food & Recipes

OXO Scale is a Must / Recipe is a Bust

Update: The giveaway featured in this blog is now closed. Congratulations to Allison from Arizona. It’s time to break out that Bavarian magazine you mentioned. I’d love it if you’d let me know what you make first with your new OXO Five Pound Food Scale… once you finish weighing everything you own just for fun. Congrats & happy weighing! -NB

When it comes to finding new recipes on the internet, I have this little problem. Some of the recipes that catch my attention are published in weight, not measurement. Ounces, not cups. Grams, not ounces. This poses a dilemma for me. I have no scale. I could just find a website that would do the conversion, but that could take a while. And I could just learn to do the math in my head, but that would take even longer. I was never very good at math. I helped My Baby with her 6th grade math homework years ago when The Complete Package was out of town on a business trip. She got an F. It’s a sad tale, but it’s true.

Fresh outta' the box & ready to roll - the OXO 5-Pound Food Scale


Enter the OXO 5-Pound Food Scale, part of OXO’s Healthy Eating Tools collection. Or as I call it – the scale that launched a thousand recipes. My key to unlocking weight-based recipes from around the world. The scale that converts US to metric, ounces to grams, with the touch of a button. Literally. As a brand new member of the OXO Blogger Outreach Program, OXO generously offered to send me their digital food scale. I immediately jumped for joy and here’s why:

1. the product is sent at no cost to the blogger
2. the blogger agrees to try the product at home
3. the blogger agrees to give their HONEST opinion
4. the blogger gets to keep the product, again at no cost
5. the blogger fully discloses participation in the program
6. the company provides a second unit for one lucky reader
7. there are no downsides to this program; not one!

To take this puppy out for a spin, I intentionally went back to my favorite recipe site, Tasty Kitchen, and dug up one of the recipes I shelved due to odd measurements. One that was so specifically strange it made my head spin. The recipe was for a plum cake. Since I had fresh strawberries and a new batch of homemade strawberry jam, I decided to go that route instead. It started with butter. I bake in tablespoons of butter, or sticks and half-sticks. This one called for 5 3/8 ounces of butter. Seriously. Five and 3/8 ounces. Can you grab a stick of butter and measure that without scratching your head? I can’t.


I started with one stick of butter. As you can clearly see, one stick equals 4 1/8 ounces. So I cut a little off of another stick and added it to the scale.


Presto. 5 3/8 ounces of butter at your service. Next up, sugar. I place a glass on the scale. A glass that evidently weighs 5 3/4 ounces.


No problem. Just hit the ‘zero’ button to the right of the display, and the scale resets to cancel out the weight of the container. Love that.


With the scale zeroed out, I was free to measure the required 6 ounces of sugar.


Six ounces on the button. No leveling. No guessing. Just straight up six ounces. You may be thinking, “Hold up, NanaBread. What’s with the battery symbol to the right of the 6?” That’s not a battery indicator, my friends. Let me show you.


That indicator shows the maximum range of the five pound scale. As you continue to add ingredients to your bowl, the indicator shows you how close you’re getting to the maximum limit of five pounds. Pretty convenient.


Next up was flour, so I switched to a bigger bowl. I also used a heavy bowl so I could see how the scale would react. This ceramic bowl weighs one pound, 10 ounces and change. Before adding the flour, I hit the ‘zero’ button again.


Did you notice that? The scale is reset to zero so my flour measurement is accurate, but the 5-pound scale on the right still shows the total weight so I can tell when I’m getting close to five pounds. The scale keeps track for you.


I love that I can just grab my flour canister and start dumping flour into the bowl now. No measuring cups, no concern over whether I should shake it or scrape it to level the cup. I can just dump it in until the scale hits the magic number.


Fourteen and 1/8th ounces. See what I mean about just how specific this recipe was? I’m not kidding. It said to add 14 and 1/8th ounces of flour. So I did. What I ended up with is a thick batter that looked more like cookie dough than cake batter. It tasted like cookie dough, too. Yes, I eat raw cookie dough. Don’t you?


I pressed it into a 9″x9″ square pan lined with parchment and started adding fruit. Instead of plums, I used ten ounces of fresh berries and half a pint of jam.


The strawberries were washed, hulled and chopped and scattered over the top.


The jam was spooned over the berries. Such a pretty shade of red.


Next, a crumb topping was applied about 1/2″ thick over the entire cake.


The cake was baked at 350F for about 35 minutes, until it was golden brown.


Breakfast or dessert? What would NanaBread do? She’d go with ice cream.


Now here’s a dirty little secret about food blogging. As good as this cake looked, it was as dry as sand. So dry, I think I’m calling this The Sahara Dessert. Not even ice cream could re-hydrate it. It looks fabulous, but it was almost inedible. How bad was it? The Complete Package thought that maybe we could buy a poultry injector and pump it full of vanilla pudding to moisten it up. Seriously. You know a recipe failed when the solution involves a poultry injection kit.

For all the detail in measurements, this recipe goes in the Fail Log. The most surprising part of the failure was that I added 2 ounces of orange juice that wasn’t even called for and STILL it was dry. From the berries up, it was lovely. That’s hardly a ringing endorsement. But at least I came out of this knowing that it wasn’t due to my lack of diligence in following the recipe. By golly, it called for 14 1/8 ounces, and it got it. Sometimes recipes just don’t work.

This recipe may have tanked, but the OXO scale was right on the money. I would never have attempted such a fussy recipe without it. Which is where my ray of hope springs eternal, and my new OXO scale becomes my saving grace. A few months ago, I grabbed this book off the clearance rack at a bookstore.


I was so excited. Baking is my therapy of choice. In all honesty, I gave it a quick flip-through on the way to the register, just glancing quickly at photos like this.


If you know me, you’ll understand why I couldn’t resist. I have a thing for cherries. When I got home, I sat down to peruse my $3 gem and noticed this:


Grams and ounces. Crap. Every recipe in the book is formatted just like this one. See where I’m going with this? Now that I have a new OXO food scale, I can finally tackle my baking book without reservation. A whole new collection of fabulous baked goods just opened up for me. And now it can for you, too.

OXO has generously provided a second OXO Five Pound Food Scale for one lucky reader. All you have to do is leave a comment, and this little lightweight beauty could be yours. If you’re like me, you’ll be weighing everything in your kitchen or pantry just so you can play with it. Things like this:


That’s not a tiny scale, it’s a huge tomato. And this:


Yes, it’s an orange the size of a grapefruit. This is Texas. And even this:


Yes, that’s my Pioneer Woman Cookbook. But wait! I can’t see how much Ree weighs! (Don’t you know she’d have a nervous breakdown if she heard we were weighing her on the internet?) It’s okay, Ree. It’s just the cookbook. But here’s the kicker – the OXO Five Pound Food Scale has one hidden feature I haven’t shown you yet. Are you ready for this?


The digital display pulls out so you can still read it, even when using larger bowls, platters or cookbooks. Can you believe it? I’m telling you, OXO really did think of everything. It’s why I own an entire collection of their products, all of which (with the exception of this scale) I have gladly paid for. Their stuff rocks.


When you’re done, just slide the display back in the dock and two small magnets lock it into place. A quick swipe of a Clorox wipe, and it’s ready to store.


This scale is extremely lightweight at 16 ounces and has a slim profile, so you can easily store it anywhere. Mine is resting to top of my spice bin. And because it runs on two AAA batteries (included), you can literally use it anywhere. The Complete Package has already used it to weigh envelopes so he no longer has to guess how many stamps to use. Fabulous!

Now leave a comment and tell me what recipe you’d tackle first if you had an OXO Five Pound Food Scale of your very own. If it’s one you found on the internet, feel free to share the hyperlink so we can see what inspires you. Participants must be residents of the United States due to shipping concerns. One name will be drawn at random at 12:00 Noon CST next Sunday, April 29th, 2012. That person will be notified by e-mail and will have 24 hours to respond before another name is chosen. Once a winner is confirmed, I’ll update this post.

As stated before, both scales were provided by the OXO Bloggers Outreach Program absolutely free of charge. The scale offered in this giveaway is identical to the one reviewed. OXO even included a shipping label for the winner. All they asked in return was my honest opinion, which I provided.

Now it’s time for you to weigh in. Good luck!

42 Comments

Filed under Food & Recipes, Things I Love

Blue & Green Giveaway Winner

Behold your bevy of blue & green gifts, Cyndi!


Congratulations to Cyndi from Arkansas. You are the winner of the Blue & Green kitchen giveaway. You’ve just won two (2) Crate & Barrel kitchen towels, eight (count ’em, 8) green Chantal ramekins, and two matching silicone hot pads/mats. I hope you enjoy your goodies! Thank you to all who participated.
-NanaBread

2 Comments

Filed under Miscellaneous Thoughts

A Blue & Green Giveaway

Update: Congratulations to Cyndi (comment #1), winner of the Blue & Green Giveaway! This contest is closed. Thank you to all who participated! -NB

I love blue and green (my favorite colors).

And I love finding super cute stuff for really great prices.

And I love sharing these treasures with friends.

So… because I love blue and green, and because I love cute kitchen stuff, and because I think one of you deserves a special treat, I’m opening up a giveaway for the following items:

Two super cute Crate & Barrel kitchen towels

Two sets of four Chantal 1/2-cup ramekins

Two coordinating honeycomb-patterned silicone hot pads/mats

So to recap, that’s:
Two (2) Crate & Barrel cotton kitchen towels in super cute patterns
Eight (8) Chantal oven & microwave-safe 1/2 cup ramekins in green, and
Two (2) cute honeycomb-patterned silicone mats for handling hot ramekins

You know you want this blue & green kitchen dream!

Please read all the rules:
1. Leave a comment on this blog to participate. One entry per person, please.
2. Use a legitimate e-mail address so I can contact you. It will not be shared.
3. You must be a resident of the U.S. with a mailing address (no P.O. boxes).
4. This giveaway closes at 6:00pm Central Time on Friday, November 4th.
5. The Complete Package will randomly draw one winner from all entries.
6. The winner will be notified by e-mail. If they do not respond within 24 hours, a new winner will be drawn. (Please don’t make me do that!)
7. Once I have a confirmed winner, I will post an announcement on the blog.

The disclaimer portion of this post: All prizes were purchased by me (aka NanaBread) with my own cash money. No portion of this giveaway was donated or sponsored in any way. I’m just a girl, standing in front of a pile of cute kitchen stuff, asking you to love it. And if you’re the first to name that convoluted movie quote reference, I’ll give you a second entry. Good luck to all who enter!

27 Comments

Filed under Miscellaneous Thoughts, Things I Love

A Box of Love from the Cherry Republic

Cherry goodness from Comfortably Domestic Blog and http://www.cherryrepublic.com

Michigan is the Cherry Republic. I hate to admit it, but I didn’t know cherries were grown in Michigan. Don’t boo and hiss, Michiganders (Michiganians?). I’m deeply rooted in southern Texas. We grow tropical fruits and pecans down here. That’s puh-CAHNS. I love cherries, I just wasn’t really aware of where they’re grown. I once saw a cherry tree in northern Montana, and I was awe-struck. But then my blogging friend Kirsten over at Comfortably Domestic mentioned Michigan cherries and I was intrigued. When she held a giveaway contest featuring a box of goodies from The Cherry Republic, I took my chances and entered. When I actually won and received a box of organic cherry chipotle salsa, a bag of dried cherries with mixed nuts, and a bag of dark chocolate covered dried cherries, my mind was totally blown. Not only am I now aware of Michigan’s glorious cherries, but I am a fan. A big fan. Huge. Fan. These are by far the best chocolate covered cherries I’ve ever eaten, and you guys know how I love dark chocolate. I can’t stop eating them, and I can’t thank Kirsten and the good folks at Cherry Republic enough for this fabulous gift box, but I can share their websites and encourage you to visit. I’m not sure about Mother’s Day shipping, but you can certainly check it out. What mom wouldn’t love a gift of Michigan cherries? And then there’s Memorial Day. And the Fourth of July. And Labor Day. And Halloween. Or Thanksgiving. Cherries at Christmas would be divine. Are cherries considered “lucky” on New Year’s? Don’t forget birthdays! I’m pretty sure the gift for a 29th wedding anniversary is Michigan cherries. Honey? Did you hear me?

You can buy fabulous cherry products at: http://www.cherryrepublic.com/

You can visit the lovely Kirsten’s blog at: http://comfortablydomestic.com/

15 Comments

Filed under Food & Recipes

Coffee Giveaway Winner Selected!

The Complete Package has randomly selected one name from a bowl, and the winner is comment #3: Cyndi – “I LOVE coffee!!!! and your blog :)” Congratulations, Cyndi. Please check your e-mail for further instructions on claiming your Lola Savannah Coffee samples. I’d love to hear what you think of the coffee, especially “Lunch with Elvis”, once you’ve tried it! Thanks for reading the blog and for participating in the giveaway. Enjoy your coffee! -NB

Congratulations, Cyndi. Here's what you've won!

1 Comment

Filed under "Buy Local" Spotlights