Tag Archives: Peanut Butter & Co

Honey Oat PB Cinnamon Swirl Bread

Honey Oat PB Swirl Bread - Sliced

Warm cinnamon-scented carbs… is there anything better?

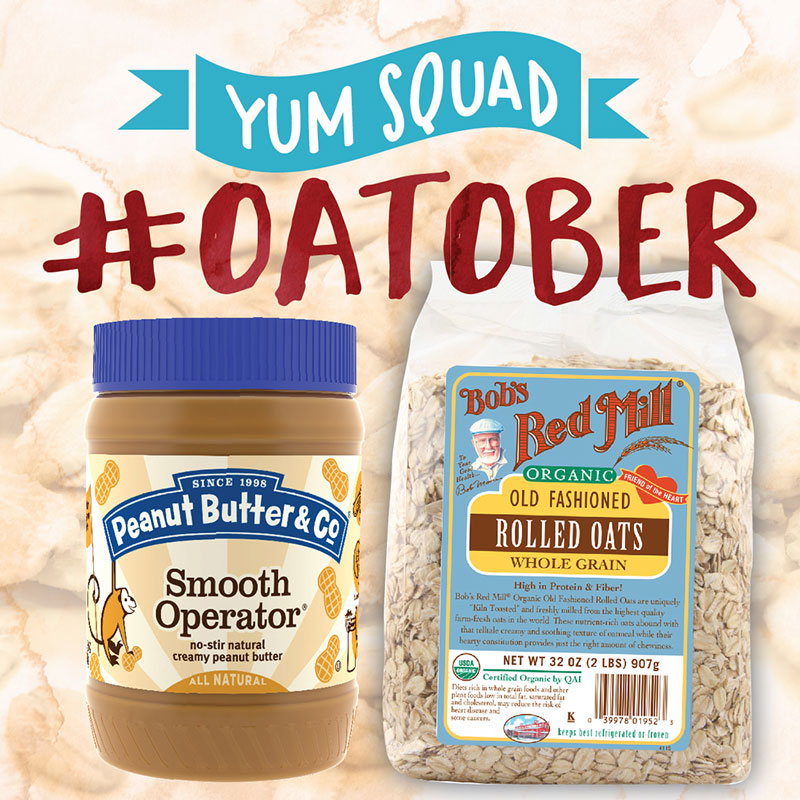
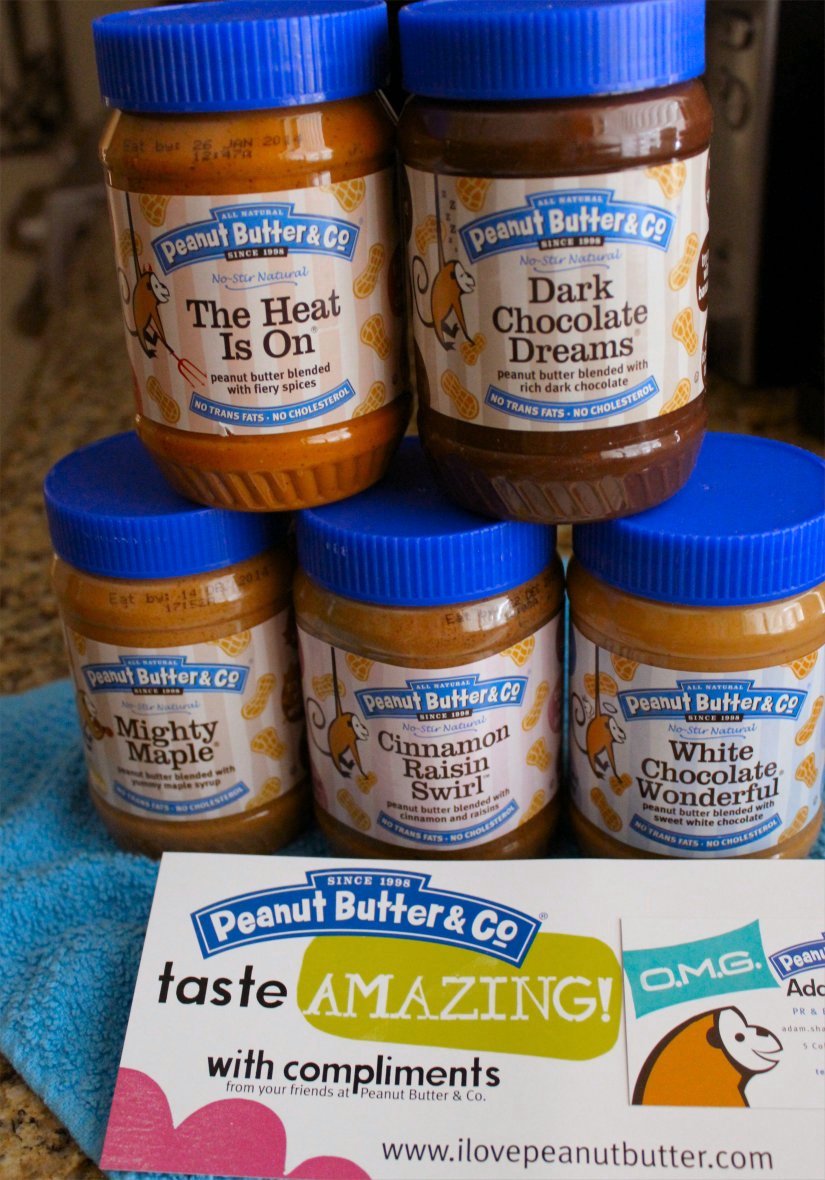
I finally got back into the kitchen this week and baked up a recipe for my friends at Peanut Butter & Co. This time, they challenged Yum Squad members to see what we could come up with given any two jars of their peanut butter and a bag of Bob’s Red Mill old-fashioned oats. Two of my favorite things. My first instinct was a cookie, but I made a pledge to overcome my fear of killing yeast doughs by facing them head-on, so I tackled a sticky, yummy yeast bread with a cinnamon raisin peanut butter swirl.

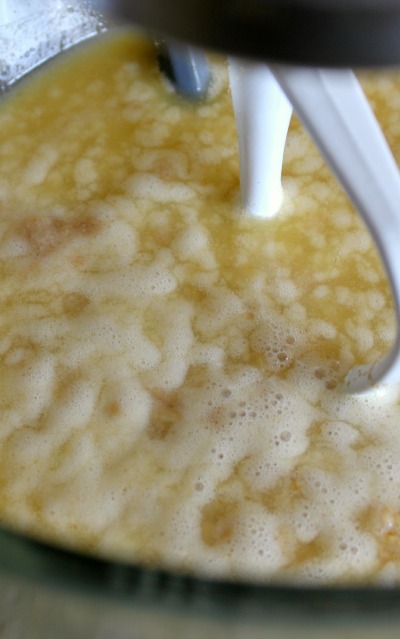
I decided to use oatmeal in the dough, so I started by heating milk, water, salt, honey, butter and oats on the stove. The oats are not really cooked, just softened.

Plumped & Softened Oats - PB Swirl Bread

Once the milk & oats mixture was cooled, I added the yeast and let it sit until it was foamy and fragrant. When yeast blooms, it is fabulous to see and smell.

Growing Yeast - PB Swirl Bread

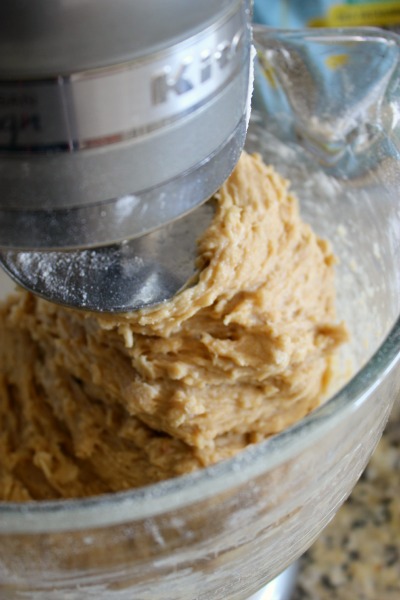
Once we had a full-blown yeast party, I blended in the eggs and added bread flour with a secret twist – Peanut Butter & Co. powdered peanut butter. I used their chocolate version. If you’ve ever wondered if you can toss powdered peanut butter into baked goods, the answer is yes! Just 3 tablespoons sifted into the flour added the perfect hint of peanut butter flavor to compliment the filling.
Do you have to use it? No. But if you can, do.

Liquids with eggs & PB flour added - PB Swirl Bread

Dough is ready! - PB Swirl Bread

Finished Dough ready to rise - PB Swirl Bread

Once the dough was mixed, I covered it in plastic wrap and a towel and let it nap in a sunny window. When it was doubled in bulk, I divided the dough into two equal rectangles, smeared half a jar of cinnamon raisin swirl peanut butter over each, sprinkled them generously with a raw sugar and ground cinnamon mixture and rolled them cinnamon roll style.

Divide & Roll - PB Swirl Bread

Cinnamon Raisin PB Layer - PB Swirl Bread

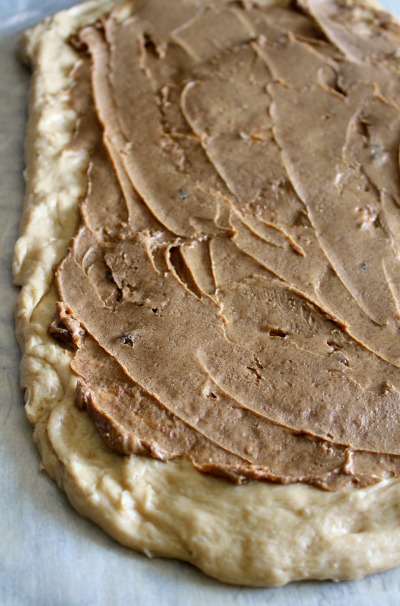
Look at that gorgeous cinnamon raisin swirl peanut butter layer. I could almost eat it just like this. Next, sprinkle with raw sugar and cinnamon.

Cinnamon Sugar Sprinkle - PB Swirl Bread

Instead of individual rolls, I dropped them into buttered loaf pans and let them rise again. All I could think was “slice it, butter it, and toast it on a griddle” so I went with loaves. Two gorgeous, pillowy loaves. I wish you could smell them.

Rolled & In The Pans - PB Swirl Bread

Finally, just before I popped them in the oven, I rubbed on a little softened butter, sprinkled on some additional oats (oh, how I love these oats!) and finished with a drizzle of local honey. Just because.

Dressed & Ready to Bake - PB Swirl Bread

Now, I know what you’re thinking. ‘Yeast breads are hard. Yeast is too easy to kill. Yeast bread recipes take too long to make.’ I feel ya’ and I was with you until very recently. The truth is, yeast breads DO take longer to make due to all that rising, but don’t be fooled – they are EASY to make. I swear it.

NanaBread’s Honey Oat PB Swirl Bread:
(makes two 10″ loaves)

1 cup milk (I used 2%)
1 cup water
1/2 teaspoon salt
1/2 cup honey
1/4 cup raw sugar (or brown sugar)
1 cup Bob’s Red Mill old-fashioned oats, uncooked
1/2 cup (1 stick) unsalted butter
3 of those little foil envelopes of rapid-rise yeast
4 whole eggs, at room temperature
3 tablespoons Peanut Butter & Co PB powder (optional)
4 to 4 1/2 cups bread flour
1 jar (16 ozs.) Peanut Butter & Co cinnamon raisin swirl PB
1/2 cup raw sugar + 1 tablespoon ground cinnamon, blended

Topping:
1/2 stick of butter, softened to room temperature
2-3 tablespoons Bob’s Red Mill oats
2-3 tablespoons local honey

In a small saucepan, combine the milk, water, salt, honey & raw sugar. Cook over medium-low heat, stirring often to keep the honey from burning, until the mixture begins to bubble and foam around the edges. Add the old-fashioned oats and continue to cook for 2-3 minutes. Give them a stir, remove from the heat, and add the stick of butter. Allow this mixture to cool to 110F.

While the liquids are cooling, sift two cups of flour with the peanut butter powder and set it aside. Measure an additional 2 1/2 cups of flour and have it standing by.

When the milk and oat mixture is cooled to 110F, add the yeast and allow it to sit for at least 10-15 minutes, or until the mixture is bubbly and frothy. With your paddle attachment on and your mixer at low speed, blend in all four eggs.

Start adding the flour with the powdered peanut butter first, about 1/2 cup at a time, until almost blended. Switch to the bread hook attachment and start adding additional flour until the dough is thick but not dry and tries to climb over the top of your dough hook. I used 4 1/2 cups total, but you may need more or less.

Once blended, stop the mixer and scrape down the sides of the mixer and dough hook. Place the dough in a buttered or oiled bowl, cover with plastic wrap and a kitchen towel, and set it in a sunny window to rise.

When doubled in bulk, divide the dough into two equal portions. On a piece of buttered parchment paper, shape each half of the dough into a rectangle as wide as your loaf pan. Spread on half the jar of peanut butter, working it out close to the edges. Sprinkle with half the raw sugar & cinnamon mixture, then roll like a jelly roll and place into your buttered loaf pans. Cover with plastic wrap and allow them to rise until doubled again.

Pre-heat your oven to 350F. Rub the top of each loaf with softened butter, then sprinkle with oats and drizzle with honey. Place the loaf pans on a parchment-covered baking sheet (in case of spillage during baking) and bake for 15 minutes uncovered. After 15 minutes, tent the loaves with foil and bake an additional 15-20 minutes, or until the loaves are risen, browned and make a hollow thump noise when you tap them. Remove from the oven and cool in the pans for 20 minutes, then turn out onto cooling racks to finish cooling (at least one hour).

I’m embarrassed to admit I avoided yeast dough for too long. So if you like hot buttered carbs as much as I love hot buttered carbs, promise you’ll tackle a yeast bread soon. Today, maybe. You can do it. I believe in you.

Honey Oat PB Swirl Bread - CloseUp

Note: As a member of the Peanut Butter & Co Yum Squad, I am occasionally given jars of peanut butter (and sometimes additional products like the Bob’s Red Mill old-fashioned oats in this recipe) to play with. What I choose to do with them is up to me. I am not compensated for the recipes or the posts.
If I like it, I share it. It’s just that simple.

YumSquad-Banner-Oatober-02

Advertisement

15 Comments

Filed under Blogger Collaborations, Food & Recipes

The Bee’s Knees Marbled PB Buckeyes

Bees & honey = a perfect pair. Peanut & chocolate = a match made in heaven. Put them together and what do you get? Chocolate peanut butter candy bliss.

Bee's Knees PB Buckeyes - Inside NanaBread's Head

Have you tried Peanut Butter & Co peanut butter yet? It’s The Bee’s Knees – quite literally. Their honey-infused peanut butter is a dream come true for peanut butter lovers like me who’ve been stirring honey into peanut butter since birth, or shortly thereafter. As a child, peanut butter was my go-to snack. Mom could get me to do just about anything for a jar of peanut butter. Hand me a jar and a spoon, and I would fold laundry or mop floors like it was my job. Flash forward to adult me, and I’m still stirring honey into peanut butter for a quick snack. That is until Peanut Butter & Co did it for me with The Bee’s Knees. As a member of the PB&CO Yum Squad, I accepted their challenge to play with my food and create a recipe to show off their Bee’s Knees peanut butter. They sent me two jars to play with (yum and thank you) and here’s what I did.

NanaBread’s Marbled Chocolate & Peanut Butter Buckeyes:
1 cup Bee’s Knees honey peanut butter
1 stick (8 tbsp) unsalted butter, at room temperature
1/2 teaspoon vanilla extract
1/4 teaspoon salt
2 1/2 cups powdered sugar, sifted & divided (see below)
1 cup Bob’s Red Mill almond meal
1/2 cup Hershey’s Special Dark cocoa powder
2 cups (12 ozs) chocolate chips (I used semisweet)
3 tablespoons paraffin (Gulf Wax), grated (optional)
salted, roasted peanuts for garnish

In a stand mixer, combine peanut butter, softened butter, vanilla, salt, 2 cups of the powdered sugar (setting aside 1/2 cup for later) and the almond meal. Blend on low speed until combined, then turn to medium speed and mix for 2 minutes until smooth. The dough should be the texture of soft play dough. Turn the mixture out onto a cutting board or sheet of parchment and divide it in half.

Gently knead the additional 1/2 cup of powdered sugar into half of the candy mixture until combined and smooth. For the other half, gently knead in the 1/2 cup of cocoa powder. Roll the chocolate dough into a square roughly 1/4″ thick. Roll the peanut butter dough into the same size square, then lay it on top of the chocolate square to form two layers of dough. Cut the square in half, forming two rectangles and stack them on top of each other, creating a rectangle four layers deep. Cut the rectangle into 1″ squares. Roll each piece into a ball and set aside on a parchment lined baking sheet. Rolling the dough into balls with your hands will create a pretty marbled effect. Once all the dough is rolled into balls, pop the baking sheet into the freezer so the buckeyes can firm up.

While the candy is chilling, melt the chocolate chips over a double boiler. If you don’t have one, simply place a metal mixing bowl over a saucepan with 3-4″ boiling water over medium heat. Once it starts to melt, whisk the chocolate until smooth. Add the grated paraffin (which helps set the chocolate so it doesn’t melt as easily when you pick it up) and whisk again until smooth. Dip frozen buckeyes into the melted chocolate, covering completely, and set them back onto the parchment lined baking sheet. Once dipped, place them in the refrigerator to firm up. Scrape the remaining melted chocolate into a plastic zip-style food bag and twist it to work the chocolate into one corner of the bag.

To garnish, snip the tip off the corner of the bag and pipe a spiral of melted chocolate on top of each buckeye. Top with a salted roasted peanut, and pop the sheet back into the fridge to set. Finished buckeyes should be stored in an air-tight container in the refrigerator, and should keep for up to one month.

Bee's Knees PB BonBons - CloseUp of Cut Candy

Besides being fabulously sweet & slightly salty, these peanut butter buckeyes are fun to make. I always tell people I love to play with my food, so I think my favorite part of this recipe was playing with the dough to make these candy bees (8 in all). As I said, the candy mixture is the texture of play dough, and I couldn’t resist. I also couldn’t stop giggling over them and the personality they had.

Bee's Knees PB BonBons - Bee CloseUp

I’m still playing with my Bee’s Knees peanut butter. My attempt at chocolate chip pancakes wasn’t a complete failure, but wasn’t what I’d hoped for. What did work was the peanut butter & honey topping. To make, combine 2 tablespoons of Bee’s Knees peanut butter with 2 tablespoons of unsalted butter, and microwave for 30-45 seconds until it is melted. Add 4 tablespoons of your favorite honey and whisk until smooth. Pour over your favorite pancake recipe and voilà! It’s a great way to enjoy that fabulous peanut butter & honey combo and add a little protein to your breakfast routine. It’s so good! If you don’t believe me, ask these guys.

Oops… looks like that little guy might not have gotten any. {burp!}

Bee's Knees Bees & Pancakes Collage - Inside NanaBread's Head

NOTE: As a member of Peanut Butter & Company’s Yum Squad, I am occasionally sent jars of peanut butter and/or peanut butter products to play with. No further compensation is received, and all opinions are my own.

PB&Co Bee's Knees Peanut Butter

9 Comments

Filed under Blogger Collaborations, Food & Recipes

31 Days of Dark Chocolate Peanut Butter? Let’s make that 32.

Dark Chocolate Dreams PB Cookies & Salted Caramel Ice Cream Sandwiches

Dark Chocolate Dreams Peanut Butter. It’s the stuff dreams are truly made of, especially if you love chocolate and peanut butter like I do. Peanut Butter & Co makes one that blows my skirt up every single time I crack the lid. I’ll eat it on anything – crackers, toast, bagels, cake, waffles, a spoon, or even my finger. (Hi. My name is Jeanne, and I’ve been a peanut butter addict since forever.)

Keep reading all the way to the bottom, people. This is going to get good!

Dark Chocolate Dreams Peanut Butter Close-Up

Oh, baby. This is the good stuff. It’s my super-duper favorite. For real.

Dark Chocolate Dreams Peanut Butter - One Glorious Spoonful

This week Peanut Butter & Co released a new cookbook titled 31 Days of Dark Chocolate Dreams‘. As a newly minted member of Peanut Butter & Co’s Yum Squad, I was thrilled to receive an advanced copy as well as a 28-ounce jar of Dark Chocolate Dreams to play with. Man, I love these guys. Great company, great products, and always such fun to work with. (Hi, Adam!)

Dark Chocolate Dreams Box - Instagram

The cookbook is amazing. As I flipped through it, I kept squealing “Oooo! I’ll make that! I’ll make THAT, too!” So many drool-worthy recipes to choose from. I’m seriously thinking of trying the dark chocolate peanut butter flourless cake first. Then maybe the marble pound cake. Or maybe ALL OF THEM.

First, though, I jumped in to make a batch of my new favorite peanut butter cookies. They’re made with coconut oil instead of butter (I know… I know… I love butter, too) but the coconut oil adds great flavor and I love the texture of these. Even better, you can stuff them with Häagen-Dazs Salted Caramel Gelato and BAM! – ice cream sandwiches to die for. Let’s start with the cookies first.

Dark Chocolate Dreams PB & Coconut Oil Cookies - Ingredients

Dark Chocolate Dreams Peanut Butter & Coconut Oil Cookies
(Original recipe credit to AverieCooks.com)

3/4 cup Dark Chocolate Dreams Peanut Butter
1/2 cup organic coconut oil, softened to room temp
1 cup light brown sugar, packed
1 jumbo or large egg
1 tablespoon pure vanilla extract
1 cup + 1 tablespoon all-purpose flour
2 teaspoons cornstarch
1 teaspoon baking soda
1/4 teaspoon salt

Pre-heat your oven to 350F. Make sure your coconut oil is softened to the consistency of softened butter (I had to microwave mine for 12 seconds). It sounds insignificant, but making sure your coconut oil is not too firm or too melted is key to the texture of these cookies. When you’re there, combine the peanut butter and coconut oil and beat for 3-4 minutes with an electric mixer. Scrape down the sides of the bowl, add the vanilla extract, and beat for 30 seconds more.

Stop the mixer and again scrape down the sides of the bowl. In a small mixing bowl, combine the flour, cornstarch & baking soda and whisk to combine. Add the flour in one batch to the peanut butter mixture, then on LOW speed, mix until flour is starting to incorporate and then turn the speed up to medium and beat just until the flour mixture is well combined and the dough starts to pull away from the sides of the bowl. It should look like this:

Dark Chocolate Dreams PB Cookie Dough - Perfect Consistency

If the mixture is too dry and crumbles easily, add a little more coconut oil and beat it again. If it seems too sticky and doesn’t easily form into a ball, add more flour – 1 to 2 tablespoons at a time – until your dough is the consistency of a new can of Play Dough. When it’s ready, grab a medium ice cream or cookie scoop and your baking sheets. I recommend using silicone baking mats for most baking projects. They guarantee your hard work won’t stick to the pan, causing violent bouts of cursing or childish hissy fits (or so I’ve heard).

Dark Chocolate Dreams PB Cookie Dough - Perfect Scoop

That, my friends, is a perfect scoop. To get it, I simply drag the scoop through the dough then scrape it up the side of the bowl as I remove it. See how the dough presses perfectly into the scoop? That’s when you know it’s the right consistency. Scoop onto lined baking sheets, 2″ apart so you can press them.

Dark Chocolate Dreams PB Cookies - Perfect Scoops

Note: if you don’t want to press these cookies flat for ice cream sandwiches, you can leave them like they appear in the above photo. They will take 2-3 minutes longer to bake, but result in a thicker, brownie-like cookie. For ice cream sandwiches, I pressed them with the bottom of an old glass candy dish.

Dark Chocolate Dreams PB Cookies - Pressed

I love the pattern this makes in the cookies. If you don’t have a fancy cookie press, I highly recommend flipping over old decorative bowls or glasses. If there’s a great pattern in the bottom, it can be used as a cookie press. Be adventurous and try it!

Bake at 350F for 9-10 minutes. Remove from the oven and allow the cookies to cool completely before removing them from the pans. Because I was making ice cream sandwiches with mine, I let the cookies cool completely on the pan, then popped the entire pan in the freezer to make sure they were super cold.

Dark Chocolate Dreams PB Cookies & Salted Caramel Ice Cream Sandwiches - Close-Up

For ice cream sandwiches:
Grab a pint of your favorite ice cream or gelato and let it sit out on the counter until it starts to get nice and soft (about 5 mins). I happened to have a pint of Häagen-Dazs Salted Caramel Gelato in my freezer (lucky girl!), but Ben & Jerry’s Cherry Garcia or Coffee Coffee Buzz Buzz Buzz, or any flavor you love will work.

Dark Chocolate Dreams PB Cookies - When the Magic Happens

Using the same scoop I used for the cookie dough, I placed a row of cookies ‘bottoms up’ on my tray, then placed a scoop of softened gelato in the center of each. With a flat metal spatula, aka pancake flipper, I flattened each scoop of gelato into a smooth, even layer.

Dark Chocolate Dreams PB Cookies - Topped with Gelato

Top with a second cookie and immediately wrap in plastic wrap. Pop them back into the freezer for at least 2-3 hours, or until they are frozen solid. To eat, just unwrap and dig in. If you plan to nibble them one at a time, place the wrapped ice cream sandwiches into an airtight container with a tight-fitting lid. They should keep for at least 4 weeks in your freezer. This recipe makes 16 individual cookies approximately 3″ in diameter, or 8 ice cream sandwiches.

Of course, you can also use a small cookie scoop and make these more bite-size for portion control. Or you can double the recipe and keep the baked cookies in the freezer in an air-tight container so you can enjoy them plain or build ice cream sandwiches on demand. Or just eat the cookies and wash them down with a glass of milk. That works, too. But I recommend the ice cream sandwiches. Because more is more, or something like that.

Dark Chocolate Dreams PB Cookies & Salted Caramel Ice Cream Sandwiches - Stacks & Jar

Now for the best part of this post – Peanut Butter & Co has generously offered to ship a copy of ’31 Days of Dark Chocolate Dreams’ and a 28-ounce jar of Dark Chocolate Dreams peanut butter to one lucky reader. To participate, simply leave a comment. It could be “I love peanut butter!” or “Peanut Butter & Co is awesome!” or even “I’m a cookbook hoarder.” One reader will be chosen at random, and Peanut Butter & Co will ship this tasty prize pack directly to their door. The deadline for this drawing is Friday, February 7th at 12:00 midnight, Central Standard Time, so jump on it now. Right now! What are you waiting for?!

Dark Chocolate Dreams Cookbook

If you don’t win or can’t wait to get your hands on the cookbook, you can purchase it online by clicking HERE, along with other Peanut Butter & Co goodies and peanut butter products. The Cinnamon Raisin Swirl blows my mind and Mighty Maple is both creamy and dreamy.

Disclaimer: This is not a paid post. Peanut Butter & Co sent me an advanced copy of the cookbook and a jar of peanut butter to play with, as stated above. I am a member of their Yum Squad, which is also unpaid. Put simply, I love their products, and they have occasionally sent me peanut butter to experiment with. For example, check out my ‘The Heat is On’ Spicy Peanut Butter Shortbread Cookies made with their spicy chili-laced peanut butter. As always, all opinions are my own and are not influenced in any way by the company. I just love the quality of their stuff, and enjoy sharing that joy with you.

UPDATE: Congratulations to Linda (comment #4), winner of the Peanut Butter & Co prize pack giveaway. Thanks to all who participated, and high five to Linda. You’re going to love the cookbook AND the peanut butter! -jeanne

52 Comments

Filed under Food & Recipes, Things I Love

“The Heat is On” Spicy PB Shortbreads

Heat Is On PB Shortbreads -Title Shot

I love peanut butter. This one time, in high school, a friend’s dad got me to run 5 miles for a giant jar of it on a dare. It was 1980, and there was a peanut butter shortage. I did what I had to do.

Fast forward to June of this year, when I attended the BlogHerFood conference in Austin. I had the best time and met so many fabulous food bloggers, but I was also fortunate to meet some really nice people from companies represented at the event like Adam Shapiro from Peanut Butter & Co.

Adam & I sat at the same breakfast table the first morning of the conference, but didn’t get a chance to talk. Later that weekend, I bumped into him again and got a chance to strike up a conversation and share how much I love their peanut butter (most especially their Dark Chocolate Dreams – it’s sin in a jar). Adam asked if I’d heard about their new flavor – The Heat is On. It’s a crazy blend of peanut butter and spicy chilies.

When I say crazy, I mean crazy genius. We talked about the standard things that came to mind, like using it in a peanut satay or in a dipping sauce for egg rolls or dumplings. But as we were talking, I kept thinking about what it would be like in a cookie. Specifically, a peanut butter shortbread cookie dipped in chocolate.

Adam was intrigued by the idea. Enough so that he offered to send me some peanut butter to play with. This was truly one of the greatest and most unexpected pleasures of attending my first food blogging conference – connecting with fascinating people you’d never have a chance to meet otherwise and sharing a passion for food. True to his word, here’s what Adam sent:

PB&Co Box

Not just one jar, but an entire box of various Peanut Butter & Co flavors. I was simultaneously stunned and thrilled. He even included a jar of the Dark Chocolate Dreams. What a guy! Lilly Bug (our granddaughter) immediately fell in love with the dark chocolate peanut butter. She’s a girl after her Nana’s heart. Jonah Bear (our grandson) loved the maple. He’s a pancake kind of dude, so that’s not really surprising. Personally, I went into that jar of Cinnamon Raisin Swirl with a spoon and almost didn’t come back out. I’m officially obsessed with it.

PB&Co The Heat is On

But this spicy The Heat is On is what inspired these cookies. This richly roasted peanut butter combined with a spicy blend of heat is as bold as it is fun. It’s just spicy enough to feel the burn spread across your palate, but not so spicy you’re running for a glass of water. It’s a party in a jar, and now it’s a party in a cookie. And all because I stepped out of my comfort zone and initiated a conversation with a super guy who just happened to work for a peanut butter company that I love.

The Heat is On Peanut Butter Shortbreads – for Adam
3/4 cup (1 1/2 sticks) unsalted butter, softened
1/4 cup ‘The Heat is On’ spicy peanut butter
1/4 cup plain crunchy peanut butter
1/2 cup brown sugar, packed
2 tablespoons honey or agave nectar
1/2 teaspoon pure vanilla extract
2 1/3 cups all-purpose flour
1/4 teaspoon table salt

In a large mixing bowl, combine the butter and peanut butter, beating with an electric mixer until well blended. Add the brown sugar, honey or agave nectar and vanilla extract, beating until combined. Sift together the flour and salt and add it slowly to the butter mixture, beating until the flour is fully absorbed.

Heat Is On PB Shortbreads - Pressed with a Glass

To press with a glass for a decorative cookie:
Scoop enough dough into the palm of your hand to form a ball roughly the size of a golf ball. Line a cookie sheet with a Silpat baking mat or parchment paper. Space the balls of cookie dough about 2″ apart and press with the bottom of a decorative glass. If the glass tries to stick to the dough, dip it in granulated sugar.

Heat Is On PB Shortbreads - Slice & Bake style

To use the slice & bake method:
Shape the cookie dough into a log and roll in plastic wrap, twisting the ends to seal them shut. Refrigerate at least one hour, then unwrap and slice into 1/4″ slices. Place the cookies 1″ apart on a lined cookie sheet.

To bake:
Pre-heat your oven to 275F. Place your oven rack in the middle portion of the oven, and bake the cookies for 40 minutes. Remember – everyone’s oven is different and some run hotter than others. Start checking the cookies at 30 minutes. If you gently press the center of the cookie and it gives a little, let them stay in a few minutes longer. I baked mine for exactly 40 minutes.

Remove from the oven and allow them to cool on the baking sheets until completely cooled. Store in an airtight container for up to one week. If you want to kick it up a notch, consider dipping them in chocolate. I did. #NoRegrets.

Heat Is On PB Shortbreads - Dipped Close-Up

To dip in chocolate:
I let the cookies cool overnight to make sure they were completely cooled. Next, combine 1/2 cup dark chocolate chips with 3/4 cup milk chocolate chips and set them over a double-boiler to melt. Once melted, whisk until the chocolate mixture is perfectly smooth, with no lumps. Scrape the chocolate into a small glass or ramekin and dip each cookie individually, placing them on waxed paper to set.

Heat Is On PB Shortbreads - Drizzed in Chocolate

In a rush? You can scrape the melted chocolate into a zippered plastic food storage bag, press it all down to one corner of the bag, and snip the corner off. Using a quick back & forth method, drizzle the cookies until all are decorated. Then squeeze some into your mouth for good measure, and throw away the used bag. After that, it’s just a matter of waiting for the chocolate to set up, if you can wait that long. I’ve never been good at waiting, especially with cookies.

Heat Is On PB Shortbreads - Final Close-Up

Tip: If you live in a warm, humid climate like I do (hello, Houston), spread your waxed paper onto a cookie sheet before you dip or drizzle your cookies with chocolate. Once done, you can pop the entire pan into the fridge for 30 minutes or the freezer for 10 minutes to help the chocolate firm up.

Note: This recipe is adapted from a shortbread recipe at Living Tastefully. This post is not sponsored by Peanut Butter & Co. As stated above, the company provided me with a box of product to sample. All opinions (and drooling) are my own. Special thanks to Adam Shapiro of Peanut Butter & Co for his generosity.

29 Comments

Filed under Food & Recipes, Things I Love