Tag Archives: fall baking

Caramel Pear Crumb Bars for a Cure

Caramel Pear Crumb Bars - OXO Cookies for Kids Cancer 2015

Each year, OXO does the most wonderful thing – they donate a great deal of money to Cookies for Kids Cancer. And each year, they invite bloggers to bake for the cause by donating $100 for every original recipe created and posted using OXO products and cookies for the cure. This year, bloggers were offered an opportunity to receive one of three baking sets: cookies, brownies or cupcakes. I applied for the brownie set and was thrilled to learn I was selected. Once I learned it was in the mail, all I could think of was caramel pear or apple blondies. Day and night, night and day, I dreamed of caramel and fruit and crumbs.

OXO Brownie Set Collage

The OXO Brownie Set Included:
OXO Non-Stick Pro 9×13 Cake Pan
OXO Brownie Spatula
OXO Baker’s Dusting Wand

The non-stick pro baking pan is amazing. It’s 13″ by 9″ and super sturdy, with double wall construction for extra insulation and a cool diamond pattern textured bottom for extra browning surface which paired really well with the copious quantities of butter and brown sugar in these caramel pear crumb bars. Have you seen the new gold-tone iPhone6? It’s got nothing on this sexy pan.
I’m sure you can tell where my priorities lie. (with the cookies)

Caramel Pear Crumb Bars - OXO 13x9 Pan

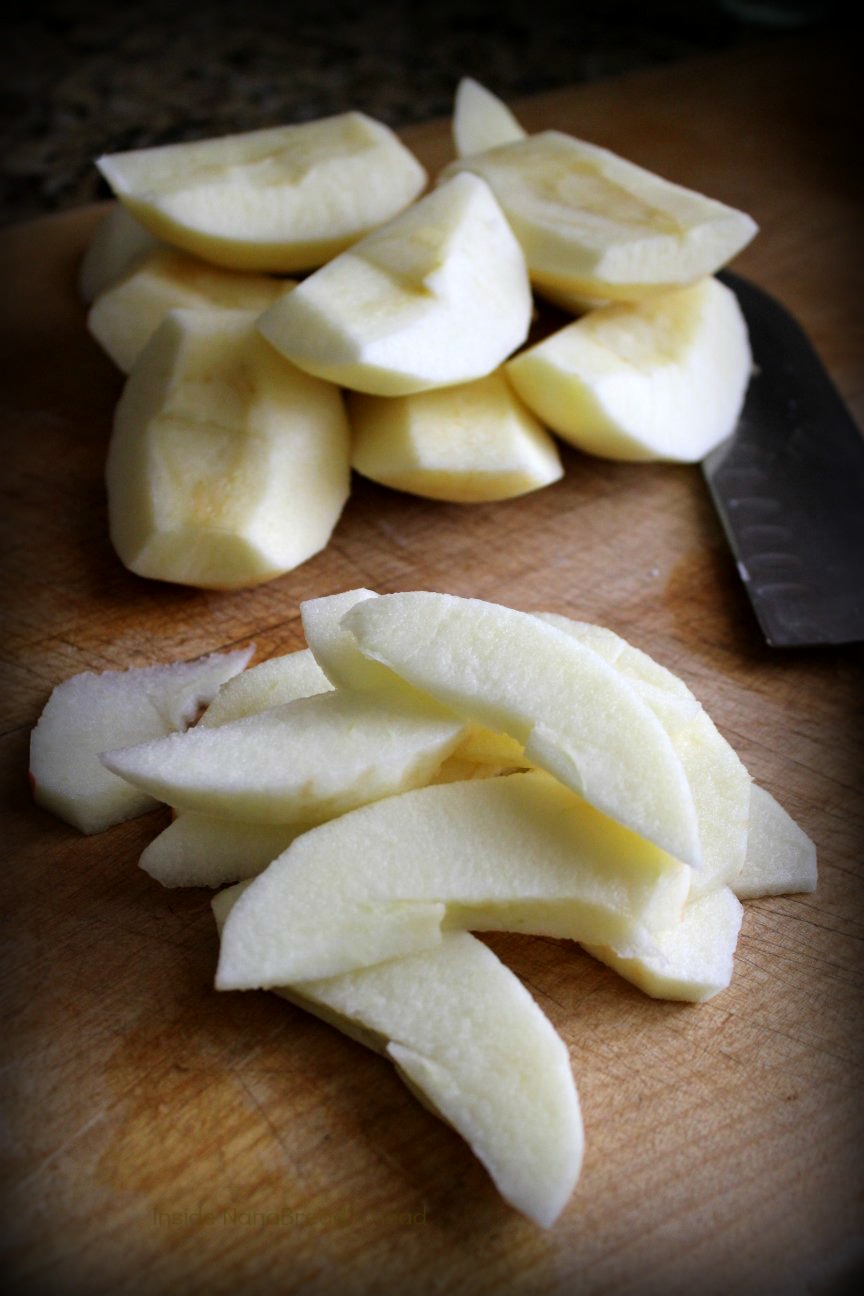
But let’s get to those sweet bars before the drool shorts out your keyboard. They actually started with another of my favorite OXO kitchen tools – the mandolin.
I used it to shave a big, fat, juicy pear into even slices.

Caramel Pear Crumb Bars - OXO Mandolin

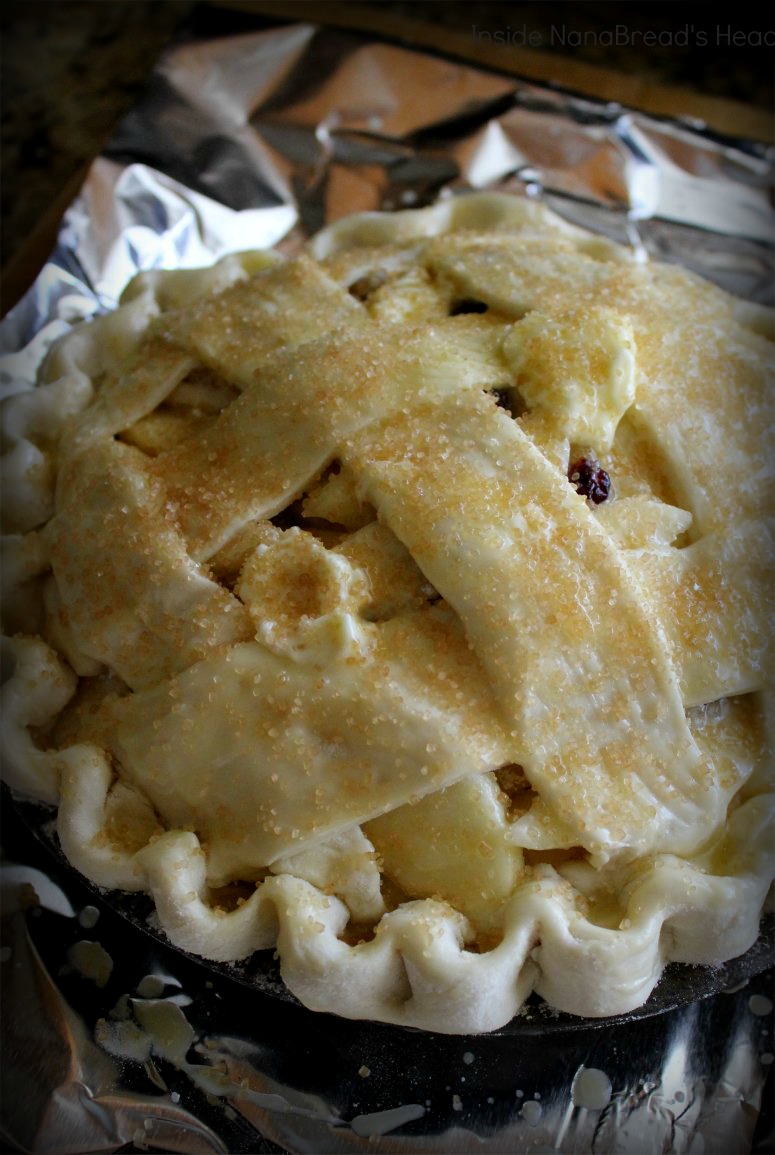
From there, I lined that pretty pan with parchment paper and gave it a light spritz of baking spray. The dough for these bars comes together quickly in a food processor, so it only takes a few pulses until your pressing it into a pan. Oh, how I love easy. Just press the shortbread base into the pan, then top with sliced pears (or apples), drizzle with half a jar of caramel (yes, half a jar) and dot with the crumb topping like this.

Caramel Pear Crumb Bars - OXO - Ready for the Oven

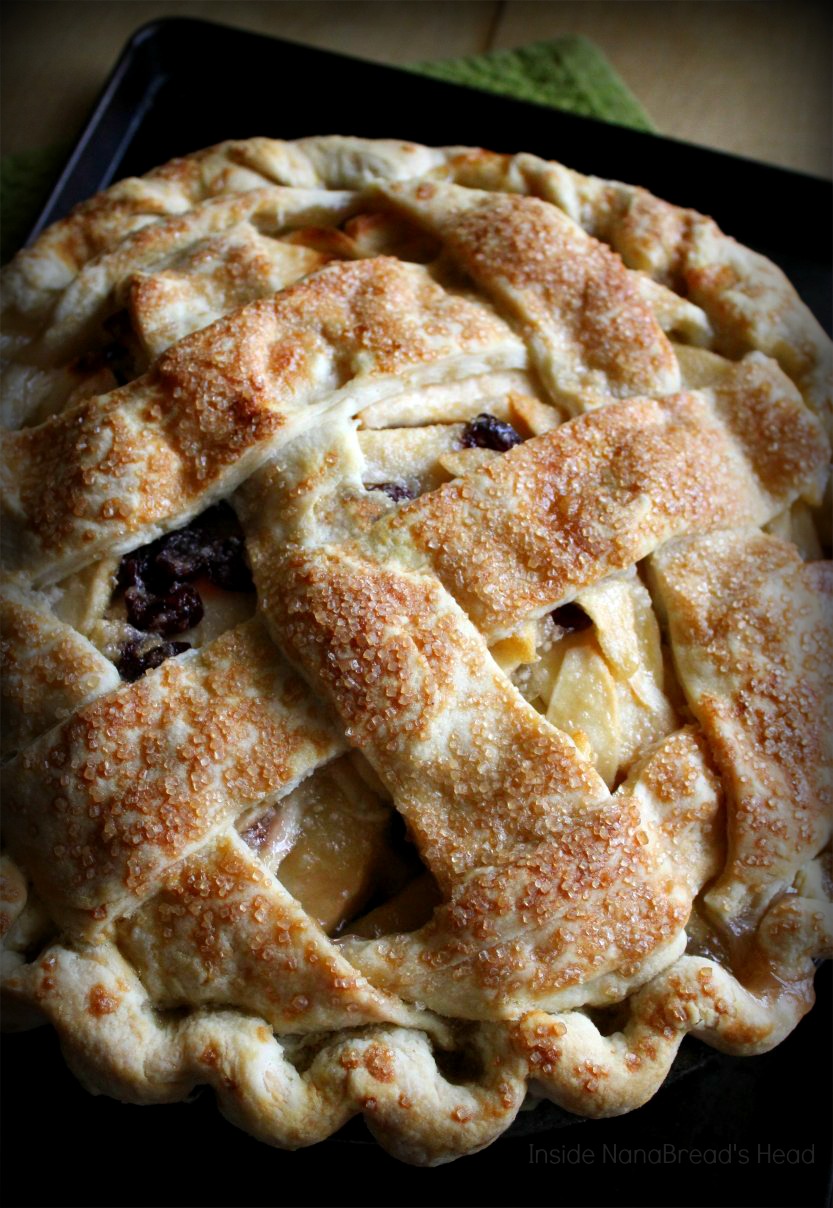
Once they’re baked to a gorgeous golden brown and your neighbors are clawing to get in because they smell so amazing, pull them out and let them cool.

Caramel Pear Bars - Ready to Serve

When they’re mostly cool but still a little warm and gooey, drizzle them with more caramel. YES, MORE CARAMEL! I love this thick goat’s milk cajeta.

Caramel Pear Crumb Bars - Cajeta from HEB

Using this slick OXO Brownie Spatula made serving a breeze. It has a beveled edge that cuts the bars as well as serves them. I’ve said it a million times, but I’ll say it again – I love OXO’s devotion to smart design.

Caramel Pear Bars - OXO Server

Mmm… I wish you could smell the butter, brown sugar, pears and caramel. If I could bottle this as a cologne, I’d be filthy rich. To serve these, I mixed cinnamon with powdered sugar and sifted it like fresh fallen snow over those glorious craggy crumbs. Have mercy.

Caramel Pear Crumb Bars - OXO Sifter - Cinnamon Powdered Sugar

That little sifting wand is nifty. Twist the handle to open; twist to close; shake. It’s a lot of fun. And versatile. It also doubles as a tea infuser. Fill with loose leaf tea, twist to close, and dunk it in your mug. Hey… a cup of tea would be perfect with these bars! (heh heh…see what I did there?)

NanaBread’s Caramel Pear Crumb Bars
(makes one 13″ x 9″ pan or 12 large bars)

Shortbread Base:
1 cup unsalted butter, at room temp
2/3 cup dark brown sugar, firmly packed
1/2 teaspoon salt
1 teaspoon vanilla extract
1 1/2 teaspoons ground cinnamon
2 cups all-purpose flour

Fruit Layer:
1-2 large pears (or apples), peeled & thinly sliced or chopped
1 tablespoon granulated sugar
1/2 teaspoon ground cinnamon

Topping:
1 cup all-purpose flour
1 stick of cold butter, diced
1/4 cup brown sugar, packed
Pinch of salt
4-5 tablespoons buttermilk (or regular milk)
One jar (10 ozs.) of your favorite caramel, cajeta or dulce de leche
3 tablespoons powdered sugar + 1/2 teaspoon cinnamon (optional)

Pre-heat the oven to 350F. Line a 9” x 13” baking pan with parchment, then coat lightly with baking spray.

In a food processor, add the butter, brown sugar, salt, vanilla, cinnamon and flour for the shortbread cookie base. Pulse until it forms large crumbs that press together well. Press the crumbs into the pan in an even layer.

Slice or chop the pears or apples into even pieces and toss or sprinkle with the sugar and cinnamon for the fruit layer. Spread evenly across the top of the cookie base. Drizzle with half the jar of caramel sauce.

In the food processor, combine the topping ingredients and pulse until it forms a thick dough. Pinch into marble-size chunks and scatter them over the fruit.

Bake for 35 minutes, until the top starts to brown around the edges and you can see the caramel bubbling. Cool until barely warm to the touch before drizzling with additional caramel. Just before serving, dust with powdered sugar and cinnamon (optional).

Caramel Pear Crumb Bars - OXO Cookies for Kids Cancer Recipe

Not pictured but also fabulous – serving these warm with vanilla ice cream.

And now, a word from our sponsor. Just kidding, but this bears mentioning.

– Cookies for Kids’ Cancer is a recognized 501c(3) public charity duly incorporated under the laws of the state of New Jersey. Your donations are tax-deductible to the fullest extent allowable by law. 100% of proceeds raised by Cookies for Kids’ Cancer fund pediatric cancer research.
– OXO will be donating $100 to Cookies for Kids’ Cancer for each blog post dedicated to this campaign in October (up to our $100,000 commitment*.)
– *In 2015, OXO will donate up to $100,000 to Cookies for Kids’ Cancer through product proceeds, bake sale matches and other fundraising efforts

Cookies for Kids Cancer Logo

Special thanks to OXO and their Blogger Outreach Program. This post is not a paid advertisement. I am not compensated for this recipe or blog post, but did receive the Brownie Baking Set at no charge to play with. All opinions are my own, and my opinion is that I will never stop loving OXO and their remarkable products. OXO rocks.

To learn more about the OXO Bloggers Outreach Program, OXO Blogger Outreach Program.
To learn more about Cookies for Kids Cancer and how you can participate, Cookies for Kids Cancer Foundation.

15 Comments

Filed under Blogger Collaborations, Food & Recipes

Simple Apple, Pear & Cranberry Pie

Hello, Fall. I’ve missed you terribly. You didn’t write. You didn’t call.

Apple Pear Cranberry Pie - Inside NanaBread's Head

I love fall fruits, especially apples and pears. Earlier this week, a blogger tweeted that she’d just tried her first SweeTango apple and it blew her mind. She mentioned her favorite apple had always been the honeycrisp, and that’s what caught my attention. Honeycrisps are my favorite apple, too. So my next visit to the grocery store, guess what I looked for? You got it. And was she right? You betcha. Crisp, super sweet and beautifully colored, I’m afraid these are going to become my new apple obsession. They are spectacular. Pie worthy, in fact.

Apple Pear Cranberry Pie - The Fruit

For this pie, I sliced my apples thin and my pears even thinner. I usually like a big chunky apple pie, but for this one, I wanted thin slices piled high and dotted with dried cranberries. The heart wants what the heart wants.

Apple Pear Cranberry Pie - Sliced Fruit

Here’s food for thought… I watched an episode of Cook’s Illustrated on PBS and they used fruit pectin powder to thicken a peach pie. Say what? Now I’ve used pectin for years when canning fruit, but it never occurred to me to bake with it. Makes sense, if you think about it, so I decided to try it with this one. And since I used instant tapioca granules to thicken my peach pie this summer, I wondered what would happen if I did both. For science. Why not, right?

Apple Pear Cranberry Pie Thickeners

Combining apple juice, sugar, instant tapioca, pectin & vanilla extract, I made a slightly thick, gently sweetened, vanilla-kissed filling that paired perfectly with the apples and pears and created a nice balance for the tart cranberries. Once the mixture was thickened, I just poured it over the fruit and tossed it to coat. So quick and simple. The tapioca still looks a little cloudy here, but don’t worry – it’s clear and unrecognizable once it’s baked.

Apple Pear Cranberry Pie - Fruit & Thickeners

After that, it’s just dough, butter, blah blah PIE! Man, how I love pie. But seriously, there’s only one pie dough recipe for me, and it’s Kirsten’s ‘No Excuses Pie Dough’ from ComfortablyDomestic.com. Once you make this one, nothing less will do. I make it in batches, wrap it in plastic, seal it into heavy bags and pop it in the freezer so I can produce pies on a whim. And that’s another reason I love this recipe – Kirsten’s dough freezes beautifully.

Apple Pear Cranberry Pie - Kirsten's Pie Dough

Just thaw, roll on a floured surface, and pop it in a pie tin. And then concentrate on stuffing every last bit of that filling into that shell. Top with a fat, rustic lattice, crimp the edges, brush with melted butter and sprinkle generously with raw sugar crystals. Easy, right?

Apple Pear Cranberry Pie - Ready for Baking

It really is easy. The only hard part is the waiting – for it to come out of the oven when it smells so amazing, for it to thicken and cool, for dinner to end so you can cut it. It’s always the waiting part that gets me.

Apple Pear Cranberry Pie - Warm from the Oven

NanaBread’s Apple, Pear & Cranberry Pie:
1 recipe for Kirsten’s ‘No Excuses’ pie dough
1 1/2 pounds (3 large) SweeTango apples
1 1/2 pounds (3 large) Star Krimson red pears
1/2 to 2/3 cup Craisins dried cranberries (to taste)
1 cup apple juice or apple cider
3 tablespoons quick-cook tapioca granules
1 tablespoon powdered fruit pectin
1/2 to 2/3 cup granulated sugar (to taste)
1/2 teaspoon pure vanilla extract
1/2 stick unsalted butter, melted
2 tablespoons raw sugar granules

Start by making the pie dough and chilling it in the refrigerator for at least 2 hours or the freezer for 30 minutes. While your dough is chilling, prep your fruit and filling.

Peel, core and thinly slice the apples and pears. I sliced my pears a little thinner than the apples since they take a little longer to bake. Place in a large mixing bowl and sprinkle in the dried cranberries.

In a small saucepan, combine the apple juice or cider, tapioca granules, pectin and sugar. Cook over medium-low heat, whisking often, until the sugar is melted and the mixture begins to bubble. Turn off the heat and whisk in the vanilla extract.

Remove the pie dough from the fridge and roll out a bottom crust, placing it gently into the pie tin. Roll a top crust and cut into wide strips (1 1/2″) so you can form a rustic lattice top.

Pour the filling over the fruit and toss to thoroughly coat all the fruit. Spoon it into the pie shell, pressing it gently into the crust to compact the fruit. Lattice the pie dough strips onto the top of the pie, then roll the lower crust edges around the edge of the pie tin and crimp all around.

In a small bowl, melt the butter and brush the entire crust. If there is melted butter left, simply pour it over the top of the pie. Sprinkle the entire pie with the raw sugar granules.

Bake in a pre-heated oven (375F) for 45-60 minutes, turning every 20 minutes, until light golden brown. Watch it once it starts to brown. Everyone’s oven is different, and yours may take more or less time depending on how hot it runs. Once golden brown, remove the pie from the oven and allow it to cool completely before serving (4-6 hours).

Apple Pear Cranberry Pie - Cut Pie - Inside NanaBread's Head

This pie was so good! It’s going on my ‘must make’ list for the holidays now. I might even rank it above all former apple pie recipes as my new favorite. Maybe even above most other pies in general. It’s definitely invited for Christmas.

Sorry, Pumpkin Pie. I’m breaking up with you.

It’s not you. It’s me.

15 Comments

Filed under Food & Recipes, Things I Love

Pumpkin & Cranberry for the win!

Peanut Butter & Jelly

Grilled Cheese & Tomato Soup

Chips & Salsa

Cheese & Burger

All are great combinations, but near the top of my list is pumpkin & cranberry. Luscious spiced pumpkin paired with tart dried cranberries makes me furiously happy. So when I saw these muffins on Kirsten’s Comfortably Domestic blog, I knew they would be mine. Mine! mwuhahahaha {that’s my evil laugh}

Photo used with permission; copyright Comfortably Domestic Blog

How do I describe these adequately? I don’t think I can. You really have to bite into one to fully appreciate it. They’re soft and delicate with a warm, robust pumpkin flavor. There’s a subtle scent of spice that leaps forward when you raise it to your lips, then the aroma of orange from the glaze leaps for joy just as you sink your teeth into this fall gem. I mean really. They are that good.

Pumpkin & Dried Cranberry Muffins

Can you smell that? It’s spice and pumpkin and cranberry and orange.

I take it back. These are not good, they’re glorious. And flavorful. And confirmation of why I love the pumpkin & cranberry combo and all things fall.

Speaking of fall, I’ve been on a canning kick. Earlier this week, I put up my second batch of cranberry goodness. It’s thick and loaded with fresh cranberries, dark sweet cherries and raspberries. I’m not sure whether to call it jam, preserves, or cranberry sauce on steroids. Whatever it is, it’s tasty.

While I was mixing up these muffins, it suddenly hit me that if dried cranberries are good, more cranberries are better. In the spirit of “more is more” I spooned a heaping teaspoon onto the top of half the muffins just before I popped them in the oven. Here’s what happened – and I hadn’t even glazed it yet!

Holy smokes, y’all. I’m in love with this muffin.

I’m sending Kirsten a jar of cranberry goodness as part of our Great Jelly Swap this fall. It’s not just that I need her approval for messing with her recipe a little. It’s that I NEED her to experience it firsthand. Because friends & food go together like Cake & Ice Cream. Fritos & Chili. Cheese & Crackers. Eggs & Bacon. Butter & Popcorn. Spaghetti & Meatballs. Mashed Potatoes & Gravy.

What are your favorite food combos? Any weird ones? I’d love to hear!
Should I go first? I like salt & vinegar chips on bologna sandwiches.

Kirsten’s muffins paired with my cranberry whateveritis; yum!

Note: I solemnly promise not to swipe other blogger’s recipes and publish them on my blog, so CLICK HERE to see Kirsten’s Pumpkin & Cranberry Muffins in the master’s own words (and with color photos to boot). She also shares tips on baking these as loaves instead of muffins, which would make fantastic gifts for family & friends during the holidays. Thanks for sharing, Kirsten! Solid A+

17 Comments

Filed under Food & Recipes

Comfort Food: Slab Apple Pie

Sometimes you just need a comfort food, know what I mean? Apple pie does it for me, and this one does it best because it’s so easy to pull together.

NanaBread’s Slab Apple Pie:
One batch of Kirsten’s ‘No Excuses’ Pie Dough (click for the recipe)
8 small or 6 large Granny Smith apples – peeled, cored & sliced thin
1 teaspoon lemon juice
3 Tablespoons unsalted butter
1/2 cup applesauce
1/4 cup dark brown sugar
1/2 teaspoon ground cinnamon
1/2 teaspoon apple pie spice
1 egg + 1 tablespoon of water (egg wash)
sugar crystals (or Demerara sugar) for sprinkling on top

To start, mix up the pie dough as directed in the link above. Form the dough into a disc, wrap it tightly in plastic wrap and pop it into the freezer to firm up. If this pie dough recipe rings a bell, it’s because it’s my all-time favorite go-to recipe. Kirsten’s pie dough is as billed – no excuses. If you have a food processor and five minutes, you can make amazing homemade pie dough. Thanks, Kirsten!

While the dough is chilling, peel, core and slice the apples and place them in a large non-stick skillet. Add the lemon juice and unsalted butter; cook over medium-high heat until the apples start to brown slightly and the liquid has evaporated. Stir in the applesauce, brown sugar and spices and continue to cook until the mixture is bubbly and the sugar begins to caramelize. Remove the pan from the heat and allow the apples to cool to room temperature.

Once the apple mixture has cooled, remove the pie dough from the freezer. Generously flour your work surface and rolling-pin. Divide the dough (2/3 for the base; 1/3 for the strips on top). Roll the larger portion into a rectangle (the size depends on your baking sheet). I like to place mine on a silicone baking mat to prevent it from sticking and to help the bottom brown more evenly.

Spread the apple mixture evenly across the bottom crust, to within 1 1/2″ of the edge. Roll the remaining dough into a rectangle. If you’re in a hurry, simply place the second rectangle over the apple mixture and cut a few steam vents in the top, then skip to the section below about finishing the edges.

If you really want to get frisky, go for broke and impress your friend and family with a pretty lattice top. You can do it! Cut the second rectangle into 1/3″ to 1/2″ strips – I like to use a yardstick and a pizza cutter to cut even strips. I know, I know… it’s just that I’m all about perfect strips. If you’re not, just eyeball it. If your strips are uneven, you call this Rustic Slab Apple Pie. {wink}

Lay one layer of strips in one direction, about an 1/2″ apart. Fold every other strip back about 2″ and lay your first horizontal strip, then return the folded strips back to their original position. Then switch and do every other vertical line until you’ve worked all the way across the pie.

If you’re starting to panic just reading this, remember you can use the second rectangle as a solid top to your slab pie. Just be sure to cut a dozen or so small steam vents into the top before baking. I’m all about giving you options. Once your top crust is on, trim off the excess so that the edges are aligned, then roll the edges inward until they are touching the edge of the apple pie filling.

To help create perfectly square corners, fold each corner in before you roll the edges. That’s an old sewing trick. Thanks for teaching me to sew, Mom!

You can stop here and have plain edges, and it will look perfectly fine.

Or you can go for broke and flute the edge. You know what they say… “go big or stay home.” Not one to shy away from a fancy-pants pie, I fluted mine. Have a few extra tablespoons of flour nearby; you’ll need it to keep your fingers from sticking to the dough while you crimp those edges.

Once you’re satisfied with your crimped up primped up pie, pop it back in the freezer for at least one hour. Why? Two reasons – 1. it will help create a flakier crust if the butter is frozen when the pie goes into the hot oven, and 2. when you brush the pie with an egg wash before baking, it will prevent the brush from damaging the dough like it would at room temperature.

Once your slab pie is properly frozen, remove it from the freezer and pre-heat your oven to 375F. Whisk one egg with one tablespoon of water to make an egg wash, and brush the entire pie with it making sure to coat all of the exposed pie dough. Then sprinkle with crystallized sugar or Demerara (sugar in the raw).

Bake at 375F for 30 minutes, rotating the pie once after 15 minutes, or until the pie turns a light golden brown all over. Remove from the oven and allow to cool at least 10-15 minutes before serving. That’s the hardest part of this recipe.

I like mine with homemade whipped cream or a scoop of vanilla ice cream, but you can do whatever floats your boat. Want a slice of cheddar on top? Go for it! Looking for an excuse to by a pint of Dulce de Leche Caramel ice cream? Do it! Whatever makes you happy. And that’s what this slab apple pie is all about – making you happy. Isn’t that the goal of all our favorite comfort foods?

Note from NanaBread: this slab pie can be made with almost any thick filling. If you love canned fruit pie filling, just spoon it on and go from there. Or go fresh and try it with an apple/cranberry combo or fresh sliced plums; yum. Go nuts! And if you do, let me know what worked for you. Enjoy!

29 Comments

Filed under Food & Recipes