

Jam. It’s my jam. I love making it, which is convenient because I love eating it. There’s something magical about canning your own jam. When I open my pantry and see that Jelly Shelf with jars stacked high, I feel I’ve accomplished something. When I take a jar of homemade jam to my grandkids I feel like I’m sharing something homemade and wholesome. It’s a love that goes back to my own grandmother and memories of sitting on the steps of her root cellar, waiting anxiously to see what she might retrieve. It’s memories of my own mother baking homemade bread on glorious summer canning days, smearing warm slices of that bread with jelly foam and passing them out like Christmas presents. Magical.
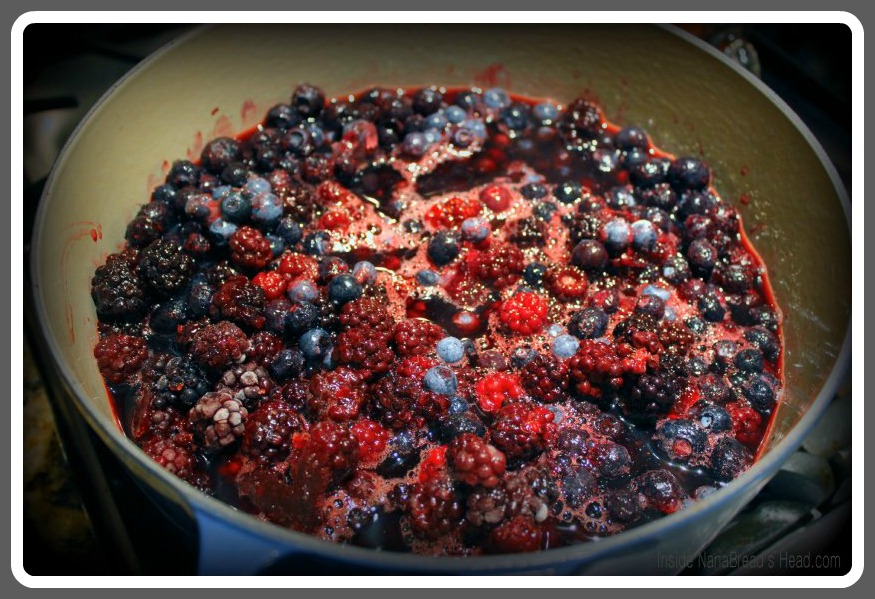
When my Big Sister and I road-tripped up to Mom’s last month, I was fortunate to find gorgeous fresh blackberries and blueberries and saved them just for this – Black & Blue Jam. The combination of these two berries, blended into a rich, deep purple jam – well, it just sings to me and stirs some deep-seeded joy from my past as well as a fervent passion for the buttered toast in my future.
Black & Blue Jam
7 cups fresh blueberries & blackberries, washed & stems removed
1/4 cup fresh squeezed lemon juice
3 boxes (1.75 ounces each) powdered pectin
10 cups granulated sugar
1 teaspoon real unsalted butter
6 pint or 12 half-pint canning jars
new lids & rings for each jar
In a large heavy saucepan, combine the berries and lemon juice. Cook over medium heat, stirring often, until the berries are soft and have released most of their juice, approximately 30-45 minutes. (Hint: I like to take an old-fashioned potato masher to mine after about 20 minutes to help extract the juice.) Add the pectin to the sugar and stir to combine, then gradually add the sugar to the berries, stirring constantly to prevent lumps. Drop in the butter and continue to cook, again stirring often, until the sugar has completely dissolved and the mixture has started to thicken. Using a big soup spoon, skim off any foam or bubbles from around the edge of the pan and save it in a bowl for jelly foam toast later. It’s a jam canner’s reward for a job well done.
Turn off the heat. If you dislike seeds (I do), place a strainer over another large pan and ladle the jam into a strainer, pressing the jam through using a flexible silicone spatula. Place your sterilized canning jars close to the pot. Using a canning funnel, ladle the jam into jars, leaving 1/4″ to 1/2″ of space at the top. Once filled, use a damp paper towel to thoroughly wipe the rim of each jar, removing any jam that may have spilled over.
In a heat-proof bowl, place new canning lids (I alternate them – one face up, one face down – to keep them from sticking together) and cover them with boiling water. Let them sit for 3-4 minutes, then carefully remove them one at a time, shaking off any excess water, placing one onto each jar. Screw a ring on firmly, but not so tight that it won’t turn at all, and set them aside until all are done.
I use this handy silicone canning basket when I can anything. It allows me to lower & raise jars without any slips or accidents, and is heat-proof so it stays in the pot the entire time without melting. Process your jam jars in a hot water bath for 15 minutes (half-pints) or 20 minutes (pints). If you’re unfamiliar with water bath processing, check out this tutorial.
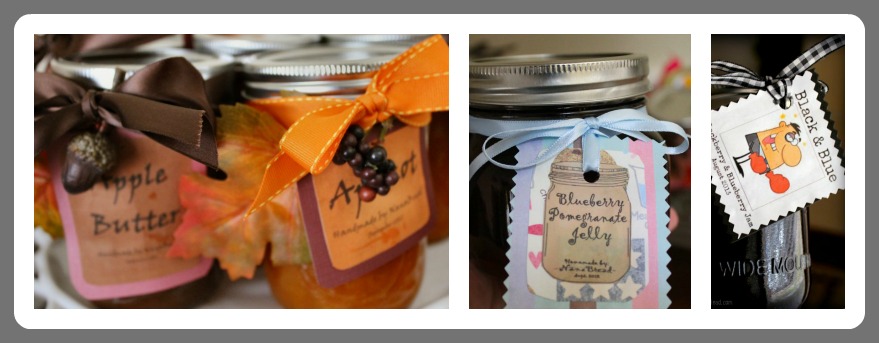
In my house, jam isn’t ‘done’ until it’s properly labeled. I may be slightly obsessed with creating cute labels for all my jams & jellies. It’s my creative process. Once your jars are properly labeled, you’re free to box them for storage, stack them on a pantry shelf, or pass them out to friends and family. Homemade jam makes excellent gifts. And speaking of gifts, there’s just one more to enjoy before you go – that bowl of jelly foam on warm buttered toast.

Oh, Mom. I cannot thank you enough. {hugs}
For more on home canning, visit http://www.freshpreserving.com/getting-started.aspx


I love blueberries in anything, this sounds great. For those not in the know, jelly foam is awesome!!! You have to make some jelly or jam once in your life to try some.
I still (even at the ripe old age of 50) love jelly foam on buttered toast – as evidenced by that photo of my latest victim. It’s funny, but I’m always a little disappointed if I make a batch of jam that doesn’t foam. Jelly foam is part of my DNA now. :)
Yum, this sounds like a yummy combo of berries. Not sure why I’ve never “jammed” them together!!
Thanks, Cathy! I’ll bet you will now!
Looks very tasty! Love the tags!! :)
Thanks, Big Sis! I’ll try to remember to bring some to Thanxmas this year. You’ll need to bake bread. :)
Ha! – Great Name for Jam and looks delicious too!!!
Thanks, Renee! It’s pretty darned tasty. :)
I wish we lived closer. I’d be right over with fresh bread and booze. What? Those don’t go together?
Me too, Jen. You know why?
Because booze DOES go with bread & jam.
You. Me. Sympatico.
Bread, Booze, Jam….sounds like a winning combination to me! I’ll bring the Brie!
Deal!
Already have some set aside (of course). Gotta supply the grandbabies first!
BTW, your grandkids are out of homemade jam….good thing you and I have telepathy and you knew to make them some!! :)
OMG Jeanne…..this stuff look luscious! I have yet to try canning. I think I’m afraid I’m going to poison everyone somehow. But between your beautiful jam, and Eileen’s pickles…..I think I am almost ready! Thanks for the link to the tutorial. I LOVE your labels….really awesome. Man….I really want a piece of toast and jam right now! : )
It’s not nearly as hard or as intimidating as you think. Try it, Anne! As long as you water batch your jars to properly seal them, you’ll be fine. Trust me.
Go for it Anne! Trust us!
Yum yum yum. True Confession: I’ve never (personally) canned or jarred anything…Ever! My mom did a ton of it but it scares me. So I just bought a bunch of jelly jars–First step, right?
I want to do this!
Aloha!!
You can doooo eeeet, Monica! I can only imagine the fabulous tropical jams you could can!
Jeanne, I love making jam too. I am planning on making peach jam this summer. My daughter comes to my house hinting and begging for a jar – just like I use to do with my mom. I love your flavor combo, and those tags are adorable with that ginham ribbon.
I made peach at Mom’s and here at the house, as well as a very small batch of peach amaretto (tasty!). I also canned a small batch of Black Mexican Persimmon Jam (my first time) with local foraged fruit, that Black & Blue (it’s so good!). I’m still waiting for our local Mexican Plums to ripen. The wild plum jam is my favorite each year. As soon as fall hits, I’ll be canning pear preserves and making another batch of cranberry/cherry conserve. I swear, Eileen – I’ve made more jam/jelly in the past year than I have in my entire life. I just can’t stop! -j
I love making jam too and I know what you mean about feeling accomplished. I haven’t made jam in ages though because I can never seem to make it to the pyo berry farm on time lately. I am hoping to scre some raspberries next week. Your black and blue jam has a very cool name and looks incredibly luscious.
Nazneen
Oh I hope you score those raspberries, Nazneen! I love a good raspberry jam. Best of luck! -j
Hi Jen, I just found you. This recipe looks delicious. I have a question before making it. The addition of pectin step: Add the pectin to the sugar and stir to combine, then gradually add the sugar to the berries, stirring constantly to prevent lumps. Normally the pectin is added to the fruit, bring to a full boil, then add the sugar. Are the directions for your recipe correct? Thank you in advance for your help.
Hi, Doris. I usually add the pectin when I add the sugar, but please make it the way you feel most comfortable with. Mine turned out just fine adding it in this order. Let me know how yours turns out! -j
Thank you for your quick response. I’ll make it the way you have written it. I’m so excited to have it. I’ll let you know how it turns out. Thank you again for your response.