Tag Archives: homemade jelly

Can It: Black & Blue Jam

Black & Blue Jam - Label Shot

Jam. It’s my jam. I love making it, which is convenient because I love eating it. There’s something magical about canning your own jam. When I open my pantry and see that Jelly Shelf with jars stacked high, I feel I’ve accomplished something. When I take a jar of homemade jam to my grandkids I feel like I’m sharing something homemade and wholesome. It’s a love that goes back to my own grandmother and memories of sitting on the steps of her root cellar, waiting anxiously to see what she might retrieve. It’s memories of my own mother baking homemade bread on glorious summer canning days, smearing warm slices of that bread with jelly foam and passing them out like Christmas presents. Magical.

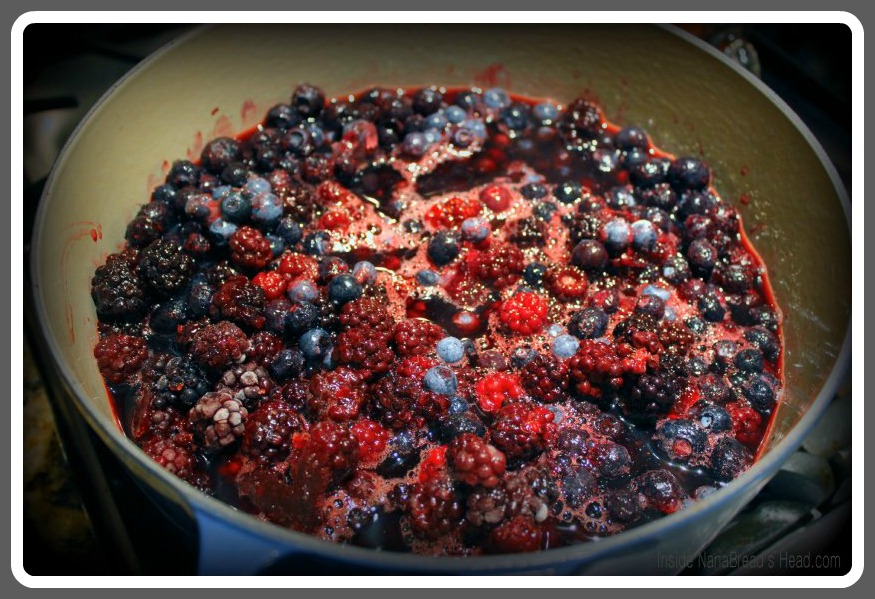
When my Big Sister and I road-tripped up to Mom’s last month, I was fortunate to find gorgeous fresh blackberries and blueberries and saved them just for this – Black & Blue Jam. The combination of these two berries, blended into a rich, deep purple jam – well, it just sings to me and stirs some deep-seeded joy from my past as well as a fervent passion for the buttered toast in my future.

Black & Blue Jam - Berries in the Pot

Black & Blue Jam
7 cups fresh blueberries & blackberries, washed & stems removed
1/4 cup fresh squeezed lemon juice
3 boxes (1.75 ounces each) powdered pectin
10 cups granulated sugar
1 teaspoon real unsalted butter
6 pint or 12 half-pint canning jars
new lids & rings for each jar

In a large heavy saucepan, combine the berries and lemon juice. Cook over medium heat, stirring often, until the berries are soft and have released most of their juice, approximately 30-45 minutes. (Hint: I like to take an old-fashioned potato masher to mine after about 20 minutes to help extract the juice.) Add the pectin to the sugar and stir to combine, then gradually add the sugar to the berries, stirring constantly to prevent lumps. Drop in the butter and continue to cook, again stirring often, until the sugar has completely dissolved and the mixture has started to thicken. Using a big soup spoon, skim off any foam or bubbles from around the edge of the pan and save it in a bowl for jelly foam toast later. It’s a jam canner’s reward for a job well done.

Turn off the heat. If you dislike seeds (I do), place a strainer over another large pan and ladle the jam into a strainer, pressing the jam through using a flexible silicone spatula. Place your sterilized canning jars close to the pot. Using a canning funnel, ladle the jam into jars, leaving 1/4″ to 1/2″ of space at the top. Once filled, use a damp paper towel to thoroughly wipe the rim of each jar, removing any jam that may have spilled over.

In a heat-proof bowl, place new canning lids (I alternate them – one face up, one face down – to keep them from sticking together) and cover them with boiling water. Let them sit for 3-4 minutes, then carefully remove them one at a time, shaking off any excess water, placing one onto each jar. Screw a ring on firmly, but not so tight that it won’t turn at all, and set them aside until all are done.

I use this handy silicone canning basket when I can anything. It allows me to lower & raise jars without any slips or accidents, and is heat-proof so it stays in the pot the entire time without melting. Process your jam jars in a hot water bath for 15 minutes (half-pints) or 20 minutes (pints). If you’re unfamiliar with water bath processing, check out this tutorial.

Jelly Collage

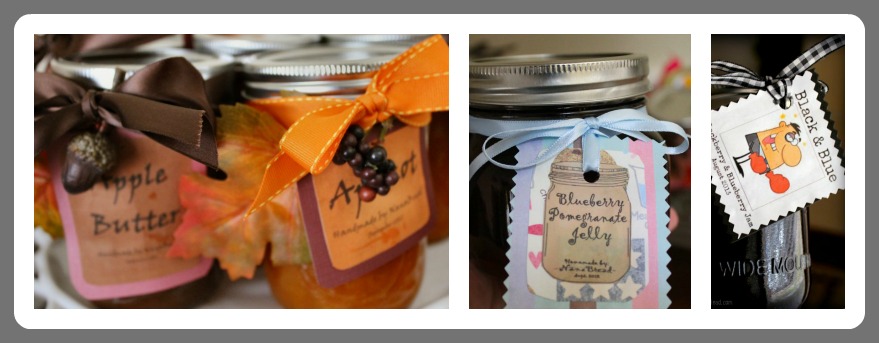
In my house, jam isn’t ‘done’ until it’s properly labeled. I may be slightly obsessed with creating cute labels for all my jams & jellies. It’s my creative process. Once your jars are properly labeled, you’re free to box them for storage, stack them on a pantry shelf, or pass them out to friends and family. Homemade jam makes excellent gifts. And speaking of gifts, there’s just one more to enjoy before you go – that bowl of jelly foam on warm buttered toast.

Black&Blue Jam Collage

Oh, Mom. I cannot thank you enough. {hugs}

For more on home canning, visit http://www.freshpreserving.com/getting-started.aspx

Advertisement

26 Comments

Filed under Food & Recipes, Things I Love

Lost in a jam session & can’t stop. Please send help…and toast or biscuits!

Raspberry and red plum and blackberry...oh my!

Last month, fellow blogger Kirsten at Comfortably Domestic posted several stories about the jam she was canning. Strawberry, to be exact. Since then, I’ve had jelly on my brain (figuratively, of course). I used to can things every summer but that was years ago when we still lived in Owasso, Oklahoma. Summers there were not as unbearable as they are here. Once we moved to Houston, the heat and humidity killed my desire to can anything, since it required hours spent over a hot stove. Then I saw Kirsten’s strawberry jam, and became a woman obsessed. She planted a seed; a crazy demon jelly seed. Suddenly, I couldn’t walk past fruit without imagining it cooked into jelly or jam and packed into cute little Mason jars. Heaven help me; I do love a Mason jar.

Enter the $1.00 raspberry sale at my local grocery store. As we walked into the produce department, I was slapped in the face by a poster board sign that read “Raspberries – $1.00 a box!” Yeah, you bet your sweet ass it deserved an explanation point, Mr. Produce Stocker Man. Those little boxes have been going for $4.00 all summer. Naturally, I grabbed 10 boxes and thought about grabbing 10 more. Thanks to a spontaneous intervention from The Complete Package, I stuck with the original 10. But as soon as we got home, I broke out the sugar, pectin and jars and got to work. As I said, I was a little jelly obsessed.

Sweet little jars of fruity goodness; labels are print-your-own stickers

This past weekend, TCP and I stopped in at my favorite fruit stand – Froberg Farms in Manvel, Texas. I love this place more than I love chicken-fried steak. Someday I’ll take my camera out there and share it with you. Where else can you walk out with an entire brown paper bag packed full of freshly picked produce for around $20? It’s incredible. We love to stroll slowly through all the gorgeous produce, dried beans, canned fruits and vegetables. They also sell little fried pies, whole pies, farm eggs and fresh milk. AND they have a little trailer outside that sells all kinds of fabulous, smoky meats. This place is crazy wonderful.

Clockwise: Grandma, Mom, Big Sis & NanaBread

When I saw fresh red plums, I immediately grabbed a big bag full, and again we raced home to make jam. Red plum jam. I don’t know why, but it reminds me of Grandma Montgomery, who died when we were young. She had the most magical root cellar stocked with jars of homemade jams, jellies, pickles and canned veggies. Oh, how I loved the smell of that root cellar. Here’s a photo of her sitting with Mom as we all ate berries and ice cream. I love this old photo of us on Grandma’s porch. I’ve often wondered what Big Sis was thinking at that precise moment. She looks stunned & I look happy. I probably stole her last strawberry. Sorry, Sis. If it’s any consolation, I’m the one with the embarrassing ice cream beard. But I digress; back to jelly!

Old-fashioned red plum jam - it's seriously good stuff!

There’s no real recipe for jelly or jam. It’s just fruit, the right amount of sugar, and some fruit pectin. In fact, pectin manufacturers have made it so easy, they’ve printed a how-to which includes the proper fruit-to-sugar ratios inside the pectin box. How easy is that? The real key is in preserving it. I went old-school and used sterilized canning jars and a boiling hot water bath. If done correctly, jars of jam processed this way can have a shelf life of years instead of months. If you don’t want to process your jars in a water bath and preserve them for all eternity, Ball now makes plastic containers with screw-top lids. You can’t store this jam in your pantry, but you can certainly keep it in your fridge or freezer. Kirsten posted a great freezer jam recipe on her blog with a full-color photo tutorial. Please check it out. So now that my raspberry and plum jams are packed away, I’m eyeing a recipe for peach marmalade I got from a friend a few years ago. Peaches, oranges and maraschino cherries all cooked into a gorgeous, sticky marmalade. Oh, my. I may just have to do it. I should do it. I must do it!

Speaking of my canning bender… do you know what else I used to can years ago? Spicy sweet pickles. And do you know what’s brewing in my kitchen right now? Homemade spicy sweet pickles. It’s been at least 20 years since I’ve made them, but when we found some beautiful pickling cucumbers at Froberg’s last week, I decided to make them again. They’re from an old family recipe that has been passed down through TCP’s family for at least 3 generations. How good are they? Good enough that every time we eat another brand, we look at each other and say, “they’re good, but they’re not Aunt Teenie’s sweet pickles.” Which brings us to a recipe card mystery, a little family controversy, and my next post – Aunt Teenie’s Sweet Pickles: are they or aren’t they? Stay tuned!

Coming soon: spicy sweet pickles from an old family recipe

10 Comments

Filed under Family Stuff, Food & Recipes