Tag Archives: NanaBread

The Uncommon Goods-ness of Gnomes

Uncommon Goods - Gnome Onesie & Blanket Duo - cutest baby gift

When opportunity knocks, sometimes super cute things await. Such was the case when Uncommon Goods asked if I’d be interested in sampling goods from their baby gift collection. Since my friend Madelyn announced she is expecting her first baby in January, the timing was perfect. I couldn’t resist, and chose these gnomes. I knew they’d be cute, but I had no idea they’d be so well-made.

Uncommon Goods - Gnome Onesie & Hat Close-Up

Both the onesie/hat set and the blanket are made of recycled fibers. If you think recycled implies a lesser quality, you would be mistaken. These were flawless in every way. The fibers are super soft and snuggly, the colors are vibrant, and the gnomes scored a solid 10 on the cuteness meter.

Uncommon Goods - Gnome Onsie & Hat - it's just too cute!

Here’s what I learned (and what I love) about Uncommon Goods:

1. Founded in 1999, they are headquartered in New York City in the old Brooklyn Army Terminal. I know where I’m going the next time I visit NYC.

2. They are committed to supporting artists & designers; half of what they sell is handmade and most of their products are created right here in the USA. As a home crafter, I appreciate this more than I can express.

3. Approximately one-third of their products are made from recycled and/or upcycled materials. As an avid recycler, I love and support this.

4. They have B Corp status, which means they use the power of business to solve social and environmental issues. That B seal also means they meet rigorous standards on issues like wage levels, environmental impact, and giving back to the community. A company with a heart? You betcha.

Even if you don’t buy into the mission, you would be a fool to miss out on the quality and variety of products offered. Even The Complete Package, my beloved husband, gasped aloud “Wow…that blanket feels amazing. It’s so NICE!” Who says men don’t notice such things? He’s all mine, ladies.

Uncommon Goods - Recycled Cotton Fibers

Uncommon Goods - Recycled Fiber Label - Green 3 Apparel

What I love most is how they pulled it all together – great design, recycled materials, handmade products with a high level of craftsmanship, and made in America. Seriously amazing. All of it.

Somewhere in southern California is a wee baby who will someday be swaddled and soothed by these sweet, cuddly gnomes. And somewhere in Houston is a blogger who is appreciative of the folks at Uncommon Goods and their commitment to quality, creativity, and community and who, just for a second or three, contemplated keeping that snuggly blanket for herself. (Hint: it’s me.)

Uncommon Goods - Gnome Blanket

Disclaimer: Uncommon Goods offered to ship products from their selection of Baby Gifts and/or Personalized Gifts. I chose the gnome items from the baby collection, which were sent at no cost to me. I was not compensated for this post, and all opinions are my own. Readers know I only share items I love and feel strongly about, and these sweet gifts certainly fit that bill. -jeanne

Uncommon Goods Info

Advertisement

4 Comments

Filed under Family Stuff, Miscellaneous Thoughts

‘Not A Recipe’ Donuts

'Not a Recipe' Donuts - Mini M&Ms - Inside NanaBread's Head

Blogger friends and I are always sending each other links to recipes found on Pinterest. Sometimes it’s because ‘OMG you need to make this!’ and other times it’s because ‘OMG why would anyone make this?!’ Example: the cake made by layering Twinkies into a pan and covering them with frozen strawberries and Cool Whip. I’m not saying which category that one fell in, but it does bring up a comment frequently heard in foodie circles:

“If you start with a mix or packaged food, it’s not a recipe. It is a creation.”

I get it. I didn’t hand craft a donut dough for these. I started with a can of refrigerated biscuits. Which brings up another comment frequently heard in non-foodie circles:

“Ain’t nobody got time for that.”

My position is firmly on top of the fence. A good 80-90% of what I make is from scratch, but sometimes quick and easy is what we need. And these are easy. Incredibly, beautifully easy and perfect for those Saturday mornings when all you want is a big cup of coffee and to get breakfast on the table in a hurry.

NanaBread’s ‘Not A Recipe’ Donuts:
one can (16.3 ounces) Grands Butter Flaky Biscuits
canola oil for frying
miniature chocolate chips (2 cups, divided)
miniature M&M candies (1 cup)
heavy whipping cream (2 tablespoons)
unsalted butter (1 tablespoon)

Start by heating 2″ of canola oil to 325F in a deep, heavy pot. While your oil is coming to temperature, unwrap your can of biscuits and cut center holes.

'Not a Recipe' Donuts - Ready to Fry - Inside NanaBread's Head

Fry until golden brown, turning once. Remove to paper towels and repeat until all donuts are fried. Cronut? We don’t need no stinkin’ cronuts!

'Not a Recipe' Donuts - Fried to a Golden Brown - Inside NanaBread's Head

Now you could shake a little powdered sugar over these to get them in your pie hole quicker, but I wanted chocolate. Don’t judge. We all have those days.

'Not a Recipe' Donuts - Toppings - Inside NanaBread's Head

I put one cup of miniature M&Ms on a saucer and one cup of miniature chocolate chips on another. The remaining cup of chocolate chips went into a bowl with the heavy whipping cream and butter, then into the microwave for 90 seconds. Once melted and whisked, I had a bowl of glossy, gorgeous ganache to dip my golden orbs in. No, not THOSE golden orbs, silly! These.

'Not a Recipe' Donuts - Ganache Glazed - Inside NanaBread's Head

Plain chocolate glazed are yummy, but chocolate on chocolate is crazy good.

'Not a Recipe' Donuts - Mini Chips - Inside NanaBread's Head

The key is to dip the donut into the ganache, then let it sit for a few minutes. It gives the ganache time to set up a little before dunking them into toppings. It also gives you time to lick the chocolate off your fingers.

What? Where are all the donut holes? I don’t know what you’re talking about.

'Not a Recipe' Donuts - Is Eight Enough - Inside NanaBread's Head

Okay, so I ate the donut holes. Someone had to. Please forgive me blah blah blah, I beg of you. Would it help if I bribed you with a donut?

'Not a Recipe' Donuts - I saved you one at Inside NanaBread's Head

You’re right. I have no shame.

21 Comments

Filed under Food & Recipes

OXO’s #WhatAGrillWants – and what this girl wants is some smokey meat, sweet corn & fried green tomatoes

What’s missing from my website? Please don’t say humor, good writing or appetizing recipes. What I was shooting for is ads. There are none on my blog. It’s a personal choice made when I started blogging four years ago, and one I’ve stuck with since. It’s not a monetary or political issue, it’s just that I started blogging to share with friends and family, and ads never felt appropriate.

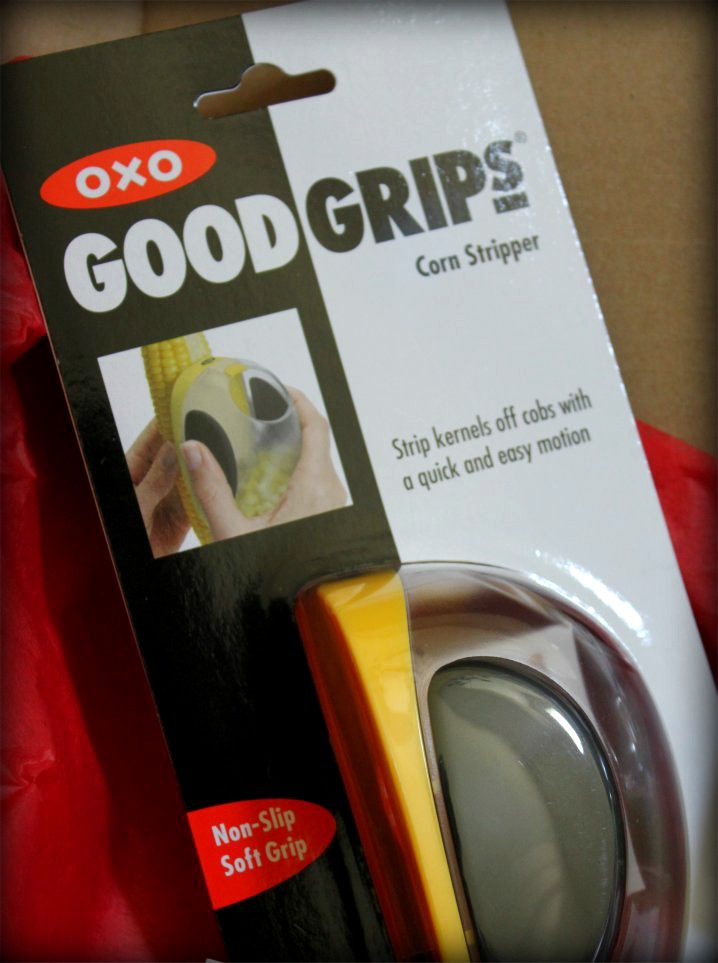
What you will see – products I occasionally share for one reason only – because I love them. OXO is one brand I stand firmly behind. Their products are well made, sturdy, easy to use and affordable. Because OXO supports the blogging community and blogs of all sizes, they created the Blogger Outreach Program. As a part of this program, I am occasionally selected to try random products. This month, it was OXO’s ‘What A Grill Wants’ collection.

OXO - What A Grill Wants Project

Included in package:
1 pair of 16″ grilling tongs
1 meat tenderizer
1 silicone basting brush
1 dressing shaker
1 corn stripper

That the box arrived just prior to the July 4th weekend was a bonus. We immediately plotted our attack. First up was playing with the corn stripper.

OXO Corn Stripper - What A Grill Wants

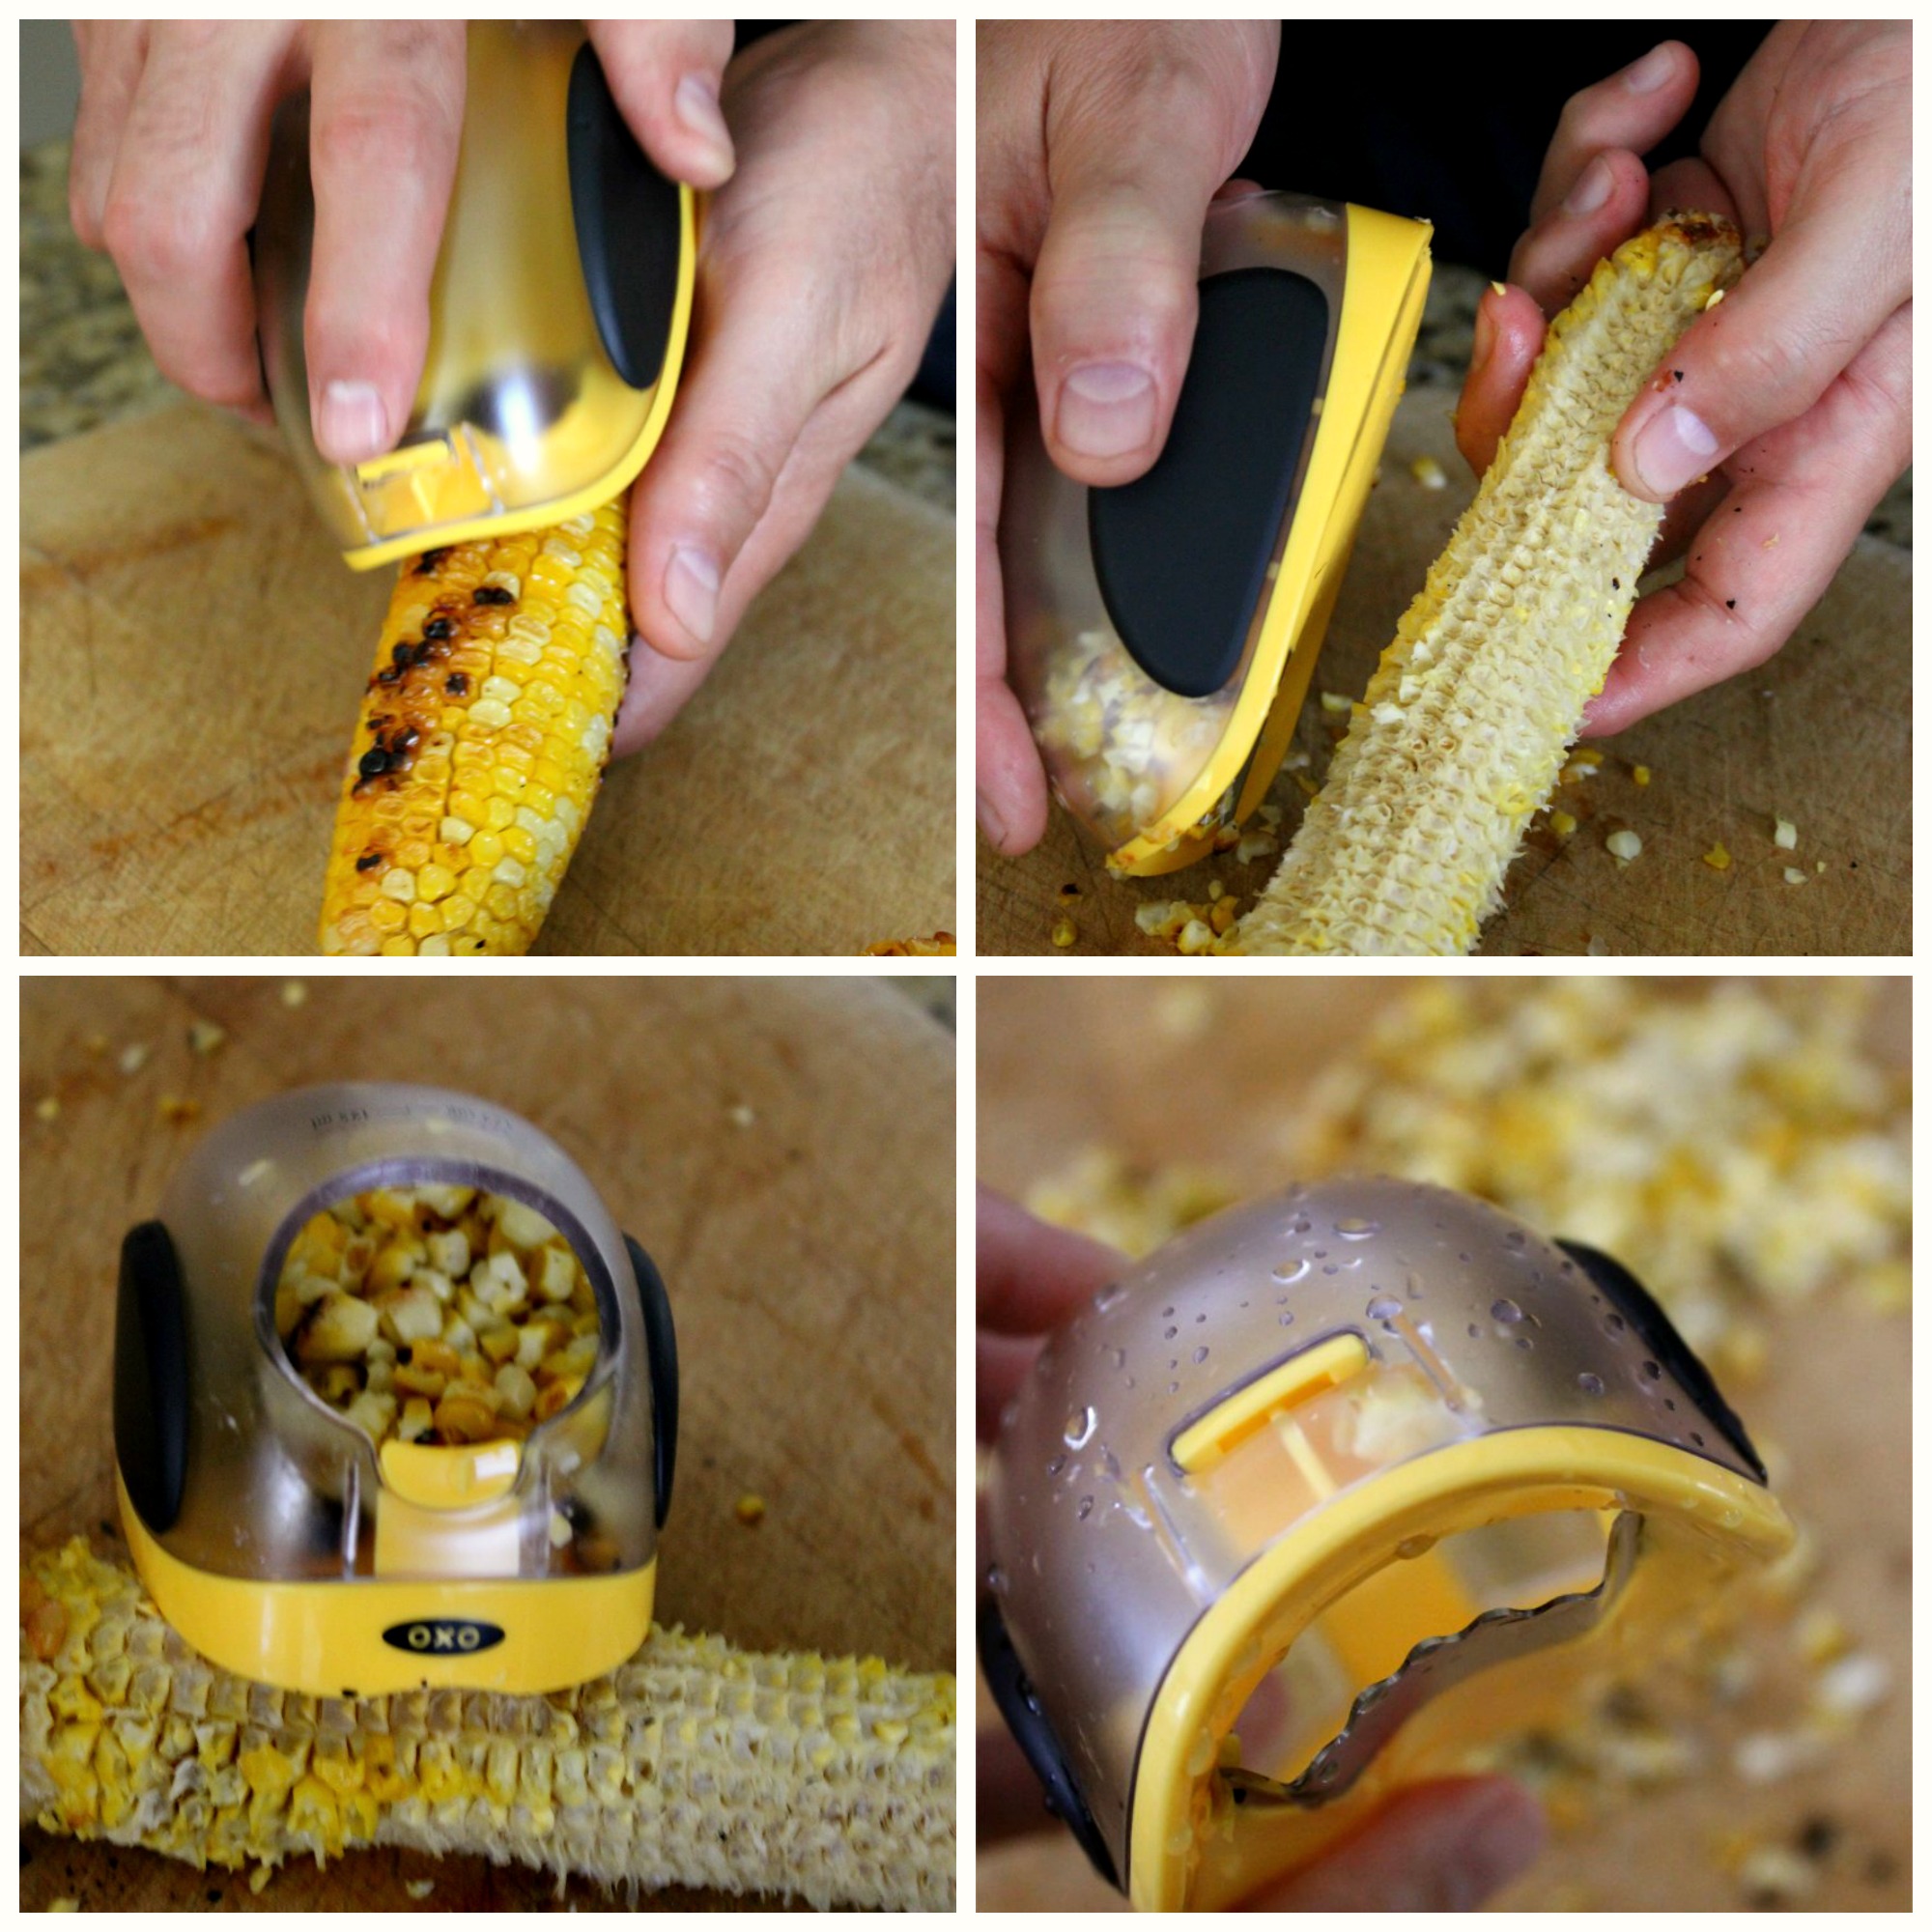
We started by grilling ears of fresh Texas sweet corn. Char = flavor.

OXO Corn Stripper & Grilled Corn - What A Grill Wants

Once they were cooled, The Complete Package grabbed that stripper and put her to work. The key was to start at one end apply the proper amount of pressure. {cue the uncontrollable giggling}

OXO Corn Stripper Collage

The Complete Package’s Review: (Overall Grade = C+)
1. He wasn’t sure it was any easier or quicker than using a knife.
2. The cutting blade tended to clog, which meant you had to stop & clear it.
3. Because one end was open, kernels tended to fall out constantly.
4. Cut kernels tended to be more pieces than whole kernels.
5. Pluses: OXO’s quality is always high & the ergonomics were good.

My Review: (Overall Grade = B)
1. I thought it WAS quicker than using a knife.
2. I also had issues with the blade area clogging occasionally.
3. A cap would be nice, as I somehow dumped corn all over the counter.
4. I had no issues with cutting whole kernels because I applied more pressure.
5. I love the size – it fits easily in your palm for ease of use.

What I also found was that the OXO corn stripper tended to remove ALL of the corn from the cob, while a kitchen knife tended to just shear off the tops of each kernel. This photo illustrates what I mean.

OXO Corn Stripper Comparison - Stripper vs Knife - What A Grill Wants

The cob in the front was denuded with a chef’s knife. You can see the flat surfaces of the cut kernels where the bottoms of the kernels are still attached. The cob in the back was cleaned with the OXO corn stripper, and you can clearly see that the entire kernel is missing. All that remains is the fibrous walls surrounding each kernel. Less waste and more volume of corn was a plus for me.

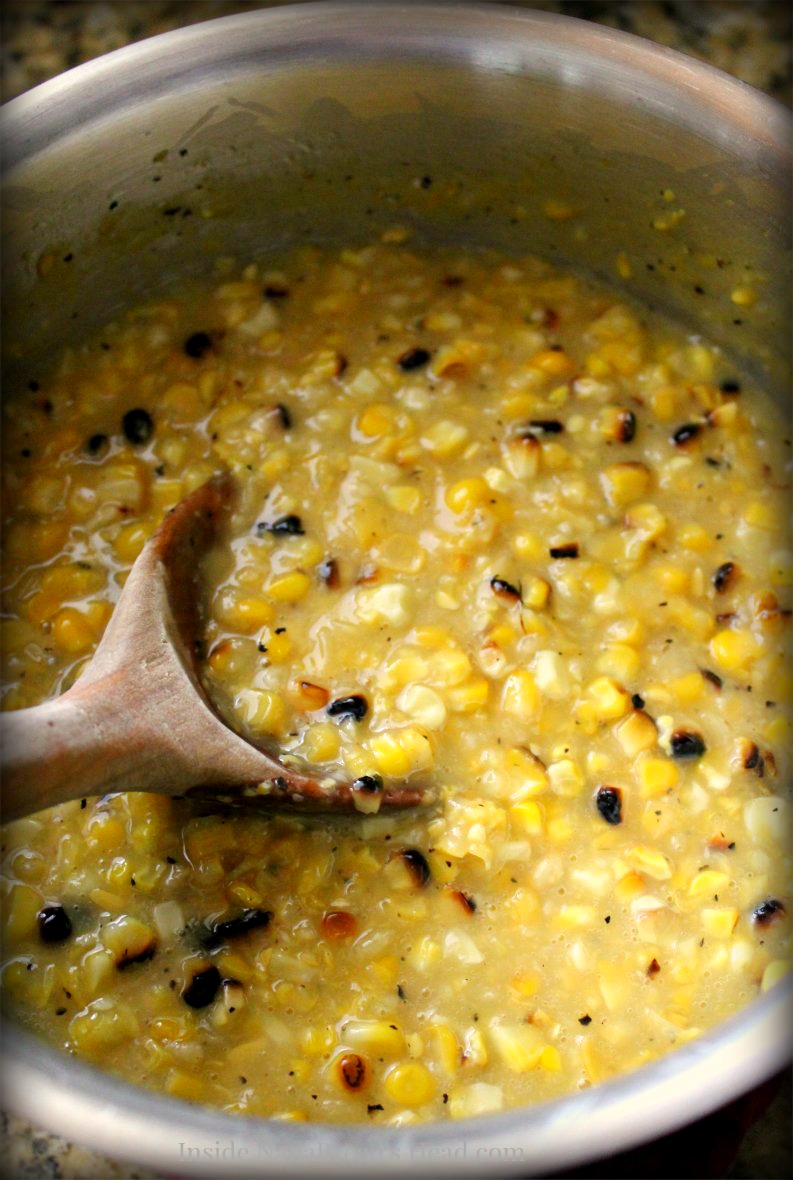
What did we do with all that cut corn? We made kicked-up creamed corn.

Grilled Creamed Corn

TCP’s Creamed Corn:
2 cans (15 ounces) sweet creamed corn
2 cups roasted sweet corn, stripped from the cob
4 tablespoons unsalted butter
2 tablespoons sugar
kosher salt & fresh cracked black pepper, to taste

Combine all ingredients; simmer over medium heat until warm.

Now, I’m not usually a fan of creamed corn because it tends to be mushy and flavorless, but this was really good. The char and flavor of the roasted corn really shines, and I found myself basically eating it right out of the pan with a spoon. I have no shame when it comes to corn, and I am unapologetic about it.

The Complete Package also broke in those 16″ tongs by grilling a pair of pork tenderloins. There’s something about meat smoked over post oak lump charcoal that touches my very soul. TCP’s pork tenderloin turns out juicy, smokey and perfect every time. For me, the mark of good smoked meat is that it needs no sauce and this needed nothing short of a napkin and some personal restraint.

TCP's Smoked Pork Tenderloin

TCP’s Smoked Pork Tenderloin:
3 pounds pork tenderloin, trimmed
Morton’s Nature’s Season Salt
Hungarian paprika
post oak hardwood lump charcoal

Start by removing the pork tenderloin from the package and rinsing them thoroughly. Pat dry with paper towels and remove any fat or silver skin. Sprinkle the meat liberally with Nature’s Season Salt and paprika.

TCP starts the smoker by stacking oak lump charcoal into a chimney and lighting it. When it is white-hot, he pours it into the smoker section of our grill along with a metal pan of hot water to create humidity. He then opens the grill vents on the opposite side of the grill to pull the smoke through the smoker. Placing the pork tenderloin over indirect heat, he smokes the pork for approximately 90 minutes at 250F, flipping once at the halfway mark, until the internal temperature reaches 160F. Removing it from the grill, he then wraps it in aluminum foil and allows it to rest on a cutting board on the kitchen counter for 30 minutes. Then it’s just a matter of slicing and serving. To sauce or not to sauce is a personal matter, but this pork needs no adornment.

OXO 16 Inch Tongs - Great Length for Grilling - What A Grill Wants

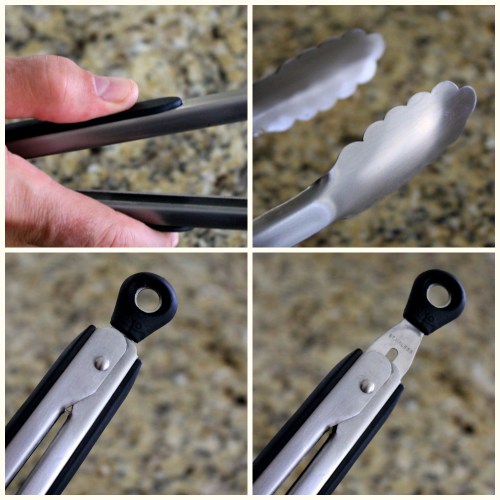
TCP’s Review of the 16″ grilling tongs: (Overall Grade: A+)
1. He loved the longer length, as it kept him from burning himself.
2. The silicone grips with thumb indention provided great grip.
3. The scalloped edges of the tongs provided a better grip on food items.
4. He loved the easy to use lock/unlock mechanism at the back of the tongs.

OXO 16 Inch Tongs Collage

In addition to the smoked pork and creamed corn, I also made fried green tomatoes. Please tell me you’ve had these before. It’s a southern favorite, and a clear sign that summer is upon us.

Fried Greed Tomatoes - Golden Brown
To make, start with firm green (unripe) tomatoes. Big slicing tomatoes work best. Here’s what you’ll need.

Fried Green Tomatoes - What You'll Need

NanaBread’s Fried Green Tomatoes:
2 large green tomatoes
2 cups all-purpose flour
1 tablespoon Morton’s Nature’s Season Salt
1/2 teaspoon freshly cracked black pepper
1 cup milk (whole or 2%)
canola oil, for frying

Wash the tomatoes, remove the core, and cut into 1/3″ slices.

Fried Green Tomatoes - Remove the Core

In a mixing bowl, combine the flour, season salt and pepper; whisk until well blended. Dredge each slice of tomato in the flour mixture, coating both sides, and lay them on a sheet of parchment or waxed paper. Once all slices are dredged, allow them to sit for 10-15 minutes to absorb the flour.

Fried Green Tomatoes - First Dredge in Flour

After 10 to 15 minutes, the flour on the tomatoes will look damp. When it does, pour the milk into a container for the second flour dredge.

Fried Green Tomatoes - Dredged

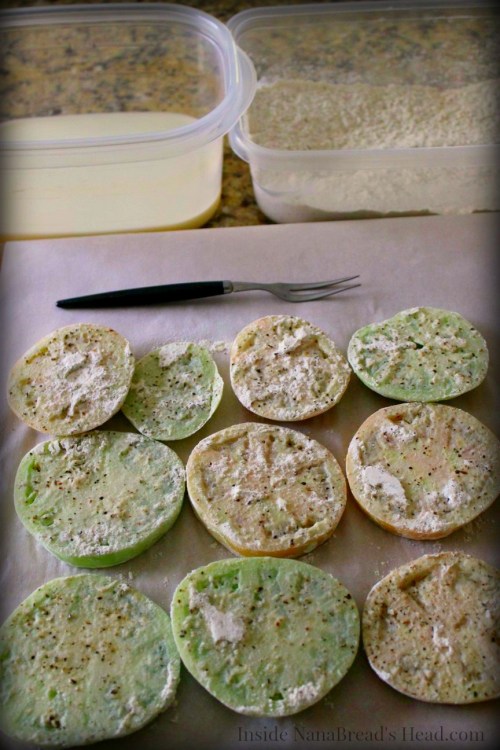
Dip each slice into the milk, then into the flour mixture for a second coat. Tap your fork on the side of the flour container to shake off any excess flour.

Fried Green Tomatoes - Dredge Collage
Place the freshly dredged tomatoes back onto the parchment paper, until all slices are coated twice. Why coat them twice? Well, the first coating of flour is not enough to adequately cover the tomatoes and keep them from splattering when fried. The second coat, along with the milk bath, creates a thick coating to help protect the tomatoes inside and create a crispy, crunchy coating.

Once your tomatoes are coated, add about 1/2″ of canola oil to a large skillet. Heat on high until the oil is shimmering and blazing hot. Carefully lower a few tomato slices into the oil (don’t crowd the skillet) and fry until the edges are clearly golden brown, then flip and fry until the second side is golden. Remove to paper towels and keep warm until all are fried. Serve immediately.

This time, we used the OXO dressing shaker to make a balsamic vinaigrette to drizzle over the finished tomatoes. It was a good call. While the tomatoes were frying, TCP whipped up a quick dressing.

OXO Salad Shaker - Balsamic Vinairgrette Ingredients

The OXO dressing shaker made this come together in a snap. Because volume measurements are printed on the side of the shaker, you can measure directly into the container. The one cup capacity is perfect for a quick vinaigrette of balsamic vinegar, olive oil, Dijon mustard, garlic and a pinch of salt.

OXO Salad Shaker - CloseUp

From there, you just screw on the lid, close the pour vent on top, and give it a good shake. We both loved this salad dressing shaker. And because the pour top seals to keep it closed, you can store unused dressing in the shaker. Just pop then entire thing into the fridge. (Overall Grade = a solid A.)

Fried Green Tomatoes - Finished with Balsamic Dressing

So we used our new OXO tongs to grill up some pork tenderloin, used the corn stripper to make quick work of grilled corn for creamed corn, and whipped up a quick vinaigrette for our fried green tomatoes. OXO delivered what they always do – fun, function, and affordability. It’s not only #WhatAGrillWants, it’s what THIS GIRL wants. Now if you’ll excuse me, there’s a plate of grilled goodness with my name on it. Hello, Summer!

Fried Green Tomatoes - Finished Meal

Special thanks to OXO for sending ‘What A Grill Wants’ products for me to play with via their Blogger Outreach Program. I was under no obligation to blog about these products, but because we love OXO & their products, I chose to share. All opinions are my own, as always.

6 Comments

Filed under Food & Recipes, Things I Love

Utah: they wanted to see mountains

It happened because they wanted to see mountains. ‘Real mountains with snow on top’ they said. So last week, The Complete Package & I took our two young grandchildren – Jonah Bear & Lilly Bug – to Salt Lake City and Ogden in Utah to see the Wasatch mountains. Real mountains. With snow on top.

Wasatch Mountains - Ogden, Utah

Why Utah? That’s a legitimate question, I guess. Our answer is “Why not Utah?” It is beautiful, and the Salt Lake City to Ogden area offered us a unique opportunity to not only show the kids mountains, but also a high desert environment and the Great Salt Lake. More bang for our buck, if you will. While we stayed in Ogden most of the time, we were close enough to explore and play in Salt Lake City. And while the mountains were mere minutes away, so were the activities of both cities. It was a really good choice.

For this trip, as we do for most vacations, we found a vacation rental home at HomeAway.com. The craftsman style house we chose in the historic district of Ogden was perfect for us. It looks small. Don’t let that fool you. This house had four bedrooms, two bathrooms, a full kitchen, a breakfast room, formal dining room, sitting area, living room and a basement laundry room. It also had a great fenced backyard for the kids to play in when we spent time at the house.

HomeAway Rental - from the webpage

Ogden Rental House - Living Room

Ogden Rental House - Sitting Room

Ogden Rental House - Kitchen

Ogden Rental House - Kitchen Kitsch

Ogden Rental House - Breakfast Nook

Ogden Rental House - One of 4 Bedrooms

We loved the craftsman-style details of the home, but I especially loved the vintage kitsch that gave it personality. For antique junkies like me, it was a dream come true. Every room was adorned with pieces of the past and touches of fun. Check out the funky upstairs bathroom and some of the old paint-by-number pieces from around the house. They are a blast from my past.

Ogden Rental House - Upstairs Bath

Ogden Rental House - Vintage Paint-By-Numbers

The kids were really good about not trying to play with all the antiques. Instead, they were focused on the big screen TV, the fenced backyard and the front porch. Each evening, we spent time playing in the yard while the sun set. I’m including a diagram of Jonah & Lilly’s use of the backyard living space. I’m all for giving children a creative outlet, but if I hear ‘Let It Go’ one more time…

Ogden Rental House - Back Yard

Most mornings, their attention was focused on the front porch. Jonah loved to sit on the front steps and whittle the sticks he collected from everywhere we went. Sticks and rocks, sticks and rocks. That boy LOVES sticks and rocks.

Ogden Rental House - Jonah Whittles on the Porch

Lilly fell in love with the porch swing. If she wasn’t swinging in it, she was pushing it or laying across it. Some day, boys will line up to woo her on a porch swing like that, but not too soon. (Somewhere, her parents just shivered.)

Ogden Rental House - Lilly & the Porch Swing

Oh my gosh, we love these kids so much. They have our hearts, for sure.

Ogden Rental House - Lilly & Jonah on the Porch

When the weather was nice, we took evening strolls to explore our historic neighborhood. We especially loved the street behind ours, which was lined with huge trees and beautiful old mansions from a bygone era. To say it was lovely is to sell it short. It was like stepping back in time, which was magical.

Ogden Historic District - Evening Walks1

Ogden Historic District - Evening Walks3

Ogden Historic District - Evening Walks2

I fell in love with the tiny barking squirrels in Ogden. They ran the phone lines each evening, and every time Jonah or Lilly started singing those squirrels would join in with their high-pitched yipping. It was hilarious. Throughout the week, they would come close enough to check us out, but not so close that we could touch them. This little guy ran circles around a tree, then started popping out of the knothole on the right like a jack-in-the-box. It was adorable. I tried to convince him to come home with us, but he was having none of it.

Ogden Historic District - Evening Walks - Furry Friends with Arrow

Lilly, who loves all creatures, also found a neighborhood friend. Not as furry or cute, but just as friendly. Meet Turbo.

Ogden Historic District - Evening Walks - Lilly's Snail

Next up: what we did with the kids during our week in Ogden & Salt Lake City. It involves flying (but not in planes), swimming (but not in the Great Salt Lake), bison (not buffalo), and a few of these monsters. KIDS – LOOK OUT!!!

Ogden Dinosaur Park - LOOK OUT!

17 Comments

Filed under Family Stuff, Travel Tales

Blackberry Cheesecake Swirl Ice Cream

Blackberry Cheesecake Ice Cream with Mini-Mallows - Inside NanaBread's Head

Know how I know it’s almost summer? The “101 Favorite Recipes” lists start flying around the internet. Last weekend it was Memorial Day Must-Haves. Soon it will be “Fourth of July Favorites”. Today, we’re getting a jump on summer with a celebration of ice cream. Jenni Fields, author of Pastry Chef Online has invited bloggers to join her for Ice Cream Tuesday – Marshmallow Edition. The marshmallow twist can take any form – a fluff topping, stacked on or stirred in, or incorporated right into an ice cream base. Anything goes!

Luckily, I have a secret weapon in my back pocket – Allison, my foodie friend who makes homemade marshmallows. We’re talking serious combinations like honey latte, pina colada, and the latest batch she sent – blackberry sage. For my ice cream, I started by cutting her full-size marshmallows into teeny tiny baby marshmallows. Man, I wish you could taste these blackberry beauties.

Photo from my Instagram feed @HeyNanaBread

Photo from my Instagram feed @HeyNanaBread

It was a no-brainer to pair these puppies with my homemade blackberry jam.
A cheesecake ice cream base, with its slightly tart bite, is a perfect match for Allison’s luscious marshmallows and the sweetness of blackberry jam.

I love it when a plan comes together. Granted, most people don’t have handmade blackberry marshmallows lying around, so fret not – this ice cream, even without pretty marshmallows, is still worthy of any summer party. And there’s no shame in a store-bought bag of mini-mallows. I buy them, too.

Blackberry Cheesecake Ice Cream - So Good - at Inside NanaBread's Head

If you love cream cheese like I love cream cheese, you’re going to love this ice cream. If you like a thick layer of cream cheese on a warm bagel, this one will make your heart sing. The combination of cream cheese, kefir and buttermilk will give you all the tang you crave, and then some.

If, however, you are more of a no-bake cheesecake person who prefers a higher fruit to cream cheese ratio, you can adapt this recipe to lessen the twang. I’ll post a note at the end of the recipe and tell you how to tone it down.

Blackberry Cheesecake Ice Cream - 8

NanaBread’s Blackberry Cheesecake Ice Cream:
1 package (8 ozs.) cream cheese, softened to room temperature
1/4 cup kefir OR plain thick Greek yogurt
1/4 cup sugar
a pinch of salt
1/2 teaspoon almond extract
1 box (3.4 ozs.) instant cheesecake pudding mix
2 cups heavy whipping cream
1 cup buttermilk (low-fat is fine)
1/3 cup + 3 tablespoons of your favorite blackberry jam
1/2 cup mini-marshmallows (optional)

In the bowl of an electric mixer, combine the cream cheese, kefir or yogurt, sugar, salt, almond extract and dry pudding mix. Beat on medium speed until thoroughly combined. Reduce speed to low and slowly add the whipping cream, buttermilk and 3 tablespoons of the blackberry jam (for color). Beat just until combined and smooth, then scrape the mixture into an electric ice cream maker. Process according to the manufacturer’s instructions, or until the ice cream thickens to a perfect frozen soft-serve consistency.

If you are adding mini-marshmallows, stir them in now.

Into a freezer-safe container with a tight-fitting lid, pour half of the ice cream base and spread to a smooth layer with a rubber spatula. Add the 1/3 cup of blackberry jam and spread into an even layer. Top with the remaining ice cream base and seal the container. Pop it into the freezer for at least 2 hours to set.

Substitutions for a lighter, less twangy cream cheese base:
1. Swap a light berry flavored yogurt for the kefir or plain Greek yogurt.
2. Use vanilla pudding mix in place of the cheesecake pudding.
3. Substitute 2% or whole milk for the buttermilk.

If you’re not into blackberries, this recipe would also rock with raspberry, blueberry or cherry jam. If you really want to go big, leave out the jam all together and add a layer of caramel, fudge sauce and nuts for a Turtle Cheesecake Ice Cream. Personally, I’m really digging the blackberry combo.

Blackberry Cheesecake Ice Cream - Ice Cream Tuesday - Inside NanaBread's Head

But wait… there s’more! Check out these Ice Cream Tuesday posts:
Posts go live throughout the day. If at first you don’t connect – try, try again!

Jenni @ Pastry Chef Online:
Strawberry Cheesecake Ice Cream with Key Lime Marshmallow Swirl

Karen @ Pint-Sized Baker:
Frozen Coconut S’Mores Bars

Dionne @ Try Anything Once Culinary:
Strawberry Ice Cream with Marshmallow Swirl and Toasted Walnuts

Liz @ That Skinny Chick Can Bake:
Fudge-Topped Marshmallow Ice Cream

Betsy @ Desserts Required:
Kahlua Marshmallows/Marshmallow Sauce

Stacy @ Food Lust People Love:
No-Churn Coffee Amaretto Ice Cream with Almond Marshmallows

Kirsten @ Comfortably Domestic:
Traverse City Cherry Cordial Frozen Yogurt

Donna @ Cookistry:
Strawberry Marshmallow Ice Cream

Allison @ Decadent Philistines Save the World:
Horchata Ice Cream with Mocha Mallow Swirl

Sophia @ NY Foodgasm:
Princess Badass Vanilla with Bourbon Cherries & Marshmallow Fluff

Jenni's Ice Cream Tuesday -Mallow Week logo

19 Comments

Filed under Blogger Collaborations, Food & Recipes

The Bee’s Knees Marbled PB Buckeyes

Bees & honey = a perfect pair. Peanut & chocolate = a match made in heaven. Put them together and what do you get? Chocolate peanut butter candy bliss.

Bee's Knees PB Buckeyes - Inside NanaBread's Head

Have you tried Peanut Butter & Co peanut butter yet? It’s The Bee’s Knees – quite literally. Their honey-infused peanut butter is a dream come true for peanut butter lovers like me who’ve been stirring honey into peanut butter since birth, or shortly thereafter. As a child, peanut butter was my go-to snack. Mom could get me to do just about anything for a jar of peanut butter. Hand me a jar and a spoon, and I would fold laundry or mop floors like it was my job. Flash forward to adult me, and I’m still stirring honey into peanut butter for a quick snack. That is until Peanut Butter & Co did it for me with The Bee’s Knees. As a member of the PB&CO Yum Squad, I accepted their challenge to play with my food and create a recipe to show off their Bee’s Knees peanut butter. They sent me two jars to play with (yum and thank you) and here’s what I did.

NanaBread’s Marbled Chocolate & Peanut Butter Buckeyes:
1 cup Bee’s Knees honey peanut butter
1 stick (8 tbsp) unsalted butter, at room temperature
1/2 teaspoon vanilla extract
1/4 teaspoon salt
2 1/2 cups powdered sugar, sifted & divided (see below)
1 cup Bob’s Red Mill almond meal
1/2 cup Hershey’s Special Dark cocoa powder
2 cups (12 ozs) chocolate chips (I used semisweet)
3 tablespoons paraffin (Gulf Wax), grated (optional)
salted, roasted peanuts for garnish

In a stand mixer, combine peanut butter, softened butter, vanilla, salt, 2 cups of the powdered sugar (setting aside 1/2 cup for later) and the almond meal. Blend on low speed until combined, then turn to medium speed and mix for 2 minutes until smooth. The dough should be the texture of soft play dough. Turn the mixture out onto a cutting board or sheet of parchment and divide it in half.

Gently knead the additional 1/2 cup of powdered sugar into half of the candy mixture until combined and smooth. For the other half, gently knead in the 1/2 cup of cocoa powder. Roll the chocolate dough into a square roughly 1/4″ thick. Roll the peanut butter dough into the same size square, then lay it on top of the chocolate square to form two layers of dough. Cut the square in half, forming two rectangles and stack them on top of each other, creating a rectangle four layers deep. Cut the rectangle into 1″ squares. Roll each piece into a ball and set aside on a parchment lined baking sheet. Rolling the dough into balls with your hands will create a pretty marbled effect. Once all the dough is rolled into balls, pop the baking sheet into the freezer so the buckeyes can firm up.

While the candy is chilling, melt the chocolate chips over a double boiler. If you don’t have one, simply place a metal mixing bowl over a saucepan with 3-4″ boiling water over medium heat. Once it starts to melt, whisk the chocolate until smooth. Add the grated paraffin (which helps set the chocolate so it doesn’t melt as easily when you pick it up) and whisk again until smooth. Dip frozen buckeyes into the melted chocolate, covering completely, and set them back onto the parchment lined baking sheet. Once dipped, place them in the refrigerator to firm up. Scrape the remaining melted chocolate into a plastic zip-style food bag and twist it to work the chocolate into one corner of the bag.

To garnish, snip the tip off the corner of the bag and pipe a spiral of melted chocolate on top of each buckeye. Top with a salted roasted peanut, and pop the sheet back into the fridge to set. Finished buckeyes should be stored in an air-tight container in the refrigerator, and should keep for up to one month.

Bee's Knees PB BonBons - CloseUp of Cut Candy

Besides being fabulously sweet & slightly salty, these peanut butter buckeyes are fun to make. I always tell people I love to play with my food, so I think my favorite part of this recipe was playing with the dough to make these candy bees (8 in all). As I said, the candy mixture is the texture of play dough, and I couldn’t resist. I also couldn’t stop giggling over them and the personality they had.

Bee's Knees PB BonBons - Bee CloseUp

I’m still playing with my Bee’s Knees peanut butter. My attempt at chocolate chip pancakes wasn’t a complete failure, but wasn’t what I’d hoped for. What did work was the peanut butter & honey topping. To make, combine 2 tablespoons of Bee’s Knees peanut butter with 2 tablespoons of unsalted butter, and microwave for 30-45 seconds until it is melted. Add 4 tablespoons of your favorite honey and whisk until smooth. Pour over your favorite pancake recipe and voilà! It’s a great way to enjoy that fabulous peanut butter & honey combo and add a little protein to your breakfast routine. It’s so good! If you don’t believe me, ask these guys.

Oops… looks like that little guy might not have gotten any. {burp!}

Bee's Knees Bees & Pancakes Collage - Inside NanaBread's Head

NOTE: As a member of Peanut Butter & Company’s Yum Squad, I am occasionally sent jars of peanut butter and/or peanut butter products to play with. No further compensation is received, and all opinions are my own.

PB&Co Bee's Knees Peanut Butter

9 Comments

Filed under Blogger Collaborations, Food & Recipes

Sweet Potato Buns (two ways!)

Sweet mother of billowy buns – these have my head spinning! Made with a freshly baked sweet potato & a touch of honey, these orange-tinted beauties will leave you craving more. Even better? They’re easy to make.

Flaky Buttery Sweet Potato Rolls

It’s rare that I decide to make homemade sandwich buns, but when I saw this recipe I knew I would give it a shot. That one lonely sweet potato in my pantry was just begging for it. The fact that they’re naturally sweetened with honey sealed the deal. What do I love most about these? Everything.

Baked Sweet Potato Buns - CloseUp

Soft on the inside. Flaky on the outside. Slightly sweet. Gloriously eggy. And as dough goes, versatile. First up was sandwich buns. Cutting this gorgeous dough into strips, I tied them into knots and smeared them with softened butter.

Buttered Sweet Potato Buns - CloseUp

Baked to golden perfection, they were perfect for grilled chicken sandwiches.
To make, we marinated boneless breasts in lime juice, garlic and olive oil then cooked them on the grill. Layered with lettuce, tomato, purple onion, a little mayonnaise and a slice of provolone, it’s one of our favorite sandwiches.

Sweet Potato Buns in Action - Grilled Chicken Sandwich

That’s not all this dough can do. It also makes perfect cinnamon rolls. Using half the dough for sandwich buns, I reserved the other half for these breakfast beauties – Sweet Potato Cinnamon Rolls with orange cream cheese frosting.

Sweet Potato Cinnamon Rolls - Glazed

If you thought this dough made a great looking sandwich bun, wait until you take a bite of these cinnamon buns. Without a doubt, these are the best buns I’ve ever made. Here’s how you can make them for your family.

NanaBread’s Sweet Potato Bread Dough:
1 medium sweet potato (roughly 14 ozs.)
1/2 cup warm water (115F)
6 tablespoons honey
2 envelopes (or 1/2 oz.) active rapid-rise yeast
1 cup mashed sweet potato (from the sweet potato above)
4 tablespoons unsalted butter, melted
1 teaspoon salt
2 whole large or jumbo eggs, plus one additional egg yolk
3 1/2 to 4 cups bread flour, sifted
1/2 softened butter, to finish (instructions below)
1/2 cup sugar + 1 tablespoon cinnamon (for cinnamon rolls)

Cinnamon Roll Frosting (optional):
1 package of cream cheese (8 ozs.), softened to room temperature
4 tablespoons unsalted butter, softened to room temperature
1 teaspoon vanilla bean paste or vanilla extract
2-3 drops Fiori de Sicilia orange essence (optional) OR 1 tablespoon frozen orange juice concentrate, thawed
2-3 cups powdered sugar, sifted

To make the bread dough: wash the sweet potato and prick the skin all around with a fork to create steam holes. Wet two paper towels and wring them out, then wrap the sweet potato in the damp towels. Microwave on high until the sweet potato is soft inside (roughly 3-5 minutes, depending on the power of your microwave). When done, set it aside to cool.

In the mixing bowl of a stand mixer fitted with the dough hook, combine the warm water and honey. Give it a quick stir with a spatula and add the rapid-rise yeast. Give it another quick stir, then walk away for at least 10-15 minutes so the yeast can bloom.

Remove the skin from the cooked sweet potato and mash it with a fork until mostly smooth (a few small lumps are okay). Sift the bread flour and set it aside. In a small bowl, beat the eggs and egg yolk with a fork until well blended.

When the yeast is ready, add the sweet potato puree, melted butter, salt and eggs and mix on low just until blended. Start adding the flour, one cup at a time, until the dough becomes sticky and clings to the dough hook (may take 3-5 mins.).

Note: this makes a soft, sticky dough. Humidity plays a part in how much flour you may need to achieve the proper texture. I’m in Houston, where the humidity was 75%, so I used all 4 cups of flour. You may use less, depending on your climate. Start by adding 3 cups of flour (one cup at a time) and slowly add more until you get a soft, sticky dough that clings to that dough hook.

Once the dough clings, stop the mixer and scrape the dough off the dough hook. Turn it out onto a lightly floured surface and knead lightly just until it forms a smooth ball. Place the dough ball in a lightly greased mixing bowl, cover it with plastic wrap and a clean towel, and place the bowl in a sunny window to rise until doubled in bulk. Once doubled, turn the dough out onto a floured surface and roll or press into a rectangle roughly 8″ x 20″.

To make sandwich buns: cut the dough into 1″ x 8″ strips (I use a rolling pizza cutter). Tie each strip into a knot, tucking the cut end underneath, and place them on a parchment or silpat mat lined baking sheet. Gently run the top of each bun with softened butter. Cover with plastic wrap and a lightweight towel and allow to rise again for at least 30 minutes, or up to one hour.

To make cinnamon rolls: combine 1/2 cup of sugar with 1 tablespoon ground cinnamon. Liberally coat your rectangle of dough with softened butter, then sprinkle the cinnamon sugar evenly over the entire surface of the dough. Roll the dough, working along the long side of the rectangle, then pinch the seam to seal it. Roll it over until the seam is facing down on the floured board, cover with plastic wrap and a towel and allow the dough to rest for 10 minutes. Using a sharp blade (I use my bench scraper), cut the dough into pieces 1 1/2″ wide and place them cut-side up on a lined baking sheet, at least 2″ apart. Cover with plastic wrap and a towel and allow them to rise one last time, for 30 minutes.

To bake: Pre-heat your oven to 375F. Once hot, bake your rolls one sheet at a time on the center rack of the oven. Bake 15-20 minutes, depending on your oven, or until golden brown. A good way to test sandwich buns is to gently press the center of one bun with your finger. If it feels soft and depresses easily, leave them in a little longer. If they feel firm, they’re done. Remove from the oven, place the pan on a cooling rack, and allow the buns to cool completely.

To make the cinnamon roll frosting: soften the cream cheese and butter to room temperature. Combine the cream cheese, butter, vanilla and orange essence or concentrate in a mixing bowl and whisk until smooth. Gradually add sifted powdered sugar, one cup at a time, until the mixture holds its shape when you drag your whisk through it. Scrape the frosting into a quart ziploc bag. Press the air out and seal the bag, then twist it to work the frosting into one corner of the bag. Snip the corner off with a pair of scissors, and frost the cinnamon rolls. I used a criss-cross pattern, but you could also start in the center and pipe a spiral or make the frosting thinner and use it as a glaze.

Sweet Potato Cinnamon Rolls - CloseUp

This recipe made 16 buns – 7 sandwich and 9 cinnamon rolls.

Baked buns can be frozen for future use. For the sandwich buns, place them in a freezer bag and press out as much air as possible, then place into a second freezer bag. For cinnamon rolls, leave glazed rolls on a baking sheet and place the pan into the freezer. Freeze cinnamon rolls for 2-3 hours, or until the frosting and buns are firm. Remove frozen rolls from the baking sheet and double bag them in freezer bags, just as you would the sandwich buns. Double-bagged buns should last up to 2 months in the freezer, if they last that long.

This recipe is adapted from a sweet potato roll recipe posted on the Tasty Kitchen website by Deana at Country Mom Cooks. I doubled the amount of sweet potato puree and yeast, and added more honey, melted butter and an additional egg yolk for a richer dough. Click the underlined link to the original.

10 Comments

Filed under Food & Recipes

Sausage, Egg & Asparagus Tart

Spring Sausage Egg & Asparagus Tart - Inside NanaBread's Head

You know Spring has sprung when fresh asparagus pops up in abundance. I grabbed a handful this week and made this easy tart for lunch. If you like quiche, you’ll love this. It starts with these beauties. I love this vibrant green color.

Spring Sausage Egg & Asparagus Tart - Raw Asparagus

Alton Brown (Food Network) says the best way to cook asparagus and preserve its flavor and bright green color is to microwave it. Start by cutting off the tough stem ends, then grab a strip of 4 paper towels (still connected). Wet them and squeeze out most of the water. Un-wad the paper towels until you have a strip two towels long and two towels thick. Spread the asparagus on the damp towels in a single layer and sprinkle with kosher salt. Roll the asparagus up in the paper towels and microwave on high for 3 minutes. Done!

Spring Sausage Egg & Asparagus Tart - Chicken Sausage

Next up are these gorgeous organic chicken, asparagus and parmesan smoked sausages from my local HEB market. I simply seared them in a hot skillet until lightly browned on both sides, then sliced them in half lengthwise.

Spring Sausage Egg & Asparagus Tart - Scrambled Eggs

Soft scrambled eggs are cooked in the same skillet until almost but not quite set. These are just getting started. A box of frozen puff pastry makes quick work of the tart shell. To save time, thaw the puff pastry while you’re steaming the asparagus and browning the sausages. I promise – this tart could not be easier and topped with shredded parmesan cheese, it could not be more delicious.

Spring Sausage Egg & Asparagus Tart - Cut

NanaBread’s Sausage Egg & Asparagus Tart:
1 box frozen puff pastry (17.3 ounces or two ready-to-bake sheets), thawed
2 tablespoons butter, melted

1 package smoked chicken sausage (I used an asparagus & parmesan version)
1 pound fresh asparagus, microwaved (instructions above)
2 slices Lacey Swiss cheese, from your grocer’s deli counter
1/2 cup shredded parmesan cheese, to sprinkle on top

2 tablespoons unsalted butter
4 large eggs
4 tablespoons heavy cream or half-n-half
2 tablespoons butter, melted
1/2 teaspoon kosher salt
1/4 teaspoon cracked black pepper

Pre-heat the oven to 425F; remove the puff pastry from the box and let it thaw.

In a hot skillet, place the chicken sausages (sliced or whole) and brown on both sides over high heat, then remove from the skillet. In a mixing bowl, combine the eggs, cream or half-n-half, melted butter, salt & pepper. Whisk until fluffy. To the hot skillet, add 2 tablespoons of butter and swirl the pan until it is melted. Pour in the eggs, and using a silicone spatula, gently push the eggs around the skillet until they are almost set, but still wet and glossy. (Don’t worry, they’ll finish cooking in the oven.)

On a lined baking sheet, lay out one full sheet of puff pastry. Cut the remaining sheet into 3/4″ strips, and lay them around the outside edge of the bottom sheet to create a frame. Brush the edges with melted butter, then layer on your ingredients starting with the Swiss cheese, then the cut up sausages, the scrambled eggs, then the steamed asparagus. Bake at 425F for 20-30 minutes (depending on your oven), or until the puff pastry is a light golden brown.

Spring Sausage Egg & Asparagus Tart - Construction Collage

Allow the tart to cool for a few minutes before slicing. To serve, top with a sprinkle of parmesan cheese. This tart makes four large servings (main course) or nine small servings (appetizer). It’s perfect for any time of day. We had it for lunch, but it would also be lovely for brunch with fruit or dinner with a side salad. No one needs to know how simple it was, except for us. And I’ll never tell.

Spring Sausage Egg & Asparagus Tart - Sliced

Notes from the Kitchen:
1. This can be made meat-free by omitting the sausages.
2. It would also be lovely with a rotisserie chicken instead of sausage.
3. To reduce the amount of butter, try spraying the skillet with Pam instead.
4. To further reduce fat, swap 2 Tbsp. fat-free Greek yogurt for the cream.
5. The sausages & asparagus can be cooked in advance to save time.
6. To tart up your tart, try adding a small pinch of nutmeg or cayenne pepper to your scrambled eggs.
7. Leftovers should be refrigerated and eaten within 2-3 days.

7 Comments

Filed under Food & Recipes

Getting Crafty with Pin Cushions

There’s a bee in my bonnet – Lori Holt’s Bee In My Bonnet blog. It’s spectacular. I often drool over her beautiful website with its plethora of quilts, her line of custom-designed fabrics and patterns, and adorable craft tutorials.

Pin Cushion Crafts - Finished Lawn Chair Pin Cushion

This lawn chair pin cushion tutorial is one of my favorites. It starts with a metal lawn chair candle holder sourced from the dollar store. Mine is a vibrant shade of teal. From there, you just need a few basic items from the craft store.

Not pictured - loose quilt batting (a.k.a. fluffy stuff).

Not pictured – loose quilt batting (a.k.a. the fluffy stuff).

I love this bright argyle print. It’s perfect for my tiny teal chair. To start, I measured the width and length of the chair. Stitching around three sides, I then turned it right-side-out and stuffed the ‘seat’ with batting. A quick stitch across the width of the cushion helped divide the seat from the back. The seat gets twice as much batting so the pins have something in which to rest. The back of the cushion gets a light stuffing and then the top is stitched shut.

Pin Cushion Crafts - Lawn Chair Pin Cushion - Overview

To keep the cushion in place, I opted to stitch a color-coordinated ribbon to the back of the cushion and tie it to the chair. It can be hot-glued into place, but I opted for a ribbon so I can use it as a candle holder or blog prop at any time.

Pin Cushion Crafts - Lawn Chair Pin Cushion Collage

The last small detail, and I do mean small, is the button tufting on the cushion. Using tiny white buttons from the craft department at Hobby Lobby, I used embroidery thread to attach them at intersecting lines on the argyle print. Pulling the buttons tightly and stitching them down at the back creates that cute tufted cushion detail. And you don’t have to worry about the stitching showing on the back because the metal covers it. Perfect!

Pin Cushion Crafts - Button Detail Close-Up

Okay, before I let you go I have to show you one more cute pin cushion idea I saw on Lori’s Instagram feed. She made a tiny travel-size pin cushion out of plastic Easter eggs. For real! They could not be cuter, so of course I had to try it. Tis the season, after all. Here’s how mine turned out.

Pin Cushion Crafts - Easter Egg Pin Cushion Collage

Those glittery Easter eggs are from WalMart. I love the colors and texture. The fabrics are remnants from my fabric basket. This one it just too easy. To make, cut a 4″ circle of a color-coordinated fabric for each egg. Stuff it with quilt batting and pin or tie it into a ball. Use a glue gun or quick-drying craft glue to glue it into the bottom of the egg and allow it to dry completely. Once dry, add pins and presto! A tiny portable pin cushion you can pop in your pocket.

Pin Cushion Crafts - Easter Egg Travel Sewing Kit

I went a step further and added a few safety pins and two needles pre-threaded with tan and black thread to convert it to a portable sewing kit. I can toss this little gem into my cosmetic bag for travel and never have to worry about losing a button again. Even better, these would make perfect gifts for a Ladies Only weekend. Thanks for the inspiration and tutorials, Lori!

Pin Cushion Crafts - Easter Egg Pin Cushions - Dozen

If you love to get crafty or just appreciate true creative genius, visit Lori Holt’s Bee In My Bonnet blog. The links to these tutorials are imbedded above, or can be found by clicking here:

Lawn Chair Pin Cushion Tutorial at Bee In My Bonnet Co.
Apron Water Bottle Cover – Bee In My Bonnet Blog
Easter Egg Pin Cushion – photo on Lori Holt’s Instagram feed

4 Comments

Filed under Craft Projects, Things I Love

So Simple: Lemon Sour Cream Pie

Lemon Sour Cream Pie - Inside NanaBread's Head

Looking at my last three posts, I’d say there’s a high probability I’m on a fruit bender. Peach waffles. Papaya Cheesecake Bars. And now this. I think I’m trying to channel Spring. I first tasted this pie in the mid-80’s when our neighbor in Owasso, Oklahoma made it for us. It’s super simple, yet loaded with lemon flavor. A little sweet, a little tart, and a little tangy… just like me.

Lemon Sour Cream Pie:

one 8″ pre-baked pie shell (I use this recipe.)
4 small lemons, zested & juiced (1 Tbsp. zest + 1/2 cup juice)
3 1/2 tablespoons cornstarch
1 cup granulated sugar
3 egg yolks
1 cup milk
1/2 stick unsalted butter, cubed
1 cup sour cream
whipped cream, to garnish

Pre-bake your pie crust (homemade or store-bought) and let it cool completely.

In a heavy-bottom saucepan, whisk together the lemon juice, lemon zest, cornstarch, sugar, egg yolks and milk. Cook over medium-low heat until thick, whisking frequently. Remove from the heat and whisk in the butter. Allow the custard to cool completely. Once cooled, whisk in the sour cream.

Pour into your pre-baked pie crust and refrigerate at least two hours. To serve, slice and top with whipped cream. Serves 8. Keep refrigerated.

If you like simple, you’ll love this pie. If you insist on getting fancy, spread a thin layer of your favorite raspberry jam on top before you slather on that whipped cream. Oh, baby! Cover me. I’m going in.

Lemon Sour Cream Pie - My Slice - Inside NanaBread's Head

35 Comments

Filed under Food & Recipes