Tag Archives: Tasty Kitchen

Sweet Potato Buns (two ways!)

Sweet mother of billowy buns – these have my head spinning! Made with a freshly baked sweet potato & a touch of honey, these orange-tinted beauties will leave you craving more. Even better? They’re easy to make.

Flaky Buttery Sweet Potato Rolls

It’s rare that I decide to make homemade sandwich buns, but when I saw this recipe I knew I would give it a shot. That one lonely sweet potato in my pantry was just begging for it. The fact that they’re naturally sweetened with honey sealed the deal. What do I love most about these? Everything.

Baked Sweet Potato Buns - CloseUp

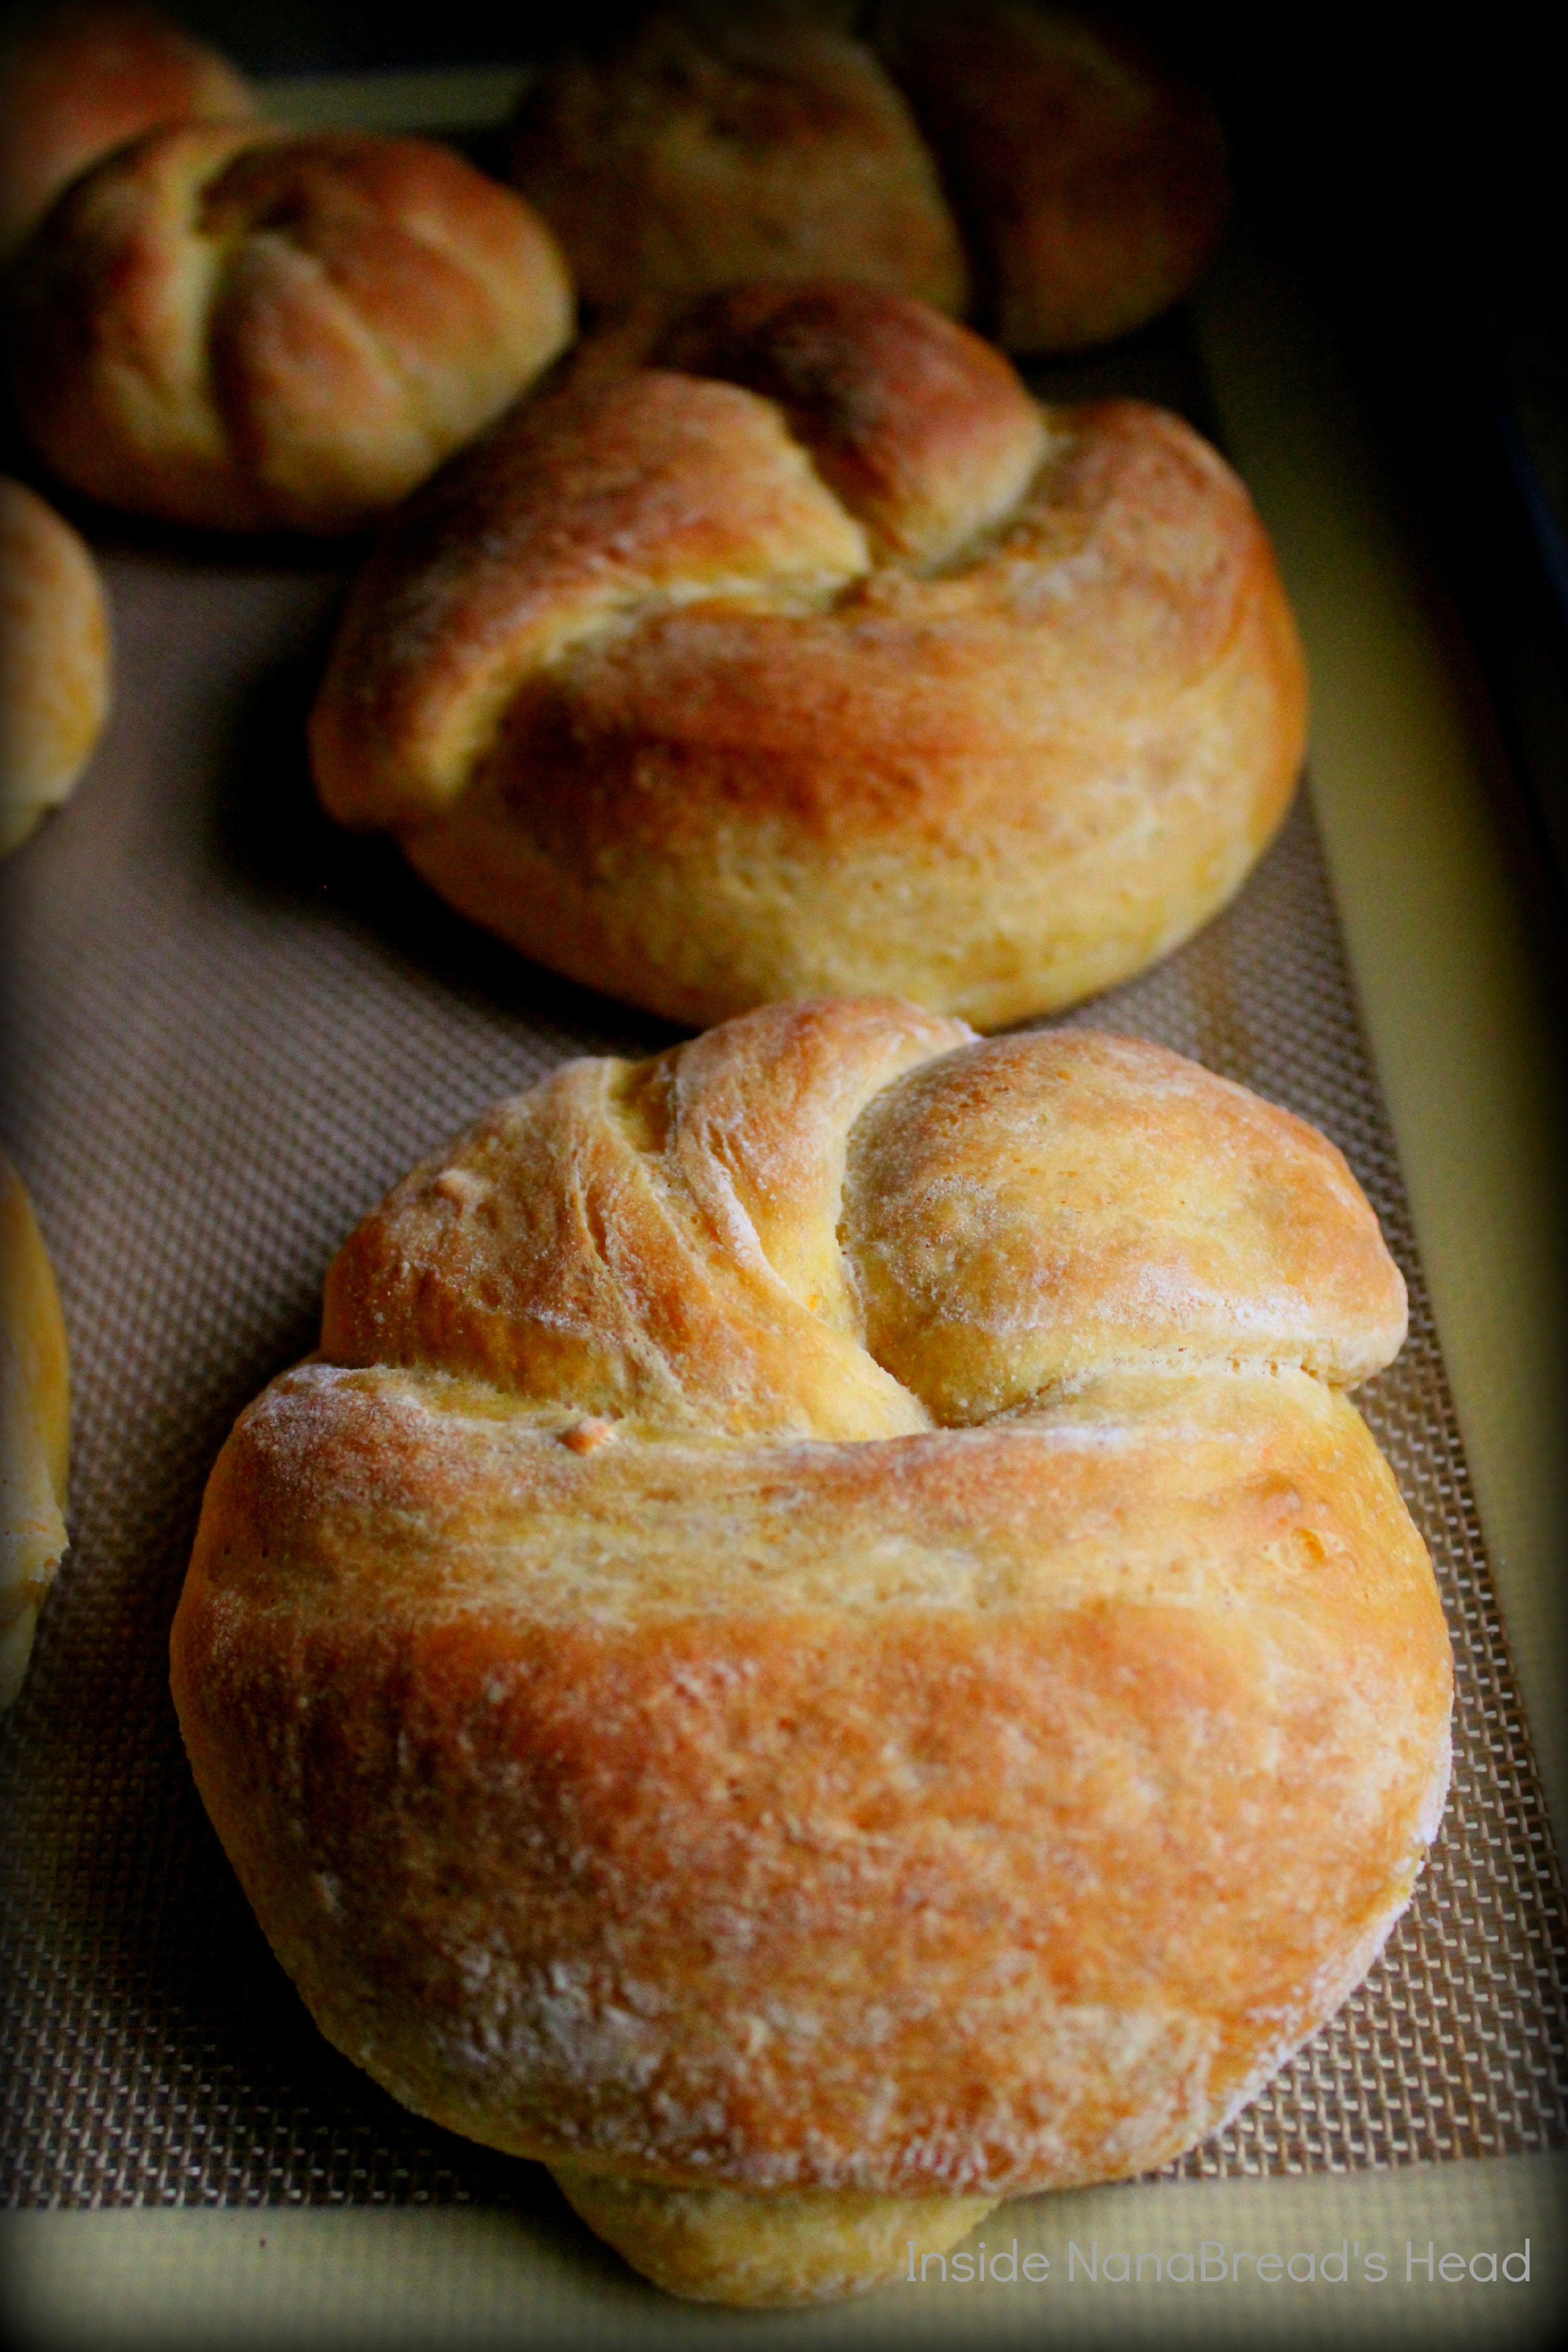
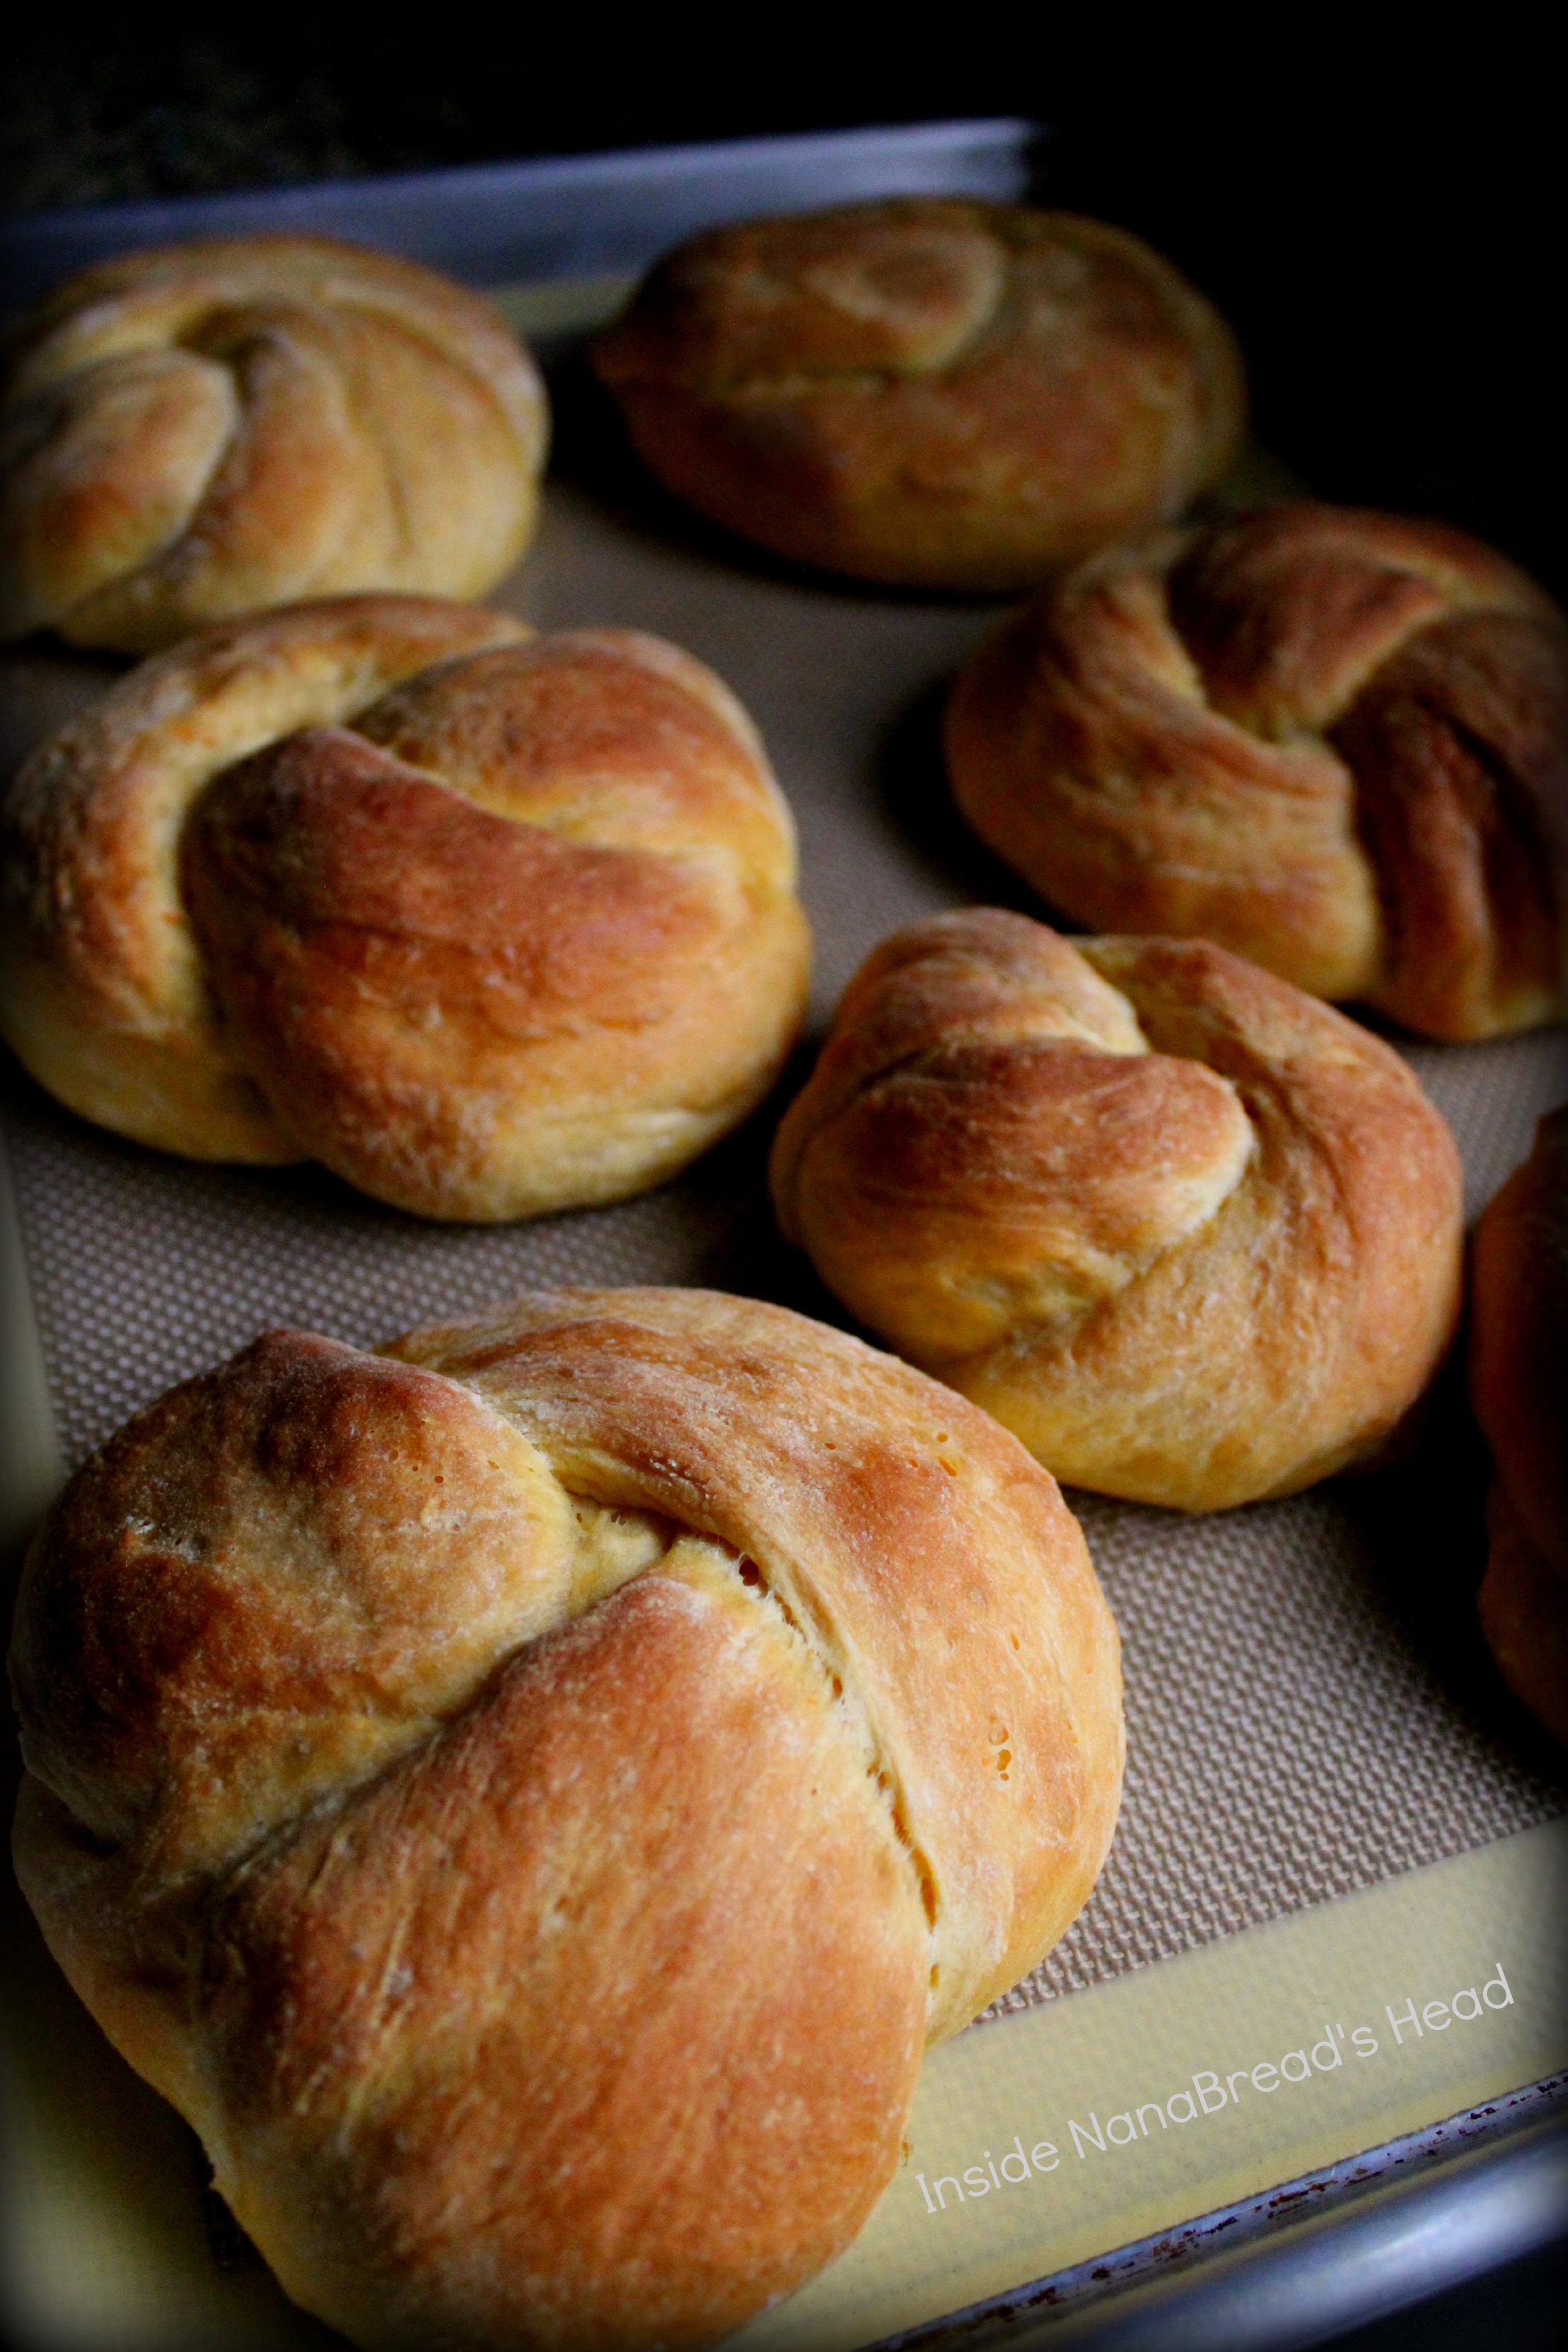
Soft on the inside. Flaky on the outside. Slightly sweet. Gloriously eggy. And as dough goes, versatile. First up was sandwich buns. Cutting this gorgeous dough into strips, I tied them into knots and smeared them with softened butter.

Buttered Sweet Potato Buns - CloseUp

Baked to golden perfection, they were perfect for grilled chicken sandwiches.
To make, we marinated boneless breasts in lime juice, garlic and olive oil then cooked them on the grill. Layered with lettuce, tomato, purple onion, a little mayonnaise and a slice of provolone, it’s one of our favorite sandwiches.

Sweet Potato Buns in Action - Grilled Chicken Sandwich

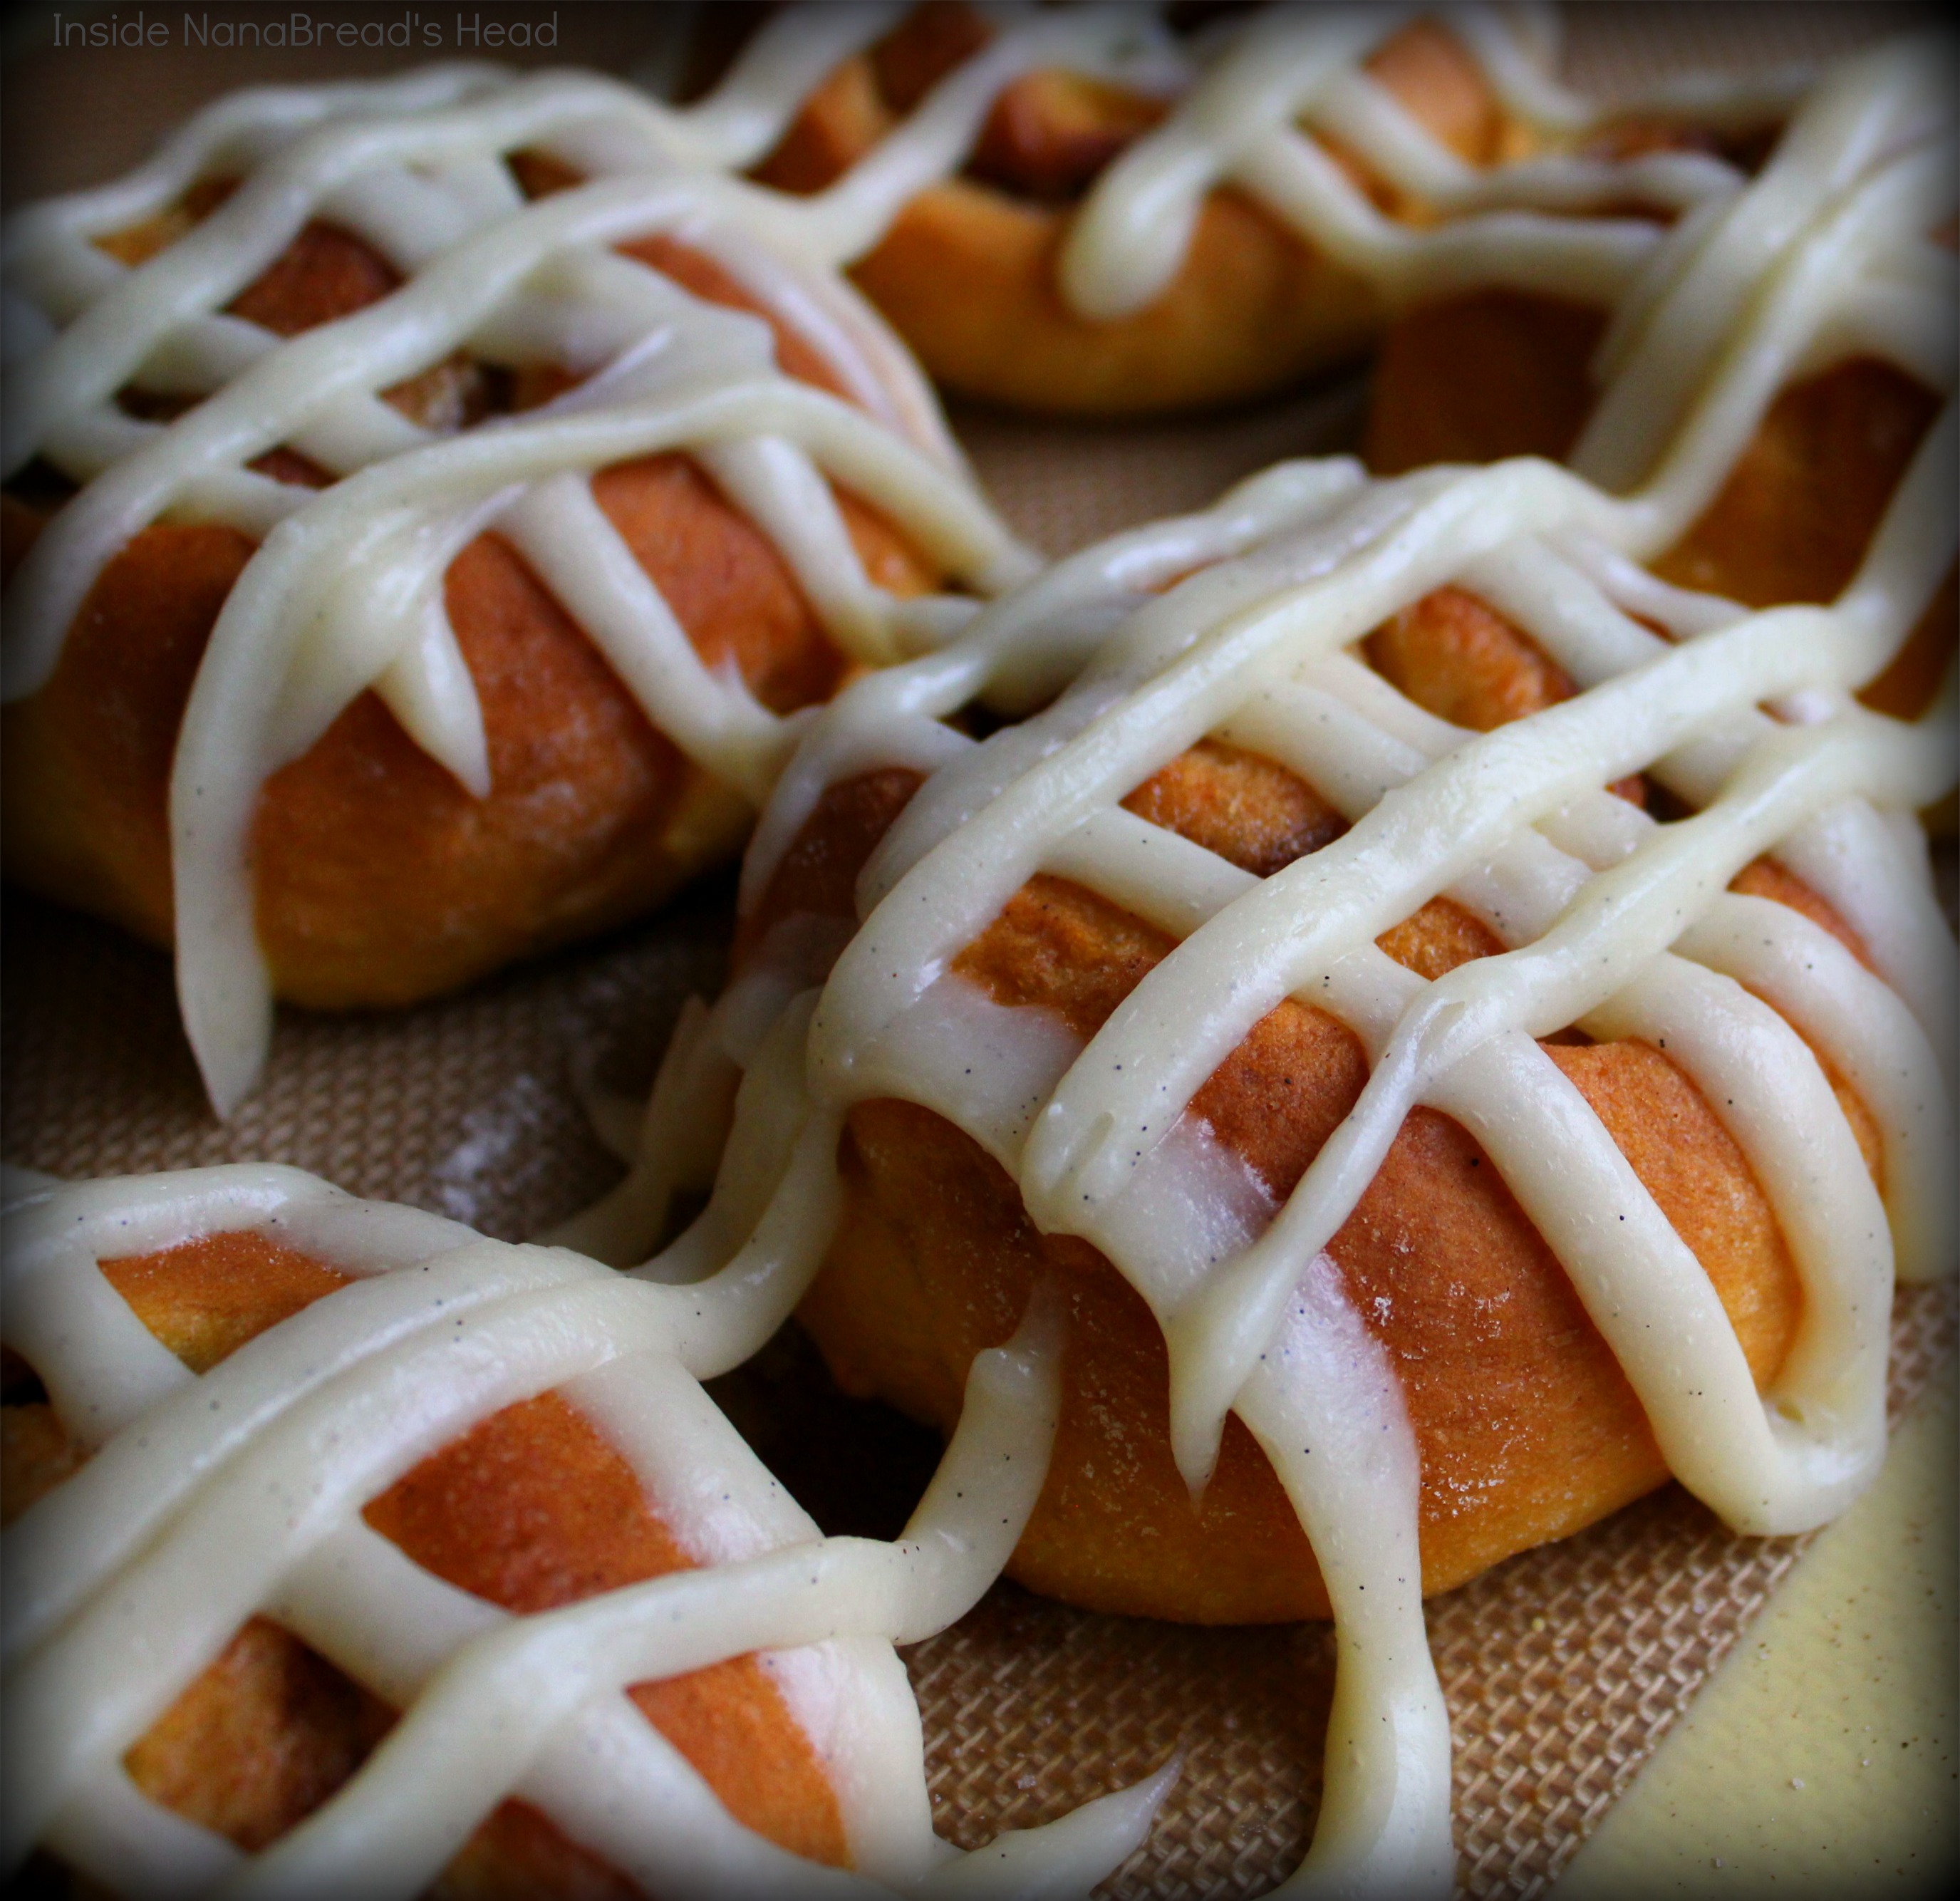
That’s not all this dough can do. It also makes perfect cinnamon rolls. Using half the dough for sandwich buns, I reserved the other half for these breakfast beauties – Sweet Potato Cinnamon Rolls with orange cream cheese frosting.

Sweet Potato Cinnamon Rolls - Glazed

If you thought this dough made a great looking sandwich bun, wait until you take a bite of these cinnamon buns. Without a doubt, these are the best buns I’ve ever made. Here’s how you can make them for your family.

NanaBread’s Sweet Potato Bread Dough:
1 medium sweet potato (roughly 14 ozs.)
1/2 cup warm water (115F)
6 tablespoons honey
2 envelopes (or 1/2 oz.) active rapid-rise yeast
1 cup mashed sweet potato (from the sweet potato above)
4 tablespoons unsalted butter, melted
1 teaspoon salt
2 whole large or jumbo eggs, plus one additional egg yolk
3 1/2 to 4 cups bread flour, sifted
1/2 softened butter, to finish (instructions below)
1/2 cup sugar + 1 tablespoon cinnamon (for cinnamon rolls)

Cinnamon Roll Frosting (optional):
1 package of cream cheese (8 ozs.), softened to room temperature
4 tablespoons unsalted butter, softened to room temperature
1 teaspoon vanilla bean paste or vanilla extract
2-3 drops Fiori de Sicilia orange essence (optional) OR 1 tablespoon frozen orange juice concentrate, thawed
2-3 cups powdered sugar, sifted

To make the bread dough: wash the sweet potato and prick the skin all around with a fork to create steam holes. Wet two paper towels and wring them out, then wrap the sweet potato in the damp towels. Microwave on high until the sweet potato is soft inside (roughly 3-5 minutes, depending on the power of your microwave). When done, set it aside to cool.

In the mixing bowl of a stand mixer fitted with the dough hook, combine the warm water and honey. Give it a quick stir with a spatula and add the rapid-rise yeast. Give it another quick stir, then walk away for at least 10-15 minutes so the yeast can bloom.

Remove the skin from the cooked sweet potato and mash it with a fork until mostly smooth (a few small lumps are okay). Sift the bread flour and set it aside. In a small bowl, beat the eggs and egg yolk with a fork until well blended.

When the yeast is ready, add the sweet potato puree, melted butter, salt and eggs and mix on low just until blended. Start adding the flour, one cup at a time, until the dough becomes sticky and clings to the dough hook (may take 3-5 mins.).

Note: this makes a soft, sticky dough. Humidity plays a part in how much flour you may need to achieve the proper texture. I’m in Houston, where the humidity was 75%, so I used all 4 cups of flour. You may use less, depending on your climate. Start by adding 3 cups of flour (one cup at a time) and slowly add more until you get a soft, sticky dough that clings to that dough hook.

Once the dough clings, stop the mixer and scrape the dough off the dough hook. Turn it out onto a lightly floured surface and knead lightly just until it forms a smooth ball. Place the dough ball in a lightly greased mixing bowl, cover it with plastic wrap and a clean towel, and place the bowl in a sunny window to rise until doubled in bulk. Once doubled, turn the dough out onto a floured surface and roll or press into a rectangle roughly 8″ x 20″.

To make sandwich buns: cut the dough into 1″ x 8″ strips (I use a rolling pizza cutter). Tie each strip into a knot, tucking the cut end underneath, and place them on a parchment or silpat mat lined baking sheet. Gently run the top of each bun with softened butter. Cover with plastic wrap and a lightweight towel and allow to rise again for at least 30 minutes, or up to one hour.

To make cinnamon rolls: combine 1/2 cup of sugar with 1 tablespoon ground cinnamon. Liberally coat your rectangle of dough with softened butter, then sprinkle the cinnamon sugar evenly over the entire surface of the dough. Roll the dough, working along the long side of the rectangle, then pinch the seam to seal it. Roll it over until the seam is facing down on the floured board, cover with plastic wrap and a towel and allow the dough to rest for 10 minutes. Using a sharp blade (I use my bench scraper), cut the dough into pieces 1 1/2″ wide and place them cut-side up on a lined baking sheet, at least 2″ apart. Cover with plastic wrap and a towel and allow them to rise one last time, for 30 minutes.

To bake: Pre-heat your oven to 375F. Once hot, bake your rolls one sheet at a time on the center rack of the oven. Bake 15-20 minutes, depending on your oven, or until golden brown. A good way to test sandwich buns is to gently press the center of one bun with your finger. If it feels soft and depresses easily, leave them in a little longer. If they feel firm, they’re done. Remove from the oven, place the pan on a cooling rack, and allow the buns to cool completely.

To make the cinnamon roll frosting: soften the cream cheese and butter to room temperature. Combine the cream cheese, butter, vanilla and orange essence or concentrate in a mixing bowl and whisk until smooth. Gradually add sifted powdered sugar, one cup at a time, until the mixture holds its shape when you drag your whisk through it. Scrape the frosting into a quart ziploc bag. Press the air out and seal the bag, then twist it to work the frosting into one corner of the bag. Snip the corner off with a pair of scissors, and frost the cinnamon rolls. I used a criss-cross pattern, but you could also start in the center and pipe a spiral or make the frosting thinner and use it as a glaze.

Sweet Potato Cinnamon Rolls - CloseUp

This recipe made 16 buns – 7 sandwich and 9 cinnamon rolls.

Baked buns can be frozen for future use. For the sandwich buns, place them in a freezer bag and press out as much air as possible, then place into a second freezer bag. For cinnamon rolls, leave glazed rolls on a baking sheet and place the pan into the freezer. Freeze cinnamon rolls for 2-3 hours, or until the frosting and buns are firm. Remove frozen rolls from the baking sheet and double bag them in freezer bags, just as you would the sandwich buns. Double-bagged buns should last up to 2 months in the freezer, if they last that long.

This recipe is adapted from a sweet potato roll recipe posted on the Tasty Kitchen website by Deana at Country Mom Cooks. I doubled the amount of sweet potato puree and yeast, and added more honey, melted butter and an additional egg yolk for a richer dough. Click the underlined link to the original.

Advertisement

10 Comments

Filed under Food & Recipes

Playing With Your Food, Recipe #3: My Big Sister’s Rainbow Tie-Dyed Cupcakes

Big Sis's Rainbow Cupcakes. I just drooled on myself.

Big Sis made these gorgeous Rainbow Cupcakes for our Hoegarden Weekend back in March. They were so awesome, I asked if she would share her recipe on my blog. Of course, she agreed. She’s a cake lover. A lover of cake. And it shows. The inspiration for these came from Andrea’s Can You Stay For Dinner blog. Substituting her own favorite white cake batter and frosting recipe, Big Sis created the perfect Rainbow Cupcake. And this week, during her visit to Casa NanaBread, she agreed to share them with you because you’re special and because we love cake. Did I say that already? I’m distracted by that photo. It’s hard to stay focused looking at that gorgeous cupcake. Here’s how she did it.

Big Sis’s “Sam Houston White Cake” batter (makes 18 cupcakes):
3/4 cup butter, softened
2 cups sugar
3 large eggs
3 cups flour
3 teaspoons baking powder
1/2 cup milk
1/2 cup water
1/2 teaspoon almond extract
6 Wilton gel food colorings in vibrant colors, not pastel
(we used red, orange, yellow, green, blue & purple)
One package of paper cupcake liners
One recipe for awesome cake frosting (link below)
One jar of colorful sprinkles for garnish

Using a mixer, beat the butter until it is soft and creamy. Add the sugar gradually and beat until it’s nice and fluffy. Add the eggs and beat until combined. In a separate bowl, blend the flour and baking powder until well combined. You can sift it if you like, but it’s not necessary. In another bowl combine the milk, water and almond extract. Starting with the flour mixture, incorporate the dry and wet ingredients alternately into the butter/sugar mixture until it’s all combined, ending with the last of the dry ingredients. Line your cupcake pans with 18 paper liners and preheat your oven to 350F.

To color your cake mix, divide the cake batter evenly into 6 bowls. Big Sis likes to wear those disposable rubber gloves for this to keep the food coloring from staining her hands. An apron’s not a bad idea, either. Using a popsicle stick or plastic spoon because the food coloring gel really will stain EVERYTHING, add 1/8 teaspoon of coloring gel to each bowl. Beat to thoroughly combine each color so you don’t get streaks in your batter. You don’t want streaks in your batter. If the color looks too dull, add a little more food coloring.

Using a spoon, add approximately one tablespoon of purple batter to each cupcake liner. If you have leftover batter, divide it and distribute it until all the batter is used. Using a clean spoon, add the blue batter to each cupcake liner, then green, then yellow, then orange, then red. You don’t need to be dainty here, but you do want to keep your batter in blobs for the best results.

Once all colors have been distributed, it’s time to swirl your batter. Grab a toothpick, bamboo skewer or chopstick and insert it into the batter. Form a figure 8 swirl through the batter to create the tie-dyed effect.

Bake one pan at a time for 15-18 minutes (depending on your oven), or until a toothpick inserted into the center of a cupcake comes out clean. Keep an eye on them. You don’t want to overbake these. Promptly remove from the oven and allow them to cool on wire racks until completely cool, at least 3-4 hours.

For the frosting, Big Sis used the “That’s the Best Frosting I’ve Ever Had” recipe by MissyDew off the Tasty Kitchen portion of The Pioneer Woman‘s website. Let me tell you, folks. They’re not kidding. This really is tremendous frosting. Click on the link to see the recipe. Generously frost each cupcake. Big Sis used a pastry bag with a nice star tip so she could pile it high. Immediately cover it with colored sprinkles so the sprinkles will stick. If you wait, the frosting will dry slightly and the sprinkles will roll off. And nothing could be more tragic than a cupcake without sprinkles. I exaggerate. But it really does make them prettier.

And that’s it, my friends. Grab a glass of cold milk and dig in. You won’t regret it. Your hips might. Your thighs might. Your jiggly upper arms might. But ignore them. You only live once. And a life without cupcakes is a life without joy.

Thanks for sharing your recipe, Big Sis. I enjoyed watching you work. The world is a groovier place with your tie-dyed rainbow cupcakes in it. Like totally.

36 Comments

Filed under Food & Recipes, Hoegarden Weekends

Sweet, Spooky Treats for Halloween!

Mummy Pretzels and Edible Eyeballs - So sweet, it's scary!

I seem to be on a mission to celebrate Halloween this year using every version of chocolate known to man. Don’t ask me why. I really can’t explain it. I just know that I’ve somehow been bitten hard by the Halloween bug, and I’m having a great time with it. This week, I decided to try my hand at bloodshot eyeballs and pretzel mummies for the grandkids – Jonah Bear & Lilly Bug. All it took was two bags of pretzels (rounds & rods), one pound of white melting chocolate, one bag of dark chocolate M&Ms, and two small tubes of Wilton decorating gel (red & black). I can’t take creative credit for either of these ideas. They came from two different blogs I follow. The bloodshot eyeballs came from a recipe posted on the Tasty Kitchen page of The Pioneer Woman website. I substituted dark chocolate M&M candies for the iris of the eyes and used the Wilton decorating gel for bloodshot streaks and pupils. This was a really fun project. It was submitted by “soufflebombay” as Edible Eyeballs. Here’s the link to the original recipe so you can see how she did it: http://thepioneerwoman.com/tasty-kitchen/recipes/desserts/edible-eyeballs/ and here’s a picture of how mine turned out. Some are bloodshot and some aren’t, but they’re all delicious!

I spy with my edible eye...something yummy!

The second round was the pretzel mummies. These were super easy and turned out really cute. This idea came from Alice and her Savory Sweet Life blog at http://savorysweetlife.com/ Her faces came out much cuter than mine, but I like the horizontal stripes I added to look like mummy wrappings. This is another really creative but easy treat to make. And I love how they look when you stand them all up in a container. They’re almost too cute to eat. Nahh!

Mummy, may I please have another pretzel?

This whole chocolate Halloween obsession started a few weeks ago with brownie spiders. I had friends over for dinner and made these for dessert. They were fun to make, and were delectibly delicious! Best of all, they were super easy and made with my favorite boxed brownie – the Ghirardelli dark chocolate mix.

No tricks, just treats...best spider you'll ever eat!

Mmmmm…best spider I’ve ever eaten. Okay, it’s the only spider I’ve ever eaten, but who’s counting? They’re also a fun hands-on art/food project if you have children or grandkids. I posted a complete “how-to” on the brownie spiders earlier. You can find them in my Food & Recipes tab.

There’s something about salty pretzels covered in chocolate that draws me in. I’m such a sucker for that combination. And the brownie spiders with ice cream and toppings satisfy a chocolate craving like nothing else. I’m wondering now what I might tackle next. Chocolate drizzled sea salt caramel apples? Oooo…maybe! A vampire themed raspberry & chocolate Godiva martini? Hmm…could be. Right now I’m just hoping I have the strength not to eat all of these treats before we see the kids. That would be bad. Very, very bad. Right?

8 Comments

Filed under Food & Recipes

Recipe Review: The Pioneer Woman’s Corn Chowder with Green Chilies

This is corn chowder with green chilies. I can’t take credit for this recipe. Not one little bit. This is a Pioneer Woman creation. It was posted last week by Ree Drummond, otherwise known as The Pioneer Woman. If you don’t know who she is, you need to find out. Like now. Her website is fabulous, and I’m not ashamed to admit I’m a devoted fan and follower. She’s a talented, funny gal.

Pioneer Woman's Corn Chowder with Green Chilies - Oh my, it's so good!

I have made several of the recipes off the Tasty Kitchen recipe link on the PW website, but this one by far has been the best. It’s creamy, it’s crunchy, and it’s got a ton of flavor with just a few ingredients. It’s rib stickin’ and soul satisfying. It’s got some of my favorite foods – bacon, sweet corn, green chilies and heavy cream. There’s just no way for this recipe to go wrong. It truly is a southwest sweet corn, green chili comfort food lover’s dream in a bowl.

I made a few slight alterations to suit our tastes, including using 8-10 shakes of Chipotle Tabasco sauce instead of 1-2 chipotle peppers in adobo sauce. I used 1/2 a teaspoon of garlic salt and 1 teaspoon of kosher salt instead of just using salt alone. I also added two small roasted poblano peppers (diced) and I roasted my corn-on-the-cob on the charcoal grill while The Complete Package was grilling pork tenderloins. Trust me, the toasty roasty bits on the corn added some great flavor to the soup. Other than that, stick to the recipe and you’ll be in chowder bliss in under an hour. And don’t forget to toast up a good loaf of crusty bread to serve with it…with lots of butter. You won’t regret it.

I’m not including the recipe in this post. I could never do it justice. Besides, Ree has already done all the work on her website. Here’s the link to the original Pioneer Woman recipe, complete with step-by-step instructions and mouth-watering photos. The rest is up to you, of course, but you really should try it! http://thepioneerwoman.com/cooking/2010/10/corn-chowder-with-chilies/

6 Comments

Filed under Food & Recipes