Tag Archives: baking

Flourless Dark Chocolate Peanut Butter Biscoff Cookies {that’s a mouthful!}

Peanut Butter Cocoa & Biscoff Cookies - Inside NanaBread's Head

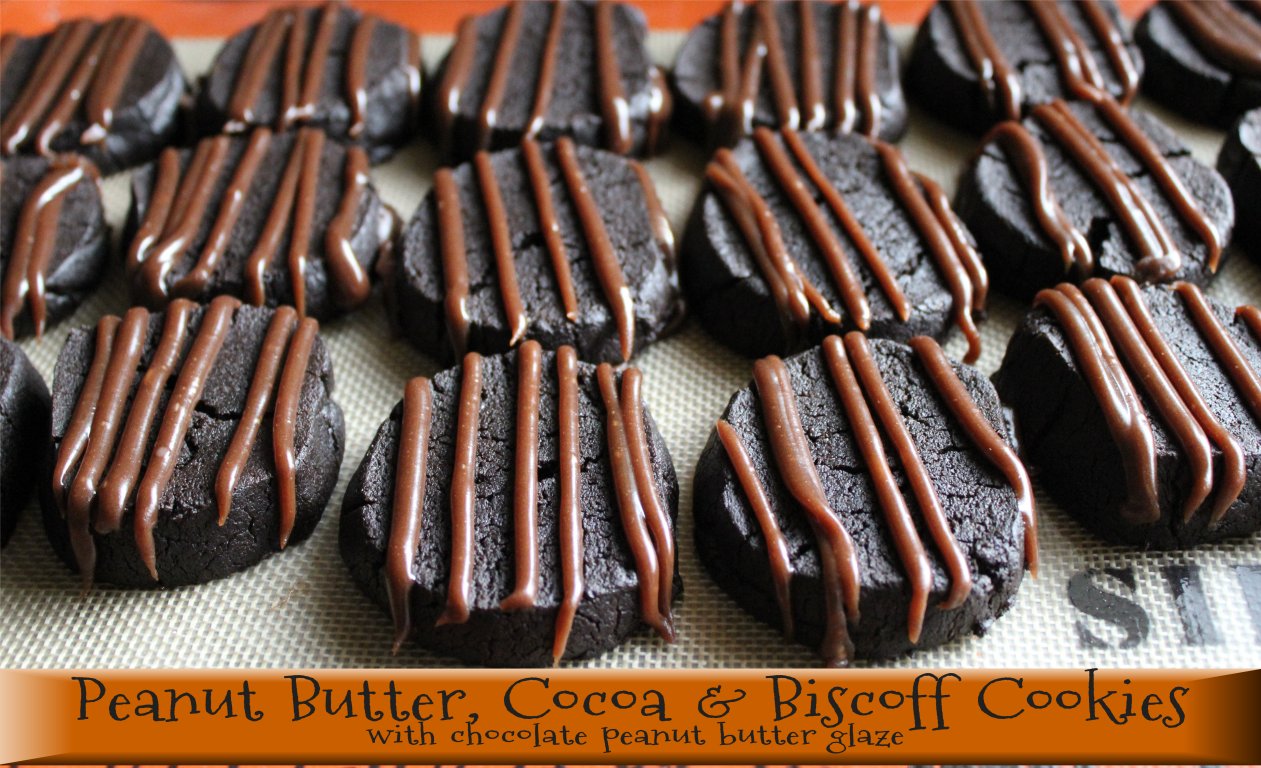
Try saying that three times fast. It’s a mouthful of title, but it’s also a mouthful of cookie. I thought about naming them “Pantry Cleaner Cookies” because that’s what I was doing when I thought of these. I found a half-empty jar of peanut butter and half a jar of Biscoff. Could they be combined? Is that legal? After a quick tweet to my Biscoff guru Megan, I decided to go for it. And if you’re going to combine peanut butter with Biscoff, why not throw in some dark chocolate because that’s how my mind works. And because more is… MORE!

For these cookies you will need:
1 1/4 cups creamy peanut butter
1 1/4 cups Biscoff cookie butter
1 3/4 cups brown sugar, packed
1 package (5 ozs.) vanilla instant pudding mix
3 large eggs
1 1/2 tablespoons vanilla extract
1 1/2 cups Hershey’s Special Dark cocoa powder
2 teaspoons baking soda
1/8 teaspoon salt

The vanilla pudding mix may seem odd, but my friend Beka put it in her peanut butter cookies for Sweets Week and they looked amazing, so I went for it. Using the paddle attachment (if you have a stand mixer), combine the peanut butter, cookie butter, brown sugar, dry pudding mix, eggs and vanilla extract until incorporated. Stop and scrape down the bowl, then turn the mixer to medium high and beat for 5 minutes more, or until the brown sugar is no longer gritty.

Stop the mixer; add the cocoa, baking soda & salt. Beat until all dry ingredients are thoroughly blended. Stop the mixer and check your cookie batter. It may seem a little dry, but should hold together when you pinch it into a ball.

Remove the beater and pour the dough out onto your work surface. I dumped mine onto a sheet of waxed paper, forming a line of dough about 18″ long. Using your hands, smash the cookie dough into an even log and wrap it in the waxed paper. Secure each end by twisting; you can secure it with a chip clip or rubber band. Once wrapped, roll the cookie dough log as if it’s a rolling-pin, making sure the entire roll is uniform in circumference. Pop the roll of cookie dough into the fridge for 1 hour or freezer for 30 minutes to make it easier to slice.

Once chilled, remove from the fridge or freezer and pre-heat your oven to 350F. Using a sharp knife, cut the roll of dough into 1/2″ slices. Note: I like my cookies thick and chewy. If you like yours thin & crispy, slice them thinner. If you intend to glaze yours like I did, leave them in smooth slices. If you’d like to skip the glaze and eat them plain, you can use a fork to make traditional hash marks on the top of each cookie. To glaze or not to glaze? That is the question.

PBCB Cookies - Slice & Bake - Inside NanaBread's Head

Lining your cookie sheets with parchment or Silpat mats; place cookies 1″ apart. Pop them into the oven while the dough is still very cold and bake for 10-14 minutes depending on how crispy you want them to be. As I said, I like mine thick & chewy, so I baked each batch for 12 minutes. They were still soft in the center and just beginning to crack around the edges like so. If you like them thin & crispy, watch them starting at 10 minutes, and check often so they don’t burn.

PBCB Cookies - Baked to a Crackle - Inside NanaBread's Head

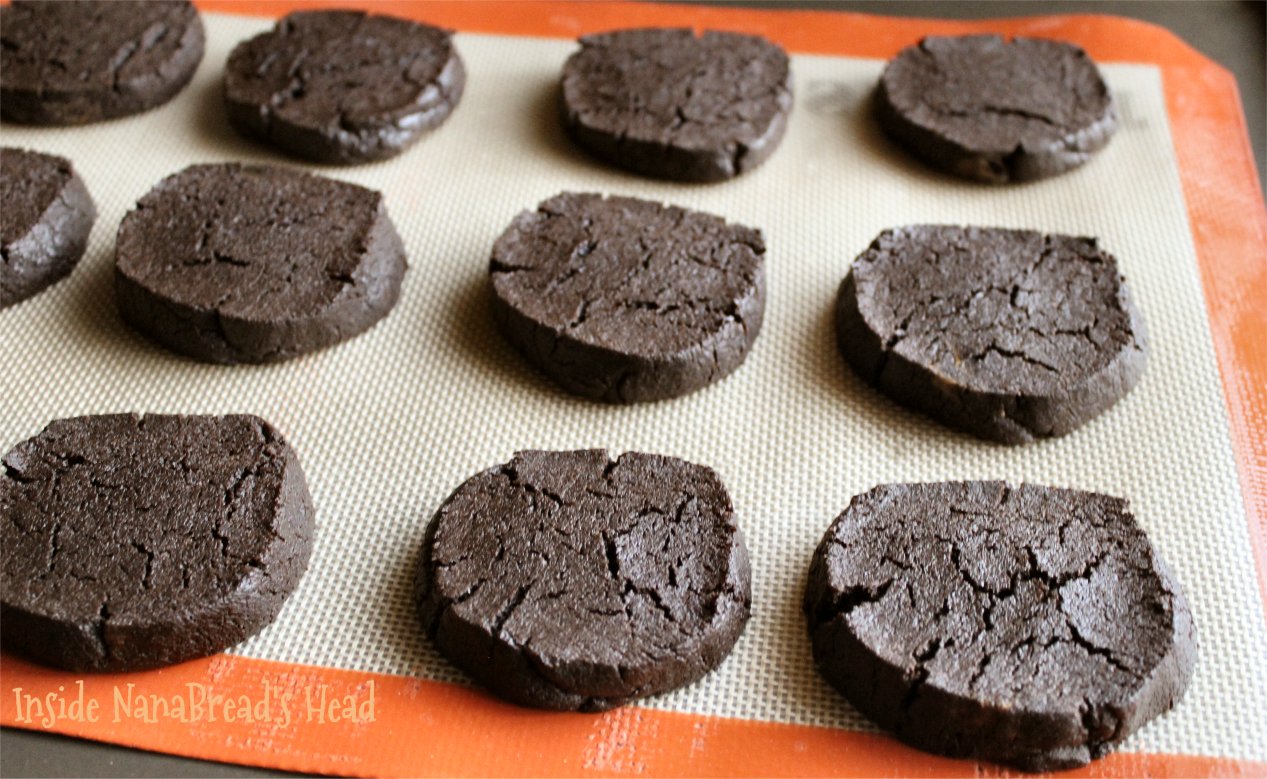
Can I just take a minute to say that one of my favorite things about baking cookies is when I have them all out on the counter, in all stages of ‘in progress’. There’s something about seeing them out there, with all the steps visible, that makes me feel like I’m accomplishing something.

PBCB Cookies - Cookie Station - Inside NanaBread's Head

Remove from the oven and allow to cool on the cookie sheets for at least 5-10 minutes before moving them onto sheets of parchment to cool completely. Because these are flourless, they are more fragile when warm. Move them too soon, and they may crumble. Now – glaze or no glaze? I vote glaze!

Dark Chocolate Peanut Butter Glaze:
1/2 cup creamy peanut butter
1/2 cup powdered sugar
4-6 tablespoons Hershey’s Special Dark chocolate syrup
2-3 tablespoons milk

Place the peanut butter in a microwave safe bowl and heat on high power for 30 seconds to soften it. Sift in the powdered sugar and whisk until incorporated; add the chocolate syrup and whisk until smooth. If it gets too thick too quickly, pop it back in the microwave for another 30 seconds. At this point, it will be too thick to pipe, so add 1 tablespoon of milk at a time until the mixture is glossy and the texture of a thick caramel sauce.

I like to put a quart freezer bag into a drinking glass (folding the top over the edge of the glass) and scrape the glaze into the bag using a spatula. To glaze the cookies, press the air out of the bag and twist the bag to press the glaze into one corner. Snip the tip off the corner and pipe immediately onto the cookies.

PBCB Cookies - Inside NanaBread's Head

I push mine close together and use a straight line motion, moving back & forth over each row. But if you’re feeling frisky, you can always:

PBCB Cookies - Swirled Glaze - Inside NanaBread's Head

Allow them to sit for 1-2 hours, until the glaze is firm to the touch. Store in airtight containers. Kept in the fridge, they should last up to 2 weeks; un-refrigerated, they should be good for 5-6 days (if they last that long). If you’ve got a cup of coffee or a glass of milk, these will be all kinds of dangerous.

PBCB Cookies - Finished - Inside NanaBread's Head

PS: These are for our annual ‘ladies only’ spring fling weekend, Hoegarden. I’ll get back to you next week and let you know how these went over, if I survive it. Want to find out more? Click on ‘Hoegarden Weekends’ on the right sidebar under Tidbits You Can Choose From. We are THAT family. No apologies. None.

PPS: If peanut butter is a no-no in your house due to allergies, you might try swapping Sun Butter for peanut butter. My friend Kisten does it often, and she swears by it. And I would give Kirsten a kidney, so if I can trust her so can you.

PPSS: I don’t really have a third one; I just wondered if you’d keep reading. :D

Advertisement

23 Comments

Filed under Food & Recipes

Cookie Week: Turtle Thumbprints

Cookie Week '12 - Turtle Thumprints - Drizzled
It’s Cookie Week! That’s great news if you’re a cookie lover; even better news if you’re a supporter of Cookies for Kids Cancer. This year, my blogging friends and I will again be baking to support this very worthy cause. For each cookie baked, sold, exchanged, or gifted Glad will donate $1 (up to $100,000). In addition, OXO (one of my favorite brands) has initiated the “OXO Matching Gift Program” and will match all proceeds from registered bake sales as part of their $100,000 pledge to Cookies for Kids Cancer. I’ve loved these brands for years, but I love them even more for their unwavering commitment to ending pediatric cancer. I’m sending a big thank you and hug to OXO & Glad.

And now on to the cookies! I chose Turtle Thumbprint Cookies this year. Risky, since I’ve never made them before, but when I saw them on Pinterest, I couldn’t resist. It’s one of my favorite flavor combinations – chocolate, caramel & toasted nuts. I love turtles – whether in cookie, brownie or ninja form. These are no exception. It all starts with a rich, truffle-like dark chocolate dough.

Dark Chocolate Thumbprint Cookies:
(adapted from The Kitchen is my Playground, and America’s Test Kitchen)

1 cup all-purpose flour
1/3 cup Hershey’s ‘Special Dark’ cocoa powder
1/4 teaspoon salt
1 stick of unsalted Land O’ Lakes butter, softened
2/3 cup sugar
1 large egg, separated + 1 extra egg white
2 tablespoons milk
1 teaspoon pure vanilla extract

1 1/4 cups toasted pecans, finely chopped
1 jar of dulce de leche caramel, for filling
6 ounces of chocolate chips, for drizzling

For the cookie dough:
Combine the flour, cocoa & salt; set aside. Using an electric mixer, cream the butter and sugar until fluffy. Add the egg yolk, milk & vanilla; mix until thoroughly incorporated. Reduce the mixer speed to low and blend in the flour/cocoa mixture. Cover with plastic wrap and refrigerate until firm (at least one hour). Once firm, scoop 1 tablespoon of dough into the palm of your hand and roll into a ball. Continue until all the dough has been rolled into balls.

Cookie Week '12 - Turtle Tumbprints - Perfectly Shaped Dough Balls

To assemble the thumbprint cookies:
Whisk both egg whites until frothy. Place the chopped pecans in a separate bowl and keep nearby. Using a fork, lower each cookie ball into the egg whites, rolling to make sure they’re completely coated.

Cookie Week '12 - Turtle Thumbprints - Finish Prep

Cookie Week '12 - Turtle Thumbprints - Egg White Wash

Remove from the egg wash and immediately drop it into the bowl of nuts. Roll or toss until the dough ball is completely coated in nuts.

Cookie Week '12 - Turtle Thumbprints - Pecan Coating

That last photo reminds me of “Where’s Waldo?” Can your find the cookie? Here’s an example of a perfectly coated cookie ball:

Cookie Week '12 - Turtle Thumbprints - A Perfectly Coated Ball

Place the cookies 2″ apart onto cookie sheets (I recommend using a silicone mat or parchment). Using your finger or a round wooden spoon handle, press a divot into the top of each cookie. The bigger the divot, the more caramel it holds.

Cookie Week '12 - Turtle Thumbprints - A Perfect Divot

Bake at 350F for 12-14 minutes, depending on your oven. You want them to just be done. Bake too long, and they’ll start to split and crack around the outside edges which will wreak havoc when you try to fill them with caramel. And we don’t want that. When they’re cooled to room temperature, grab your favorite dulce de leche caramel. I’m using this jar of unholy goodness sent to me by my friend Kat at Tenaciously Yours. It’s sea salt caramel from Trader Joe’s and it’s divine. Ima need a new jar soon. Or two. Or twelve.

Cookie Week '12 - Turtle Thumbprints - Trader Joe Caramel

Spoon just enough caramel into each cookie to fill the divot without running over the top. They get really messy when they run over the top.

Cookie Week '12 - Turtle Thumprints - Oh Sweet Caramel Goodness

Now grab your favorite milk chocolate and melt it; whisking until smooth. I like to scrape it into a plastic zip-style Glad bag so I can drizzle quickly and easily (plus it makes clean-up a snap). Just twist the baggie to press the chocolate into one corner, then snip the tip and drizzle like a pro. If you want to get all fancy-pants, you can top these with a toasted pecan. I tried it, but I’m not sure I like having my view of that sea salt caramel blocked. Caramel is meant to be seen.

Cookie Week '12 -  Finished Turtle Thumbprints

Notes from my personal experience with this recipe:
1. The dough balls (uncoated) can be made and frozen in advance in airtight freezer bags. Just thaw before coating with egg wash & nuts and baking.

2. The recipe called for regular cocoa, but I’m a dark chocolate lover so I substituted the Hershey’s Special Dark cocoa and it rocked.

2. Almonds can be substituted for pecans. And if you’re a Snickers fan, I’m betting peanuts would be pretty tasty, too.

3. The original recipe (as seen on Pinterest) called for using 14 wrapped soft caramel candies, melted down with 3 tablespoons of heavy cream. I chose the jar of sea salt caramel because I had it on hand and it’s delicious.

4. This recipe says it makes approximately 30 cookies. I tripled the recipe for a holiday cookie exchange and it worked perfectly. It made exactly 90 cookies. You’ve got to love truth in advertising.

Speaking of truth in advertising, are you familiar with the OXO brand? They make some of my favorite kitchen gadgets – including my digital scale, measuring & cooking utensils, mandolin, etc. Their Good Grips utensils are my ‘go to’ products. I love them, and that’s the truth. Last week, this box of goodies arrived via the OXO Blogger Outreach Program. It contains two OXO items that came in handy for cookie baking. Perfect timing!

Cookie Week '12 - Turtle Thumbprints - OXO Box of Love

The box included the OXO “Be A Good Cookie” spatula and the cutest set of miniature measuring cups I’ve ever seen. First, check out this spatula.

Cookie Week '12 - Turtle Thumbprints - OXO Good Cookie Spatula

Proceeds from the sale of OXO Good Cookie spatulas help support Cookies for Kids Cancer and the good work they do. If you’re looking for stocking stuffers for the cooks/bakers in your family, this is perfect. It’s a gift that keeps on giving. You know what else would make a great stocking stuffer? These adorable and highly useful miniature measuring cups. I just can’t get over these. And did I mention they nest? Love, love, love them!

Cookie Week '12 - Turtle Thumbprints - OXO Mini Measuring Cups

Stay tuned for updates all week long as other Cookie Week bakers share their holiday favorites. For instance, Kirsten at Comfortably Domestic kicked off our Cookie Week shenanigans yesterday with decorated shortbread cookies and a King Arthur Flour giveaway. You’ll want to check out that giveaway!

Other Cookie Week bloggers will include Megan at Country Cleaver, Kat at Tenaciously Yours, Mads at La Petite Pancake, Allison at Decadent Philistines Save the World, Carrie at Bakeaholic Mama, and Madeline at Munching in the Mitten.

And if you’re baking for your friends & family and would like to join our alliance to fight pediatric cancer, drop me a comment with your cookie count and we’ll include it in our total number. Help Glad & OXO and bakers everywhere support Cookies for Kids Cancer – one sweet treat at a time.

Cookies for Kids Cancer Button

Monday: Kirsten @ Comfortably Domestic – Decorated Shortbread & King Arthur Flour Giveaway

Tuesday: Mads @ La Petite Pancake – Honey-Glazed Lemon Yogurt Cookies

Wednesday: Madeline @ Munching in the Mitten – Chocolate Chunkers & Megan @ Country Cleaver – Homemade Mint Oreos & Carrie @ Bakeaholic Mama – Maple Bacon Sugar Cookies

Thursday: Allison @ Decadent Philistines – Sesame Plum Thumbprints & Kat @ Tenaciously Yours – Colossal Cookies

Friday: Carrie @ Bakeaholic Mama – Brown Sugar Toffee Cookies & Kirsten @ Comfortably Domestic – Gingersnaps

Saturday: Madeline @ Munching in the Mitten – Salted Double Chocolate Peanut Butter Cookies & Kirsten @ Comfortably Domestic – Egg Nog Logs

20 Comments

Filed under Blogger Collaborations, Food & Recipes, Things I Love

Pumpkin & Cranberry for the win!

Peanut Butter & Jelly

Grilled Cheese & Tomato Soup

Chips & Salsa

Cheese & Burger

All are great combinations, but near the top of my list is pumpkin & cranberry. Luscious spiced pumpkin paired with tart dried cranberries makes me furiously happy. So when I saw these muffins on Kirsten’s Comfortably Domestic blog, I knew they would be mine. Mine! mwuhahahaha {that’s my evil laugh}

Photo used with permission; copyright Comfortably Domestic Blog

How do I describe these adequately? I don’t think I can. You really have to bite into one to fully appreciate it. They’re soft and delicate with a warm, robust pumpkin flavor. There’s a subtle scent of spice that leaps forward when you raise it to your lips, then the aroma of orange from the glaze leaps for joy just as you sink your teeth into this fall gem. I mean really. They are that good.

Pumpkin & Dried Cranberry Muffins

Can you smell that? It’s spice and pumpkin and cranberry and orange.

I take it back. These are not good, they’re glorious. And flavorful. And confirmation of why I love the pumpkin & cranberry combo and all things fall.

Speaking of fall, I’ve been on a canning kick. Earlier this week, I put up my second batch of cranberry goodness. It’s thick and loaded with fresh cranberries, dark sweet cherries and raspberries. I’m not sure whether to call it jam, preserves, or cranberry sauce on steroids. Whatever it is, it’s tasty.

While I was mixing up these muffins, it suddenly hit me that if dried cranberries are good, more cranberries are better. In the spirit of “more is more” I spooned a heaping teaspoon onto the top of half the muffins just before I popped them in the oven. Here’s what happened – and I hadn’t even glazed it yet!

Holy smokes, y’all. I’m in love with this muffin.

I’m sending Kirsten a jar of cranberry goodness as part of our Great Jelly Swap this fall. It’s not just that I need her approval for messing with her recipe a little. It’s that I NEED her to experience it firsthand. Because friends & food go together like Cake & Ice Cream. Fritos & Chili. Cheese & Crackers. Eggs & Bacon. Butter & Popcorn. Spaghetti & Meatballs. Mashed Potatoes & Gravy.

What are your favorite food combos? Any weird ones? I’d love to hear!
Should I go first? I like salt & vinegar chips on bologna sandwiches.

Kirsten’s muffins paired with my cranberry whateveritis; yum!

Note: I solemnly promise not to swipe other blogger’s recipes and publish them on my blog, so CLICK HERE to see Kirsten’s Pumpkin & Cranberry Muffins in the master’s own words (and with color photos to boot). She also shares tips on baking these as loaves instead of muffins, which would make fantastic gifts for family & friends during the holidays. Thanks for sharing, Kirsten! Solid A+

17 Comments

Filed under Food & Recipes

One Kitchen Many Hearts – October

Oh sweet glorious gift exchanges, it’s that time again. The time when our little circle of blogging buddies send care packages to each other; just because.

The OKMH Gang (top, left to right) – Mads, Kirsten & Megan (bottom, left to right) me, Allison & Kat

And while we know who’s sending each box, we never quite know what to expect. For that reason, each exchange is like a little bit of Christmas all year round. This month my box came from Kat of Tenaciously Yours in the Minneapolis/St. Paul area of Minnesota. Check out all the fabulousness, including every non-perishable thing needed to make Cafe Latte’s Famous Turtle Cake. You heard me – gooey, fudgy caramel-coated Turtle Cake. {sigh; where are my fat pants?}

Dessert in a Box & all the pretties to serve it with


See that cute tea towel? If I’m not mistaken, Kat’s sweet mother has been hand-stitching these one-of-a-kind towels for all of Kat’s OKMH boxes this year. How sweet is that? Mine has purple plums framed in a cheerful yellow border. Absolutely lovely. And get a load of that silver server. I have an old dainty one that I have to use with caution. This one is fancy AND sturdy. I’m talking ‘lift a turkey from the roaster’ sturdy. I think that cut-out at the end may even double as a beer bottle opener. How’s that for an all-purpose kitchen tool?

A vintage cake server & a handmade tea towel

This next treasure really made my heart melt. I don’t even remember how it first came up, but Kat showed off this vintage 1940’s cookbook a few weeks ago and I immediately swooned. I have a deep abiding love for vintage cookbooks, as well as a long-standing love affair the JR Watkins brand. This book was like a long-lost star-crossed love at first sight thing for me. When I opened my box, I was stunned to find the book with its purple post-it note. Heart be still.

A vintage cookbook from 1946; heart be still

It’s a salad cookbook; copyright 1946. In case you’re wondering, yes there are ingredients listed that I don’t believe exist any more & yes, there’s a lot of mayonnaise throughout the book. But I’m not afraid of a little mayonnaise, and you should know by now that I always play around with recipes. So hello, 1946. Let me introduce you to a little thing called fat-free Greek yogurt. Booyah!

Salads from the 1940’s; how fun is that?

Another unexpected surprise: while flipping through the cookbook, this gem fell out. It’s a recipe from a magazine or newspaper circa the 1950’s, and it’s for Halloween Doughnuts. Just before Halloween, y’all! Talk about timing!

This bonus recipe was tucked inside. Perfect timing!

I’ll have to try those soon, but for now let’s get to the real meat of this OKMH Box – that Turtle Cake. Raise your hand if you want to help me eat this:

The star of the show – Cafe Latte’s Turtle Cake

What? Still not sure? What if I show it to you like this? All sliced up and ready to face-plant into? Does that help? Did I mention it’s all soft and gorgeous on the bottom, and all fudgy and caramel-coated on top? Now are you interested?

Yes, it is as rich and gooey as it looks.

Okay, I’ll put on a pot of coffee and wait for you. Who am I kidding?! This cake is GONE! G-O-N-E gone. Don’t despair, my lovelies. Kat included the link to the recipe on her blog and I’ll share it here, too. Just click here for the recipe. Note: the recipe calls for this to be baked in three 9″ round pans. I baked it in a 13″x9″ pan (baking time changes to 35 minutes, in case you’re taking notes).

Next month, in celebration of the holidays, we’re rocking OKMH “Secret Santa” style. Boxes will arrive in December with no advance notice of who will be shipping it. When I say “I can’t wait!” I mean it; I’ve already been crafting cute holiday things for my secret recipient. Until then, see what I sent to Allison by clicking here, and you can follow the chain from blog to blog to see what everyone else got, as well. Now… where did I hide that last piece of cake?

11 Comments

Filed under Food & Recipes, Things I Love

Bake Sale for Beka – join the party!

UPDATE: The Bake Sale for Beka is closed. Thanks a million to Cindy C. who placed the winning bid on my dark chocolate cherry pecan cookies at $60. WOW – $60 for my cookies! I promise not to disappoint, Cindy! Thank you also to all who visited the bake sale and to those who helped raise funds more than $1,700 for the Crohn’s & Colitis Foundation of America and Camp Oasis. Great cause, great people and a great bake sale. Congrats, Megan & Beka!

My good friend Megan at CountryCleaver.com is hosting a Bake Sale this weekend in honor of her best buddy Beka. Proceeds will benefit the Crohn’s & Colitis Foundation of America, Camp Oasis, and Beka’s first half-marathon where she’ll be racing for the cure. You can join the party by participating!

Megan will be joined by 25 of her blogging buddies (myself included) as we bake fabulous goodies for an on-line auction this Sunday & Monday. We’re talking good stuff like Pumpkin Peanut Butter Brownies, Nutella-Stuffed Cinnamon Sugar Muffins, Coconut Oil Poundcake with Almonds & Lime, Chipotle Butter Toffee, Cheddar & Olive Biscuits, Coconut Maple Granola, Passionfruit Chili Pepper Palmiers, Neapolitan Cupcakes, Mud Hen Bars, Death By Chocolate Cookies and more!

I’ll be baking my Dark Chocolate Cherry Pecan Cookies for one lucky bidder. They’re gooey, they’re loaded with dried cherries & nuts, and they are sinful as H-E-doublehockeysticks. And the best part is four dozen of them can be YOURS if you place the winning bid. Did I mention they’re really delicious?

But wait! There’s more! In addition to this plethora of baked goods, the following sponsors have joined in to donate these incredible auction items:

Chobani – donated a party pack of good-for-you flavored yogurts

Kerrygold – donated one month’s worth of their high quality butter & cheese

Star Fine Foods – donated a basket of their olive oils & Mediterranean classics

Le Creuset – donated a 4.5 quart Dutch Oven in a lovely cassis color

America’s Test Kitchen – a copy of their new Quick Family Cookbook AND the new Cook’s Country Complete Series Cookbook

To see these fine products and read more about the Bake Sale for Beka, go to www.CountryCleaver.com. One look and you’ll see what we all see – that life is precious, cookies are delicious, and nothing beats the love and support of our friends and family. Now mark your calendar for Sunday, grab your wallet, and bid on something yummy! {please & thank you}

4 Comments

Filed under Food & Recipes, Miscellaneous Thoughts

Comfort Food: Slab Apple Pie

Sometimes you just need a comfort food, know what I mean? Apple pie does it for me, and this one does it best because it’s so easy to pull together.

NanaBread’s Slab Apple Pie:
One batch of Kirsten’s ‘No Excuses’ Pie Dough (click for the recipe)
8 small or 6 large Granny Smith apples – peeled, cored & sliced thin
1 teaspoon lemon juice
3 Tablespoons unsalted butter
1/2 cup applesauce
1/4 cup dark brown sugar
1/2 teaspoon ground cinnamon
1/2 teaspoon apple pie spice
1 egg + 1 tablespoon of water (egg wash)
sugar crystals (or Demerara sugar) for sprinkling on top

To start, mix up the pie dough as directed in the link above. Form the dough into a disc, wrap it tightly in plastic wrap and pop it into the freezer to firm up. If this pie dough recipe rings a bell, it’s because it’s my all-time favorite go-to recipe. Kirsten’s pie dough is as billed – no excuses. If you have a food processor and five minutes, you can make amazing homemade pie dough. Thanks, Kirsten!

While the dough is chilling, peel, core and slice the apples and place them in a large non-stick skillet. Add the lemon juice and unsalted butter; cook over medium-high heat until the apples start to brown slightly and the liquid has evaporated. Stir in the applesauce, brown sugar and spices and continue to cook until the mixture is bubbly and the sugar begins to caramelize. Remove the pan from the heat and allow the apples to cool to room temperature.

Once the apple mixture has cooled, remove the pie dough from the freezer. Generously flour your work surface and rolling-pin. Divide the dough (2/3 for the base; 1/3 for the strips on top). Roll the larger portion into a rectangle (the size depends on your baking sheet). I like to place mine on a silicone baking mat to prevent it from sticking and to help the bottom brown more evenly.

Spread the apple mixture evenly across the bottom crust, to within 1 1/2″ of the edge. Roll the remaining dough into a rectangle. If you’re in a hurry, simply place the second rectangle over the apple mixture and cut a few steam vents in the top, then skip to the section below about finishing the edges.

If you really want to get frisky, go for broke and impress your friend and family with a pretty lattice top. You can do it! Cut the second rectangle into 1/3″ to 1/2″ strips – I like to use a yardstick and a pizza cutter to cut even strips. I know, I know… it’s just that I’m all about perfect strips. If you’re not, just eyeball it. If your strips are uneven, you call this Rustic Slab Apple Pie. {wink}

Lay one layer of strips in one direction, about an 1/2″ apart. Fold every other strip back about 2″ and lay your first horizontal strip, then return the folded strips back to their original position. Then switch and do every other vertical line until you’ve worked all the way across the pie.

If you’re starting to panic just reading this, remember you can use the second rectangle as a solid top to your slab pie. Just be sure to cut a dozen or so small steam vents into the top before baking. I’m all about giving you options. Once your top crust is on, trim off the excess so that the edges are aligned, then roll the edges inward until they are touching the edge of the apple pie filling.

To help create perfectly square corners, fold each corner in before you roll the edges. That’s an old sewing trick. Thanks for teaching me to sew, Mom!

You can stop here and have plain edges, and it will look perfectly fine.

Or you can go for broke and flute the edge. You know what they say… “go big or stay home.” Not one to shy away from a fancy-pants pie, I fluted mine. Have a few extra tablespoons of flour nearby; you’ll need it to keep your fingers from sticking to the dough while you crimp those edges.

Once you’re satisfied with your crimped up primped up pie, pop it back in the freezer for at least one hour. Why? Two reasons – 1. it will help create a flakier crust if the butter is frozen when the pie goes into the hot oven, and 2. when you brush the pie with an egg wash before baking, it will prevent the brush from damaging the dough like it would at room temperature.

Once your slab pie is properly frozen, remove it from the freezer and pre-heat your oven to 375F. Whisk one egg with one tablespoon of water to make an egg wash, and brush the entire pie with it making sure to coat all of the exposed pie dough. Then sprinkle with crystallized sugar or Demerara (sugar in the raw).

Bake at 375F for 30 minutes, rotating the pie once after 15 minutes, or until the pie turns a light golden brown all over. Remove from the oven and allow to cool at least 10-15 minutes before serving. That’s the hardest part of this recipe.

I like mine with homemade whipped cream or a scoop of vanilla ice cream, but you can do whatever floats your boat. Want a slice of cheddar on top? Go for it! Looking for an excuse to by a pint of Dulce de Leche Caramel ice cream? Do it! Whatever makes you happy. And that’s what this slab apple pie is all about – making you happy. Isn’t that the goal of all our favorite comfort foods?

Note from NanaBread: this slab pie can be made with almost any thick filling. If you love canned fruit pie filling, just spoon it on and go from there. Or go fresh and try it with an apple/cranberry combo or fresh sliced plums; yum. Go nuts! And if you do, let me know what worked for you. Enjoy!

29 Comments

Filed under Food & Recipes

Texas Brew Salsa, a hearty breakfast and a GIVEAWAY; what a morning!

UPDATE: Congratulations to Wen, winner of our Texas Brew Salsa giveaway. Enjoy! Special thanks to Brenda Craig of Texas Brew Salsa. I very much appreciate her generous offer to make a reader’s salsa dreams come true.

Good morning, y’all. At least I hope it’s a good morning for you. If it isn’t, then maybe you should have one of these beauties for breakfast:

A Texas Howdy Breakfast with Texas Brew Salsa

Nothing gives your day a swift kick in the pants like a rib-sticking breakfast smothered in salsa, am I right? And not just any salsa – Texas Brew Salsa from right here in the heart of Texas. Created and run by local salsa magnate Brenda Craig (she’ll get a kick out of that title), it’s a great example of Texas ingenuity and creativity. And honey, Texans know salsa.

Texas Brew Salsa ingredients are roasted over an open fire for exceptional flavor. Better yet, they’re all natural. That ‘little something extra’ you’ll taste is honey. Varieties include Honey Roasted Chipotle, Honey Roasted Peach, Honey Roasted Pineapple, Honey Roasted Mango, Honey Roasted Apple Cinnamon, Hot Iron Habanero, Fire Roasted Poblano, and Fire Roasted Black Bean & Corn. Texas Brew is slightly sweet, and yet not too sweet and it’s highly addictive. We’ve tried it on just about everything – eggs, fish tacos, burgers, bean burritos and bag after bag of tortilla chips. Like I said, it’s addictive.

I took this photo; that’s why the bottom right jar has some missing. Yum.

I was introduced to Texas Brew Salsa via a blog giveaway hosted by Jen of Juanita’s Cocina. Like most of you, I enter these things thinking “I’ll never win, but what the heck; may as well try!” Well, it’s a good thing I did. A few days later, I received an e-mail from Jen saying ‘Congratulations!’ which was quickly followed by an e-mail from Brenda saying “You’re a winner – which varieties would you like to try?” In a few days, I had a big heavy box of salsa at my door. Now that’s great customer service. Here’s what I was inspired to make for you:

NanaBread’s Easy Green Chili, Cheddar & Bacon Biscuits:
1 1/2 cups buttermilk baking mix (I use Pioneer; Bisquick will work)
1/2 cup medium cheddar cheese, grated
1 Tablespoon roasted Hatch green chilies, minced
1/4 cup cooked bacon, crumbled (reserve the bacon fat)
1/2 Tablespoon bacon fat
pinch of cracked black pepper
pinch of garlic salt
2/3 cup milk
2 Tablespoons butter

Filling:
bacon, fried to perfection
sausage, fried to perfection
eggs, soft fried to perfection
salsa, fire roasted to perfection
(see the pattern here?)

Pre-heat your oven to 450F and line a baking sheet with parchment paper; set it aside. In a bowl, combine the baking mix, grated cheese, green chilies, bacon, pepper & salt; stir to combine. Gradually stir in 2/3 cup milk and blend just until the dry ingredients are incorporated; do not over mix. Using an ice cream scoop that has been lightly oiled, scoop biscuit mix onto the parchment paper. Place a pat of butter on top of each biscuit. Real butter, pretty please.

Biscuits just before they go into the oven


Bake for 15-18 minutes (depending on the size of your biscuits) or until they turn a pale golden brown. Remove from the oven and allow them to cool before slicing to prevent them from falling apart. Biscuits can be tricky like that.

Biscuits as big as your head, just out of the oven. Pretty!


Carefully slice the biscuits in half and top each half with a schmear of butter, a generous helping of bacon or sausage (or both – your choice), and a soft fried egg or two. Slather the entire pile in Texas Brew Salsa (I used the poblano).

A bacon, egg & cheese biscuit is good, but salsa makes it so much better!

This recipe makes two very large or 4 small biscuits. But this is Texas, so we make them big. Of course. I’m digging in. Would you like to join me?

You’d better be hungry; this is one big biscuit!

Now, who would like to try Texas Brew Salsa? Brenda Craig has generously offered to give away a box to one lucky reader. For a chance to win:

Leave a comment telling us what you’d make with Texas Brew Salsa or if you’d eat it straight out of the jar with a big bag of chips.

For extra entries, you may:
1. Follow Texas Brew Salsa on Facebook
2. Follow Texas Brew Salsa on Twitter
3. Follow me, NanaBread on Twitter
**NOTE: You MUST leave a separate comment stating that you have done each or any of these three things.**

This giveaway is for one variety pack of Texas Brew Salsa, including free shipping right to your door. This giveaway is open to Continental US residents only. It will run from Monday, October 1st, 2012, to 9:00 p.m., CST on Friday, October 5th, 2012. At that time, one winner will be chosen by random draw and notified by e-mail. He/she will have 48 hours to respond or another winner will be chosen. Now get to entering! You can’t win if you don’t!

Texas Brew Salsa – getcha’ some!

32 Comments

Filed under "Buy Local" Spotlights, Food & Recipes

Dark Chocolate Cherry Pecan Cookies

Dark Chocolate, Dried Cherries & Toasted Pecans – all in one cookie!

Years ago, during a visit to Seattle, I fell in love with Chukar Cherries. More specifically, I fell in love with their dried cherries. So much so, I may have been gently escorted away from the free sample basket at the Pike Place Market.

Since then, I have tried to incorporate more dried cherries into my life, especially (it seems) when paired with dark chocolate. I made these cherry chocolate chip scones back in 2010. They were really tasty.

But the tide took a turn last year when my friend Kirsten sent me a box of Michigan cherries. Dried cherries. That’s when I took a step back and said, “Hold on. Michigan grows cherries, too?” That’s when Kirsten confirmed that yes, Michigan does indeed grow cherries. Really spectacular, gorgeous tart red cherries. And I fell in love all over again.

My first box of Michigan cherries – from The Cherry Republic

Last month, as part of our One Kitchen Many Hearts box exchange, Kirsten struck again by including another bag of dried cherries from Shoreline Fruits. They’re from her neck of the woods. Have mercy! They are world class – with a perfect balance of tart and sweet, dried yet plump. Now I’m not trying to start a war between the states, but I think Michigan cherries may just edge out Washington state cherries. Granted, it has been a few years since I’ve had a Washington dried cherry, and if the fine folks at Chukar want to send me a box just to settle this once and for all, I’m open to a side-by-side tasting. Until then, here’s my latest ode to the dried cherry. Paired with chocolate; as it should be.

NanaBread’s Dark Chocolate Cherry Pecan Cookies:
(makes approximately 36 cookies)

2 cups all-purpose flour
2/3 cup good quality cocoa powder
3/4 teaspoons baking soda
1/4 teaspoon salt
1 cup (2 sticks) unsalted butter, at room temperature
1 1/4 cup granulated sugar
2 large eggs
2 teaspoons vanilla extract
1 teaspoon almond extract
1 cup extra-dark chocolate chips (I prefer Guittard)
1 cup toasted pecans, chopped
1 cup dried cherries, chopped

Pre-heat your oven to 350F. In a large bowl, sift together the flour, cocoa, baking soda and salt. Using a mixer, beat the butter, sugar, eggs, vanilla and almond extracts until fluffy. Gradually add the flour mixture, beating until well combined. Reducing the mixer to low speed, blend in the chocolate chips, toasted pecans and dried cherries. If you’re using a hand mixer, you may want to stir them in by hand, as the dough will be thick.

Oh, that dough… this would be great as brownies, too.

I like to bake cookies on those silicone baking mats, but if you don’t have them, line your baking sheet with parchment paper. I also like to use a medium-size ice cream scoop to shape my cookies. I absolutely love how perfectly uniform they turn out with a scoop. Don’t worry; you can also use a spoon. Drop golfball-size dough balls onto prepared sheets, approximately 3″ apart.

The key to perfectly uniform cookies – an ice cream scoop.

Bake for 10-12 minutes, depending how ‘done’ you like them. For soft chewy cookies, bake closer to 10 minutes. For cookies that are soft in the center and crispy around the edges, bake closer to the 12 minute mark. Remove from the oven, allow to cool on the pan for 10-15 minutes, then remove to parchment or waxed paper to finish cooling.

From there, you’re just a cold glass of milk away from a perfect cherry-laden fudge bliss cookie coma.

Do you have a favorite dried fruit you cook with? Coconut, blueberries, pineapple, figs, prunes or something tropical? I’d love to hear what inspires you. Feel free to include links to recipes in your comments. I’m always looking for something new to try or Pin. Please do share!

Recipe adapted from: http://zestycook.com/a-taste-of-heaven-double-dark-chocolate-cookies/

35 Comments

Filed under Food & Recipes

Apricot & Marmalade Fried Pies

Texas-style fried pies filled with warm fruity goodness

My friend and favorite Canadian, Karlynn of The Kitchen Magpie, recently put out a call for guests posts for her Pieday Friday series while her family is on vacation. I love Karlynn and her Friday pie features, so I immediately jumped in. I’d love it if you would drop by and check out my Apricot & Marmalade Fried Pies and tell her “Howdy!” from NanaBread.

Fried Pies are easy with a great pie dough & the filling of your choice

Speaking of pie dough, my guest post includes a shout out to my friend Kirsten from Comfortably Domestic. Her “No Excuses” Pie Dough recipe makes an appearance. In fact, I couldn’t have done this without her. Thanks, Kirsten!

You want ice cream with that?

Thank you, Karlynn, for the opportunity to share Texas-style fried pies with your readers. To read my guest post, click HERE. Thanks, y’all!

24 Comments

Filed under Food & Recipes

Tropical Cream Cheese Pound Cake

When it comes to dessert, my motto is usually “More is More.” A pan of plain brownies doesn’t cut it in my world. They need to have Hershey’s Special Dark chocolate syrup, dark chocolate chips and a shot of Kahlua thrown in. There are, however, a few things for which I am a purist. Shortbread cookies and pound cake, for example. Some things are just better in their pure, simple forms.

Don’t get me wrong – you can still add stuff, but the key is to keep it simple. To enhance, not overshadow. Sometimes, that’s a thin line to balance. For a girl who trips over her own two feet and walks into walls (this girl), that can be tricky. This week, I tried something that could have pushed ‘simple’ over the edge, but didn’t. It worked beautifully and started with some of my favorite things:

1. Lots & lots of butter, cream cheese and some gorgeous brown eggs

2. A bowl of soft, fluffy, sifted all-purpose flour; I’m a messy sifter

3. Macadamia nuts, shredded coconut and Cream of Coconut

4. A bag of dried tropical fruits – mango, papaya and pineapple

The result was a soft, moist, not-too-dense pound cake with all of the flavors of the islands. I’m not going to lie. My heart melted at the first bite. This, to me, is a perfect cake. No layers. No frosting. Just pure, delicious cake. It was super easy to whip up, and made two large gorgeous loaves. Here’s how I did it.

NanaBread’s Tropical Cream Cheese Pound Cake:
3 sticks unsalted butter, at room temperature
1 8-oz. pkg. cream cheese, at room temperature
6 large eggs, at room temperature
3 cups granulated sugar
1/2 teaspoon salt
4 teaspoons vanilla extract
1 teaspoon almond extract
1/2 cup Cream of Coconut
3 cups + 2 tablespoons all-purpose flour
1 teaspoon baking powder
1/2 cup macadamia nuts, chopped
1 cup sweetened shredded coconut
1 6-oz. pkg. dried tropical fruit

To start, lay your butter, cream cheese and eggs out in advance. You’ll want them to be at room temperature when you start putting this together.

Preheat your oven to 325F. Spray 2 large non-stick loaf pans with Pam spray for baking (or grease & flour both pans).

Using an electric mixer, beat the butter and cream cheese until light and fluffy. With the mixer still running, gradually beat in the sugar, then add the salt, vanilla, almond extract and Cream of Coconut. Beat until thoroughly combined. Turning the mixer down a notch, add the eggs one at a time beating well after each addition. Remove the bowl from the mixer.

In a separate bowl, combine the flour and baking powder; whisk to blend well. Roughly chop the dried fruit into 1/2″ pieces, then add the fruit, macadamia nuts and coconut to the bowl of flour; stir until combined.

Add the dry ingredients to the butter/egg mixture. Using a spatula, gently fold until all of the flour mixture is incorporated. Divide the batter in half and spread evenly into each loaf pan. Tap the pans gently on the counter a few times to help remove air bubbles, then bake at 325F for 60-75 minutes, rotating once half-way through baking. The cakes are done when a toothpick comes out clean from the center of the top of the cake. You’ll want to keep an eye on it so you don’t over bake these. An over-baked cake is a dry cake.

Remove from the oven and place the pans onto wire racks for at least one hour. After one hour, remove them from the pans and allow them to cool on the racks for another hour. One loaf can be sliced and stored in an airtight container for now; the other loaf can be wrapped tightly in plastic wrap and zipped into a large freezer bag and stored in the freezer for later. Or you can make a friend’s day and share a loaf. It’s up to you, but I’d taste it first and then decide. You might just decide to hang on to both.

Note: This recipe was adapted from a cream cheese pound cake recipe by my blogging friend & baker Anne, the genius behind the From My Sweet Heart blog. If you haven’t seen Anne’s blog yet, you need to drop in for a visit. She’s a lovely lady and her love of baking shows in all of her recipes and photographs. If you drop in, please tell her I said hello.

16 Comments

Filed under Food & Recipes