Category Archives: Food & Recipes

Food is an important part of our family. I don’t believe in “secret recipes.” If I make it, I’ll share it. And if you like it, I hope you’ll share it, too.

Berry Week: Annie’s Blackberry Cake

Blackberry Cake - InsideNanaBreadsHead

Hooray for summer berries and Berry Week! Fresh produce from the farmers market is one of my favorite things about summer and each year I look forward to hitting all the fruit stands. Fresh berries, peaches, watermelon and all those glorious veggies make me happy to my core.

This week, our Theme Weavers band of bloggers is taking on summer’s bounty with Berry Week. Contributions include pies, cakes, cocktails and breakfast treats so stay tuned and plan to visit all this deliciousness.

Berry Week Logo

Monday:
Kirsten @ Comfortably Domestic – Fresh Strawberry Pie
Madelyn @ La Petite Pancake – Berry Sangria

Tuesday:
Anne @ From My Sweet Heart – Summer Berry Terrine with Mascarpone
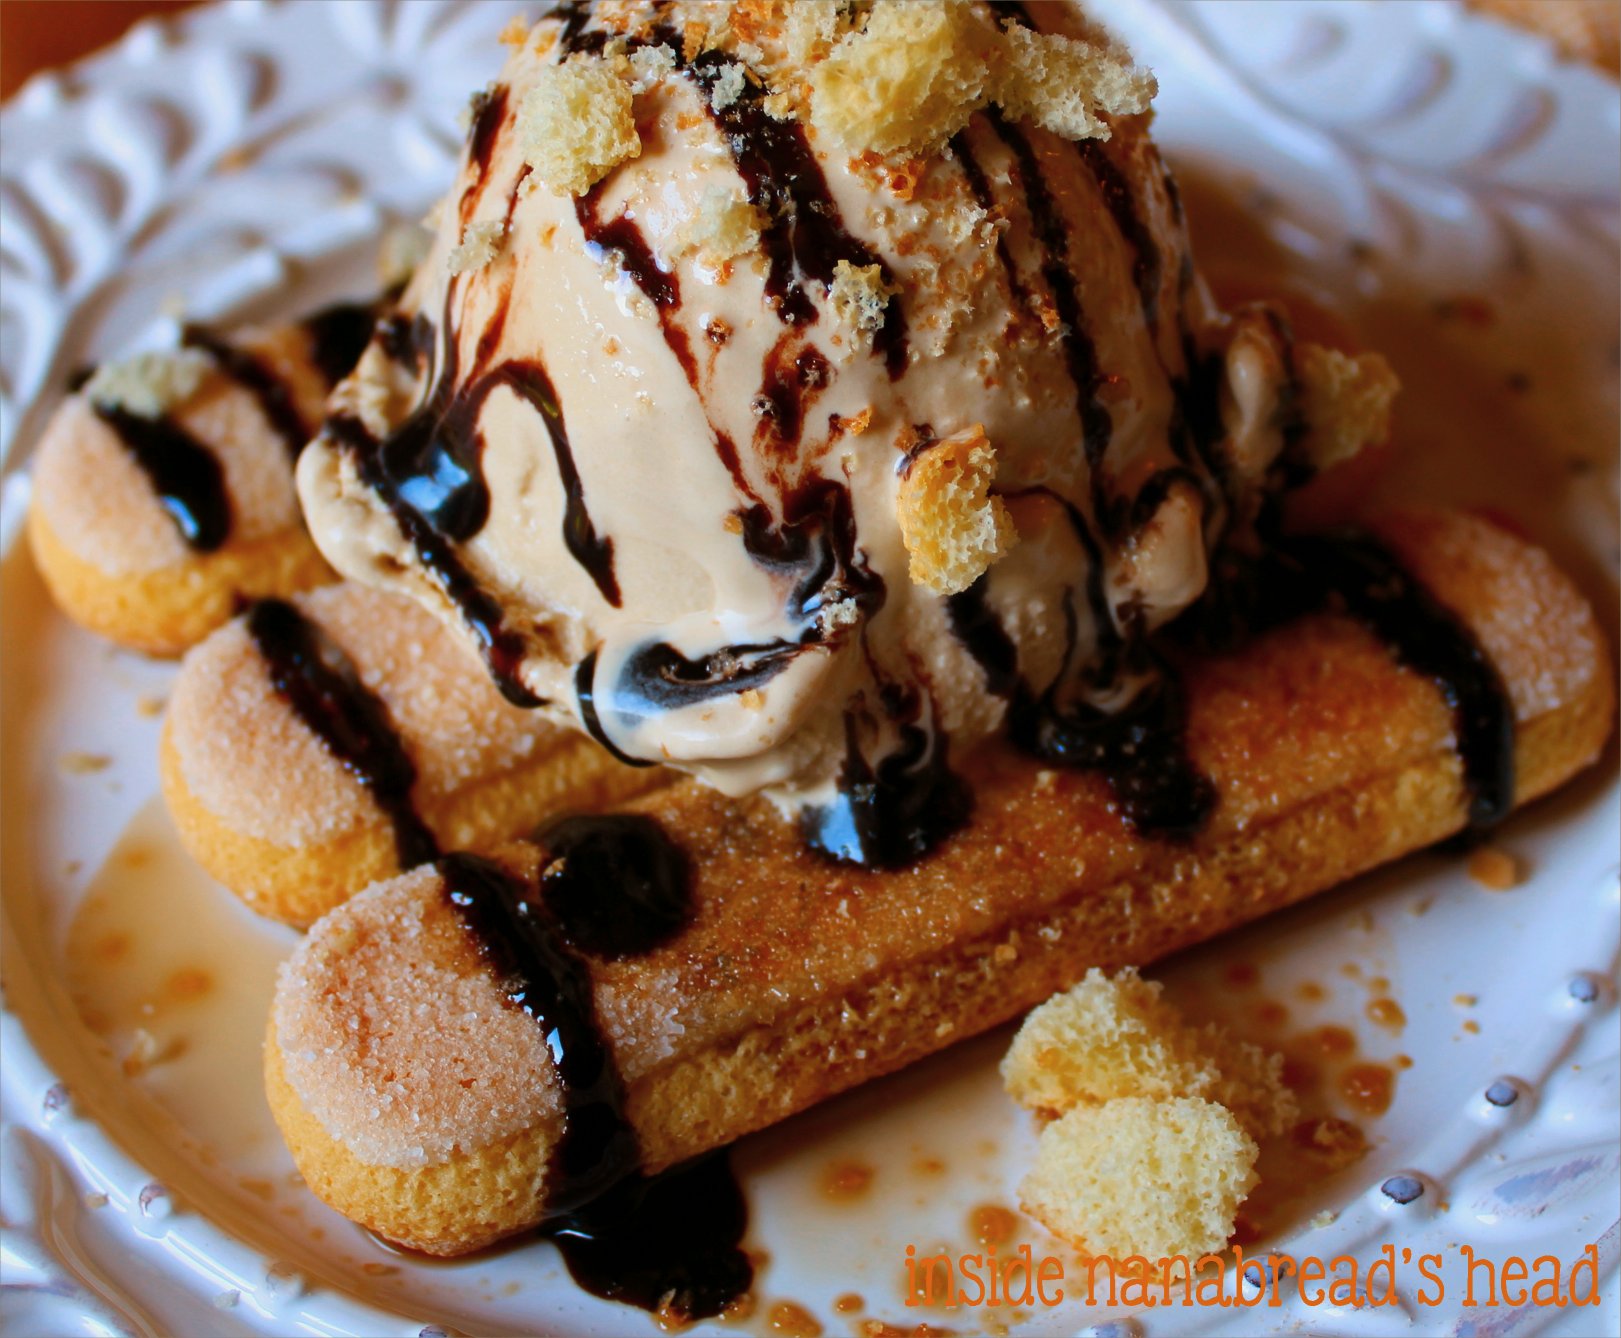
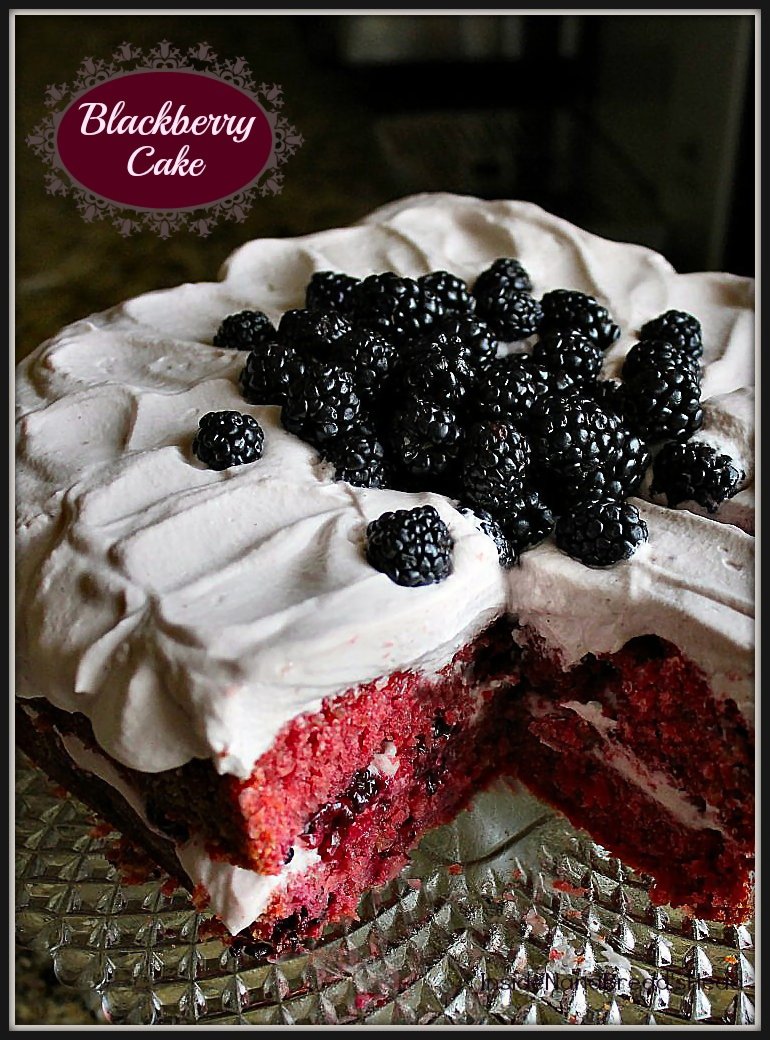
Jeanne @ Inside NanaBread’s Head – Annie’s Blackberry Cake (below)

Wednesday:
Lauren @ Grier Mountain – Vanilla Gelato with Peach-Blueberry Compote
Kat @ Tenaciously Yours – Strawberry Smash

Thursday:
Megan @ Country Cleaver – Strawberry Basil Sorbet Bellini
Haley @ Girly Girl Cooks – Strawberry-Rhubarb Stuffed French Toast

Friday:
Christina @ Buffy & George – Raspberry & Cherry Pie (gluten-free crust)
Beka @ Kvetchin’ Kitchen – PNW75 Berry Cocktail
Monica @ The Grommom – Papaya-Berry Crisp (gluten-free)

Saturday:
Madeline @ Munching in the Mitten – Cherry Clafoutis
Allison @ Decadent Philistines – Raspberry Marshmallows (2 ways)

Blackberry Cake & Vintage Square Cakestand - Inside NanaBread's Head

Now let’s talk cake! I am a self-proclaimed Pie Girl. Basically, it’s because I despise dry, over-frosted cake. Yuck. I’d rather skip dessert all together than eat dry cake. Luckily, this is not that cake.

I first got this recipe from my dear friend Annie. We worked together in an elementary school front office for years and became soul sisters. She shared this gem with me and I shared it with my mom and sisters. Now it’s a family favorite. Best of all, it’s incredibly easy to make and absolutely packed with blackberry flavor. I know some people hate the M word (rhymes with hoist) so I’ll refrain. Just know that this cake is the furthest thing from dry.

Annie’s Blackberry Cake

For the cake:
1 box white ‘super moist’ cake mix (18 ozs.)
1 box black raspberry or raspberry Jell-O (3 ozs.)
1 cup vegetable or canola oil
1/2 cup milk
4 whole eggs
4 Tablespoons seedless blackberry jam
1 cup fresh or frozen blackberries
1 cup sweetened coconut
1 cup chopped pecans

For the Whipped Cream Frosting:
2 cups heavy whipping cream, chilled
1/4 to 1/2 cup granulated sugar (to taste)
1 teaspoon pure vanilla extract
3 tablespoons seedless blackberry jam
fresh blackberries for garnish

To Make the Cake:

Pre-heat your oven to 350F. The original recipe called for three 8″ round pans for a layer cake. I used a vintage square tube pan I found at an antique shop last summer, but you could also bake this cake in a 13″ x 9″ rectangle pan (even easier). Generously grease & flour your baking pan(s) and set them aside.

Next, put the coconut & pecans into a food processor and pulse until both are well combined and ground into small pieces; set those aside, as well.

Combine the cake mix, dry Jell-O powder, oil, milk and blackberry jam in a large bowl and beat with a mixer until thoroughly combined. Add the eggs one at a time, beating after each addition. Gently fold in the berries, coconut and pecans until evenly distributed. Pour the batter into your pan(s) and spread it into a smooth, even layer.

Bake at 350F until a toothpick inserted near the center of the cake comes out clean. My square tube pan took 40 minutes. A 13″ x 9″ square should take 25-30 minutes, and three round layers should take 20-25 minutes. As with all recipes, baking time may vary depending on your oven, so keep an eye on it for the last 10 minutes and check it often with a toothpick. Once it’s done, remove from the oven and allow to cool in the pans until cool to the touch.

To Make the Whipped Cream Frosting:

While your cake is cooling, place your mixing bowl and beaters in the refrigerator and chill for at least 15-20 minutes. Once chilled, remove from the fridge and add the cream, sugar, vanilla and jam to the bowl. Beat on medium-high to high speed just until firm peaks form.

If your cake is still warm to the touch, put your prepared whipped cream in the fridge and wait until the cake is completely cooled to prevent your cream from melting. Once the cake is cool, you’re ready to frost.

For my tube pan cake, I used a serrated knife to cut the cake into two even layers. If you use a 13″ x 9″ pan, simply top with whipped cream frosting and sprinkle with fresh berries. For a layer cake, stack one layer at a time onto a serving plate and fill with 1/2″ of the whipped cream, then top with last of the whipped cream and fresh berries. I had extra berries, so I tossed them with some sugar and used them between my layers as well.

Because of the whipped cream frosting, this cake must be refrigerated. It’s also best when eaten within 48 hours. That’s one of the reasons my family makes this for family gatherings. It’s a lot of cake to consume for two people in one weekend. If that’s an issue, you might consider baking this as cupcakes and freezing them un-frosted. Then when you need a cake fix, you can thaw as many as you want/need and make just enough whipped cream for those few.

If you’re thinking “I’m not really a blackberry fan” then try it with raspberries or strawberries. Don’t like pecans? Substitute toasted almonds. Allergic to nuts? Leave them out! I draw the line at coconut. It’s just too good to leave it out, but if you have to I promise to look the other way. It’s not brain surgery – just cake. Tweak it any way you like. Food should be fun, so play with it!

Now all that’s left to do is to dig in. My cake is going to Mom’s house. Luckily, she’s a good sharer. Speaking of sharing, here… I saved you a piece.

Blackberry Cake - A Slice - Inside NanaBread's Head

Note: This recipe was adapted from a copy of a recipe taken from an old unspecified spiral-bound cookbook. It is credited to Billie Kendrick of Springdale, Arkansas. Her original recipe called for a heavy fudge-like frosting made with one pound of confectioner’s sugar. Since I’m not a buttercream fan, my family and I opt for a lighter whipped cream topping. I also took the liberty of adding blackberry jam to the cake batter for extra flavor. My heartfelt thanks go to Ms. Kendrick for her perfect summer berry confection and to my sweet friend Annie who was kind enough to share it. XOXO

Advertisement

28 Comments

Filed under Blogger Collaborations, Food & Recipes

Cherry Almond Shortbread Cookies

This year’s Bake Sale for Beka (aka Cookies for Crohn’s) was a great success, raising $1,680 for the Crohn’s & Colitis Foundation of America. Wahoo! Great job and high fives to all the bakers, bloggers & bidders who participated!

Cherry Almond Shortbreads - Inside NanaBread's Head

My contribution to this year’s bake sale was these luscious Cherry Almond Shortbread Cookies – so buttery and delicious! My winning bidder was Taryn from the Pacific northwest (Seattle area). To my surprise, she bid a whopping $60.00 for four dozen of my shortbreads. Thank you so much, Taryn! I hope you and your friends and family enjoy them!

Now that they’re baked and shipped, I thought I’d share them here so you can make them as well. And trust me – if you love buttery shortbread cookies, dried cherries and pecans, you ARE going to want to make them. This recipe has been doubled so that it makes approximately 5 to 6 dozen cookies, depending on how big you cut them. Mine were approximately 1 1/2″ squares and made 6 dozen.

NanaBread’s Cherry Almond Shortbread Cookies
adapted from The Grand Central Baking Book (Classic Buttery Shortbread)

3 cups all-purpose flour
1 cup Bob’s Red Mill Almond Meal (almond flour)
1 1/2 cups powdered (confectioner’s) sugar
1/2 teaspoon salt
4 sticks (2 cups) unsalted butter, room temp
2 teaspoons pure vanilla extract
2 teaspoons pure almond extract
1 1/2 cups dried tart cherries
1 1/2 cups whole almonds, toasted
granulated sugar, to sprinkle on top

Pre-heat your oven to 375F. While your butter is softening, spread the flour, almond meal and almonds onto a silpat or parchment lined baking sheet and toast in the oven for 10-15 minutes, or until the flour just starts to take on some light color and the almonds are fragrant. Remove from the oven and allow to cool to room temperature.

Reduce your oven temperature to 325F.

In a food processor, combine the dried cherries and cooled almonds. Pulse until both are chopped into small chunks. Don’t pulse too long, or you’ll end up with cherry/almond paste. Set aside.

In a mixing bowl, combine the toasted flour and almond meal, the powdered sugar, salt and cherry/almond mixture; whisk to combine.

Using a stand mixer with a paddle attachment, beat the softened butter on medium speed until smooth and creamy (2-3 minutes). Reduce the speed to low and add the vanilla and almond extracts, beating just until combined. Slowly add in the dry ingredients and mix until thoroughly combined.

Line a jelly roll pan with parchment or a silpat mat. Scrape the dough onto the pan and with lightly floured fingers or a flat spatula, spread the shortbread dough into the pan, working it all the way out to the corners. To get a nice even layer, place waxed or parchment paper on top of the dough and use a rolling pin.

Cherry Almond Shortbreads - Pressing Into Pan - Inside NanaBread's Head

If you don’t have a rolling pin, lay some waxed or parchment paper on top of the cookie dough then top with a second cookie sheet or jelly roll pan and press to form a nice even layer. Peel the paper off and sprinkle lightly with granulated sugar, then pop the pan in the freezer to chill for 20-30 minutes.

Next, use a bench scraper (my favorite tool) or a metal pancake spatula to score the cookies into squares. I like to hold the bench scraper vertically and press until I feel it hit the bottom of the pan. (Because the bench scraper has a fairly sharp edge, just be sure not to press so hard that you damage your silpat mat!)

Cherry Almond Shortbreads - Cutting into Squares - Inside NanaBread's Head

Once the cookies are scored, place the baking sheet into the oven on the middle rack and bake for 40-45 minutes (time may vary depending on how hot your oven gets – each oven is a little different). When the shortbread is firm to the touch in the middle of the pan and the cookies are a light golden brown, they’re done. Remove from the oven and allow then to cool 15-20 minutes, then use your bench scraper or spatula to re-cut the cookies along your score lines.

Cherry Almond Shortbreads - Out of the Oven - Inside NanaBread's Head

Once they are completely cool, you can remove them from the pan and layer them with parchment or waxed paper into an air-tight container. These will stay fresh for about 2 weeks at room temperature, or up to one month in your fridge.

Cherry Almond Shortbreads - Cut into Squares - Inside NanaBread's Head

Love chocolate? Then why not dip them? For that first Bake Sale glamour shot, I dipped a few cookies in dark chocolate. For Taryn, my winning bake sale bidder, I created a variety pack of white, milk and dark chocolate dipped (1 dozen ea.) as well as one dozen plain so she could enjoy them in their pure just-baked form.

Cherry Almond Shortbreads - Dipped in Chocolate - Inside NanaBread's Head

Have mercy – the dark chocolate coated are my personal favorite. What a winning combo! Now I just have to hope they make it to the west coast without all that gorgeous Guittard chocolate melting. I packed them in an insulated lunch cooler with those blue ice freezer packs, so keep your fingers crossed.

Note to Self: Next year, don’t dip anything in chocolate. It’s summer, dummy.

18 Comments

Filed under Blogger Collaborations, Food & Recipes

It’s time! Bake Sale for Beka time!

Bake Sale logo courtesy of Megan @CountryCleaver

Bake Sale logo courtesy of Megan @CountryCleaver

Update: The Bake Sale for Beka is now closed. I’d like to thank Taryn L. from the Seattle area for placing the winning bid on my Cherry Almond Shortbread Cookies – a whopping $60! This year’s Bake Sale raised almost $1,700 for the Crohn’s & Colitis Foundation of America. Unbelievable, and completely impossible without the support of our friends, family and bake sale bidders. So thank you from the bottom of my heart for helping us help Beka reach her goal!

We’ve waited so patiently and it’s finally here! The Bake Sale for Beka, also known as Cookies for Crohn’s, kicks off this morning and I’m so excited to be participating! As I mentioned earlier, I’m donating four dozen Cherry Almond Shortbread Cookies dipped in chocolate. What kind of chocolate, you ask? Well, whatever chocolate the winning bidder chooses, of course!

Win my cookies, and you can pick whichever rich Guittard chocolate enrobes them – white, milk or dark. But wait, did you just say you’d pick all three? Well then, place the winning bid on my cookies and tell them you’d like them as a ‘variety pack’ and that’s exactly what you’ll get! I’ll stop at nothing to raise more money for Beka and the Crohn’s & Colitis Foundation of America!

To recap – that’s four dozen handmade shortbread cookies chock full of toasted almonds, dried Michigan cherries and real butter, dipped in the chocolate of your choice. Heck, I may even throw in a jar of homemade jam for the lucky winner. It’s insanity! So what are you waiting for? Go bid on these beauties!

Cherry & Almond Shortbreads - Inside NanaBread's Head

To browse the mouth-watering line-up of goodies donated by 35+ food bloggers from across America, visit our hostess with the mostess – Megan at www.countrycleaver.com. Her Bake Sale for Beka post outlines the on-line bidding guidelines and instructions you need to make sure a box of baked goods arrives on YOUR doorstep. You do want fresh-baked cookies on your doorstep, right? So let’s DO this and help put Crohn’s & Colitis in our rear-view mirror.

7 Comments

Filed under Blogger Collaborations, Food & Recipes

Random Thoughts Thursday

It’s early Thursday morning and I desperately need coffee. So while I’m making a cup, feel free to browse a few random things that came up this week.

1. Bake Sale for Beka (aka Cookies for Crohn’s)
My friend Megan from Country Cleaver is hosting this amazing on-line bake sale benefitting the Crohn’s & Colitis Foundation of America for the second year running. I’m participating again by baking four dozen of these Cherry Almond Shortbread Cookies dipped in dark Guittard chocolate. Holy yum!

Cherry & Almond Shortbreads - Inside NanaBread's Head

Made with flour & almond meal, dried Michigan cherries, toasted almonds & real butter these shortbread cookies stand on their own without any chocolate. But what fun is that? Seriously, when things can be dipped in dark chocolate, they absolutely should be. If these beauties have captivated you, you can bid on them! If you win, I’ll ship 4 dozen directly to your home, dipped in whichever type of chocolate you prefer – white, milk or dark. Winner’s choice.

To bid or browse the other selections generously donated by a plethora of fabulous food bloggers go to Megan’s website THIS SATURDAY, JUNE 22, 2013. That’s right, folks… this is a one day on-line auction benefiting the Crohn’s & Colitis Foundation and celebrating Beka’s first half-marathon for the cure. For the record, on a scale of 1 to 10, Beka is a 15 kind of amazing. So mark your calendar and drop in on the Bake Sale for Beka to watch the bidding shenanigans. And if you end up with the winning bid on my cookies, I might just throw in a jar of homemade jelly. It’s been known to happen.

2. The Complete Package went to the Republic of Texas motorcycle rally in Austin and all we got were photos & disco light sabers.
Okay, that’s true but not entirely true. TCP (my beloved) DID attend the ROT Rally in Austin where his girlfriend (if I may brag a bit) took first place in the Metric Customs category. Yes, I refer to his motorcycle as his girlfriend. Here’s a snap in case you’re curious about her. Meh; she’s okay I guess. :)

TCP's Honda Fury

Each year, on Friday evening, participants in the motorcycle rally ride from the Austin fairgrounds into downtown in a bike parade that stretches more than 10 miles. MILES, people. And each year, My Baby and I take the grandkids downtown to watch the parade so they can see their Papi ride in. They get the biggest kick out of seeing him in the parade. It’s his rock star moment.

After he gets downtown and parks, we all walk Congress looking at the motorcycles and snapping photos. Here are a few from last Friday night. This first one is of Jonah Bear & Lilly Bug with ‘The Cat Lady’. She’s really popular.

ROT Rally 2013 - Jonah & Lilly with Cat Lady

ROT Rally 2013 - Strolling on Congress

ROT Rally 2013 - State Capitol

3. I took the kids back to Springdale Farm.
Remember last week when I mentioned I had the privilege of visiting Springdale Farm for the U.S. Farmers & Ranchers Alliance dinner as part of the BlogHer Food conference? It was a wonderful, magical night under the stars and trees.

Springdale Farm - US Farmers & Ranchers Dinner

I enjoyed it so much I vowed to bring My Baby and the kids for a visit, and last Saturday we did just that. Despite the heat, the kids had a great time and enjoyed walking the farm, spotting fresh vegetables, and picking out some to take home. In case I haven’t been clear in past posts, I L-O-V-E a good farmer’s market or farm stand and Springdale Farm is now one of my favorites. If you’re in Austin, please visit and support a local farmer. Food doesn’t get any fresher.

Lilly & The Chickens - Springdale Farm

Jonah & Lilly - walking the herb garden at Springdale Farm

Farm Stand at Springdale

Ever wondered what an artichoke looks like when it’s left to bloom? Well now you know. You’re not going to see that in a grocery store, folks!

Artichoke Blooms - Springdale Farm

We also attempted to take Jonah & Lilly on a mural hop around Austin. More on that later, but here’s a glimpse of what we did before we died of heat stroke.

Lilly & Jonah at Austin Mural

4. Nothing rocks summer like the glitter polish.
It started with pale pink glitter polish over raspberry red and it has now morphed into pale teal glitter over a dark teal base. For a girl who doesn’t usually paint her nails, I’m totally digging the disco glitter. Hello summer!

The Megan - Teal Sparkle Nails

5. Don’t forget this weekend’s Bake Sale for Beka on-line auction!
I mean it, people. Buy my cookies and I’ll make it worth your time & money. We’re talking FOUR DOZEN HANDMADE FROM SCRATCH COOKIES and homemade jam or jelly. If I could ship a puppy, I would. I’m not above bribery. Whatever it takes. Just bid. It’s for a good cause and there are cookbooks & cookies to be had. LOTS of cookies. For a preview, CLICK HERE.

BakeSale4Beka

25 Comments

Filed under Blogger Collaborations, Family Stuff, Food & Recipes, Miscellaneous Thoughts, Things I Love

Loaded Veggie Pizza (& I mean loaded!)

Veggie Pizza - Inside NanaBread's Head

Ever been so sold on a certain brand you start to think of yourself as a rabid brand loyalist? Well, I have become obsessed with DeLallo. You may remember a certain post for homemade pimento cheese? Well, those piquillo peppers were so glorious, I decided to branch out and try other items. To the extent that I made a total veggie power pizza with some of their line. And you know what? Their other products live up to the piquillo pepper hype.

Here’s what I bought from the DeLallo line this week:
1.) can of artichoke hearts
2.) jar of sun-dried tomato bruschetta
3.) jar of basil pesto in olive oil
4.) jar of pine nuts
5.) yet another jar of piquillo peppers

I know… I’m out of control. But stay with me, because the pizza was awesome.

In addition to the DeLallo goodies, I also picked up:
1.) fresh baby spinach
2.) fresh button mushrooms
3.) an orange bell pepper
4.) a purple onion
5.) a small tub of ricotta cheese

Secret foodie confession: I keep frozen pizza dough in my freezer at all times. The type I buy is just a frozen dough ball in a bag from my local HEB grocery store. I keep both the whole wheat and traditional white on hand. And not just for pizza. If you thaw it out and let it rise, it can double as breadstick dough, cinnamon rolls, etc. Pretty versatile stuff, really.

So for this pizza, I thawed out a ball of the whole wheat and let it rise while I baked cookies. (More on that later, but it involves an on-line bake sale coming up later this month for which I am making cherry almond shortbread cookies dipped in chocolate. Break out your wallets, kids. You’re going to want to bid on these.) Here’s how the pizza baking went down.

First, I rolled out the whole wheat dough and baked it for 10 minutes, brushed only with olive oil, to prevent it from getting soggy, then I layered on a schmear of pesto, some sun-dried tomatoes (drained) and mushrooms sautéed in chili oil.

Veggie Pizza - pesto, sun-dried tomatoes & mushroom layer

Next came a layer of fresh spinach, some sliced purple onion and the chopped & drained artichoke hearts. For the record, I L-O-V-E love artichoke hearts.

Veggie Pizza - spinach, purple onion, artichoke hearts

But wait! There’s more! Next, I got artsy with my orange bell pepper and roasted piquillo peppers. Yes, I play with my food. :) The Complete Package walked into the kitchen just as I finished laying on the peppers and said “this is going on the blog, isn’t it?” Psssh, what do you mean? All my food looks this good! Okay, whatever. Yes it’s for the blog, smartass. Still, it’s pretty!

Veggie Pizza - orange bell pepper & piquillo peppers

And then, just when you’re thinking “Holy craptastic veggie goodness! What else could she possibly add?” I threw on some ricotta cheese seasoned with oregano, basil, garlic salt & red pepper flakes, some pine nuts I toasted in a skillet, and a drizzle of extra virgin olive oil. Looks good, doesn’t it?

Veggie Pizza - seasoned ricotta, pine nuts & olive oil

I know what you’re thinking, and you’re right. That’s a whole lotta veggie. But we’re not done yet. You gotta pop that beast into the oven and bake at 425F for 25-30 minutes. I like to bake mine on a Silpat mat for an extra crispy crust. When the ricotta and pine nuts start getting brown around the edges, it’s done.

Veggie Pizza - just out of the oven

Yeah, baby… that’s the good stuff. Now you have to let it sit for 5-10 minutes to settle down a little. Then, cut that puppy up and dig in!

Veggie Pizza - Dig in!

Boom. Done. Blow it up! For the record – it was delicious, we didn’t miss the meat, and it has completely solidified my deep and abiding love for all things DeLallo. Rabid. Brand. Loyalist. And not ashamed. Do you have a favorite brand or brands that you can’t live without? Please leave a comment and share. You never know what might spur my next food obsession!

Please Note: I am not in any way compensated by the DeLallo Foods Company. I am (as I have stated) just a loyal lover of their products who is dead set on converting the rest of the world. Amen.

16 Comments

Filed under Food & Recipes, Things I Love

BlogHer Food Conference 2013

If total sensory overload is the purpose of any good blogging conference, then BlogHer Food last weekend in Austin can be declared a raging success. In fact, I think it will probably take the next few weeks for me to totally absorb it all. My synopsis right now is that there was just SO MUCH to take in.

For now, I’ll just say that I met some truly fabulous people (both bloggers and sponsors), picked up great tips on food writing & photography, and basically had the time of my life. Hopefully, you will start to see some of that information reflected in future posts, but for now I’m going to focus on some of the events I attended. Here is but a fraction of last weekend’s activities.

Bites & Bloggers ATX Event at Whole Foods Market
sponsored by the Austin Food Bloggers Alliance & Whole Foods

Clockwise: Party on the rooftop terrace, Becker Vineyards wine tasting, Foreign & Domestic food sampling & Katie the Hill Country Cook

Clockwise: Party on the Whole Foods rooftop terrace, Becker Vineyards wine tasting, Foreign & Domestic food sampling & Katie the Hill Country Cook

The party on the roof at Whole Food’s flagship store was fun, blazing hot and super windy but the food provided by local chefs was fabulous and the people were warm & friendly. One stand-out was Becker Vineyards (including Richard Shelton, Assistant Winemaker & Enologist) who took the time to really speak to us about the wines and the science behind them. Do I remember all the chemistry mentioned? No, I do not. But I can tell you that Richard loves what he does and it shows in the wine. We sampled a Claret, Viognier, and rosy Provencal – all of which were spectacular.

For me, the best bite of the night went to the ladies from Foreign & Domestic (including chef & co-owner Jodi Elliott), who put together a creamy custard parfait topped with peaches, honey, thyme & a graham cracker crumble. So simple, yet rich and bursting with peach flavor. It was amazing.

Foreign & Domestic's Peach Parfait - I could have eaten the entire tray!

Foreign & Domestic’s Peach Parfait – I could have eaten the entire tray!

To see more great photos from this event, click here.

Between sessions on food writing, photography and social issues, I was fortunate enough to be invited to some truly special off-property events. The first of these was the U.S. Farmers & Ranchers Dinner held at Springdale Farm in east Austin. Aside from being surprised to find such a large farm inside the city, I was stunned at the oasis they had created.

U.S. Farmers & Ranchers Alliance Dinner at Springdale Farm
sponsored by USFRA, held at Springdale Farm, emceed by Chef Danny Boome

Springdale Farms in Austin, Texas - farm, produce stand & Eden East restaurant

Springdale Farms in Austin, Texas – farm tour provided by Glenn Foore, owner

As part of the event, we were treated to a tour of Springdale Farm as well as a dinner with local farmers and ranchers where we were given the opportunity to discuss issues around food sourcing, organic vs non-organic foods, and the importance of supporting local farms and ranches. Our group was fortunate to be paired with Jason Peeler, a cattle rancher from Floresville, Texas who attended with his lovely wife, Marianna. He raises cattle, she raises free-range chickens, and together they raise their children with a focus on quality over quantity. While our conversation became fairly spirited debating corn-fed vs grain-fed beef, Jason was open and honest and made the evening as informative as it was fun. Speaking of fun, our host chef Danny Boome was charming, despite struggling to pull off a Texas drawl with his British accent. A heartfelt thanks to our hosts and owners of Springdale Farm, Glenn & Paula Foore and the U.S. Farmers & Ranchers Alliance. It was a magical evening.

Clockwise - rustic place settings, rancher Jason Peeler & guest, host Danny Boome of the Food Network, and our lovely outdoor dining tables

Clockwise – rustic place settings, rancher Jason Peeler & guest, host Danny Boome of the Food Network, and our lovely outdoor dining tables

Private Dole Luncheon
sponsored by Dole Foods & hosted by Susan of Doughmesstic.com

Saturday afternoon, I had the pleasure of attending a luncheon with Dole Foods hosted by Susan of Doughmesstic.com. A bus picked us up from the Hilton and whisked us away to a modern mansion in the hills overlooking Austin. The house and views were amazing, but the focus was on Dole’s line of fabulously fresh foods, which were served for lunch. The meal was anchored by last year’s Taste of Dole California Cook-Off contest winner – Island Pork Sliders (so moist & juicy). We were also treated to a cooking demo by Chef Ben Ford, who has again partnered with Dole for this year’s cook-off competition.

Lunch with Dole Foods, including a blind food challenge, food demonstration with Chef Ben Ford, and a fabulously fresh lunch from the Taste of Dole California Cook-Off

Lunch with Dole Foods, including a blind food challenge, food demonstration with Chef Ben Ford, and a fabulously fresh lunch from the Taste of Dole California Cook-Off

In a surprising twist, we were treated to a blind tasting of a date-topped appetizer and challenged to name as many ingredients as possible. The blogger who came closest to identifying all of the ingredients would be flown to California in late June to sit on the judges panel for this year’s Dole California Cook-Off. And the winner was…. Liz from The Lemon Bowl. Congratulations, Liz!

BlogHer Food 2013 Closing Party at Stubbs Bar-B-Q
hosted by The Pioneer Woman, Steamy Kitchen & Simply Recipes

Lastly, the conference was capped with a closing party at Stubb’s Bar-B-Q in downtown Austin, hosted by Ree Drummond (The Pioneer Woman), Jaden Hair (Steamy Kitchen) and Elise Bauer (Simply Recipes). There was barbecue, live music, cold beer and dancing and despite the oppressive heat, a good time was had by all. It was a perfect end to an exhausting but exhilarating weekend.

The sun sets on the BlogHerFood'13 Closing party at Stubb's Bar-B-Q

The sun sets on the BlogHer Food’13 Closing party at Stubb’s Bar-B-Q

One last peek at the week’s excess: the swag. I’ve heard tales of bloggers coming home from conferences with bags full of freebies from vendors and sponsors, but I really had no idea. No baseline, so to speak. Now that I’ve seen it in action, I am stunned. Here is just a portion of what I received over the weekend.

Swag Aftermath – this is only two-thirds of what I received at BlogHerFood.

Swag Aftermath – this is only two-thirds of what I received at BlogHerFood.

And that’s part of what was left after I gave some away. The most surprising thing is it’s REALLY NICE STUFF! Kitchen utensils, glasses, cookbooks, you name it. There was so much food, I actually gave the valet guys at the hotel a bag of snacks when I checked out. I was one of the lucky ones who drove home. I cannot even begin to imagine trying to get all of this on an airplane. But I guess I’ll have to figure it out because I’ve got the bug now and really hope to attend BlogHerFood again next year, wherever it may be. I figure I’ve got one year to plan, scheme, save & beg… but I think I can do it. Who’s with me?!? One thing is for certain – I can always count on my homegirls!

Megan (Country Cleaver), Katie (Hill Country Cook) & Lauren (Grier Mountain) at the closing party

Megan (Country Cleaver), Katie (Hill Country Cook) & Lauren (Grier Mountain) at the BlogHer Food 2013 closing party

26 Comments

Filed under Blogger Collaborations, Food & Recipes, Travel Tales

TCP Cooks: Tiramisu Ice Cream Sundae

Coffee Ice Cream - Tiramisu Sundae - Inside NanaBread's Head

I know my husband, The Complete Package, loves me. How?

1. Because we’ve been married 30+ years.
2. Because he tells me all the time.
3. Because he makes me coffee ice cream.

Or in this case, coffee & mascarpone ice cream. It’s true… he really went there. Using his favorite recipe for Ben & Jerry’s Sweet Cream Base, he added espresso and mascarpone cheese to create the perfect tiramisu ice cream blend. And it was good. Really good. Like Ben & Jerry’s Coffee Coffee Buzz Buzz good. Have you ever tried that one? It’s only available in scoop shops, not grocery stores, which is a shame. But also probably a blessing, because if it could be bought on a routine basis by the half-pint, there’d be long lines at stores and hand-to-hand combat if they ever ran low. But that’s just me. {wink} Here is TCP’s version.

TCP’s Tiramisu Ice Cream:
2 large eggs
3/4 cup sugar
1 container (8 ozs.) mascarpone cheese
2 cups heavy whipping cream
1/2 cup milk
1/2 cup brewed coffee + 1 Tbsp. espresso powder, chilled
1 teaspoon pure vanilla extract
Lady Finger cookies, chocolate syrup & Kahlua (optional) for garnish

In a mixing bowl, whisk the eggs until light and fluffy, about 2 minutes. Whisk in the sugar a little at a time; continue to whisk until thoroughly combined. Add the mascarpone cheese & beat until smooth and creamy; add the cream, milk, coffee and vanilla extract; whisk until blended.

Pour the ice cream mixture into an electric ice cream maker and process according to the machine’s instructions. If you don’t have an electric ice cream maker, just put the ice cream into a bowl with a tight-fitting lid and place it in the freezer. Take it out and stir it every 15 minutes or so until it gets too firm to stir. Return to the freezer until it is firmly set.

When it’s ready, grab a bowl or plate and place 3-4 lady finger cookies in the center. If you’re bad like me, give them a light drizzle of Kahlua. Then top them with a big scoop of coffee ice cream and drizzle liberally with Hershey’s Special Dark chocolate syrup. Finally, crumble up another lady finger or two and sprinkle them over the top because “More is more!” is TCP’s favorite motto, followed closely by “We Can DO This!” But that’s a traumatic series of family travel stories for another post. Somewhere, My Baby just shivered.

Tiramisu Sundae - Inside NanaBread's Head

22 Comments

Filed under Family Stuff, Food & Recipes

Because sometimes you just need a giant pile of homemade potato chips

Potato chips - Finished Image with Text - Inside NanaBread's Head

Tired of reaching for stale potato chips from a greasy bag? Me, too. And it’s unnerving to read the list of preservatives on some of those bags. Am I right? Well, those days are over thanks to The Complete Package’s new toy – the OXO V-Blade Mandoline. This little guy is incredibly quick and efficient when it comes to slicing veggies. And it’s incredibly sharp.

Potato Chips - OXO Mandoline - Inside NanaBread's Head

Here’s how we sliced up a whole mess of fresh potato chips. It really could not have been any easier. To start, grab a few russet potatoes, scrub them, and peel most of the outer skin off. I like to leave a little of the potato skins for color, so I peel off every other 1/2″ or so. Give them a quick rinse and pat them dry.

Next, set up your mandoline and turn the dial to the thinnest setting. In this case, it’s 1/16th of an inch (1.5mm) for super thin & crispy chips.

OXO Mandoline - Settings - Inside NanaBread's Head

Starting at the top of the mandoline, apply a little pressure to the potato and move it back & forth across the blade. It glides so easily, it almost seems as though it’s not working, but it is. When you get down to the last inch or two of spud, grab the tool included.

OXO Mandoline Tool - Inside NanaBread's Head

I’m not sure what it’s called, but I know what it does – it keeps you from slicing your fingertips off. Just spear the end of your potato, grab the tool by the ergonomic handle, and continue slicing your potato down to the very last slice. It’s so easy, and it completely eliminates any fear you may have of working with the super sharp blades. I love that. OXO really does think of everything.

OXO Mandoline - Tool to Hold Food - Inside NanaBread's Head

When you’re done, you are left with a pile of perfectly sliced potatoes. In a million years, I could never accomplish this with a chef’s knife.

Potatoes Sliced on an OXO Mandoline - Inside NanaBread's Head

Sure, I can slice potatoes with a knife, but I can’t come anywhere close to this razor thin. I mean, c’mon. You can actually see through them. It’s amazing.

OXO Mandoline - Thin Enough To Read Through It - Inside NanaBread's Head

Once your potatoes are all sliced up, toss them into a colander and give them a thorough rinse under cold water to remove the excess starch. Spread them out onto a bed of paper towels and pat them dry.

Next, pour about 2″ of canola oil into a deep, heavy pan. Heat the oil to 350F. If you don’t have a clip-on thermometer for projects like this, I highly recommend it. I have one that can be used for frying, candy-making, you name it. And it is important to make sure the oil is hot enough. It’s what makes them crispy and keeps them from being greasy.

Once your oil hits 350F, use a slotted spoon to transfer the potatoes into the oil. This is my favorite frying tool. I found it in an antique shop years ago. If you ever run across one some day, grab it!

Perfect Frying Tool - Inside NanaBread's Head

Fry, stirring occasionally, until they are a lovely golden brown.

Frying Potato Chips - Inside NanaBread's Head

When done, lift them from the oil and allow as much oil as possible to drain off, then move them onto a paper towel lined plate to drain thoroughly. While they are still warm, sprinkle them with your favorite salt. And that’s it – you’re done!

Now grab your favorite sandwich or a hot dog, or just grab a cold drink and eat them right off the plate. Either way, they’re much tastier than chips from a bag. Let’s dig in! You grab the napkins.

Potato chips - Finished Image with Text - Inside NanaBread's Head

This is not a sponsored post. I’ve featured the OXO Mandoline because I love it and use it frequently. If you’re in the market for one, I highly recommend it. OXO’s products are well made, reliable and affordable – all things I appreciate. All opinions are my own. Pinky swear.

18 Comments

Filed under Food & Recipes, Things I Love

It’s a girl & a cornbread!

Today I’m guest posting over at Mommy Notes for my friend & fellow Texan, Sarah. We’re celebrating her beautiful new baby girl, grandmotherhood, Mother’s Day and our mutual love of Texas comfort foods. Please drop in to say hello and congratulations, and while you’re at it you can get my mother’s recipe for Mexican Cornbread. Stuffed with ground beef, cheese and green chilies, it’s rib stickin’ and delicious! To see it, click here. Congratulations & hugs, Sarah!

Mexican Cornbread for Sarah

3 Comments

Filed under Blogger Collaborations, Food & Recipes

I love a good pimento cheese sammich

Pimento Cheese Sandwich - Inside NanaBread's Head

It’s hard to beat a good sandwich, isn’t it? Some people like tuna or egg salad. Some reach for a PB&J, a BLT or a grilled cheese. All are great, but let’s not forget the sometimes overlooked pimento cheese sammy. In my book, a really good homemade pimento cheese made with great cheddar and roasted piquillo peppers is hard to beat.

Let’s break one down. It starts with a great cheese. In this case, my favorite – Tillamook Cheddar. Medium or sharp, it needs to have great flavor.

Pimento Cheese - Tillamook Cheddar - Inside NanaBread's Head

Oh, Tillamook Cheese… how I adore you. If you have a food processor with a grater blade, grating the cheese happens in mere seconds. No fooling.

Pimento Cheese - Grating the Cheese - Inside NanaBread's Head

You only need 6 ounces to make two good-sized sandwiches. Which gives me an excuse to show off one of my favorite kitchen gadgets, my OXO food scale. This little guy is awesome. I’m using it with the digital reader in its ‘parked’ position, but if you’re trying to weigh something larger, it pulls out about 3″ so you can still see it even when using a larger container. Very cool. Just set your empty bowl or plate on the scale and hit ‘zero’ to clear the weight of the plate off, then add enough cheese to hit six ounces.

Pimento Cheese - Cheese Peppers & OXO - Inside NanaBread's Head

Next, grab jar of these gorgeous DeLallo grilled piquillo peppers. No cheap pimentos here, kids. Trust me – these piquillo peppers will rock your world. I love their rich roasted flavor and that they’re packed in water, not vinegar. They are robust and so much better than those small jars of brined pimentos. For this, five or six of these beauties will do nicely.

Pimento Cheese - Piquillo Peppers - Inside NanaBread's Head

In a mixing bowl, combine the grated cheese, chopped peppers and 1/4 cup of mayonnaise (we’re a Hellman’s house). Toss in a pinch of kosher salt and 1/4 teaspoon of coarse ground black pepper. Stir until well blended, then cover it tightly and let it sit in the fridge for about 20-30 minutes.

After that, the only decision left is which bread to use, whether to toast it, and what to top it with. We like a good oat nut wheat bread. It’s so darned tasty. I love mine plain; he likes his with add-ons. A pickle on the side gets an A+ too.

Pimento Cheese - His & Hers - Inside NanaBread's Head

Mmm… so good. So creamy. So cheesy. And those piquillo peppers? I could kiss them. So, share time… do you like pimento cheese or do you reach for that BLT? Are you a grilled cheese & tomato soup guy/gal or do you prefer a good tuna or egg salad? Let’s talk sammies. And GO!

Note: I’m aware this post sounds like an advertisement for certain brands, but I swear it’s not. The post was not sponsored in any way by Tillamook Cheese, OXO or DeLallo Foods. These are products I love and use frequently; they just all came together beautifully for this post. All opinions are my own and are shared without influence from the companies shown. I promise.

11 Comments

Filed under Food & Recipes, Things I Love