Category Archives: Food & Recipes

Food is an important part of our family. I don’t believe in “secret recipes.” If I make it, I’ll share it. And if you like it, I hope you’ll share it, too.

Caramel Week: Chocolate Alfajores

Chocolate Alfajores for Caramel Week - Inside NanaBread's Head

Definition: Alfajores (Al-fa-ho-res) are a South American type of shortbread sandwich cookie that are filled with dulce de leche (caramel filling). These delicious cookies can trace their origin back to the Moorish occupation of Andalusia, Spain and the great culinary traditions of the Mediterranean Basin.

Caramel Week Logo

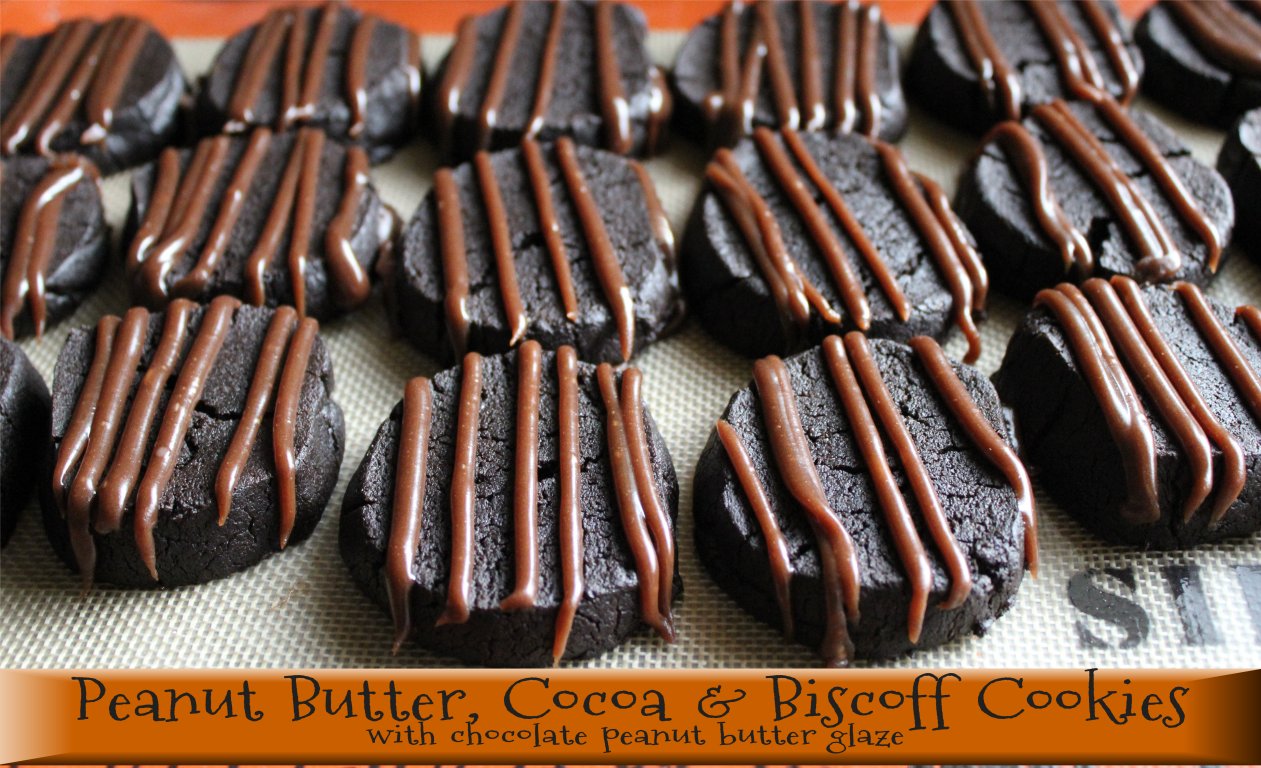
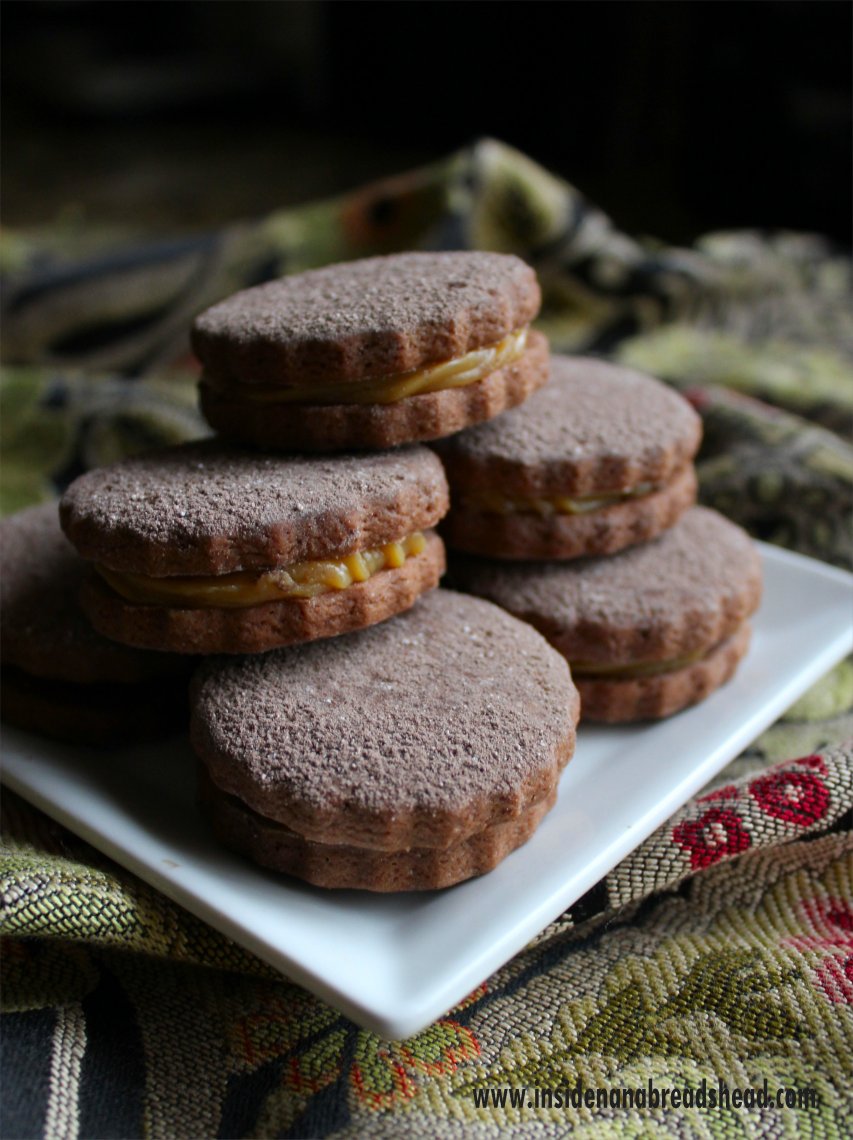
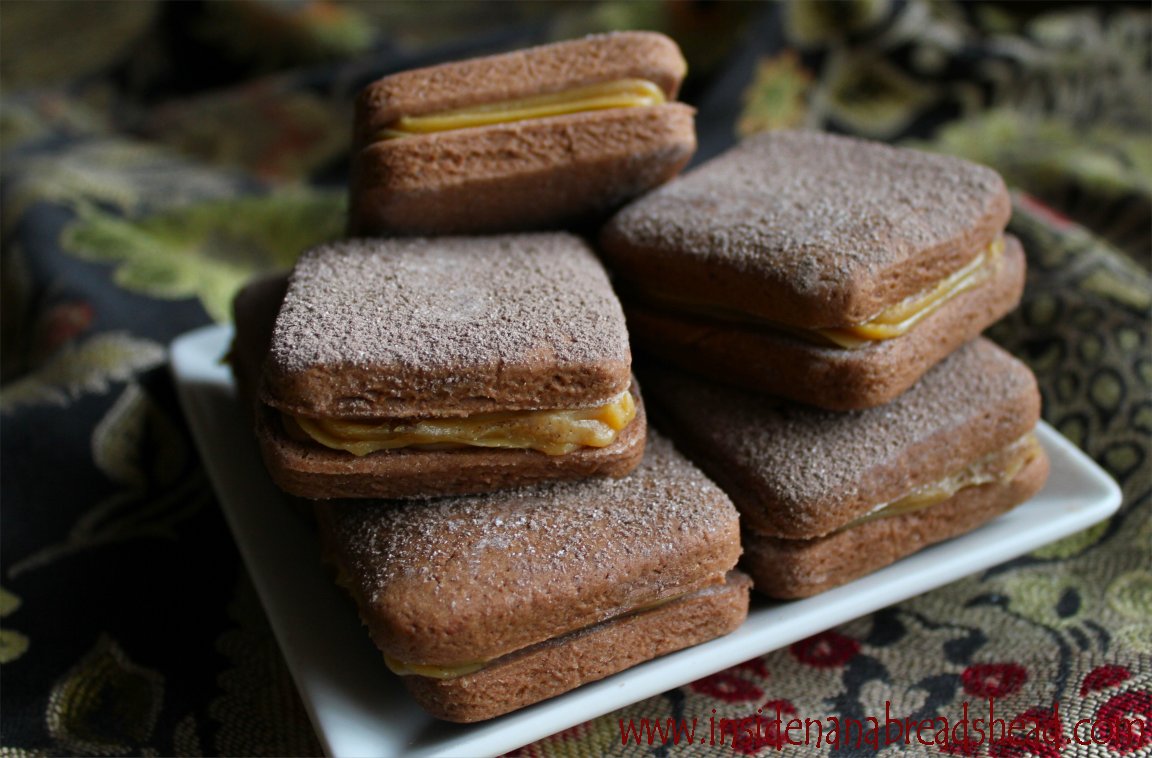
To celebrate Caramel Week, I tried a new twist on a traditional favorite – a chocolate version filled with homemade salted vanilla bean caramel, both in the traditional scalloped round shape and a less traditional square.

Chocolate Alfajores Close-Up - Inside NanaBread's Head

Chocolate Alfajores: The Cookie Dough (makes 3-4 dozen)

1 1/2 sticks unsalted butter, softened
1 cup granulated sugar
2 cups all-purpose flour
1 1/2 cups cornstarch
2 teaspoons baking powder
1/2 teaspoon salt
4 tablespoons cocoa powder
2 eggs + 2 egg yolks
1 tablespoon vanilla bean paste (or 2 tsp. vanilla extract)
Dulce de leche caramel (recipe below or store-bought)
powdered sugar & cocoa for dusting

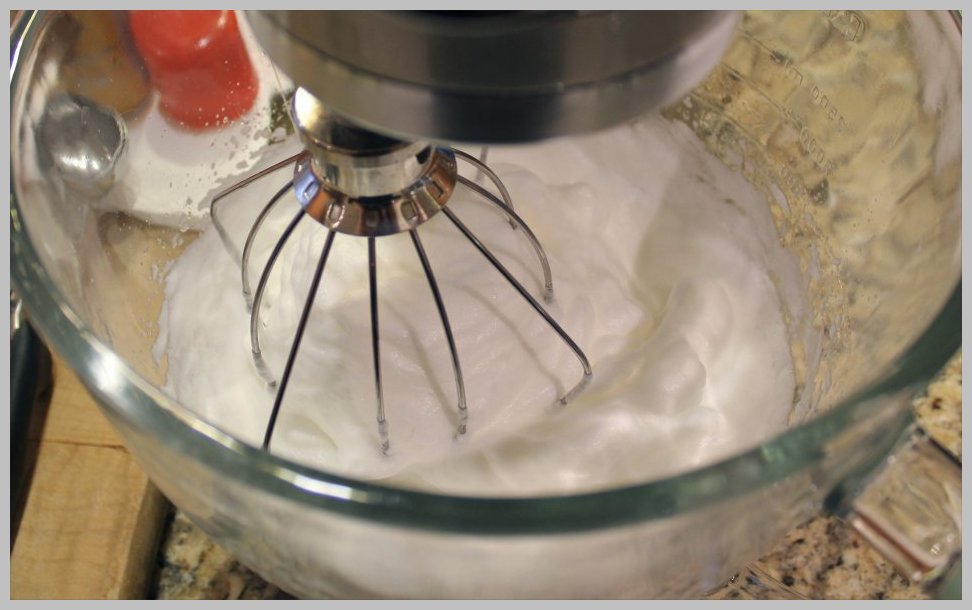
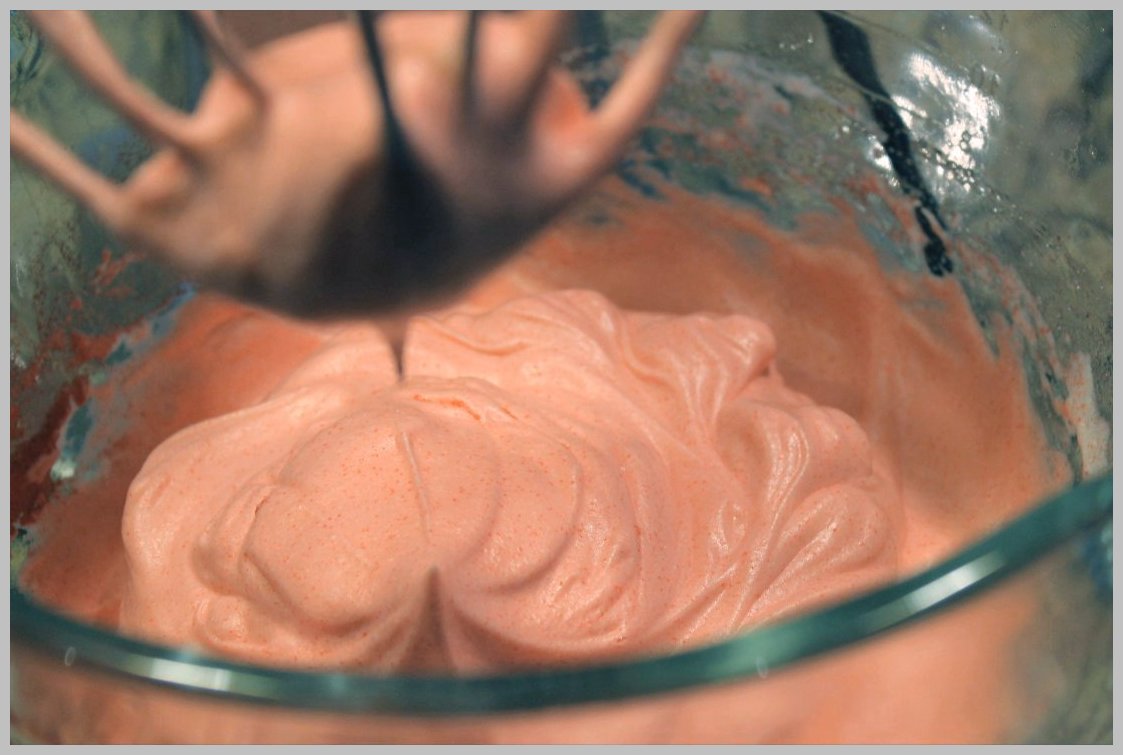
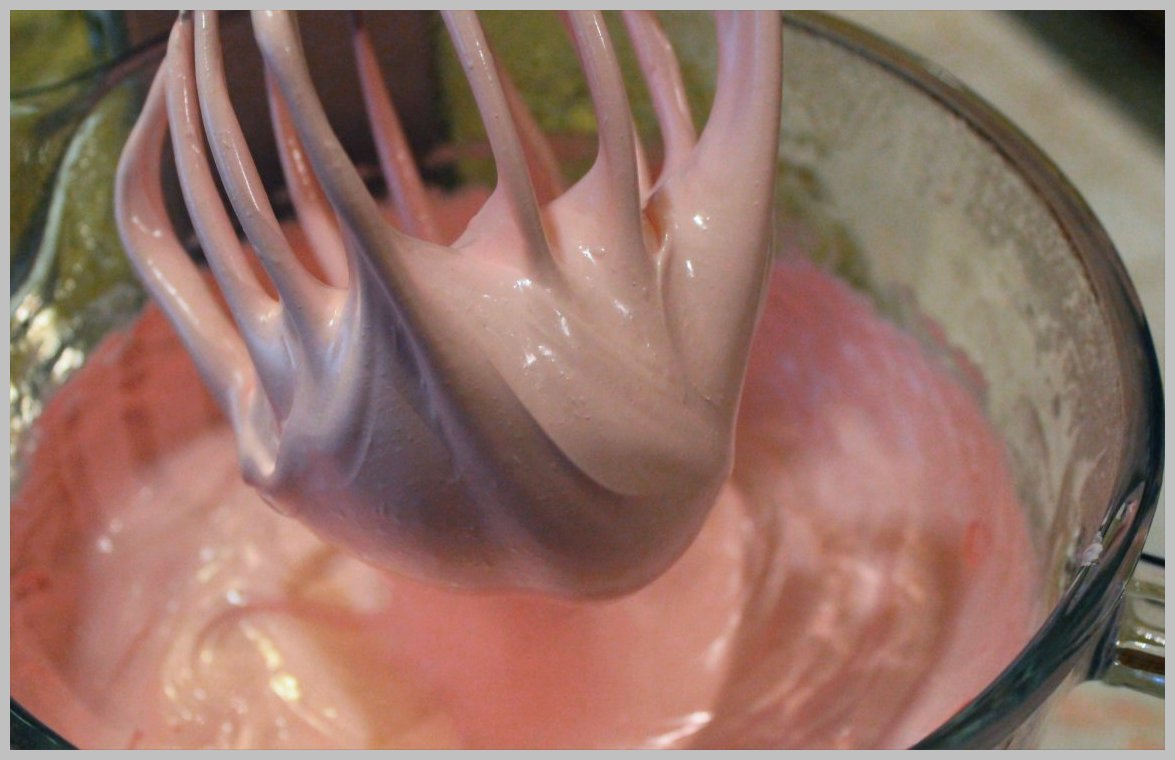
Cream the butter & sugar until fluffy. Add the eggs and egg yolks one at a time, mixing after each addition, then beat in vanilla bean paste or extract until well blended. In a separate bowl, combine the flour, cornstarch, baking powder, salt and cocoa; sift to remove all lumps. Turning the mixer to low speed, gradually add the flour and beat until it just starts to come together; turn the mixer to medium and beat 10-15 seconds. Scrape the dough onto a lightly floured surface and gently knead the dough into a smooth ball; pat into a disk and wrap tightly in plastic wrap. Chill in the refrigerator for an hour or until firm.

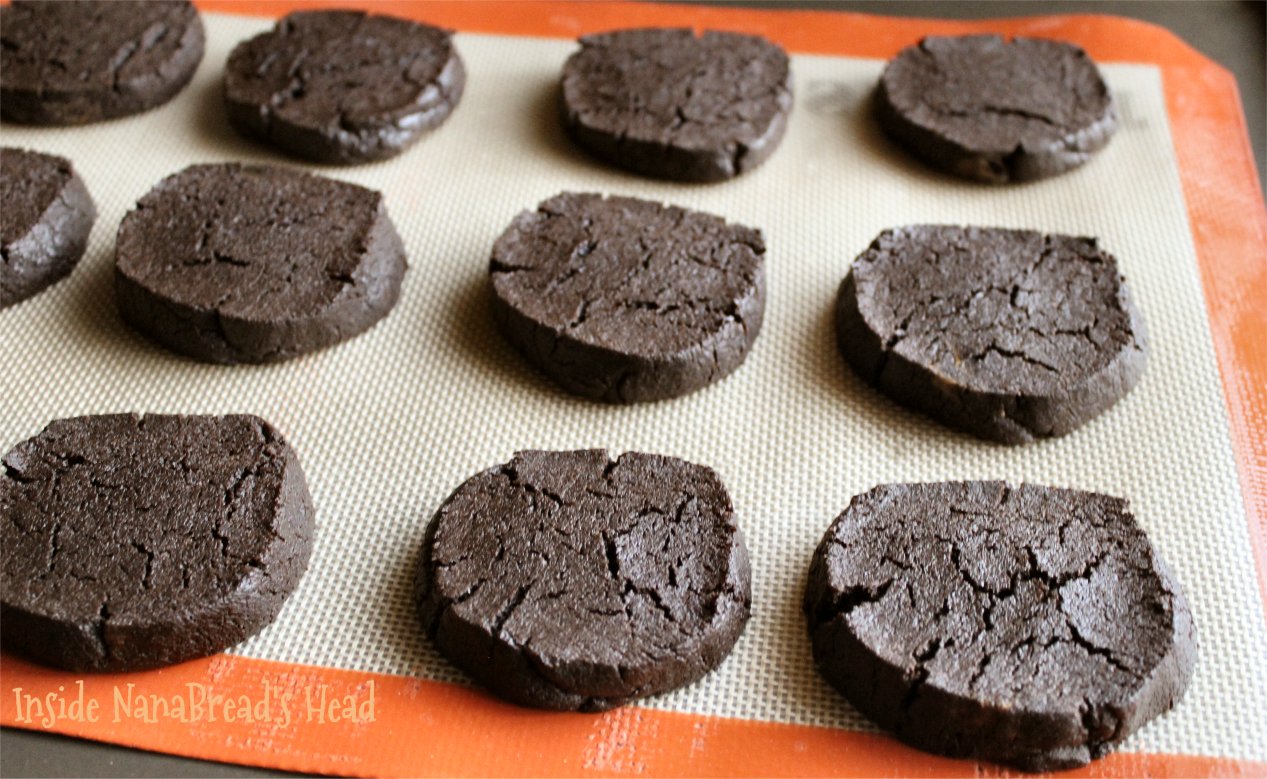
Pre-heat the oven to 350F. Line several baking sheets with parchment or silicone baking mats and set aside. Lightly flour your work surface and roll the dough to 1/4″ thick, making sure the dough doesn’t stick to the counter or board. Using a 2″ cookie cutter (round & fluted is traditional), cut out the cookies and carefully transfer them to the baking sheets, about 1″ apart.

Place the cookie sheets into the freezer and allow the dough to chill for 15-20 minutes, or until very firm. Once firm, pop them into the oven for 8 to 10 minutes, or until the tops are firm to the touch. Cool on the baking sheet for 10-15 minutes, then transfer to a cooling rack.

You can save time by buying a jar of dulce de leche caramel (Trader Joe’s has a great one) but if you want to tackle it from scratch, here’s mine.

Salted Vanilla Bean Caramel: (makes approximately 2 1/2 cups)

2 cans ( ozs. each) sweetened condensed milk
1 1/2 to 2 cups heavy whipping cream, as needed
1 tablespoon vanilla bean paste
1/8 teaspoon sea salt

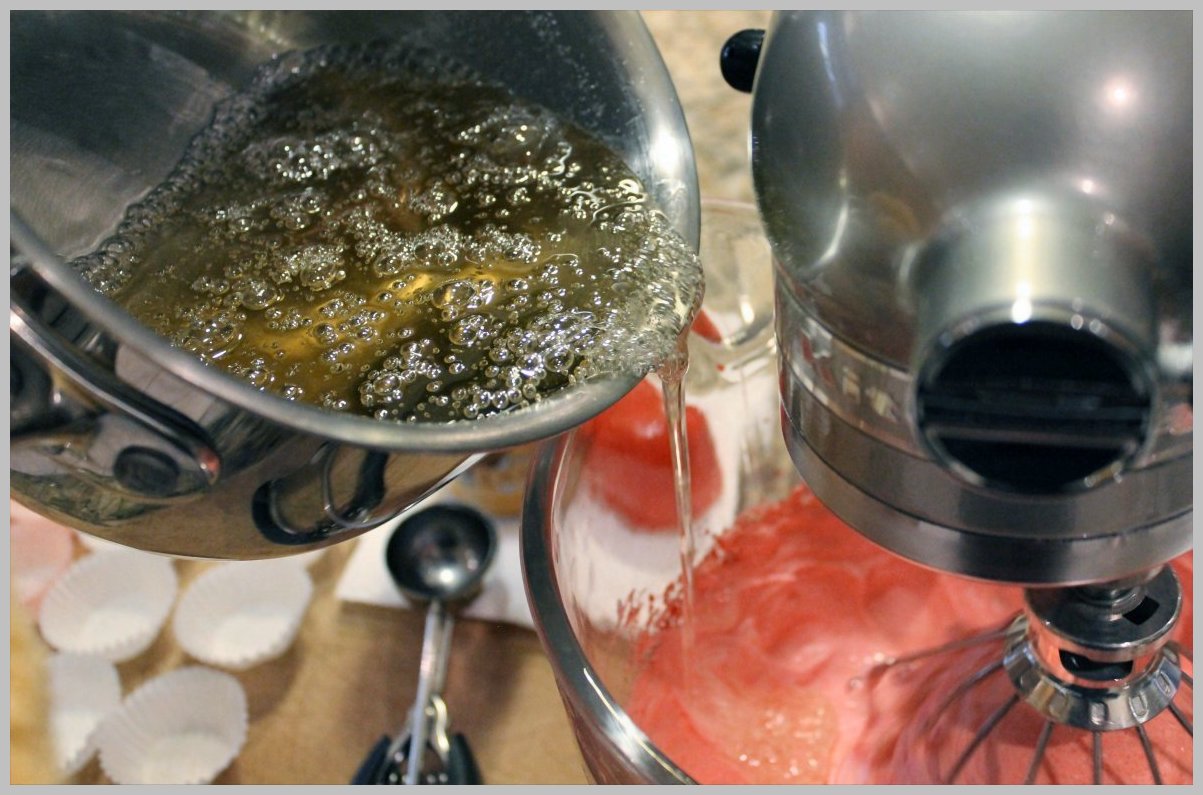
In a large heavy bottom saucepan, heat the sweetened condensed milk until it comes to a boil, stirring often. Once the mixture comes to a boil, reduce heat to medium and cook, whisking constantly, until it turns a golden tan color. If the mixture starts to thicken, add heavy cream 1/2 cup at a time, whisking constantly. Continue to cook until the caramel turns a light brown shade, adding cream to thin it out some as needed. The finished caramel should coat a spoon thickly, but still pour from the spoon easily. When it reaches that stage, remove it from the heat and add whisk in the vanilla bean paste and sea salt. Allow the caramel to cool completely before using.

To Assemble the Alfajores:

Lay the cooled cookies out in rows so you can work quickly. I like to place one row ‘bottoms up’ and the next ‘face up’ so I can keep my pairs matched. Scrape the caramel mixture into a piping bag with a star tip and twist it until the caramel is compressed into the bottom of the bag. Pipe a generous layer of caramel onto the bottom side of half of the cookies. Using the remaining cookies, put a lid on each alfajor and gently press to make sure it’s seated. Once all cookies are filled, dust them lightly with powdered sugar or, as I did, a combination of powdered sugar and cocoa powder. Then try not to eat them all at once.

Chocolate Alfajores by Inside NanaBread's Head

If alfajores have piqued your interest, please drop by my friend Kirsten’s blog at Comfortably Domestic. She baked up a batch using her favorite shortbread recipe and a deep, dark caramel that will make your mouth water. Pinky swear.

Recipe Source: The caramel shown is my own recipe. The alfajor cookie dough was adapted slightly from Vianney Rodriguez at Sweetlifebake.com, who used the recipe from The Cookiepedia cookbook by Stacy Adimando. If you’d like to see Vianney’s traditional vanilla alfajor dough, CLICK HERE.

Chocolate Alfajores with Salted Vanilla Bean Caramel - Inside NanaBread's Head

For more Caramel Week goodies, visit our other Theme Weavers:

MONDAY:
Kirsten at Comfortably Domestic – Crock Pot Dulce de Leche Caramel

Madelyn at La Petite Pancake – Caramel Banana Bread Pudding

Rebeka at Kvetchin Kitchen – Caramel Apple Pie

TUESDAY:
Allison at Decadent Philistines – Salted Caramel Pork Loin with Shaved Brussel Sprout & Apple Salad

Carrie at Bakeaholic Mama – Chewy Milk Dud Brownies

WEDNESDAY:
Jeanne at Inside NanaBread’s Head – Chocolate Alfajor Cookies (that’s me!)

Kirsten at Comfortably Domestic – Vanilla Alfajor Cookies

Haley at The Girly Girl Cooks – Almost Famous Fairground Caramel Sauce

Lauren at Climbing Grier Mountain – Dulce de Leche Milkshakes

THURSDAY:
Kat at Tenaciously Yours – Caramel Popcorn Crunch Sundae

Beka at Kvetchin’ Kitchen – Red Wine Caramel Sauce

Christina at Buffy and George – Butterscotch Pudding

FRIDAY:
Megan at Country Cleaver – Pear & Caramel Mini-Cheesecakes

Madeline at Munching in the Mitten – Caramel Cake

SATURDAY:
Kirsten at Comfortably Domestic – DIY Dulce de Leche Caramel Coffee Creamer

Katie at The Hill Country Cook – Salted Caramel Pie

Caramel Week Logo

21 Comments

Filed under Blogger Collaborations, Food & Recipes

A Pineapple Update

If you’re a regular reader, you might remember that in 2011 we grew and harvested our first ever homegrown pineapple. It was the best of times.

Our first ever pineapple; summer of 2012

Our first ever pineapple; summer of 2012

We’re such dorks, we called our kids & grandkids and invited them over for the weekend so we could harvest it together. The Complete Package helped our grandson, Jonah Bear, cut the first pineapple. Go Jonah Bear!

Jonah Bear puts some muscle into harvesting the pineapple.

Jonah Bear puts some muscle into harvesting the pineapple.

Then Jonah & I immediately cut it up and baked a birthday cake for our granddaughter, Lilly Bug. What a great adventure that was. And so much fun.

Lilly Bug blows out the candles on her homemade cake.

Lilly Bug blows out the candles on her homemade cake.

Well, this year – we have four baby pineapples. FOUR! It’s so amazing. Of the ten pineapple plants currently growing on our back porch, four have bloomed and produced fruit. We are so excited! Here are a few shots of the new babies.

This snap shows the baby pineapple on its stalk.

This snap shows the baby pineapple on its stalk.

This one shows the crown starting to form on top.

This one shows the crown starting to form on top.

If you look closely at the tips, you'll see the purple flowers almost ready to emerge.

If you look closely at the tips, you’ll see the purple flowers almost ready to emerge.

So hold on to your britches, folks. This summer promises to bring All The Pineapple Goodies. While I’m sure there’s another pineapple upside-down cake in our future (because last year’s cake was beyond delicious), there’s no telling what the others may become. Pineapple preserves? Pineapple sherbet? Pineapple tarts? Feel free to shout out suggestions! Like all other mothers with new babies, I’m sure I’ll post additional photos as they grow.

Ever the proud pineapple momma,
-Jeanne (NanaBread)

33 Comments

Filed under Family Stuff, Food & Recipes, Miscellaneous Thoughts

NanaBread’s Crispy Potato Pancakes

Potato Pancakes - Plated

This is absolutely my favorite way to use leftover mashed potatoes. In fact, I love these so much, I sometimes intentionally make more mashed potatoes than we need for dinner just so I can make these the next day. They’re just SO GOOD! Crispy on the outside and creamy on the inside, these gorgeous golden beauties are packed with flavor and smothered in comfort.

NanaBread’s Crispy Potato Pancakes:
(makes eight 3″ potato pancakes)

2 cups leftover mashed potatoes
2 large eggs
1 tablespoon sour cream or Greek yogurt
3 tablespoons all-purpose flour
1 teaspoon Mrs. Dash salt-free seasoning
1/8 teaspoon black pepper
2 teaspoons chives (optional; I use freeze-dried)
oil for frying

Combine all of the ingredients (except the oil) in a mixing bowl.

Potato Pancakes - Ingredients

Whisk until well combined. It’s okay if there are small lumps of potatoes.

Potato Pancakes - Mixed

Add just enough oil to a non-stick skillet to about 1/8″ deep. You’ll want just enough oil to allow it to bubble around the edges as these fry. If you’re really adventurous and you’re making these for breakfast, fry a few strips of bacon first, then fry your potato pancakes in the bacon grease. The extra punch of flavor it adds will blow your mind, and if it’s hot enough, they will turn out nice and crispy without being greasy. I promise.

Potato Pancakes - Frying

Cook over medium-high heat until both sides are golden brown and crispy around the edges. Drain on paper towels and keep warm until they’re all finished. These make a great side to almost anything, but we love them for breakfast. Piled onto a plate with a little bacon and a soft fried egg? Fuhgeddaboudit.

Potato Pancakes - Breakfast

Make these, and I swear you’ll never look at leftover mashed potatoes the same way again. Now go make your own; these are mine.

24 Comments

Filed under Food & Recipes

Apple Pie Moonshine

Apple Pie Moonshine - Inside NanaBread's Head

Sounds good, right? And it is. This was yet another gift from our recent Hoegarden weekend. I had bookmarked a recipe for Apple Pie Moonshine months ago with the hope of trying it some day. When we picked our ‘Lowdown Hoedown’ theme for this year’s shenanigans, it seemed like perfect timing so I fired off an e-mail to my Big Sis with the short & simple message “We should totally make this for Hoegarden!”

One of the many things I love about having four sisters is that we never have to twist arms to get someone to participate in things like this. Big Sis was all in. She agreed to source some vintage jars from Mom’s barn and take on the role of Head Moonshiner. I would act as Chief Brainstormer, equal financial partner and creative director (which put me in charge of packaging & tags).

Somewhere our relatives are nodding and saying “See, Hank… I told you they were hillbillies.”

This recipe made a lot of hooch – 7 quarts in all. Big Sis packaged it into Mason jars and I whipped up some cute tags in honor of our theme. Every good hillbilly knows the only appropriate wrapping for a jar of hooch is a brown paper bag, so we went there because our Momma taught us not to half-ass anything. Here’s how the finished jars turned out.

Apple Pie Moonshine - Packaged - Inside NanaBread's Head

This is not your typical moonshine that doubles as paint stripper. First of all, it’s not nearly as strong as traditional moonshine. Because of the cider and fruit juice, this version is slightly sweet, incredibly smooth and resembles spiked apple cider much more than paint solvent. And it is good. Really, really good.

Big Sis’s “Make Ya’ Holler” Apple Pie Moonshine
1 gallon of spiced apple cider
1 gallon of apple juice
8-10 cinnamon sticks
1 1/2 cups granulated sugar
1 1/2 cups brown sugar
1 large bottle (750ml) of good vodka*
7 quart-size Mason jars with new lids

In a large stock pot, combine all ingredients EXCEPT for the vodka. Cook over medium-high heat, stirring often, until the mixture comes to a boil. Shut off the heat and allow the mixture to cool completely. Once cooled to room temperature, stir in the vodka and ladle it into sterilized canning jars. Drop one of those used cinnamon sticks into each jar, wipe the rim of the jar with a clean damp cloth and top with a sterile canning lid & ring.

Caution: Big Sis says this stuff will knock your head off if you try it right away, and no one wants that. Instead, seal it up and let it sit for 3-4 weeks to mellow. You’ll be glad you did. When we cracked that first quart at Hoegarden, you could sip it straight from the jar it was so smooth. I think Big Sis could have a brilliant future as a moonshiner if she wanted.

Apple Pie Moonshine can be served hot or cold, as a mixer or straight up. Since it was chilly for Hoegarden and Sister #4 built a glorious fire in the fire pit, we chose to add a quart of it to a half-gallon of apple cider and serve it hot like a toddy. And it rocked that toddy. If it had been sweltering, I could picture this stirred into a pitcher of freshly brewed iced tea with fresh sliced apples. Yum.

Apple Pie Moonshine - Finished - Inside NanaBread's Head

Disclosure: Full credit for this recipe goes to Mallory Jane of Hayseed Homemakin’ blog. Mallory Jane makes hers with *everclear* (pure grain alcohol at 190 proof), which can be really expensive and hard to find. We substituted a good quality vodka, which worked really well and significantly lowered the alcohol content (to 80 proof). To see the Hayseed Homemakin’ version, click rat-cheer. Thank you, Mallory Jane, for sharing your recipe and putting the hooch in our hoedown.

39 Comments

Filed under Food & Recipes, Hoegarden Weekends

Almond Joy Granola

Almond Joy Granola - Title Shot - Inside NanaBread's Head

Hi – me again; back with more dark chocolate. Forgive me, but I’m on a bender. Last week it was flourless peanut butter, Biscoff & dark chocolate cookies. This week it’s dark chocolate, coconut & almond granola, which is at least healthier. Stop laughing! It’s good for you, right? Okay, you be the judge.

NanaBread’s Almond Joy Granola:
4 cups old-fashioned oats (I use Bob’s Red Mill)
2 cups raw whole almonds
3 cups unsweetened coconut, the large flakes
4 tablespoons Hershey’s Special Dark cocoa powder
1/4 teaspoon table salt
1/3 cup agave nectar
1/3 cup honey
1/3 cup canola oil
1/2 stick (4 tablespoons) unsalted butter
2 teaspoons pure vanilla extract
1 teaspoon almond extract

Start by lining two large baking sheets with parchment or Silpat mats. Spread the oats, almonds and coconut on baking sheets in a thin, even layer and toast at 350F for 10-15 minutes, or until the coconut is golden brown and the oats & nuts are fragrant. Remove from the oven and scrape the oats, almonds & coconut into a large mixing bowl; toss to combine.

In a saucepan, combine the agave nectar, honey, canola oil and butter. Cook over medium heat until the mixture comes to a boil. Remove from the heat and stir in the cocoa powder & salt, whisking until smooth. Stir in the vanilla and almond extracts. Pour the hot liquid mixture over the oat mixture and toss until everything is coated. (This smells SO GOOD the entire time you’re making it.)

Almond Joy Granola - Freshly Baked - Inside NanaBread's Head

Spoon the mixture back onto the lined baking sheets and pop them back into the oven (still at 350F) for 15 minutes. Stir or flip the mixture around and bake an additional 15 minutes, for a total baking time of around 30 minutes. It’s done when the edges are toasty and the mixture is only slightly sticky but very fragrant. Remove from the oven and allow to cool completely. Store in airtight containers at room temperature for up to 2 weeks.

Almond Joy Granola - Baked - Inside NanaBread's Head

Options:
1. Nut allergies? Go Mounds and omit the almonds & almond extract.
2. Not a chocolate fan? Omit the cocoa and add dried fruit like cranberries or blueberries. Dried apricots & candied ginger would also be a great combination.
3. Grab a straw, because the chocolate almond milk left behind is delicious.

AJ Granola - Final Shot - Inside NanaBread's Head

Note: This recipe was adapted from a recipe found on Pinterest which was adapted from the Joy the Baker Cookbook; her version calls for cinnamon & granulated sugar and uses less coconut & nuts. But those are my favorite parts of granola, so I upped the volume of almonds & coconut, substituted agave nectar for the granulated sugar, added almond extract, and doubled the butter. I gotta be me.

6 Comments

Filed under Food & Recipes

Flourless Dark Chocolate Peanut Butter Biscoff Cookies {that’s a mouthful!}

Peanut Butter Cocoa & Biscoff Cookies - Inside NanaBread's Head

Try saying that three times fast. It’s a mouthful of title, but it’s also a mouthful of cookie. I thought about naming them “Pantry Cleaner Cookies” because that’s what I was doing when I thought of these. I found a half-empty jar of peanut butter and half a jar of Biscoff. Could they be combined? Is that legal? After a quick tweet to my Biscoff guru Megan, I decided to go for it. And if you’re going to combine peanut butter with Biscoff, why not throw in some dark chocolate because that’s how my mind works. And because more is… MORE!

For these cookies you will need:
1 1/4 cups creamy peanut butter
1 1/4 cups Biscoff cookie butter
1 3/4 cups brown sugar, packed
1 package (5 ozs.) vanilla instant pudding mix
3 large eggs
1 1/2 tablespoons vanilla extract
1 1/2 cups Hershey’s Special Dark cocoa powder
2 teaspoons baking soda
1/8 teaspoon salt

The vanilla pudding mix may seem odd, but my friend Beka put it in her peanut butter cookies for Sweets Week and they looked amazing, so I went for it. Using the paddle attachment (if you have a stand mixer), combine the peanut butter, cookie butter, brown sugar, dry pudding mix, eggs and vanilla extract until incorporated. Stop and scrape down the bowl, then turn the mixer to medium high and beat for 5 minutes more, or until the brown sugar is no longer gritty.

Stop the mixer; add the cocoa, baking soda & salt. Beat until all dry ingredients are thoroughly blended. Stop the mixer and check your cookie batter. It may seem a little dry, but should hold together when you pinch it into a ball.

Remove the beater and pour the dough out onto your work surface. I dumped mine onto a sheet of waxed paper, forming a line of dough about 18″ long. Using your hands, smash the cookie dough into an even log and wrap it in the waxed paper. Secure each end by twisting; you can secure it with a chip clip or rubber band. Once wrapped, roll the cookie dough log as if it’s a rolling-pin, making sure the entire roll is uniform in circumference. Pop the roll of cookie dough into the fridge for 1 hour or freezer for 30 minutes to make it easier to slice.

Once chilled, remove from the fridge or freezer and pre-heat your oven to 350F. Using a sharp knife, cut the roll of dough into 1/2″ slices. Note: I like my cookies thick and chewy. If you like yours thin & crispy, slice them thinner. If you intend to glaze yours like I did, leave them in smooth slices. If you’d like to skip the glaze and eat them plain, you can use a fork to make traditional hash marks on the top of each cookie. To glaze or not to glaze? That is the question.

PBCB Cookies - Slice & Bake - Inside NanaBread's Head

Lining your cookie sheets with parchment or Silpat mats; place cookies 1″ apart. Pop them into the oven while the dough is still very cold and bake for 10-14 minutes depending on how crispy you want them to be. As I said, I like mine thick & chewy, so I baked each batch for 12 minutes. They were still soft in the center and just beginning to crack around the edges like so. If you like them thin & crispy, watch them starting at 10 minutes, and check often so they don’t burn.

PBCB Cookies - Baked to a Crackle - Inside NanaBread's Head

Can I just take a minute to say that one of my favorite things about baking cookies is when I have them all out on the counter, in all stages of ‘in progress’. There’s something about seeing them out there, with all the steps visible, that makes me feel like I’m accomplishing something.

PBCB Cookies - Cookie Station - Inside NanaBread's Head

Remove from the oven and allow to cool on the cookie sheets for at least 5-10 minutes before moving them onto sheets of parchment to cool completely. Because these are flourless, they are more fragile when warm. Move them too soon, and they may crumble. Now – glaze or no glaze? I vote glaze!

Dark Chocolate Peanut Butter Glaze:
1/2 cup creamy peanut butter
1/2 cup powdered sugar
4-6 tablespoons Hershey’s Special Dark chocolate syrup
2-3 tablespoons milk

Place the peanut butter in a microwave safe bowl and heat on high power for 30 seconds to soften it. Sift in the powdered sugar and whisk until incorporated; add the chocolate syrup and whisk until smooth. If it gets too thick too quickly, pop it back in the microwave for another 30 seconds. At this point, it will be too thick to pipe, so add 1 tablespoon of milk at a time until the mixture is glossy and the texture of a thick caramel sauce.

I like to put a quart freezer bag into a drinking glass (folding the top over the edge of the glass) and scrape the glaze into the bag using a spatula. To glaze the cookies, press the air out of the bag and twist the bag to press the glaze into one corner. Snip the tip off the corner and pipe immediately onto the cookies.

PBCB Cookies - Inside NanaBread's Head

I push mine close together and use a straight line motion, moving back & forth over each row. But if you’re feeling frisky, you can always:

PBCB Cookies - Swirled Glaze - Inside NanaBread's Head

Allow them to sit for 1-2 hours, until the glaze is firm to the touch. Store in airtight containers. Kept in the fridge, they should last up to 2 weeks; un-refrigerated, they should be good for 5-6 days (if they last that long). If you’ve got a cup of coffee or a glass of milk, these will be all kinds of dangerous.

PBCB Cookies - Finished - Inside NanaBread's Head

PS: These are for our annual ‘ladies only’ spring fling weekend, Hoegarden. I’ll get back to you next week and let you know how these went over, if I survive it. Want to find out more? Click on ‘Hoegarden Weekends’ on the right sidebar under Tidbits You Can Choose From. We are THAT family. No apologies. None.

PPS: If peanut butter is a no-no in your house due to allergies, you might try swapping Sun Butter for peanut butter. My friend Kisten does it often, and she swears by it. And I would give Kirsten a kidney, so if I can trust her so can you.

PPSS: I don’t really have a third one; I just wondered if you’d keep reading. :D

23 Comments

Filed under Food & Recipes

It’s just a number anyway, right?

50th birthday

Wow… that’s a big number. Half-a-hundred. Half a century! Remember when you were just a kid and someone said they were 50 and you thought “Wow, she’s older than dirt!” – well, I’m officially there.

Today could have sucked the wind out of my sails or the jelly out of my donut but it didn’t. Some people may turn 50 and FREAK OUT, but not me. Age is just a number and while my knees often feel 50, in my mind I am still 36. If that’s me taking the denial train, then I’m all aboard. In fact, I kind of like my seat.

The Complete Package (my beloved husband) left this morning for a business conference and while his timing brought him a lot of guilt, I was prepared to spend the day alone shopping for new bras and treating myself to a lemon berry slush at Sonic. That might sound sad to some, but we haven’t really put a lot into celebrating birthdays around here since our daughter grew up and moved out on her own and I started seeing more gray hairs than brown in the mirror.

That is, until this morning when I received a text from my friend Kirsten at Comfortably Domestic while browsing the bra selection at Kohl’s. (That’s right, ladies… if you’re in the market for over-the-shoulder-boulder-holders, they’re on sale this weekend at Kohl’s. You’re welcome.)

Not to put too fine a point on it, but while I was shopping, Kirsten sent a text message that went something like this:

Her: Where are you?!? Why aren’t you on your computer like you’re supposed to be?!? How could you be so selfish?!? (Okay… that’s slightly embellished.)

So I responded with: “Yo! Why you all up in my biz-ness? I’m shopping for B-rahs!” (Not really, but I’m trying to illustrate a point so roll with it.)

So then she was all like: “Seriously. You need to get home and get online.”

And I was thinking: “Sweet! They must have picked a new pope!” (But I’m not catholic, and that was not it.)

As it turns out, my friends from Salad Week & Beer Week & Crepe Week & Sweets Week had pulled out all the stops and thrown me a virtual Happy 50th Birthday party. They were all watching their Twitter feeds for my reaction, and I was at Kohl’s picking out bras to take home and try on (because no one ever wants to try on bras in a public fitting room – am I right, ladies?)

Here’s what greeted me when I opened Kirsten’s blog:

50th birthday button

As I read her recipe for Orange Creamsicle Pie, I began to grasp the scope of it all. There was the list of my blogging besties with all of the glorious things they created for my big day. Shit, y’all. Cue the waterworks and pass me the tissues. So. Much. Love. You know today had to be the day I failed to wear the waterproof mascara, right?

So I’ve been sitting at my computer for hours now, and I’m blown away by the thoughtfulness of others and the karma of timing and the gratitude that comes from having such amazing friends. Anyone who scoffs at bloggers for having imaginary internet friends will never get it. But I do, and I am forever grateful to these wonderful ladies whom I adore:

Kirsten at Comfortably Domestic – the suspected ring-leader who cooked up a childhood memory with Orange Creamsicle Pie

Megan at Country Cleaver – who baked up a lovely batch of Nutella Cream Cheese Turn-Overs

Allison at Decadent Philistines Save the World – who baked an old-fashioned classic Coca Cola Sheet Cake

Anne at From My Sweet Heart – who made this absolutely gorgeous (and pink!) Mexican Ice Cream

Mads at La Petite Pancake – who whipped up some TexMex love with her Cheesy Chorizo Dip

Carrie at Bakeaholic Mama – who had the worst week ever & still managed to whip up a Coconut Banana Brownie Pie

Kat at Tenaciously Yours – who made one of my favorite obsessions with her Guacamole

Madeline at Munching in the Mitten – who combined several of my favorites with her Fig, Fontina & Pecan Flatbread

Monica at The Grommom – who brought the Aloha all the way from Hawaii with Tropical Ice Cream

Katie at The Hill Country Cook – who baked a big ol’ pan of Texas heritage with her Dr Pepper Cake

Lauren at Climbing Grier Mountain – who put the fun back in mini pies with Key Lime Pies in Animal Cracker Crusts

And Beka at Kvetchin’ Kitchen – who brought the funny & the hooch with her Aged Manhattan Cocktail because nothing says “Let’s celebrate the old broad” like aged whiskey (love it!)

There are not enough words in the English language to convey how much these ladies mean to me. They made turning 50 unexpectedly fun. If you have a minute, please take the time to check out their fabulous recipes. Even better, bookmark their blogs and spend some quality time on each and you’ll see why I find them all so delightful. Much love to everyone and thank you for the sweet birthday wishes. I would gladly blow out a candle for each of you, but there are already enough to warrant a fire code violation in most all public venues.

Hugs to you all & thanks so much! – Jeanne (NanaBread)

37 Comments

Filed under Blogger Collaborations, Food & Recipes, Things I Love

Sweets Week: Retro Raspberry Divinity & a sweet little giveaway for bakers

Divinity - Pans & Cups

That’s right, folks – this ain’t no modern homemade marshmallow trend. We’re kickin’ it old school with divinity, baby! This raspberry version is sure to soothe your savage sugar craving. It’s retro. It’s fluffy. And it’s pretty in pink.

Valentines’ Day may be for lovers, but let’s not forget that it’s also an excuse to celebrate SUGAR. Candy, chocolates, cupcakes, creme brulee… you name it, we’ll eat it. So join my blogging friends and I as we stop lookin’ for love in all the wrong places and start rummaging through the pantry for something sweet.

It’s Sweets Week, and we’re celebrating with sweets for your sweetie pies.

When I was a kid, my mother made divinity every Christmas. I remember little balls of white fluffy confection laced with chopped pecans like it was yesterday. While most kids were getting their divinity fix from a Stuckey’s Pecan Log, our Mom was shaming other mothers by making it at home. Mom rocked the 70’s.

The Pecan Log from Stuckey's - a blast from some poor kid's past. Photo via http://brucemctague.com/pecan-logs

The Pecan Log from Stuckey’s – a blast from some poor kid’s past. Photo credit to http://brucemctague.com/pecan-logs

But this ain’t my Mama’s divinity. This version is cooler. It’s hipper. And did I mention it’s PINK? That hue is due to yet another childhood favorite – Jello. That’s right. Good old-fashioned Jello. Raspberry to be exact, although I’ve also made this with cherry and I’m pretty sure it would rock in blackberry, too.

Here’s what you’ll need:
3 cups granulated sugar
3/4 cup light (clear) corn syrup
3/4 cup water
3 egg whites
1 small (3-oz.) pkg. Jello (raspberry is shown)
3/4 cup toasted pecans, chopped
1 teaspoon vanilla extract

Start by lightly oiling an 11″ x 7″ pan, or you can use 4 miniature loaf pans like me. I sprayed them with regular Pam cooking spray, then wiped them gently with a paper towel so they were lightly oiled.

Next, combine the sugar, corn syrup and water in a medium or large saucepan (you’ll need 4-5″ of headroom, because this will come to a furious boil and rise in the pan). Set it over medium-high heat and whisk it occasionally until it reaches 260F on a candy thermometer.

Divinity - Boiling the Syrup

When the sugar syrup reaches around 200F, start your egg whites. In the bowl of an electric mixer, whip your egg whites until soft peaks begin to form.

Divinity - Whipping Egg Whites

Lower the speed and sprinkle in the Jello powder, whisking until combined.

Divinity - Adding Jello to Egg Whites

Turn the speed up to high and continue to beat until the Jello powder is incorporated and the egg whites hold their peaks.

Divinity - Egg Whites & Jello

Once the syrup mixture reaches 260F, turn the mixer to medium-low and slowly pour a thin stream of syrup into the egg whites until all of the syrup has gradually been added. DO NOT STOP THE MIXER WHILE ADDING THE HOT SYRUP MIXTURE OR YOU WILL SCRAMBLE YOUR EGG WHITES! Sorry for the drama, but it’s a divinity no-no to stop the mixer & scramble the eggs.

Divinity - Whipping in the Syrup

Once all of the syrup has been added, turn the mixer up to high and let it run for 6-8 minutes, or until the candy mixture begins to get very thick. I just set the timer and went for the full 8 minutes. Better safe than sorry, I always say.

Divinity - Ready to Spread

Turn off the mixer and remove the beater. At this point, the divinity will be thick and glossy. Using a spatula, fold in the pecans and vanilla extract by hand.

Divinity - Stir in Nuts & Vanilla

Pour the candy mixture into the prepared pan(s) and smooth evenly. If yours sets up as quickly as mine did, you may need to lightly spray your spatula or hands with additional cooking spray to keep the candy from sticking to it.

Now the hard part – set your pan(s) on a kitchen towel somewhere out of the way and let it sit for at least 6-8 hours to completely firm up. I put mine on our formal dining room table because we haven’t used it for a meal since 1992.

Once it’s set, cut into 1″ squares with a lightly oiled knife; a serrated bread knife works best. Store in an airtight container at room temperature.

Divinity - Final Cut

Fun Facts About Divinity:
1. Humidity and Divinity are not friends; they do not play well together.
2. Divinity should never be refrigerated; apparently it doesn’t like cold, either.
3. Most candy, divinity included, should not be made on a rainy day (see #1).
4. Unless they are ‘of a certain age’ your friends may not recognize divinity.
5. Just tell those friends you made ‘marshmallows with nuts’ – it’s simpler.

Recipe Credit: This appeared in Womans Day Magazine when Ronald Reagan was president. I tore it out & saved it when I was but a wee child. {cough}

Now on to the giveaway! One lucky reader will win the following baking booty in honor of Sweets Week:

Sweets Week Giveaway Bar - Vertical

This prize package includes: one copy of the Good Housekeeping Best Loved Desserts cookbook with more than 250 glorious recipes, two adorable ceramic mini-crocks in cherry red, two packages of treat wrappers by Martha Stewart, my favorite bowl-scraping silicone spatula in Valentine’s red, a sweetheart print quilted apron, and a matching kitchen towel in raspberry.

Note: My friend Katie, The Hill Country Cook, introduced me to these sweet little single-serving ceramic crocks. You’re going to love them!

To enter, simply leave a comment at the bottom of this post telling me your favorite sweet treat. This giveaway will run from 8:00am CST on Sunday, February 10th through 12:00 Noon CST on Saturday, February 16, 2013. One winner will be selected at random and notified by e-mail. If the reader selected does not respond within 48 hours, a new winner will be drawn. Participation is limited to US residents only.

THIS GIVEAWAY IS CLOSED. CONGRATULATIONS TO LAUREN GRIER, OUR WINNER! (Lauren, check your e-mail for details.)

sweetsweekbadge

Sweets Week is for sugar lovers, so drop in & check out these Sweetie Pies:

Sunday:
Retro Raspberry Divinity – Jeanne @ Inside NanaBread’s Head (that’s me!)
Red Velvet Vanilla Marble Cupcakes with Milk Chocolate Buttercream Frosting – Kirsten @ Comfortably Domestic

Monday:
Chocolate-Dipped Peanut Butter Pudding Cookies – Beka @ Kvetchin’ Kitchen
Mini Meringue Strawberry Pie – Katie @ The Hill Country Cook

Tuesday:
Chocolate Pistachio Biscotti – Madeline @ Munching in the Mitten
Samoa Crack Dip – Carrie @ Bakeaholic Mama

Wednesday:
Avocado Peppermint Chocolate Mousse – Lauren @ Climbing Grier Mountain
Cherry Garcia Chocolate Bark – Megan @ Wanna Be A Country Cleaver

Thursday:
S’Mores on a Stick – Kat @ Tenaciously Yours
White Chocolate Cupcakes with Raspberry Buttercream Frosting – Mads @ La Petite Pancake

Friday:
‘Pucker Up’ Lemon Marshmallows – Allison @ Decadent Philistines Save the World
Mini Chocolate Mousse Pies – Kirsten @ Comfortably Domestic

Saturday:
Berry Smoothie Ice Cream Pie & a Giveaway – Anne @ From My Sweet Heart

Divinity - Cake Stand

81 Comments

Filed under Blogger Collaborations, Food & Recipes

It’s 80F so we made ice cream

Chocolate Amaretto Pecan Ice Cream - TitlePic

For the record, 80F in January is a crime against nature. My roses are blooming again. Our yard guy showed up this week to mow. We turned on the AC again. It’s JANUARY, people! This is why we can’t own sweaters. {sigh}

So what do you do when Mother Nature turns the tables on you? Make ice cream (of course). This time we decided to use the chocolate-covered amaretto pecans given to us by our friends Kaki & Donny. She said they were addictive like crack. She was right. These babies are good right outta the bag, but they’re even better swimming in a big vat of dark chocolate ice cream.

I’m going to daydream about that for a minute…

Dark Chocolate Ice Cream with Chocolate-Dipped Amaretto Pecans
2 large eggs
3/4 cup sugar
2 cups heavy whipping cream
1 cup milk (we use 2%)
1/8 teaspoon salt
1/2 teaspoon vanilla extract
3 tablespoons Hershey’s Special Dark chocolate syrup
3/4 cup chocolate-dipped amaretto pecans, chopped

Whisk the eggs until light and fluffy (about 2 minutes); slowly add sugar and whisk for one minute more. Add the cream, milk, salt, vanilla and chocolate syrup and whisk until thoroughly combined. Pour into an electric ice cream freezer and process until done. We use the Cuisinart machine, which takes about 30 minutes. Stir in the chopped pecans, spoon into a a freezer-safe container with a tight fitting lid & place in the deep freeze overnight. (Makes 1 quart)

Chocolate Amaretto Pecan Ice Cream - CloseUp

So while the rest of the nation basks in the glory of fluffy snow or cute sweater weather, we’ll be down here pulling weeds in our flip-flops. And eating ice cream.

PS – If that makes you jealous, call me. House-swap offers will be considered.

8 Comments

Filed under Food & Recipes

Soup Week: TCP’s Shrimp Bisque

Shrimp Bisque - Title Photo

It’s Soup Week – I feel warmer already. Nothing says winter & comfort better than soup, and this week 14 food bloggers joined mittens to warm up your week. Actually, I should say 15 cooks because this recipe is my husband’s. Seriously… it’s all him. We don’t call him The Complete Package for nothing, folks. He not only cooks, he is the Boss of Bisque. And this bisque is boss – it’s rich, it’s plush (if you can call a soup such a thing) and it’s heavenly. I swear it.

PS – Want to impress friends & family or blow their minds with a gourmet-quality shee-shee-foo-foo seafood soup? Well, this is the one. Not only is it ‘scrape the bowl’ fabulous, it’s fabulously easy to make. {our little secret}

The Complete Package’s Shrimp Bisque
3 tablespoons of good quality olive oil
1 1/2 pounds medium shrimp, shelled & deveined (save the shells)
1/4 cup unsalted butter (1/2 stick)
1 large onion, diced
1 carrot, peeled & chopped
1 celery stalk, chopped
2 1/2 cups water
1 cup dry white wine (TCP uses pinot grigio)
2 cups cooked white rice (great way to use leftover rice!)
1 bay leaf
1/2 teaspoon salt
1/4 teaspoon ground cayenne pepper
3 cubes of chicken bullion (or 1 1/2 tablespoons of granules)
1 16-ounce can diced tomatoes
2 cups heavy cream

In a large soup pot or Dutch oven, heat the oil over medium-high heat. Add the shrimp shells and cook until pink, stirring often to keep them from burning. Remove the shells with a slotted spoon and discard them, leaving all the shrimp-flavored oil in the pot (this creates a more flavorful base for your soup, so please don’t skip this step).

Add the peeled, deveined shrimp to the hot oil and cook, stirring often, until they turn pink and curl up (about 3 minutes). Remove them from the oil with your slotted spoon and place them in a bowl; cover and set aside.

Reduce the heat to medium; add the butter, onion, carrot and celery to the pan. Cook, stirring often, until the veggies are tender. Add the water, white wine, cooked rice, bay leaf, salt, cayenne pepper and chicken bullion and cook, stirring occasionally, until the mixture comes to a boil. Reduce the heat to low, and continue to simmer for 10 minutes.

Turn off the stove and then remove the bay leaf from the soup. Add the can of diced tomatoes, juice included, and the cooked shrimp, stirring to combine. Using an immersion blender, puree the soup until mostly smooth. If you don’t have an immersion blender, you can do this in your blender. Just work carefully and in small batches; be sure to cover the lid of your blender with a kitchen towel to prevent spatters. Be careful; the mixture will be hot!

Once blended, return the soup to the pot; stir in the cream and bring it to a gentle boil over medium heat. Once it’s thoroughly heated, it’s ready to serve.

Shrimp Bisque

The Complete Package insists on serving this with hot buttered sourdough bread. And, as usual, he’s right. But please don’t tell him I said so.

Don’t forget to visit the other ‘souper’ Soup Week bloggers:

MONDAY:
Broccoli Cheddar Soup with Bread Bowls @ Comfortably Domestic
Hearty Vegetable Mexican Soup & Jalapeno Cornbread @ The Girly Girl Cooks
3 Bean & Spinach Soup @ The Hill Country Cook

TUESDAY:
Garbage Soup @ Munching in the Mitten
Gnocchi Pesto Soup @ La Petite Pancake

WEDNESDAY:
40 Clove Garlic Chicken Soup with Parmesan Croutons @ Country Cleaver
Sunchoke Soup with Gorgonzola & Honey Crostini @ Climbing Grier Mountain

THURSDAY:
Coconut Curry with a lot of Aloha @ The Grommom
Beef Bourguignon @ Bakeaholic Mama

FRIDAY:
Eat Live Run’s White Chicken Chili @ Tenaciously Yours
Arizona Mountain Soup with Cornbread @ Decadent Philistines

SATURDAY:
‘Fungus Among Us’ Mushroom Soup @ Kvetchin’ Kitchen
Pink Prosecco Soup – a dessert soup From My Sweet Heart

Nothing like a little dessert soup to wrap up Soup Week.
Great job, ladies! As always, it’s an honor to cook with you. And TCP.

23 Comments

Filed under Blogger Collaborations, Food & Recipes