

You asked for it; you got it. Following my post on the felt mouse invasion we launched upon my sister’s new home in the country, some of you requested a step-by-step tutorial on how to make them. Here’s my attempt. If you have any questions at the end of this, leave a comment and I’ll do my best to clarify.
To start, print my mouse pattern on an 8.5″ x 11″ standard sheet of paper.

There are two patterns on the page – one for a large mouse and one for a small. Cut the page in half, and then you can decide if you’d like to make a large or small meeska buddy. For this tutorial, I’m using the large.

Carefully cut out the pattern pieces. I like to cut just outside the line since it will be trimmed off as I cut the felt. I’m a visual person & this helps me somehow.

Next, you will need:
1 felt square in the color of your choice for the body
1 felt square (or piece of one) in a contrasting color for ears
embroidery thread (also called floss) that matches the body color
quilt batting or cotton balls for stuffing
an embroidery needle with a sharp point
black beads or buttons for eyes (2 per mouse)
small black pompom for nose (1 per mouse)
black embroidery thread for whiskers
sharp scissors & clear craft glue
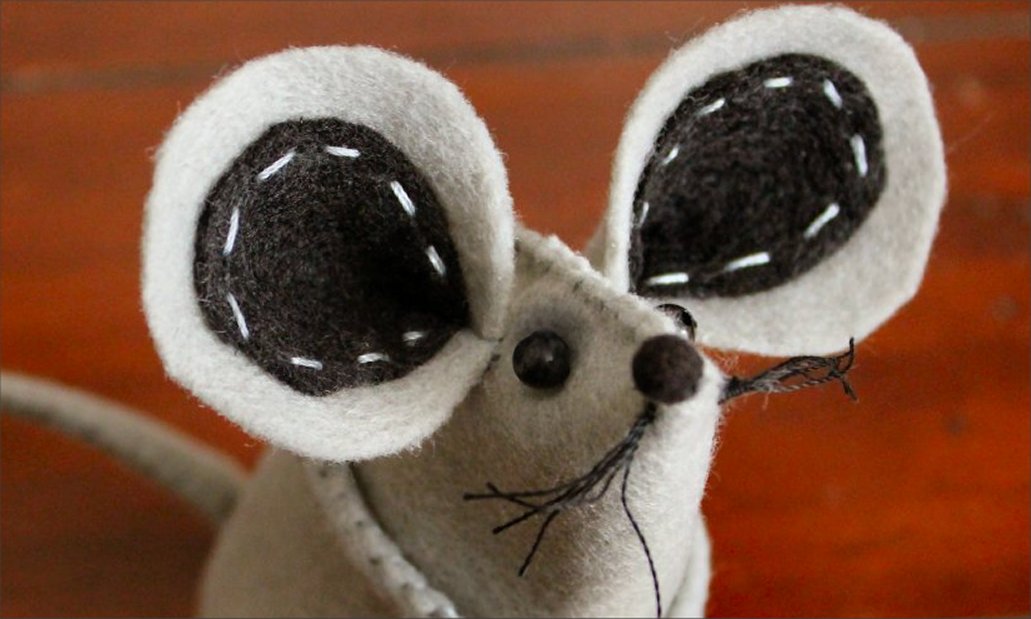
I decided on a pale grey felt for this tutorial because it photographs well. For the ears, I chose black to show off the stitching. So, let’s get started.
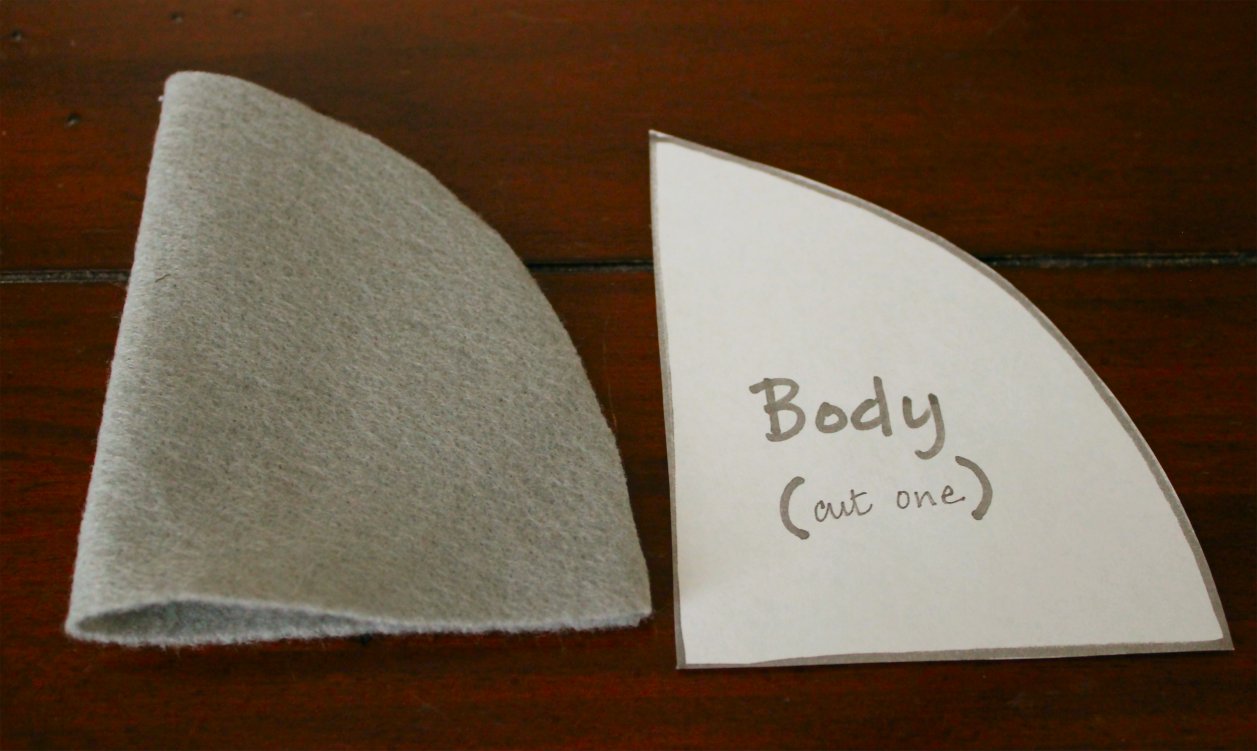
First, fold your body felt so that it’s wide enough to fit the main pattern piece.

The long straight edge on the left should lay directly on the edge of the fold. You can pin the pattern pieces down if it helps, or simple hold tight and cut along the arched edge of the pattern. Sharp scissors are a must for me.
At this point, I like to go ahead and cut out all the pieces. I’m a process girl – cut all the pieces, stitch all the pieces, connect all the pieces.
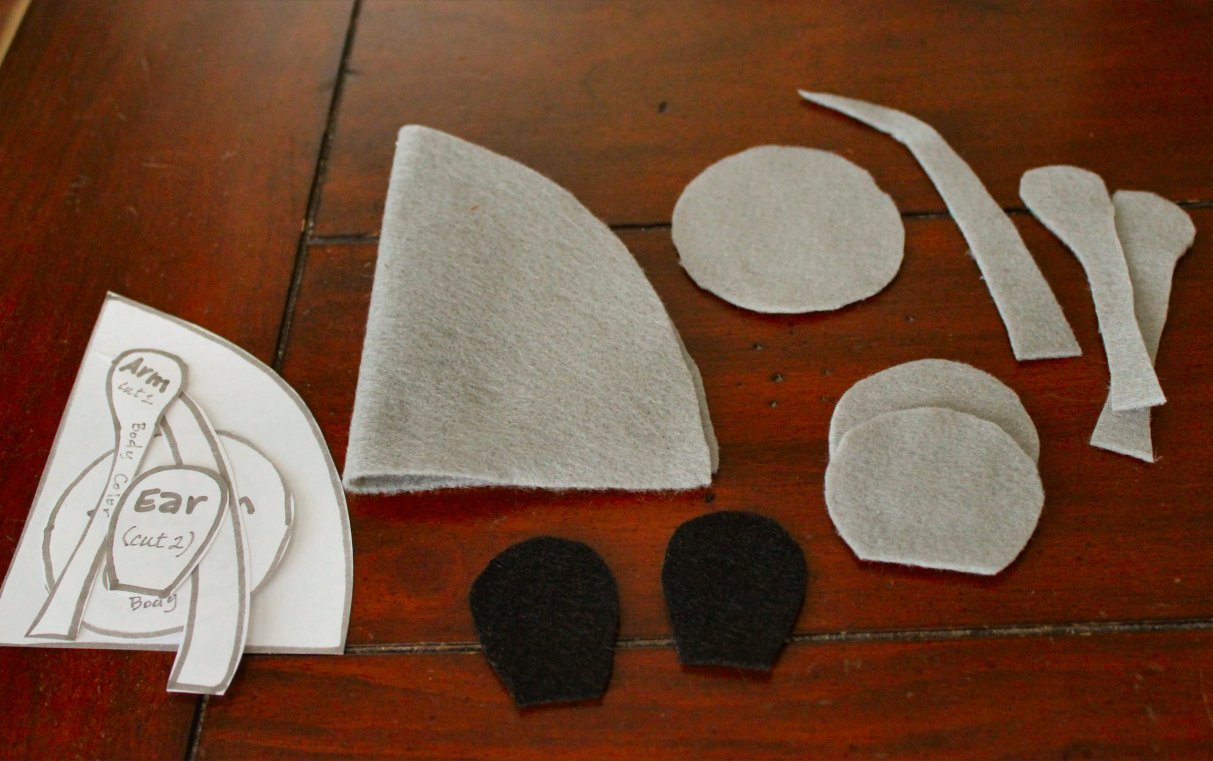
If you’re not a certified anal retentive like me, you can cut & work one piece at a time. It’s really a matter of whatever you’re comfortable with. Once you’re ready to sew, the first step is to pick a thread color that matches the body.

I chose this nice grey shade; it’s a great match. Did you notice the spool? It’s actually a foam wine cork. Can we sidetrack for a minute? I want to show you how I reorganized my embroidery thread. I was inspired by a bag of horribly tangled embroidery thread and some heavy cursing (don’t ask).
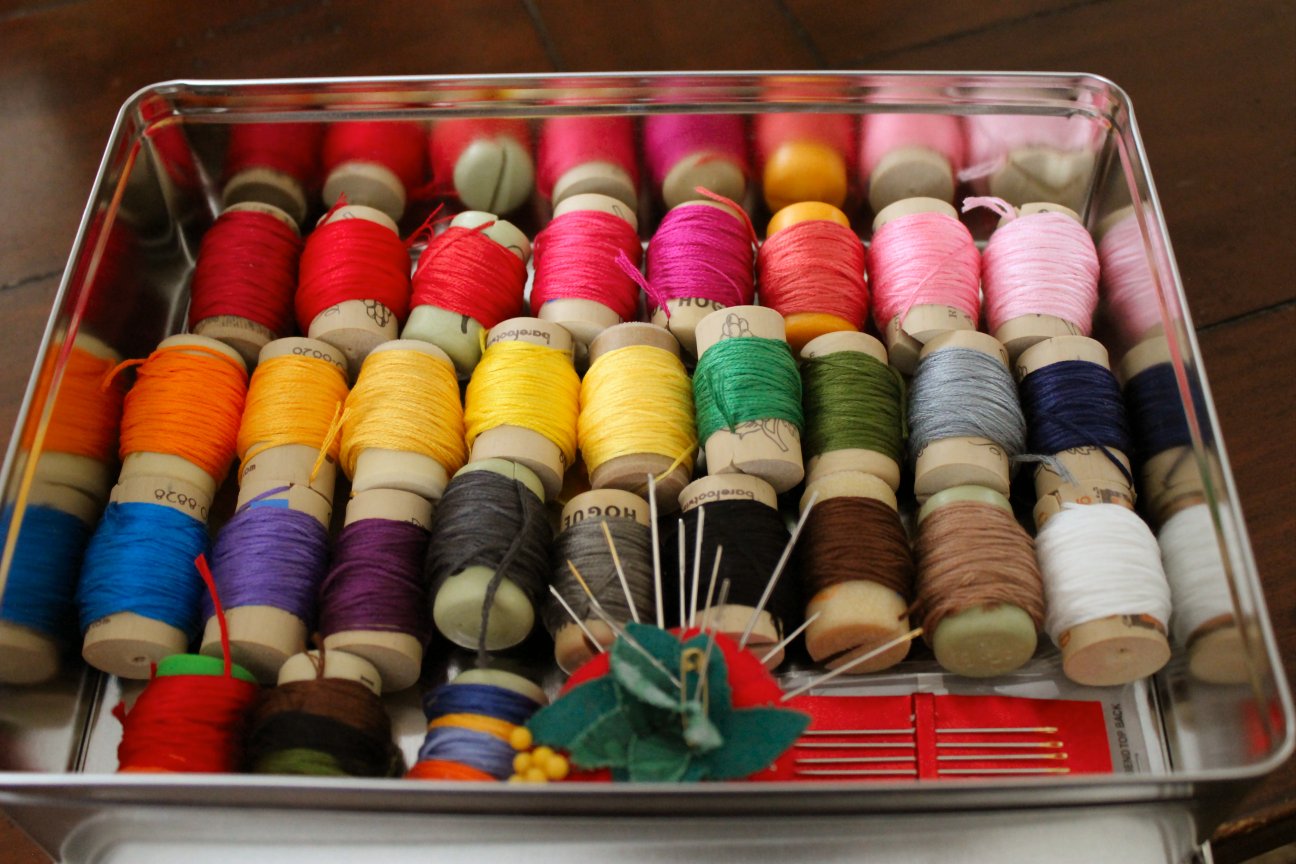
After untangling all my embroidery thread, I grabbed my jar of foam corks and a sharp paring knife. First, I cut a slit in the top of each cork; then I cut out a shallow “V” notch at the top of the slit.

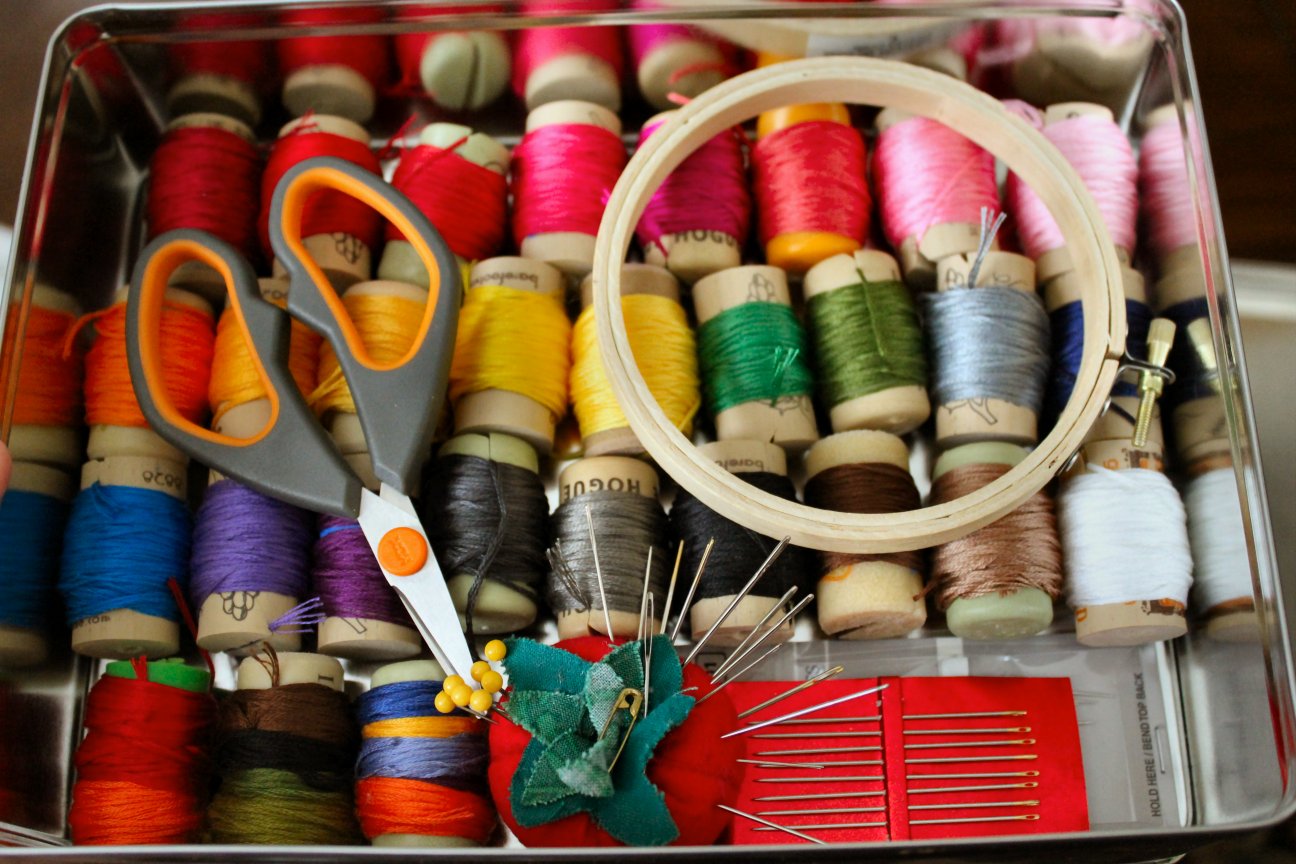
Using a strip of blue painter’s tape, I secured one end to the side of the cork. I then wrapped then entire skein of embroidery thread around the cork, leaving approximately 1 1/2 to 2″ as a ‘tail’ to tuck into the slit on top. The ‘V’ helps you find the slit in the top of the cork (because corks tend to self-heal when cut) and the deep slit holds the thread firmly in place. Once all your thread is corked, they can be easily stored in a metal tin or plastic tub with a lid. I used this metal tin because it was big enough to lay all the corks flat, which made it easier to see which colors I have. It also gave me enough room to store a pin cushion, extra packages of needles, a pair of scissors and a small embroidery hoop. I love it.
Now back to the mice! I like to use an embroidery needle with a nice deep hole because I’m turning 50 in March and it would take me all day to thread a smaller needle – even with reading glasses. Here’s a snap of what I’m talking about, in case you decide to pick some up at your local craft store.

That deep, wide hole makes it easy to thread embroidery thread through the eye of the needle. It’s especially handy if you’re using all 6 strands at once. Did I just lose the beginners? Let me clarify. Embroidery thread is made up of 6 strands of thread twisted together. If you want bold stitching, you use all 6 threads. If not, you can separate out threads to use as many as you like. For stitching up these mice, I used 3 threads (except for the whiskers, when I used all 6). It helps to cut the length of thread you want to use BEFORE trying to separate threads. I like to work with a piece about 18″ long most of the time.
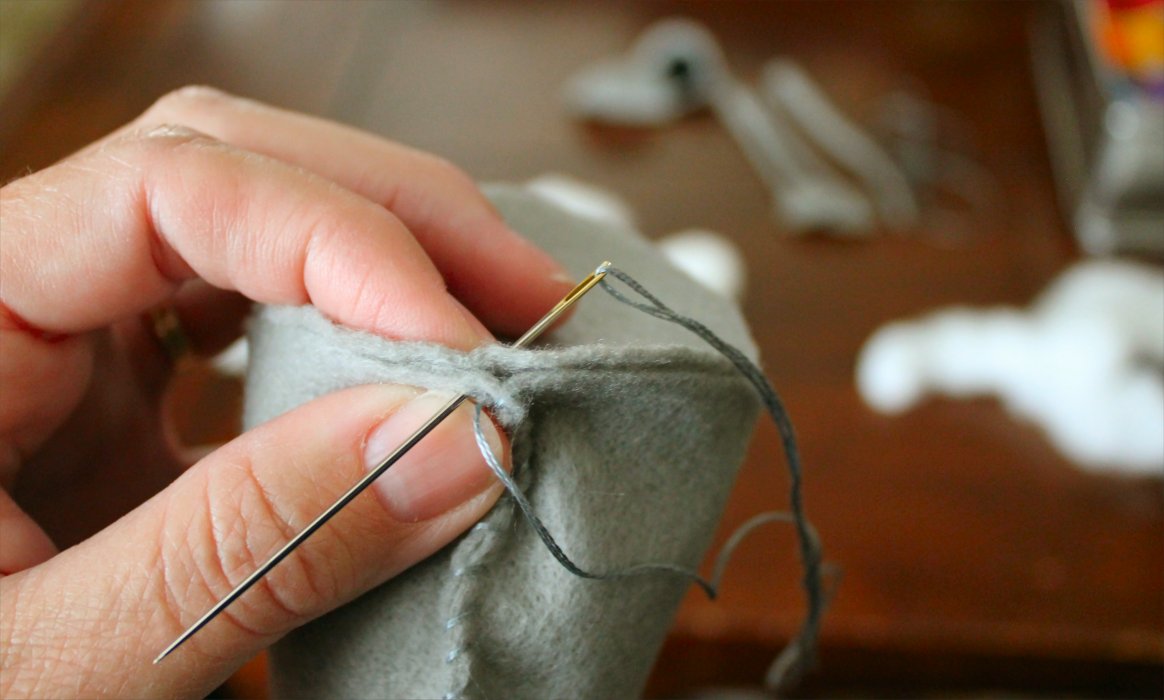
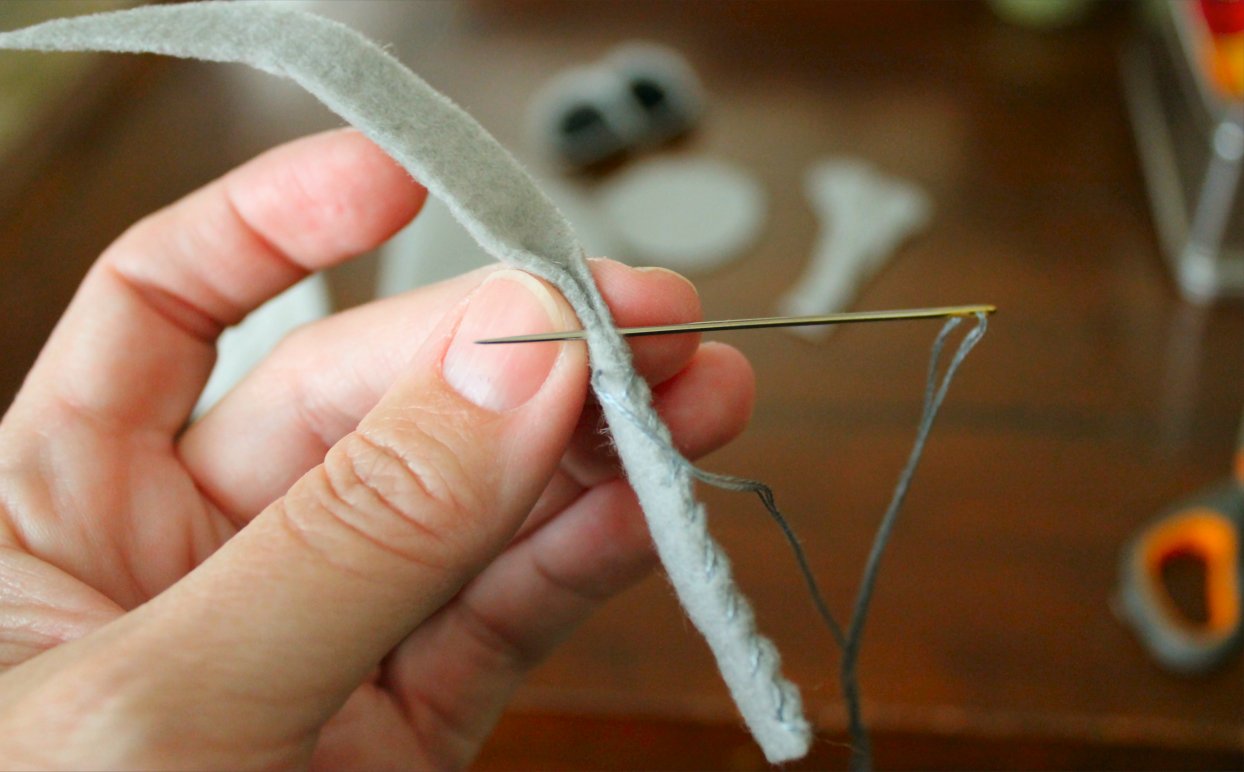
So, starting with a needle threaded with 3 strands of your embroidery thread, grab the body felt, fold it in half (just as you did when you cut it) and let’s start at the bottom (or wide) end. I use a straight stitch for this.
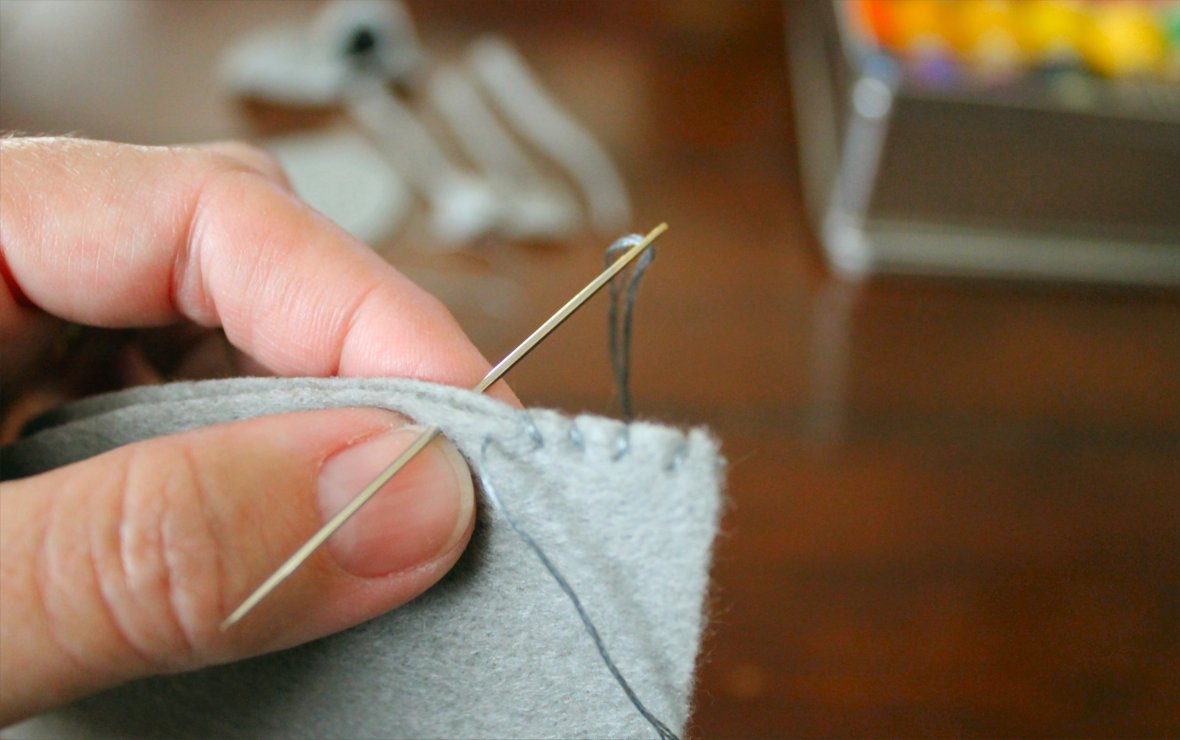
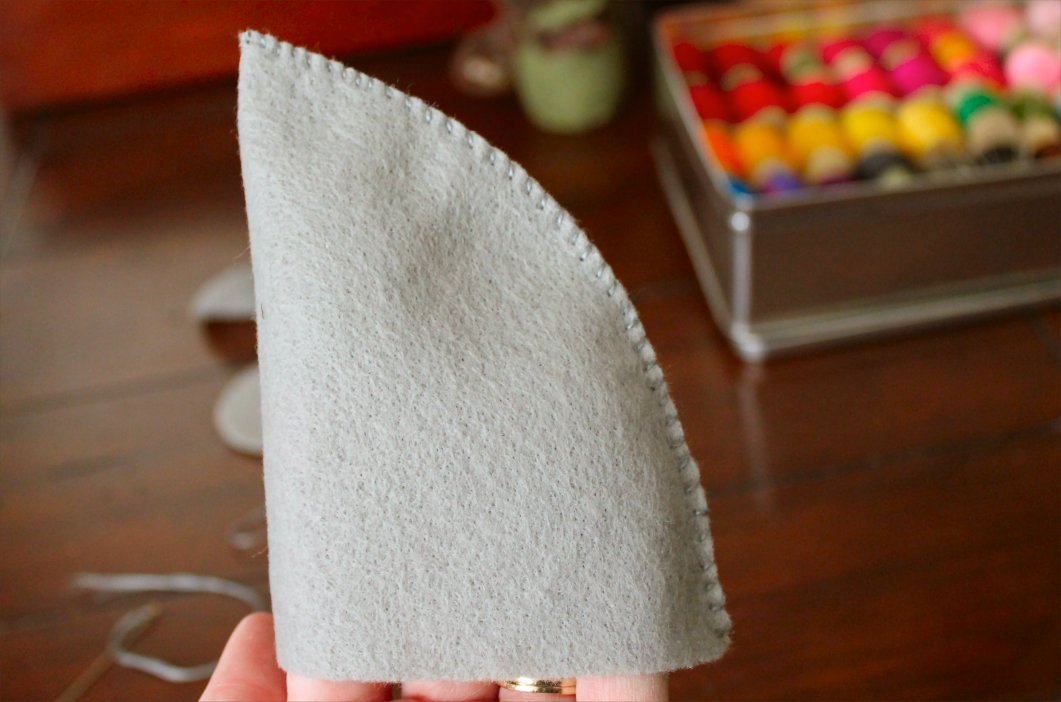
Unless you’re planning to fashion a costume for your mouse, it’s important to keep your stitches evenly spaced. It makes a big difference in how the finished mouse looks. Just take your time. When you reach the tip of the nose, tie a good knot, then run your needle through the felt into the cavity of the body. Cutting the thread inside the mouse hides any loose ends when it’s knotted. I do this to all the pieces to make the finished part neater. When done, it will look like this:
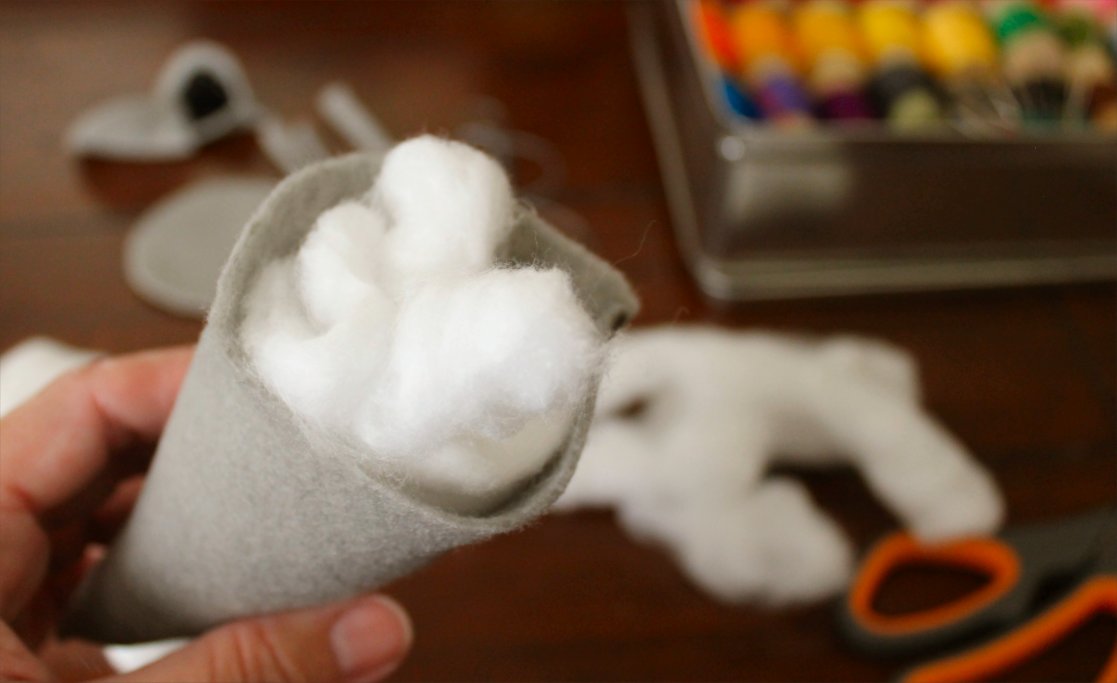
If you have a bag of quilt batting (fluffy filler) lying around the house, grab it. If not, you can use cotton balls. They’re much cheaper than a bag of quilt batting, and you won’t need many to stuff a mouse. I find that 6-10 cotton balls are usually enough to stuff a large mouse. First, I like to stretch them out and fluff them up a little. It makes for a less lumpy mouse.

Grab a cotton ball ‘strip’ and gently stuff it down into the nose. If it helps, you can close your scissors and use the pointy end to gently push the cotton into the tip of the nose. Then add additional cotton until the mouse is filled.
When I first started, I overstuffed my mice to the point that they were too firm. I didn’t think much of it until I tried to sew on the other body parts. If your mouse is overstuffed with filler, you’ll have a hard time running your needle through the body to attach other pieces. Plus, I’ve found that a less-stuffed mouse just looks better. When I’m happy with how stuffed my mouse is, I like to form a ring of cotton to put at the very bottom.

That little cotton ring forms a base so your mouse will sit up properly when he’s done. Now grab your circle you cut for the bottom and let’s put it into place.
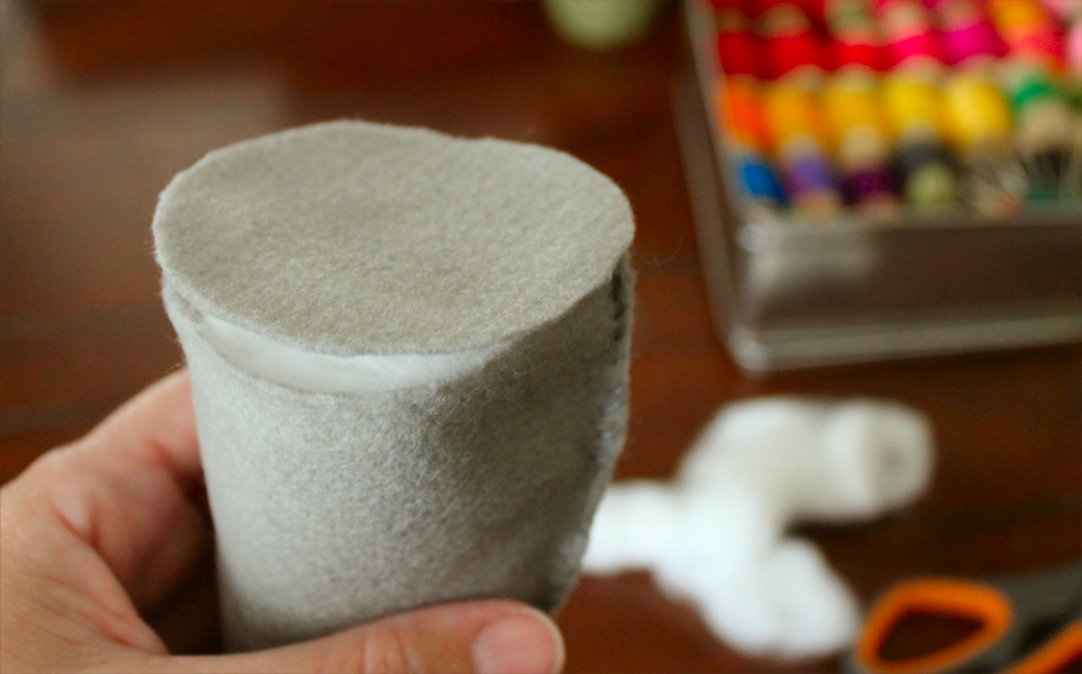
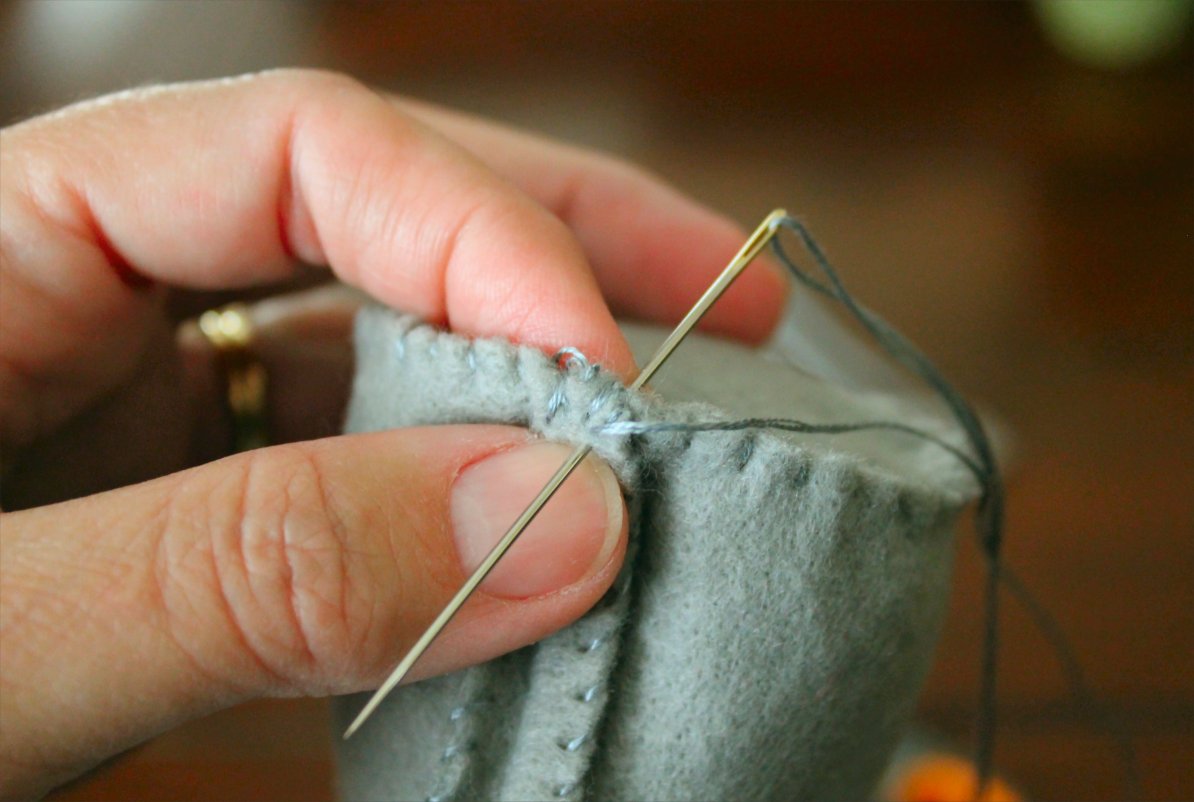
Grab your needle and thread and stitch the bottom onto the mouse. As usual, if you start your knot inside the body cavity it won’t show when it’s finished.

Watch your stitching so it’s evenly spaced again. This part is going to show.
When you’re done, tie a good knot to secure it and trim the loose threads at the end off. If you start and end at the ‘spine’ seam, you won’t have to worry about the knot showing. We’re going to cover it with the tail later.
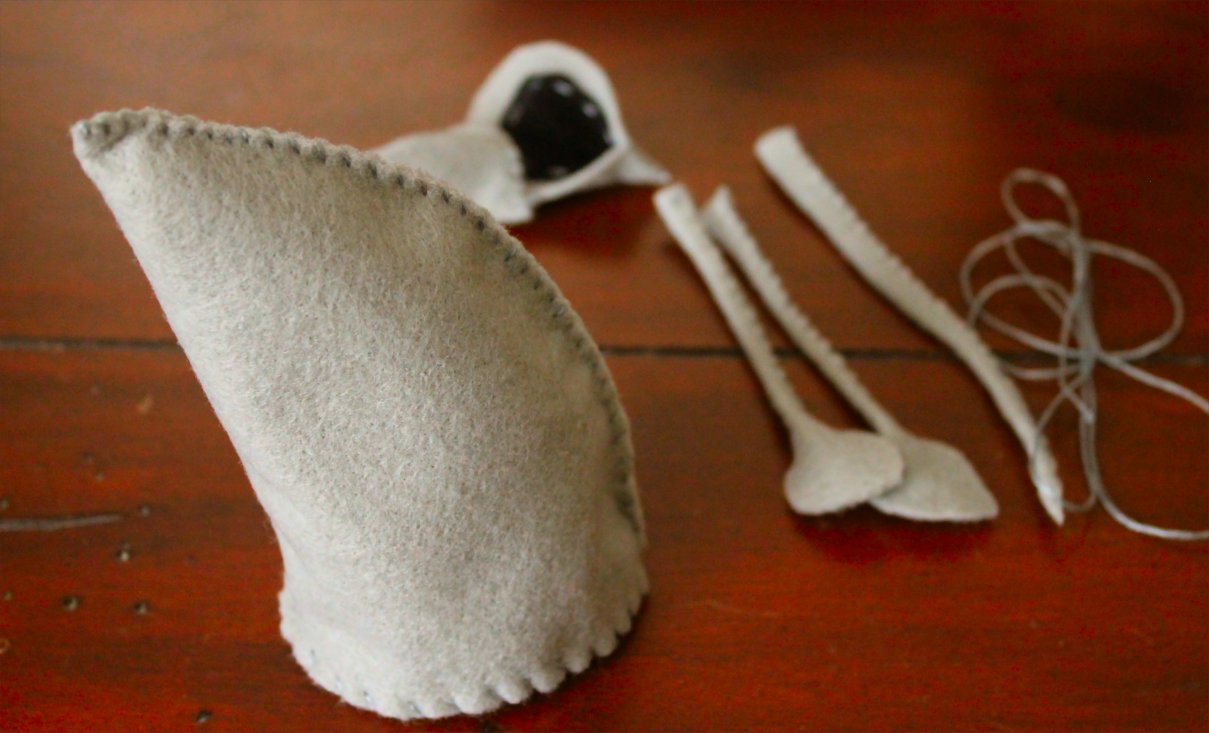
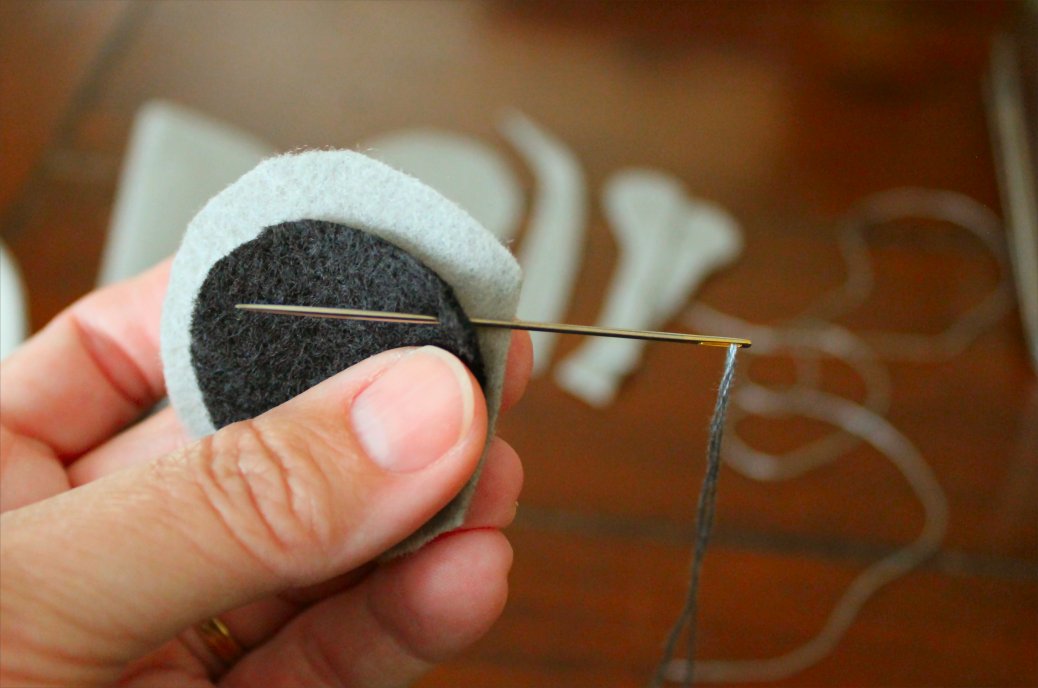
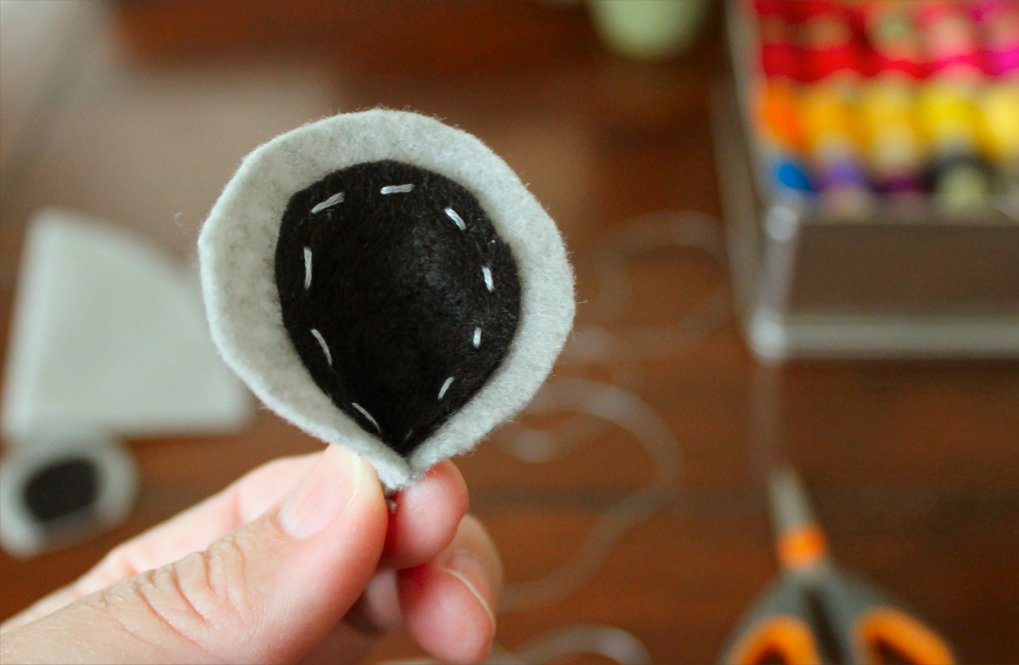
And now you’re ready to assemble the other body parts. Try not to notice that some of mine are already finished in the background of that photo. We’ll get to all of those in a minute. For now, let’s start with the ears. Grab one of your ‘outside’ pieces and center the contrasting center piece on top.

Feel free to move the inside color around until it’s centered and you’re happy with the way it looks. If it overhangs the outside color at the bottom edge, just trim off the excess felt. Once you’re happy with it, grab your needle and stitch it down. I love to use the body color so it shows up as contrast stitching on the ear. Again, I like to start with my knot on the back side so it doesn’t show.
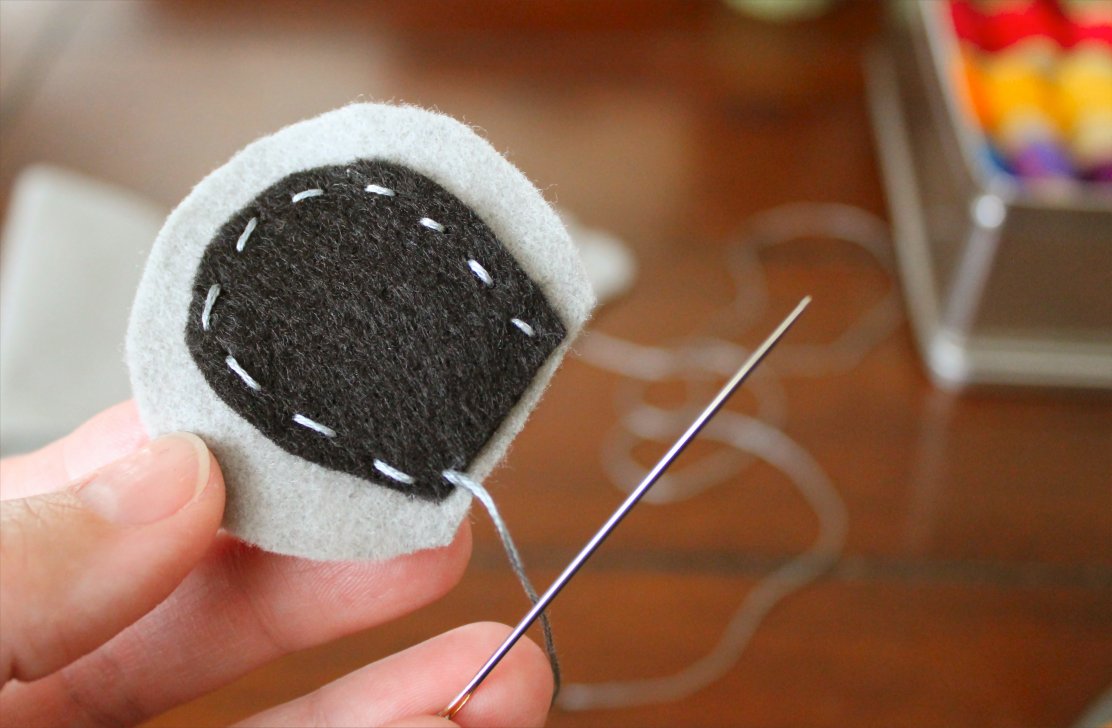
I’m not sure what this stitch is officially called, but I like to run my needle past the next stitch, then come back to make each ‘loop’. Why? Because it allows me to barely run my needle through the depth of the grey felt so my stitches aren’t as noticeable on the back of each ear.

If you’re not concerned about the back of the ears, just do a regular stitch to secure it. You’re using embroidery thread in the body color, so it’s not a big deal. Again, I’m anal retentive and I tend to get hung up on little details like that. I apologize. Here’s what it looks like when it’s done:
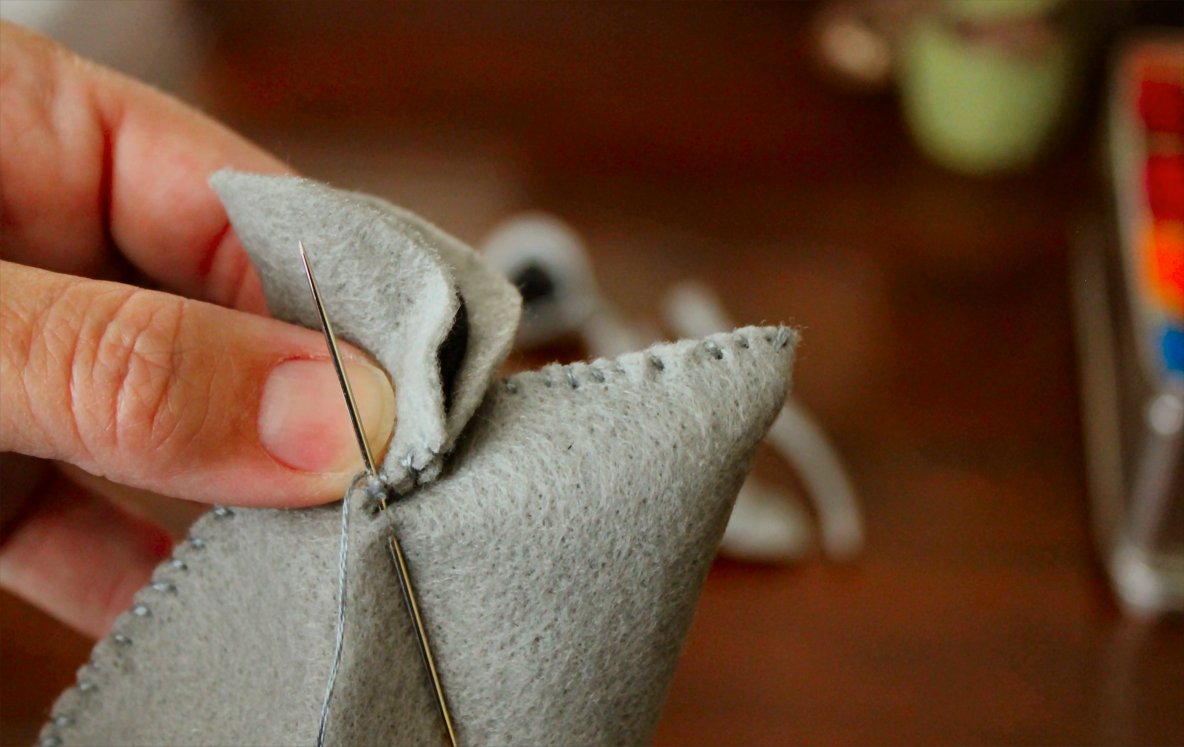
You don’t need to worry about tying a knot at the end, because we’re going to immediately fold the ear in half at the bottom edge and stitch it closed.
Stitch across the straight edge at the bottom of the ear, just as you did when you sewed the body together, then tie a knot to secure it. All done!

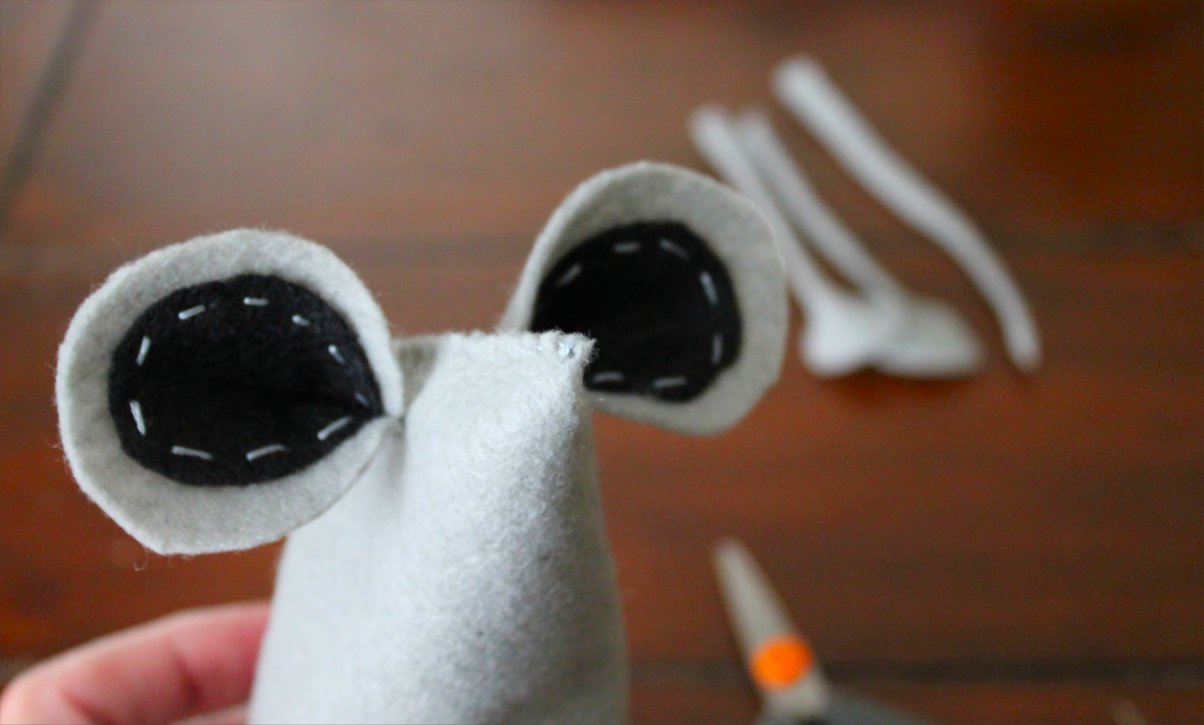
Now do the same to the other ear, and we’re ready to stitch them onto the body. I like to start by placing the first ear (facing forward, of course) about 1″ from the tip of the nose, and about 1/3″ to 1/2″ from the seam of the ‘spine’. Then stitch it down (be careful not to go through the mouse and out the other side or you’ll sew your mouse shut); knot it and snip off the end. Like this:
To make sure I get the second ear in the correct position, I line it up like this:

You can pin it into place if that helps. Just make sure you reach inside the mouse body to make sure you’re not pinning or sewing all the way through the other side. Once both ears are attached, you can pry them open and move them up or down a little until you like how they look.
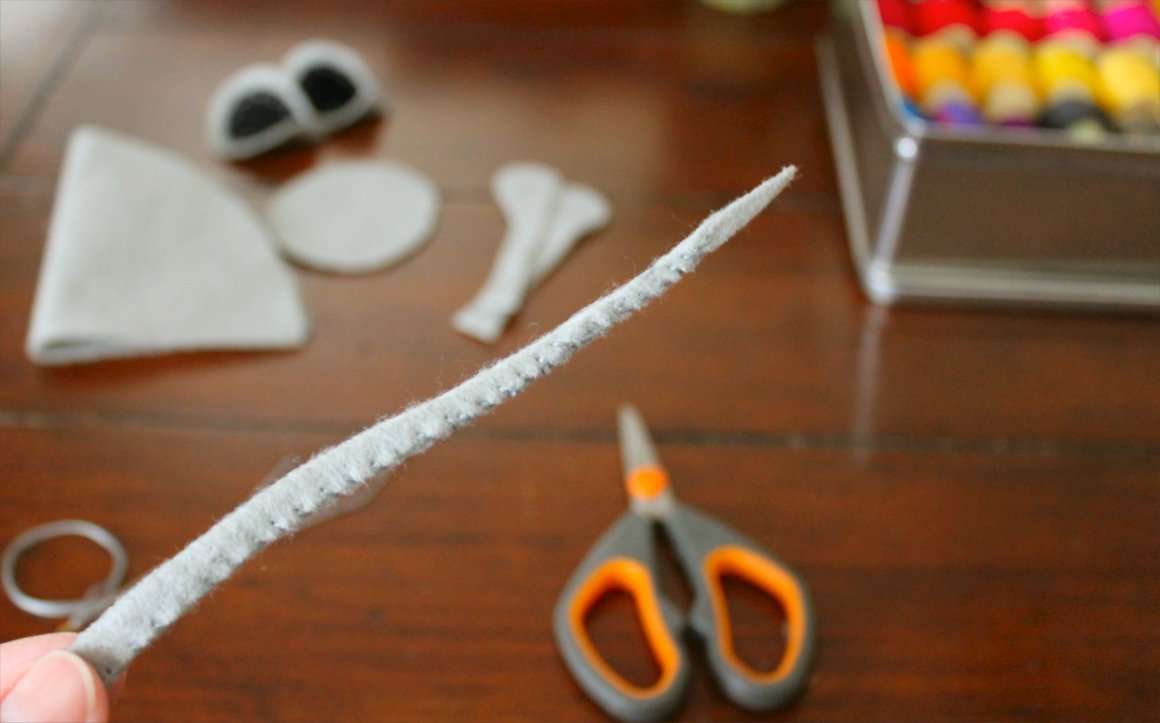
Ready to make a tail? Me, too! Grab your tail piece and make sure you have enough thread in your needle. I hate to start a piece and have to stop and tie knots in the middle. Once I start a piece, I like to go to the end without stopping. I know! I told you I have issues! Don’t be like me. Just grab your tail (heehee)… I mean grab your mouse tail, and fold it in half at the bottom edge. We’re going to sew it up just like we did the body.
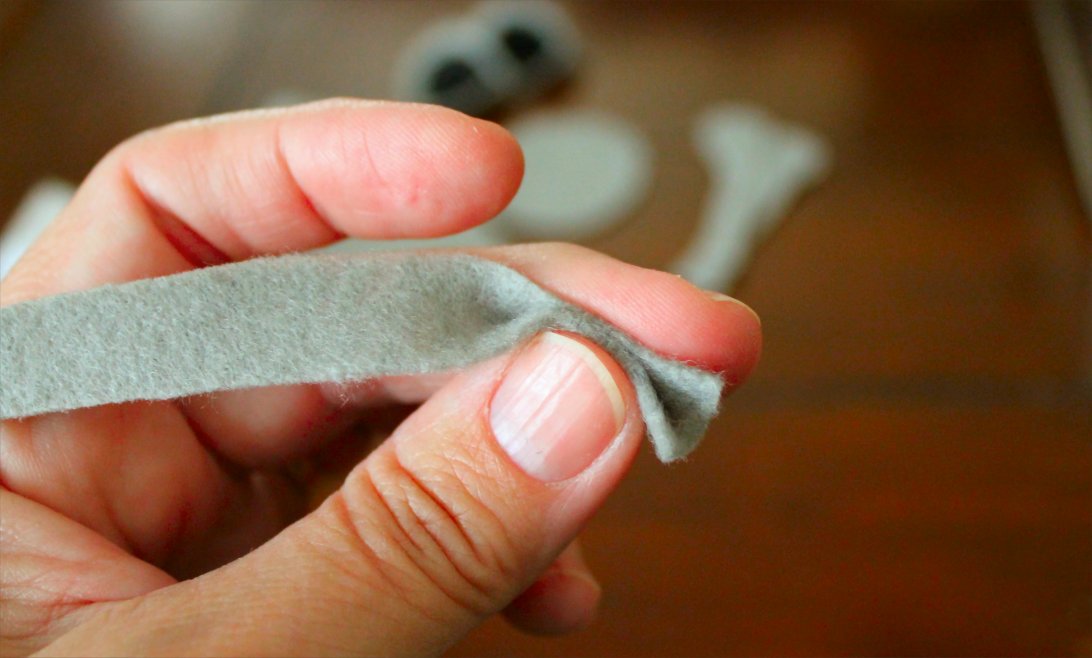
Do you have a problem with your nails getting brittle and splitting and breaking off in the winter? I do. Drives me crazy. Anywho, stitch up your mouse tail until you get as close to the tip as possible. You’ll see what I mean when you get there.
The more narrow that tail gets, the tougher it is to stitch it shut. When it’s done, it should look something like this:
Now grab your mouse body, and we’ll attach it at the ‘spine’ seam.

I find it easier to flip him upside down.
And now your tail is attached. Here’s the bonus to all that tail stitching – it gives it enough structure to bend and shape the tail any way you want, which gives your mouse more personality. You can thank me later. So now you’re ears and tail are on. Congratulations! You’re almost finished.

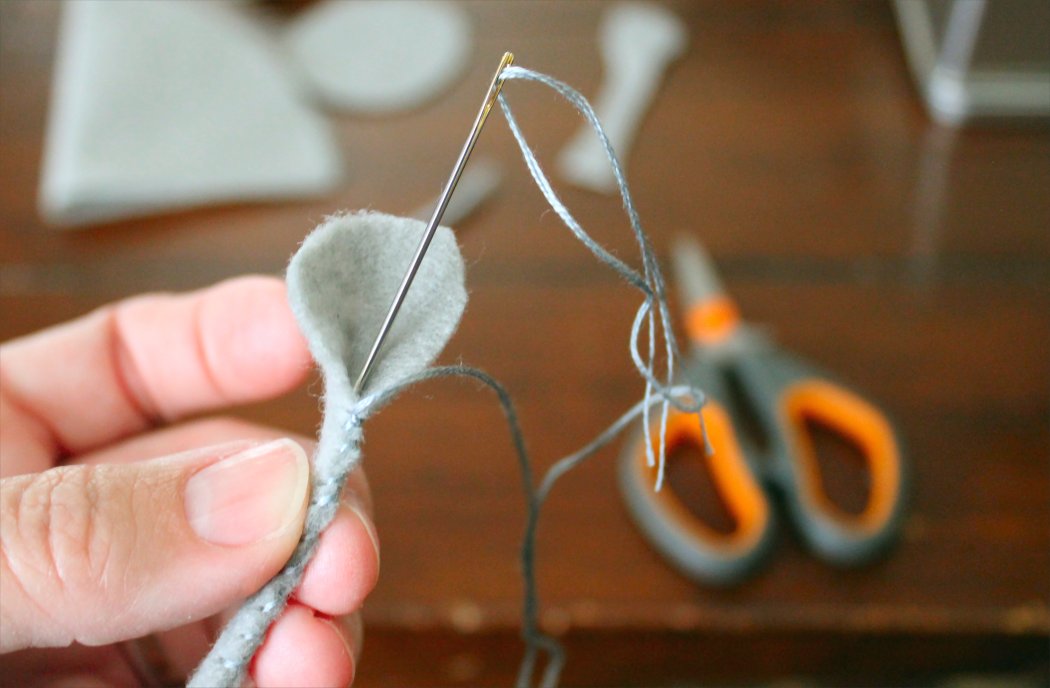
Let’s move on to arms. I think the arms are what makes these mice so adorable. And versatile. A mouse with arms can do just about anything. More on that later. For now, grab an arm piece and we’ll stitch it up just like we did the tail – starting at the flat end. Stop when you get to the part where the palm flares, and secure with a strong knot. I like to run the thread back down through the arm before I cut it so the knot doesn’t show.
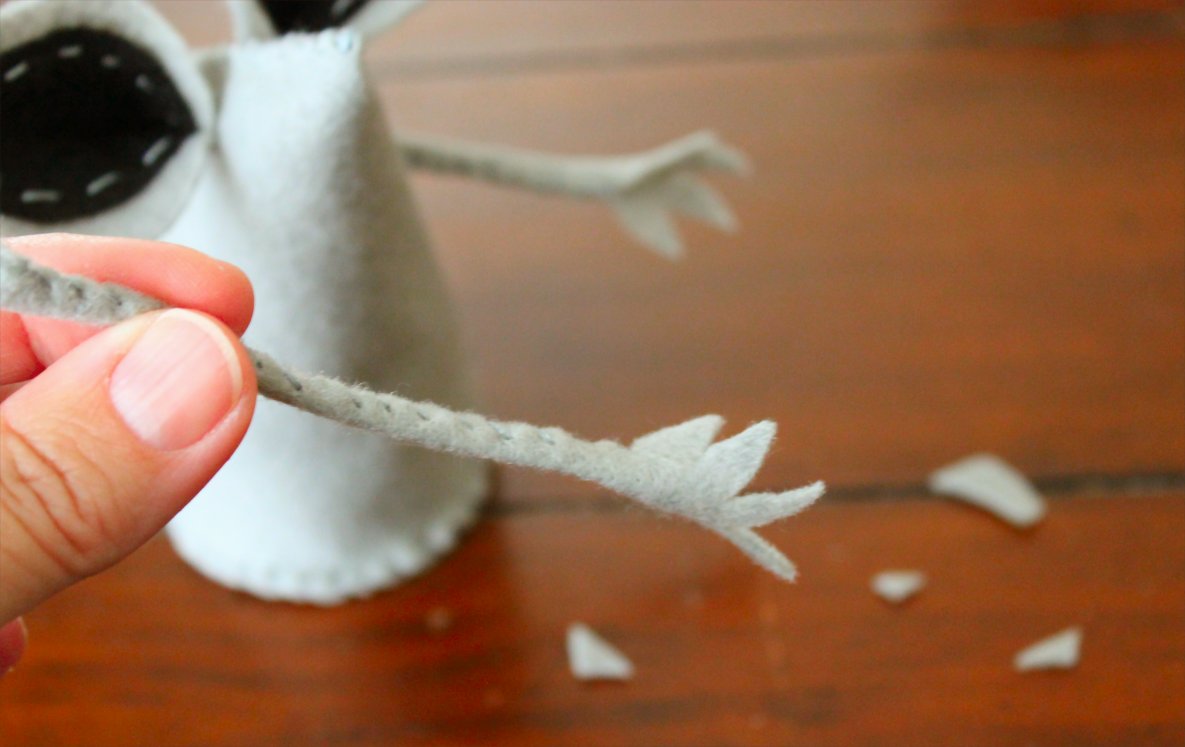
Here’s where I just get crazy stupid excited. I LOVE making these arms and hands. It adds so much personality to your mouse. And it’s seriously fun. Grab your scissors, and let’s start cutting fingers for your mouse.

Using sharp scissors, remove little curved triangles to form 4 fingers.
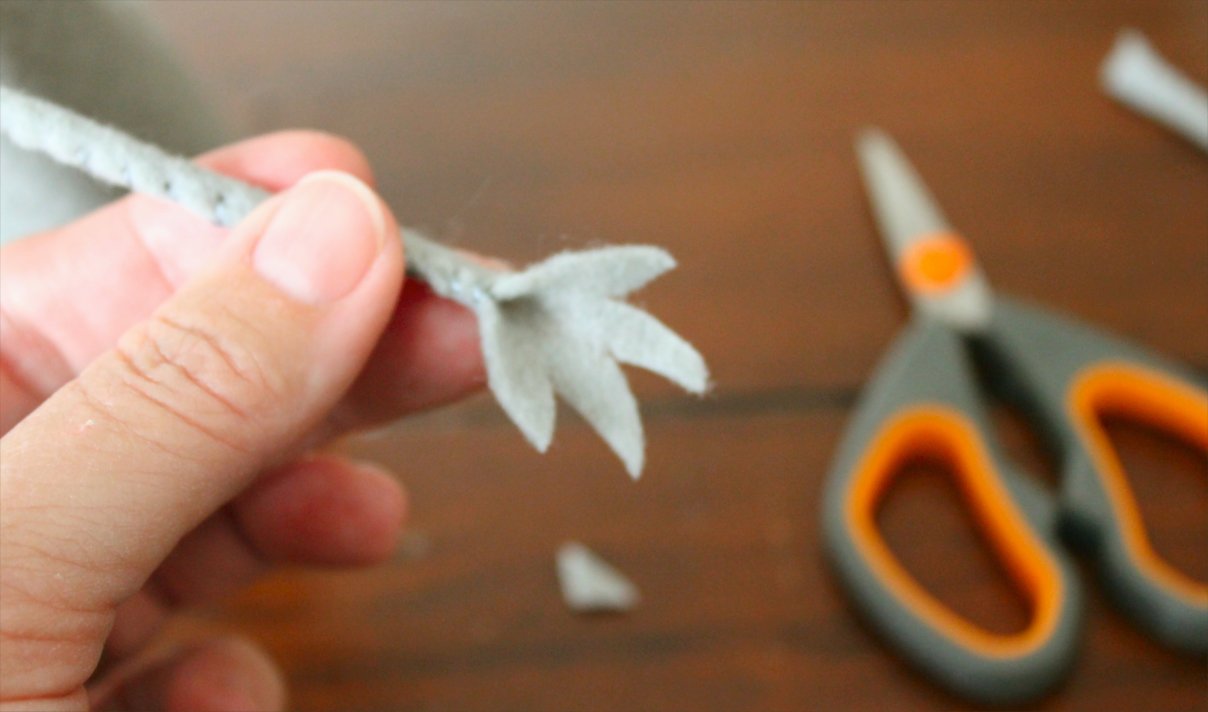
Gah! Isn’t that adorable? I just love these little mouse hands.
When both hands are done, we’re ready to stitch the arms on. I like to attach them both at the same time by pinching them together on the ‘spine’ seam.
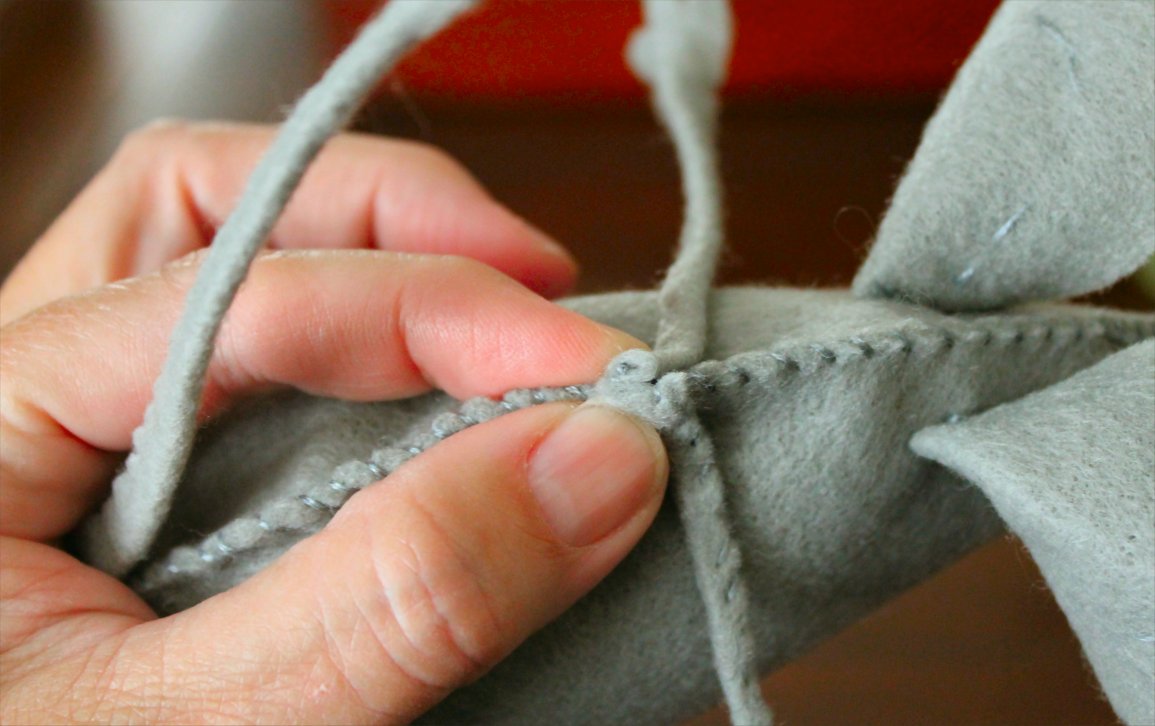
I really stitch these down well, so I’ll go over it twice before I knot it off. Here’s what I mean when I say arms give these mice such character.


See? They don’t even have faces yet, and they’re starting to come to life. This must be what being an animator feels like. Please say you’re just as crazy about this as I am so I don’t feel like a total craft geek. Please.
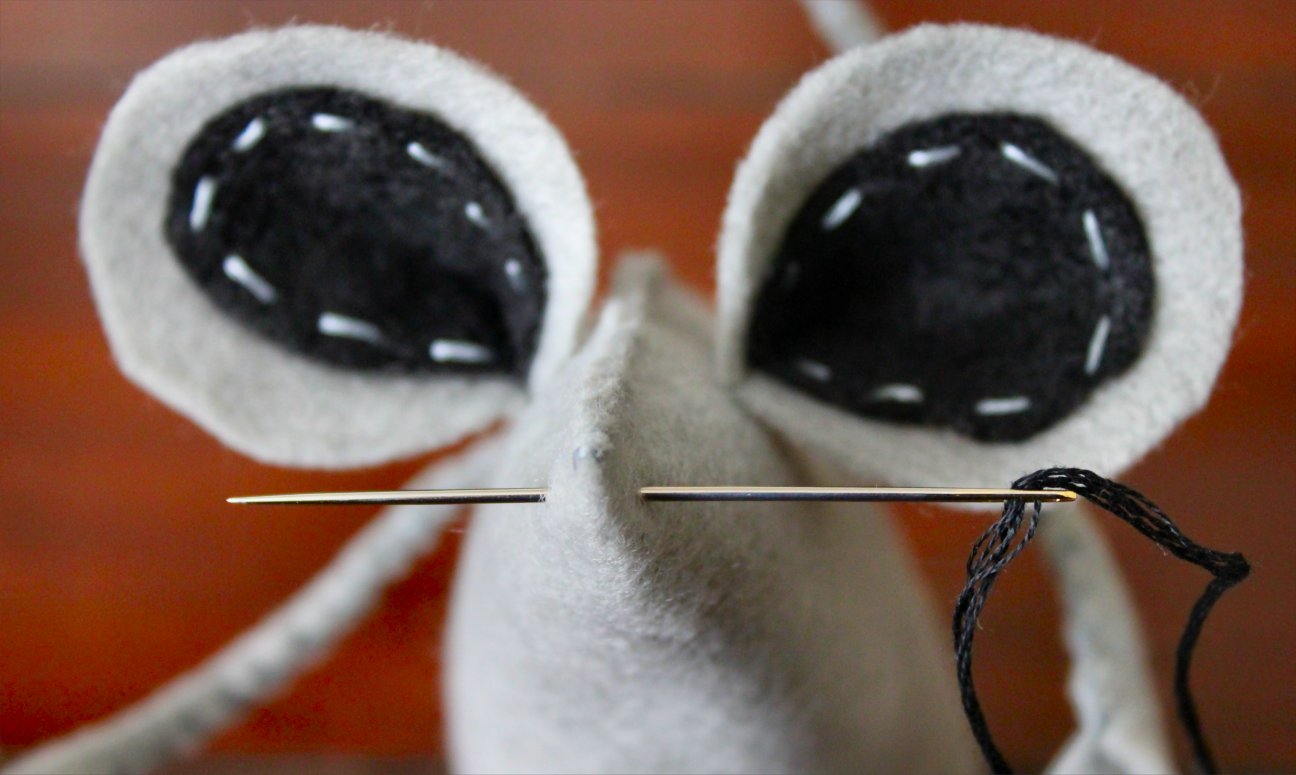
Maybe we should just move on to faces. Every mouse needs whiskers. For this, I use all 6 strands of the embroidery thread. Tying a knot about 1″ from the end, I pull the needle through the end of the snout (about 1/4″ from the tip). The knot stops the whiskers from pulling all the way through.
Once it’s through, cut the second side to the same length as the first (1″). To secure them, I use a toothpick and apply a small dab of clear craft glue at the base of both sides of the whiskers. Tip: just as wax is used by men to keep handlebar mustaches in line, so goes Chapstick for wee little mousetaches – keeps those whiskers separated & stylish.
Next, we’ll place the eyes. If I’m not sure where I want to put them, I grab a few straight pins with the balls on the end. I just keep jabbing the mouse in the head until I like how it looks. If you need to, mark the spot with a pencil.

I buy shiny round beads for the eyes and tiny pompoms for noses. (They love me at Hobby Lobby.) Once I sew them down, I hit them with a dab of clear craft glue just to make sure they’re securely attached.
You’re done! Now you’re free to embellish your mouse any way you see fit. For this one, I created a flower from an antique button. I thought it would be sweet to have her holding a flower, since she’s making new friends here.

It almost looks like a bridal bouquet. Which is an insight into how my mind works. Now that I’ve seen her and thought ‘bridal bouquet’, there’s a good chance I’ll end up making a wedding dress and veil for her. Because in my mind, more is more; and more is better.
And that brings me to The One That Got Away from Sister #4.
My Big Sister and I started this mouse project separately, but there came a time during the summer when Mom decided to visit and Big Sis decided to join us. At that time, we committed to combining the mouse tribes into one big happy family and finish it together so we could tag them and box them up in one tidy bundle. We made the last few mice together while sipping cocktails and chatting around the living room coffee table.
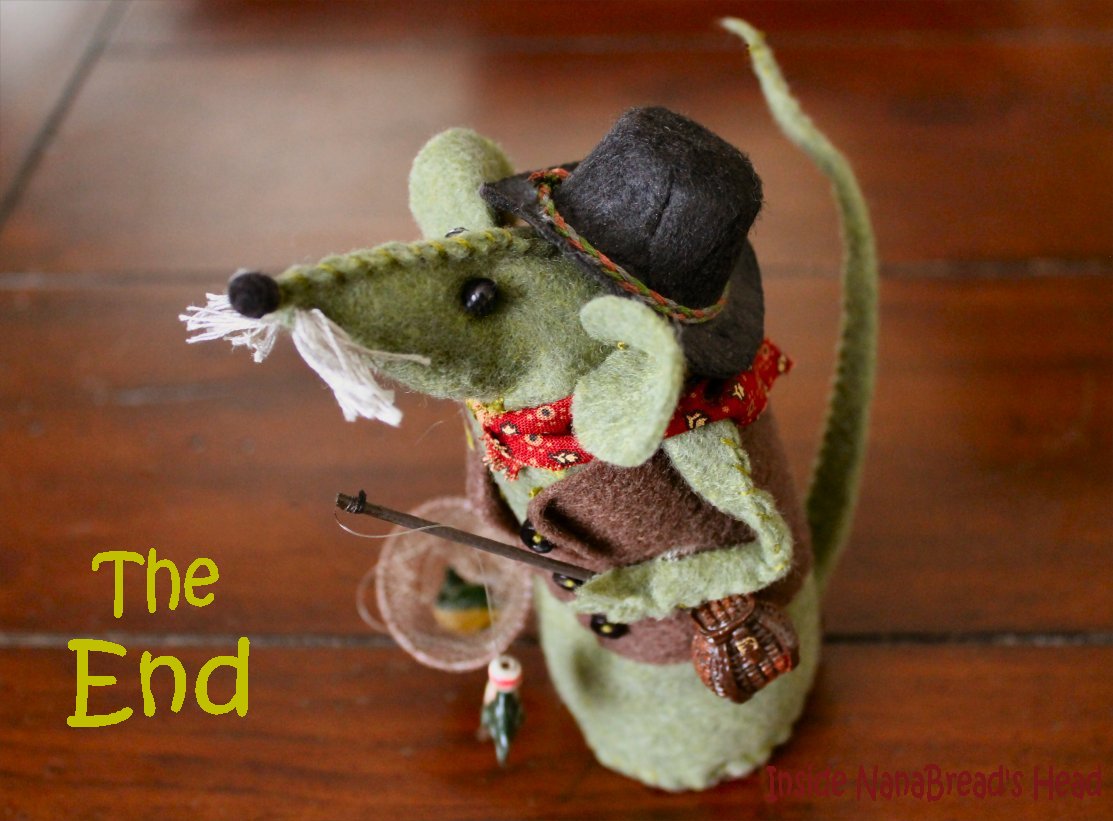
And that’s where Grandpa FisherMouse came to life. He was the very last mouse I crafted, and I fell so head-over-heels for him, I told the girls I wasn’t sure I could turn loose of him. I mean… could you?

I just love him. He has a fishing net with a few small fish in it. And a fishing pole with one on the hook (and there’s a bobber on the line). He even has a fishing vest with teeny tiny buttons and a trout basket.

This is where that anal retentive attention to detail comes into play. Sometimes I can’t stop myself. He has a little print bandana, a black felt hat, and I even braided a band to go around the hat. He reminds me of the movie ‘A River Runs Through It’ – which may be why I’m obsessed with him. There’s a slight chance it might be tied to my deep and abiding love of Robert Redford, Brad Pitt and the great state of Montana. Maybe-ish. Whatever – he’s mine (my preciousss).
Sorry, Sister #4. I love ya’ and all, but you’re not getting this one. :)
Maybe I should make him a canoe out of toothpicks & popsicle sticks…
