Tag Archives: felt mice

The Mouse Project

You guys… I thought the 50th birthday shenanigans ended on Thursday when my blogging besties threw me a virtual birthday party, but no. They upped the ante with what has been known on Twitter as #TMPWatch2013. When it first popped up in my Twitter feed, I admit – I ignored it. I have goofy friends and there’s always some kind of ‘watch of the week’ going on. But when they started mentioning crafts, injuries, cat-tastrophes and swearing, it got my attention. Eventually, I wailed “I WANT IN!” Bet that got a laugh.

Kat stepped up and explained that it was a craft project. A “stitch & bitch” of sorts. She even produced a photo of an apron she was working on. There was embroidery of cilantro. (Yes, cilantro.) But she was a deceiver because that apron was distraction bait. They were scheming behind my back. My suspicions were confirmed when six boxes arrived, all with the same taunt written across the outside – “DO NOT OPEN UNTIL ALL PACKAGES ARRIVE”.

Three days I waited. There was a lot of tweeting back & forth. I kept saying “I can’t stand it!” and they kept saying “Don’t you dare touch them until they’re all there!” When the final box arrived last night, it was on like Donkey Kong. I did my best to live tweet as each box was opened, but I couldn’t help but wish they were all perched in my living room drinking margaritas with me.

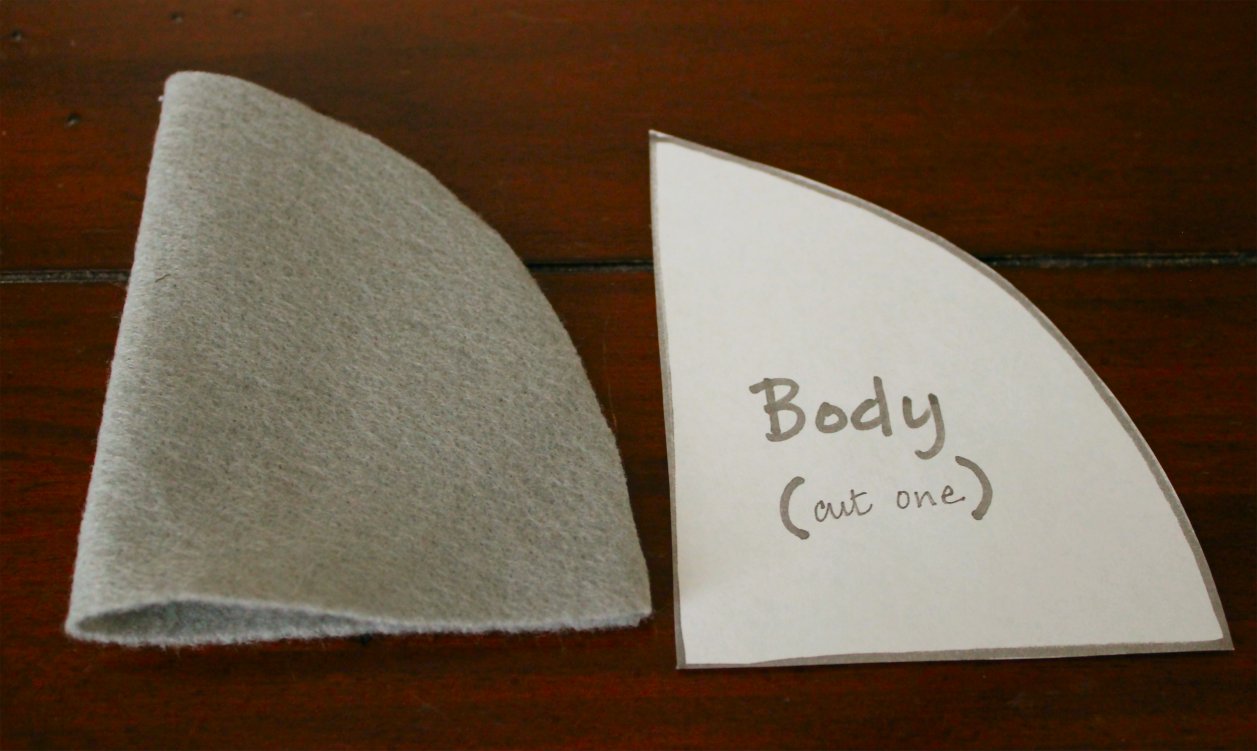
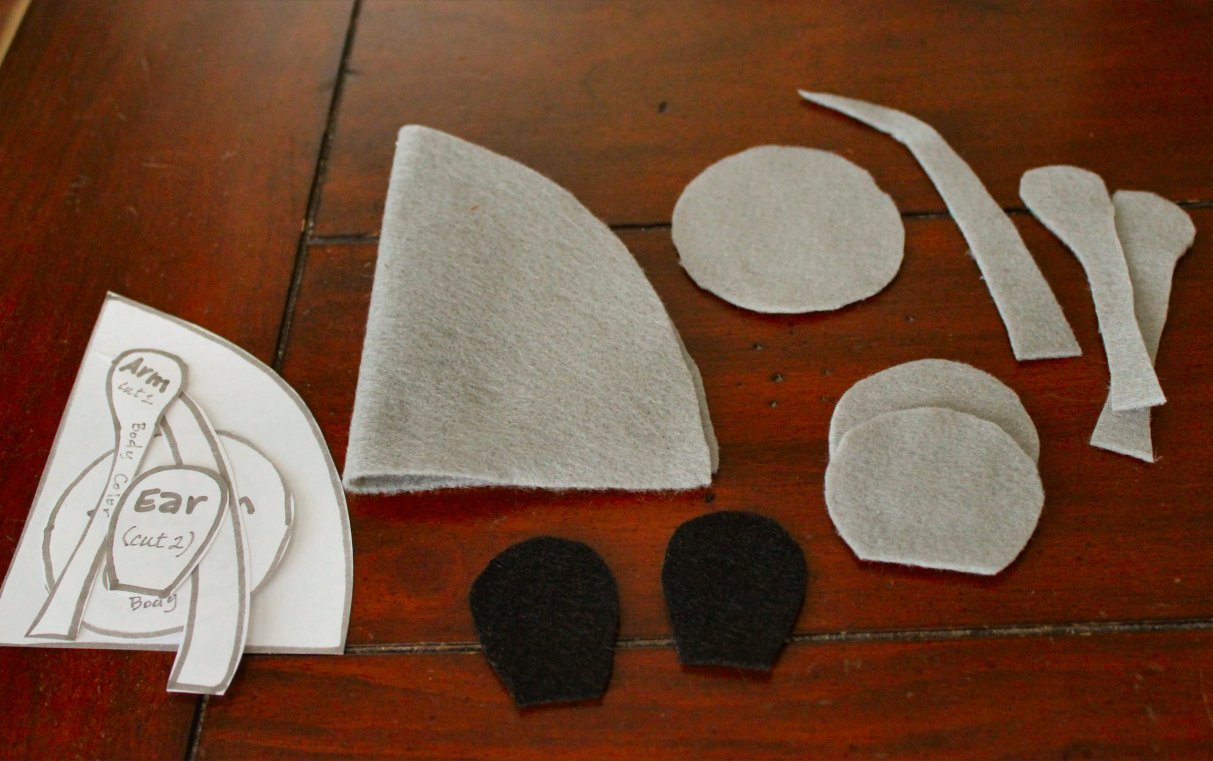
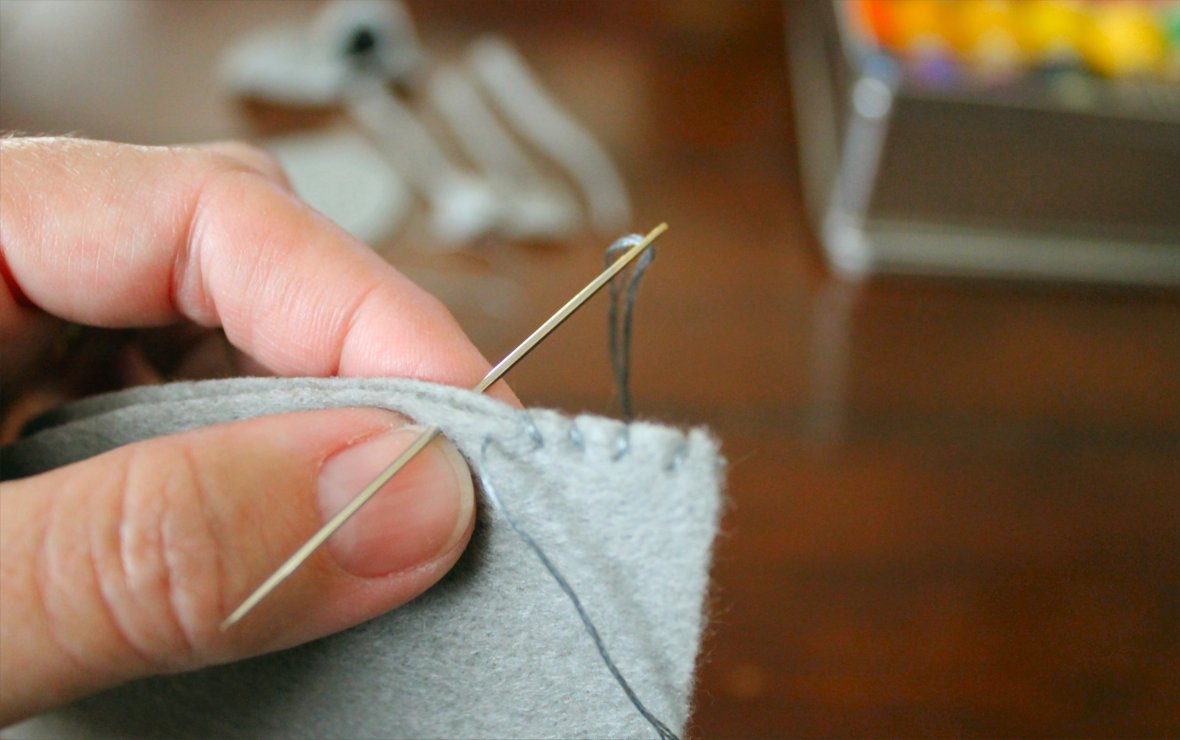
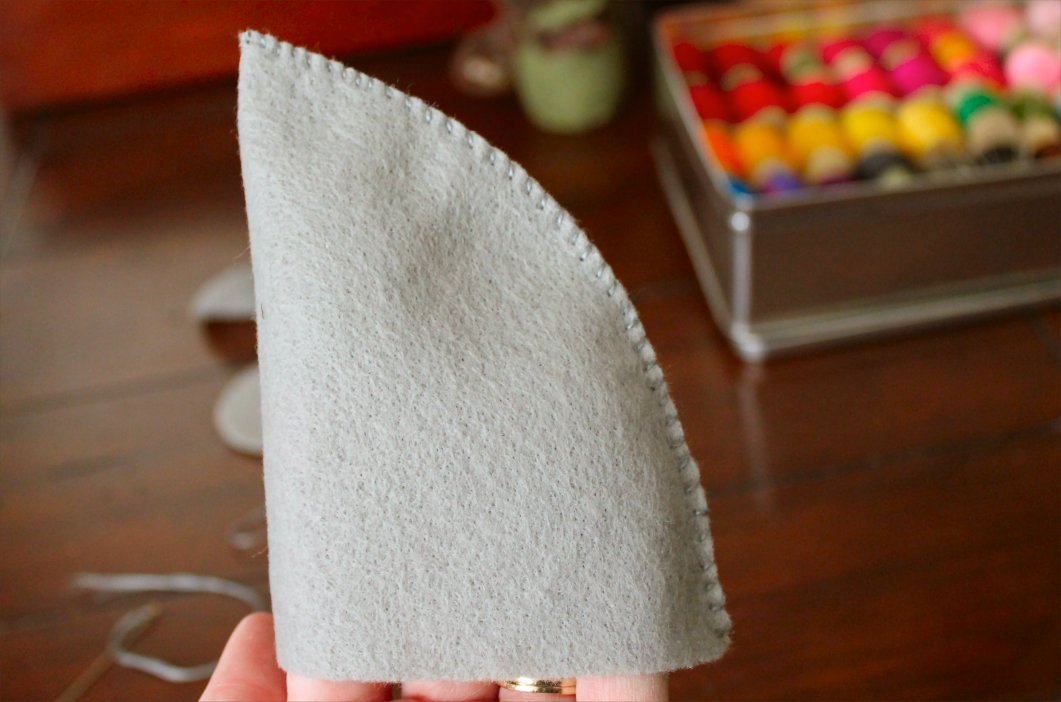
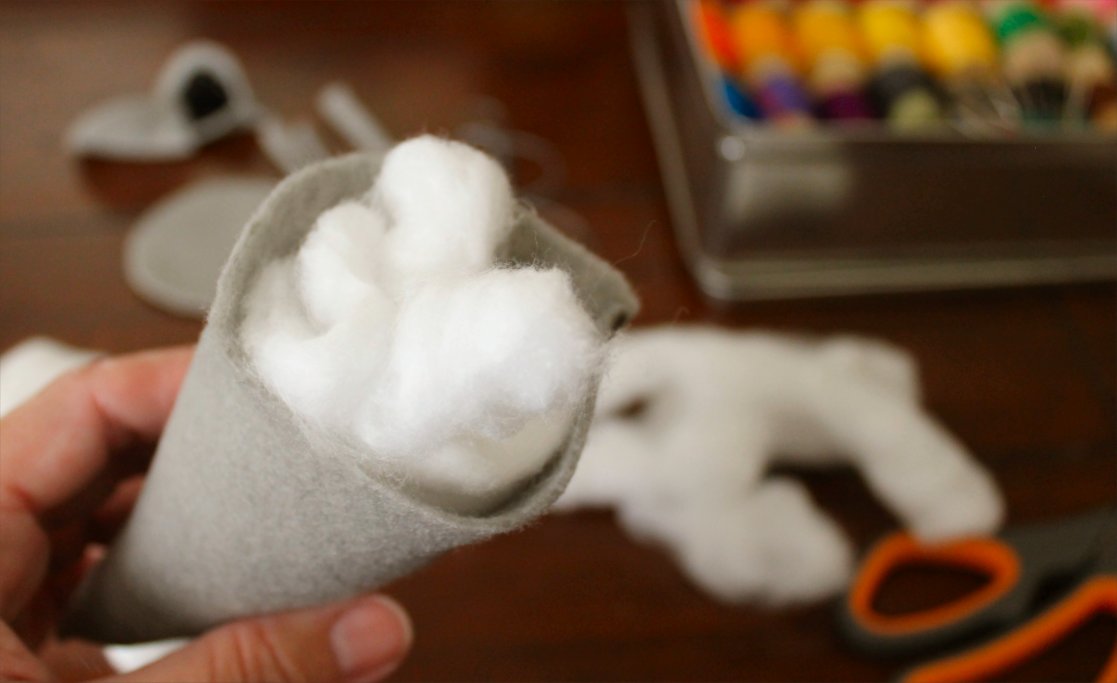
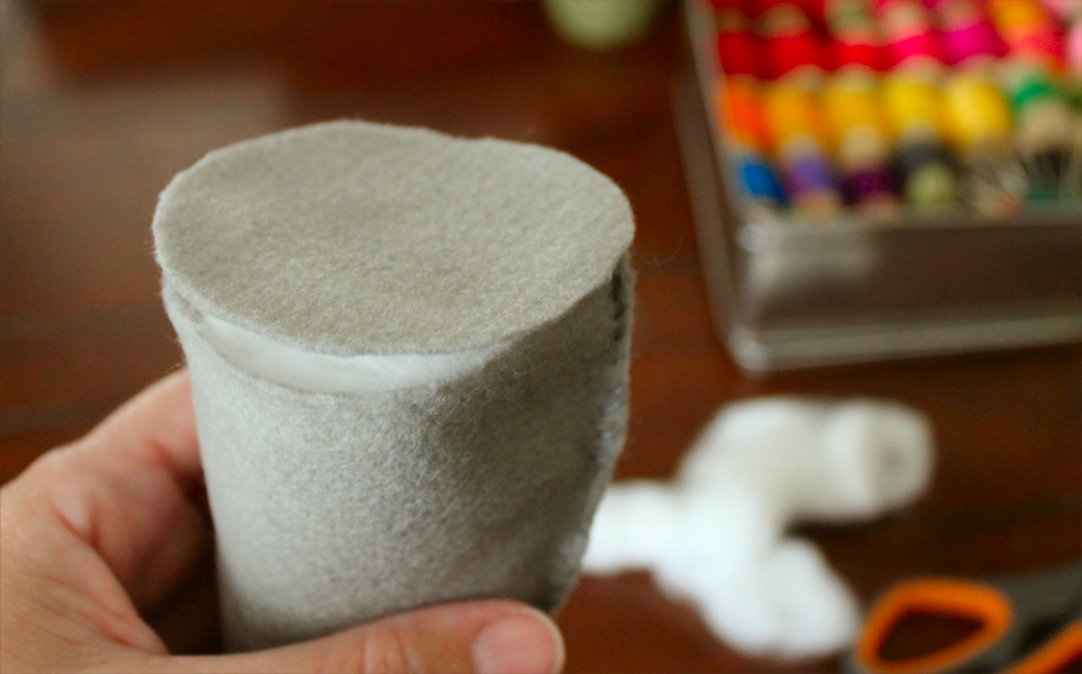
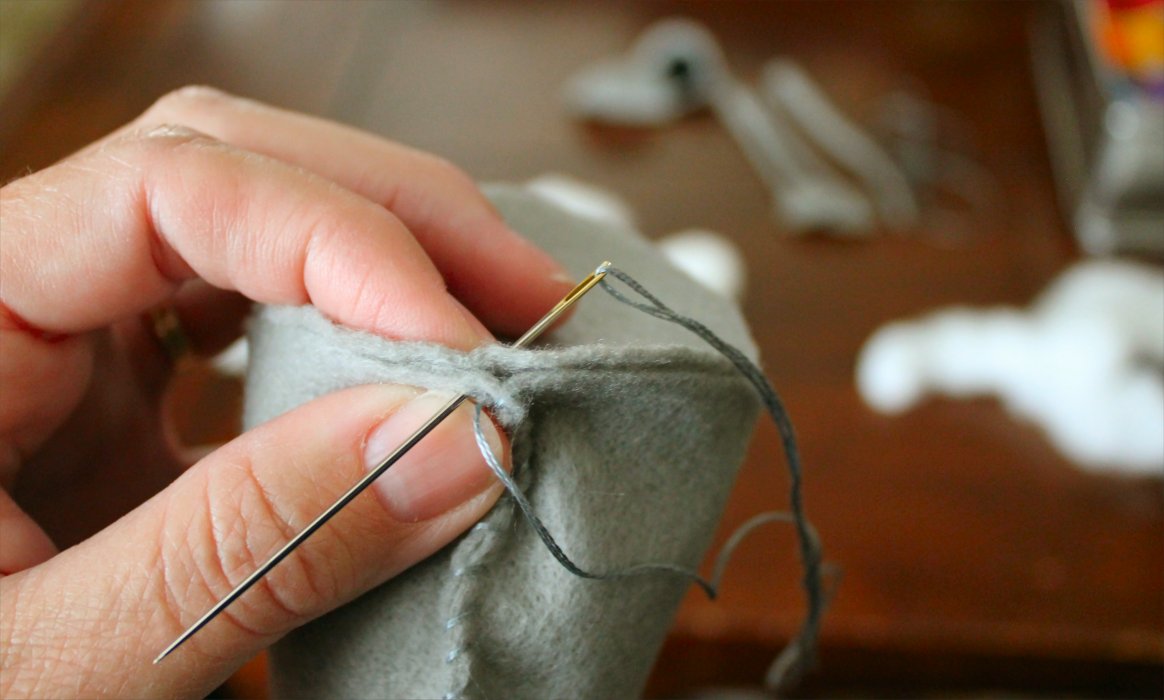
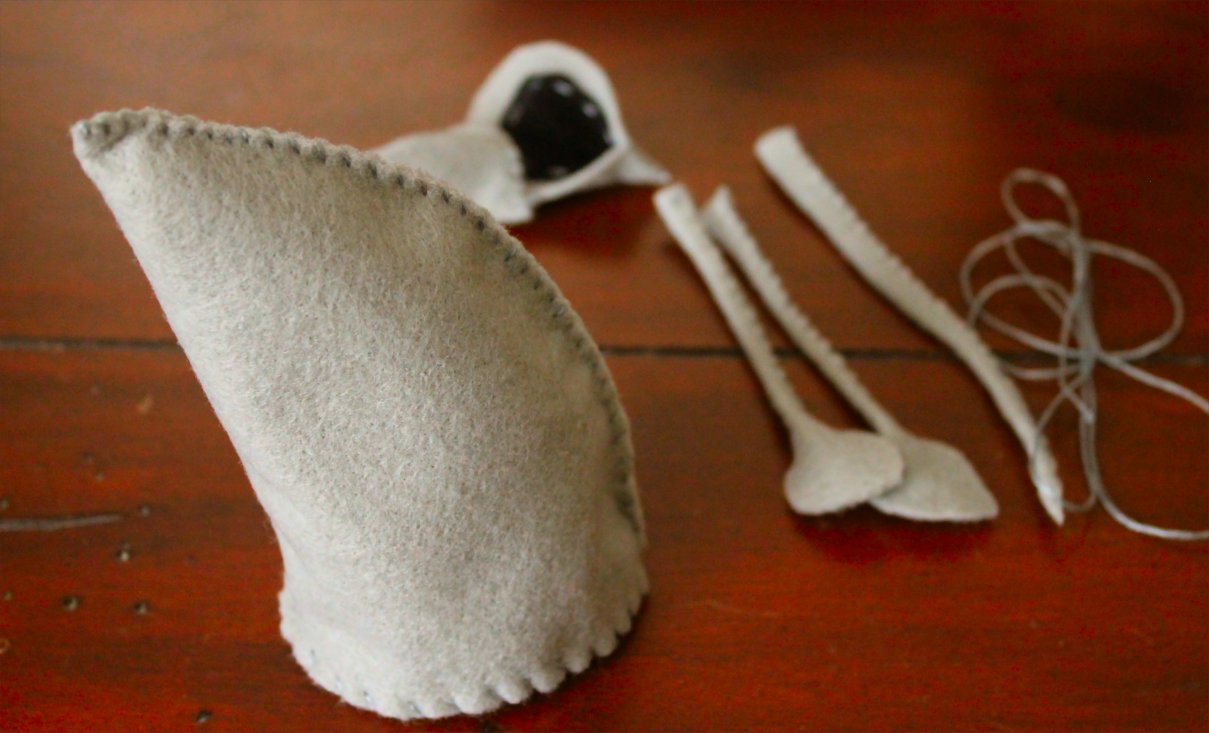
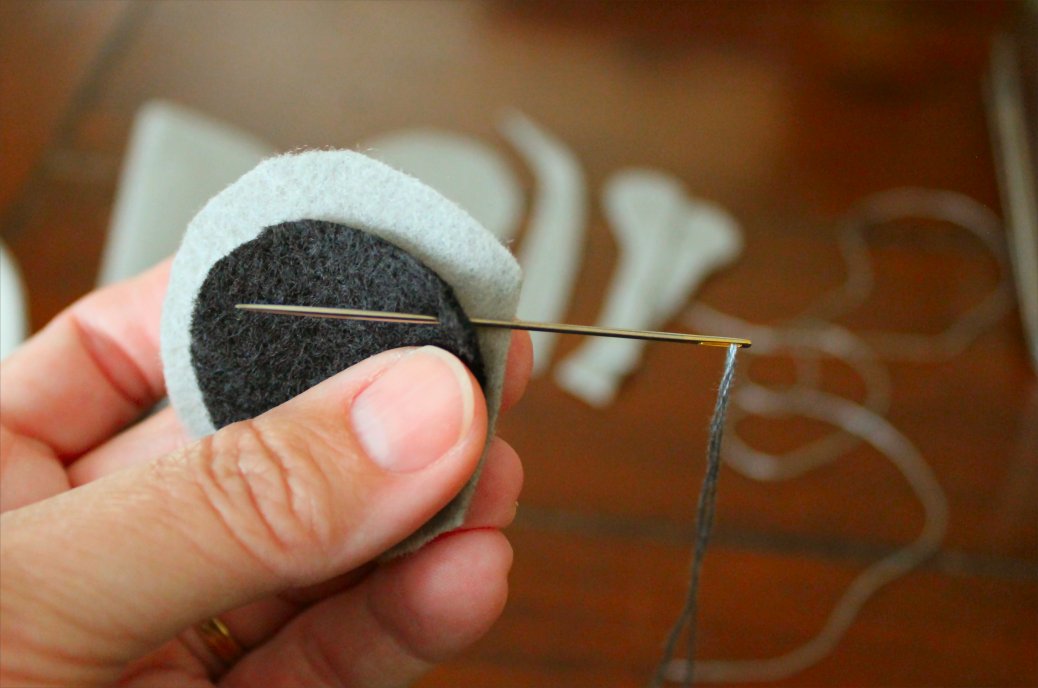
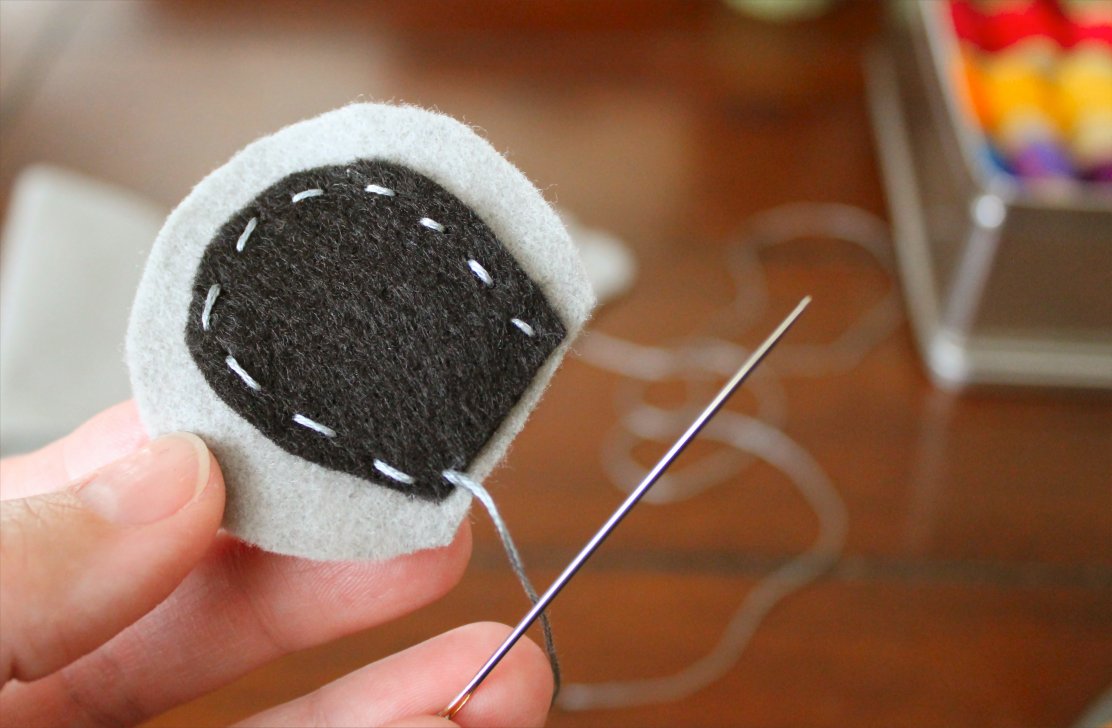
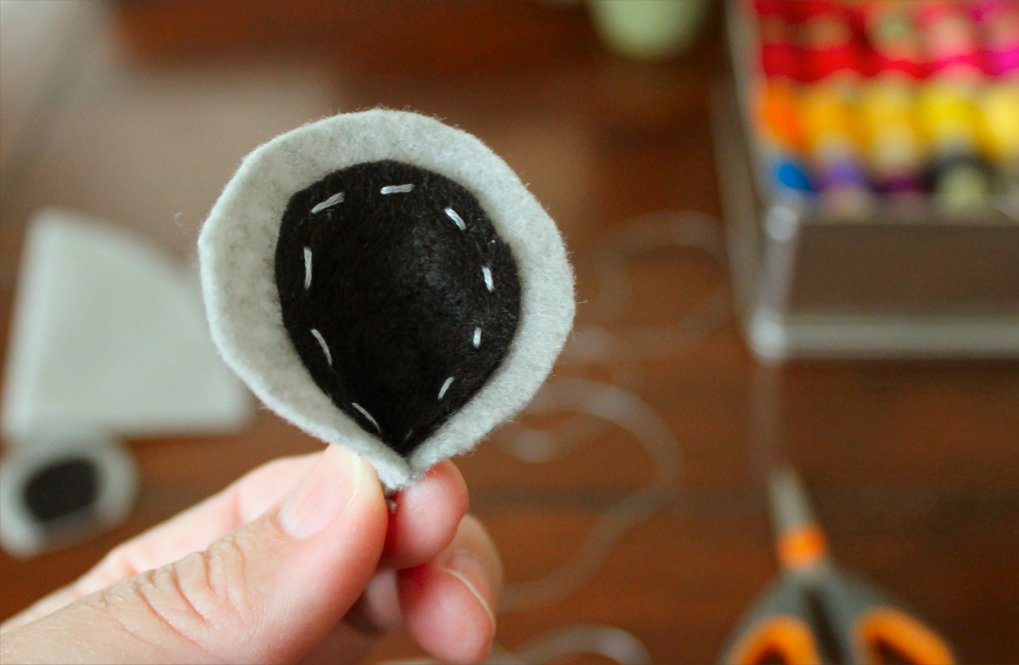
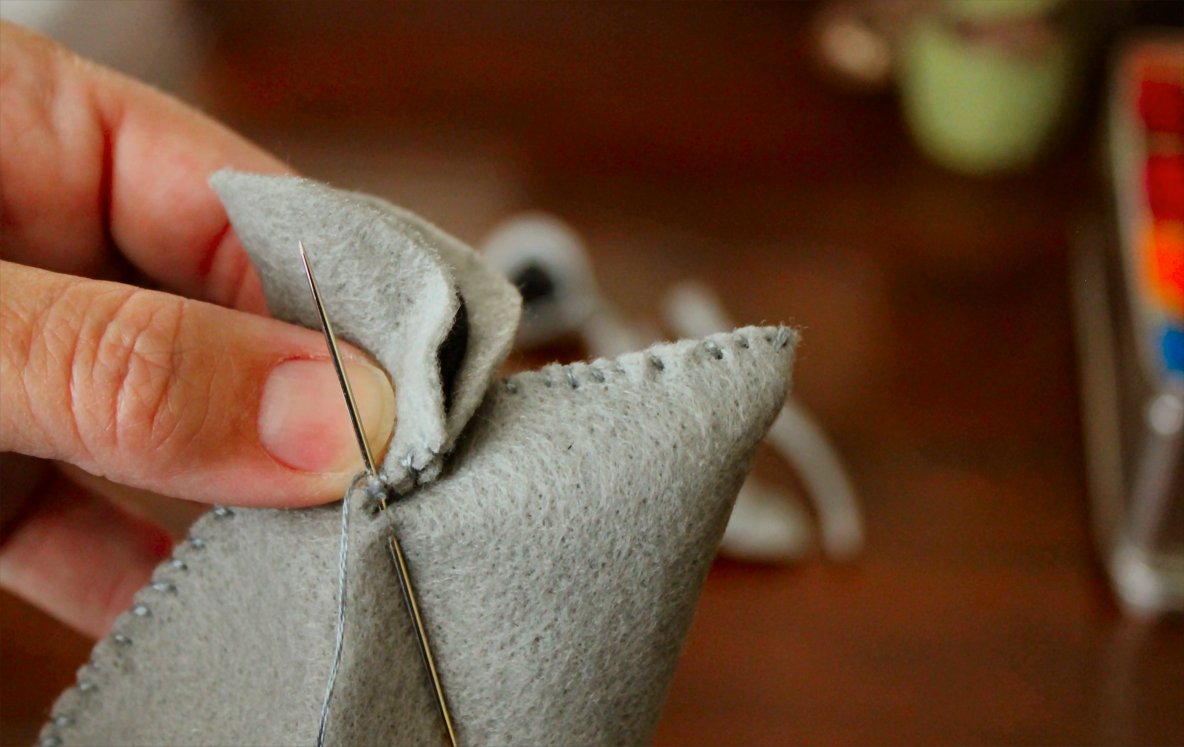
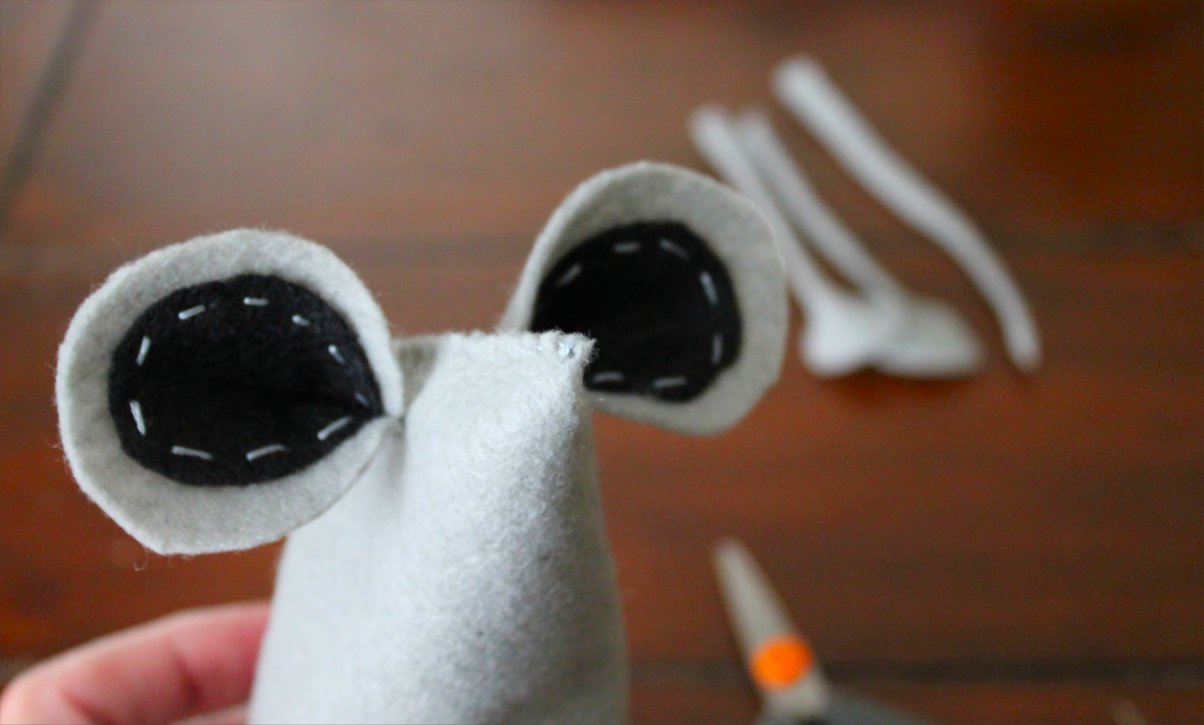
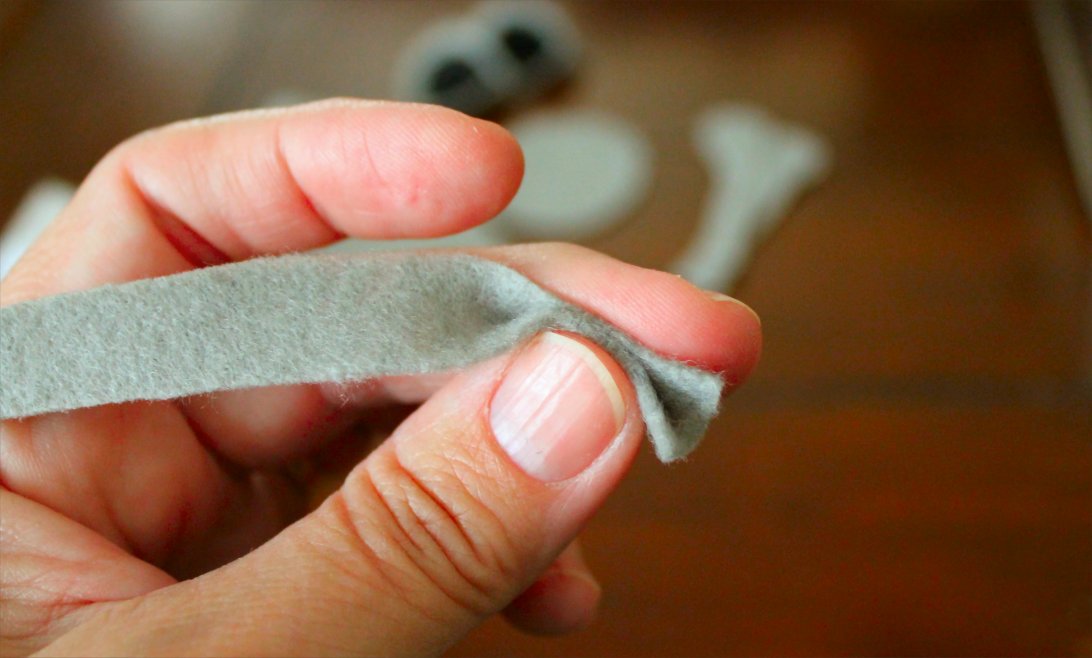
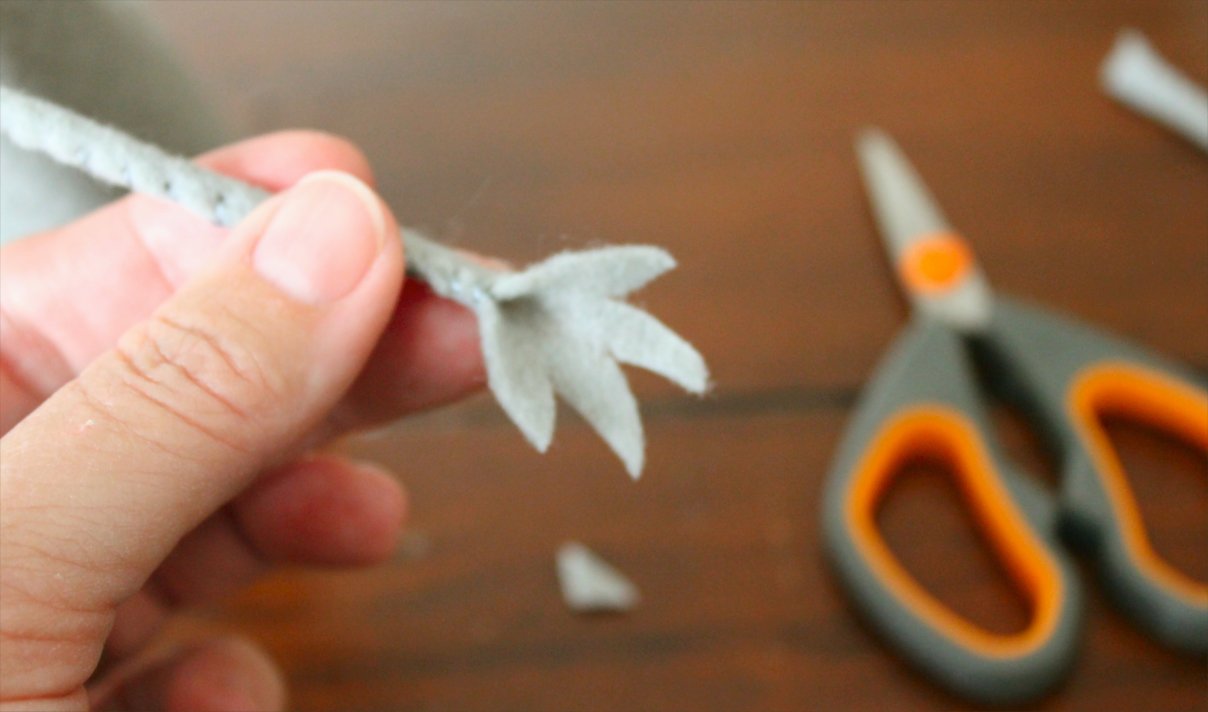
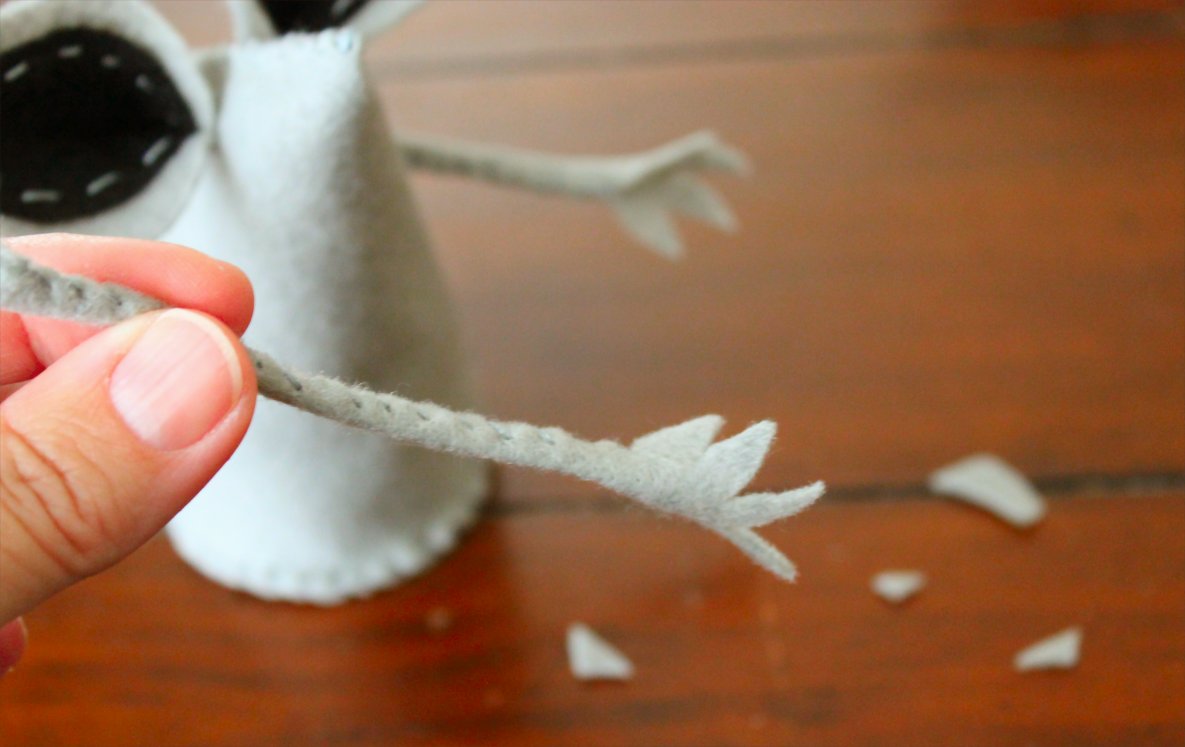
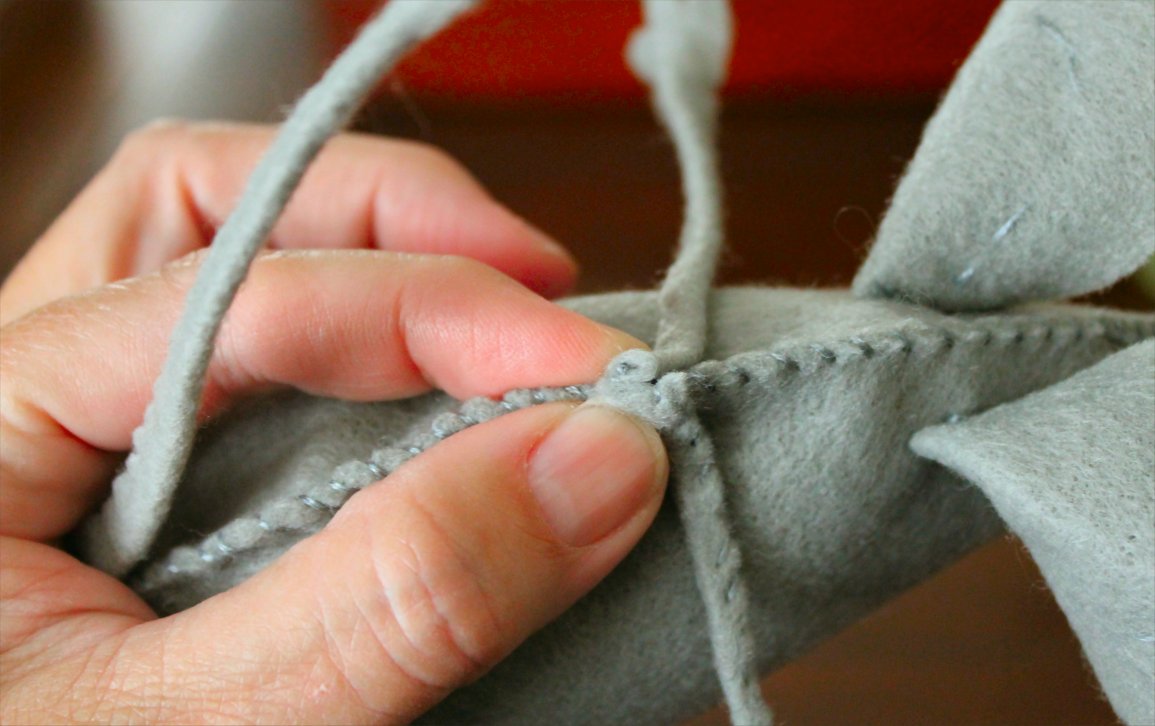
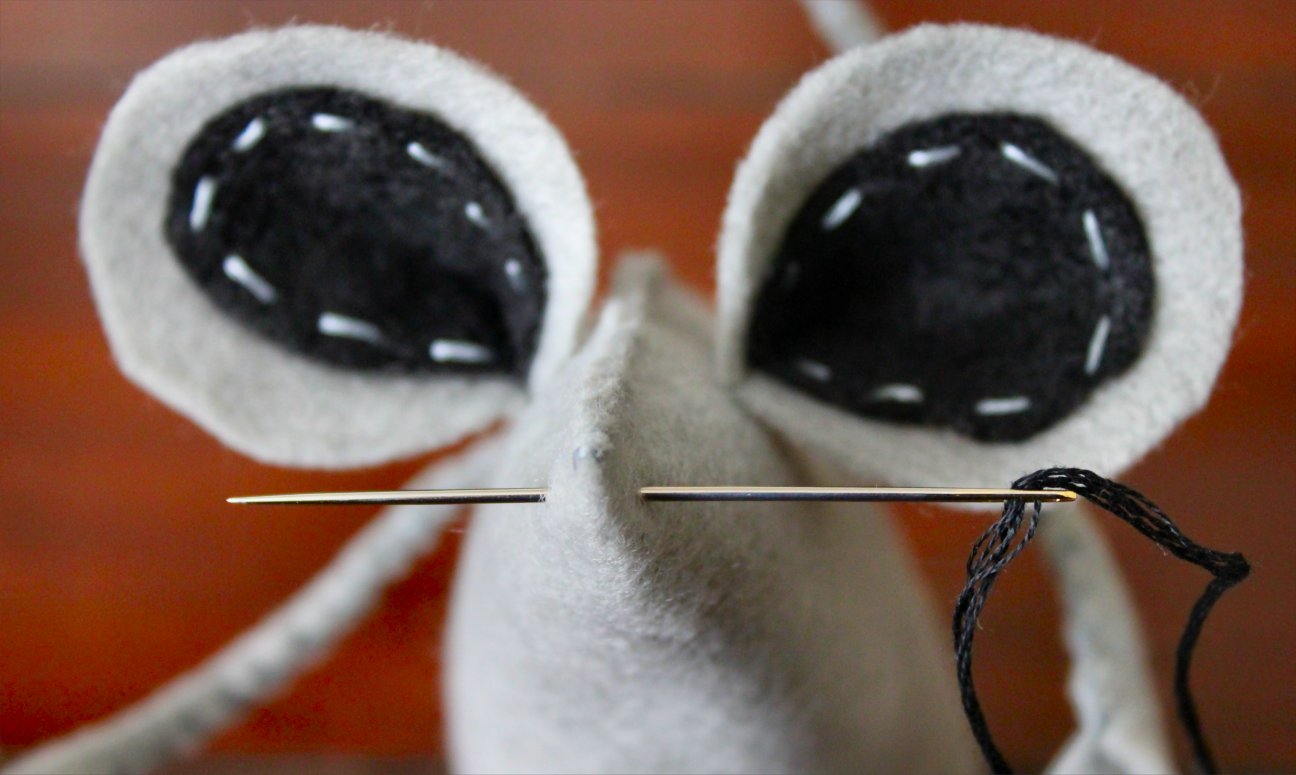
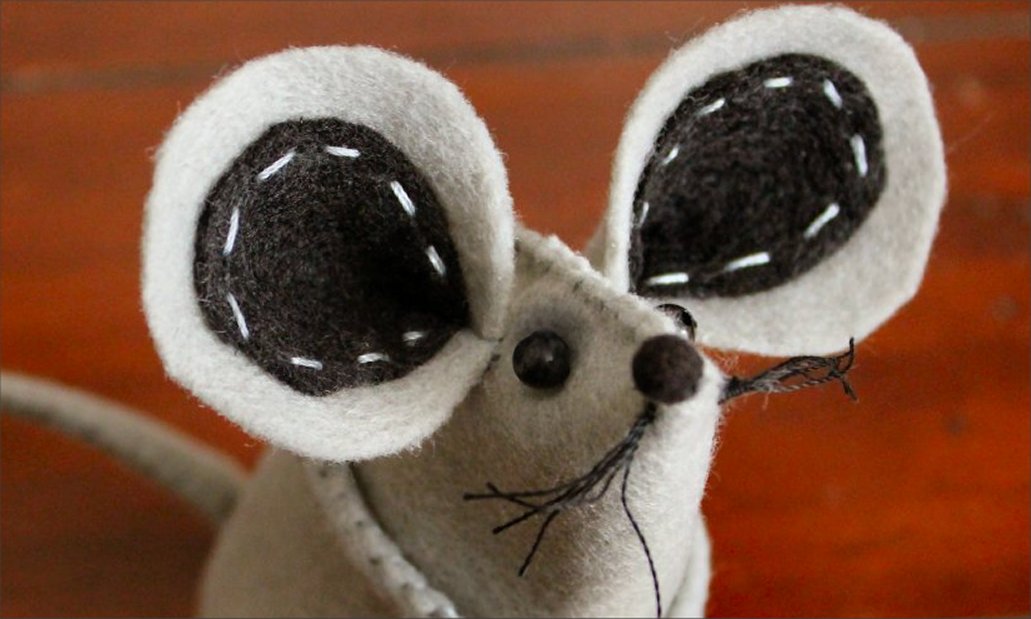
Side Note: Now I know why my Felt Mouse Tutorial got so many hits last month.

Here’s a photo line-up of The Mouse Project. I still can’t stopped laughing.

Collage - Kirsten
So many wonderful things in Kirsten’s box. The mice are hilarious. Old MouseDonald comes with a pig that oinks (and the eyes light up). The Ranger Mouse was a joint project with her oldest son. He sent a book to go along with it. There’s Laverne & Squirrely, a travel mouse, a pie baker, Jeanne Cash (dressed in black & an inside joke with TCP), and an adorable garden gnome mouse complete with shears. Bonus swag: Danish chocolate & girly bling. Hey, Kirsten… I think this birthday brought both Freaked Out and peeing my pants a little.

Collage - Allison
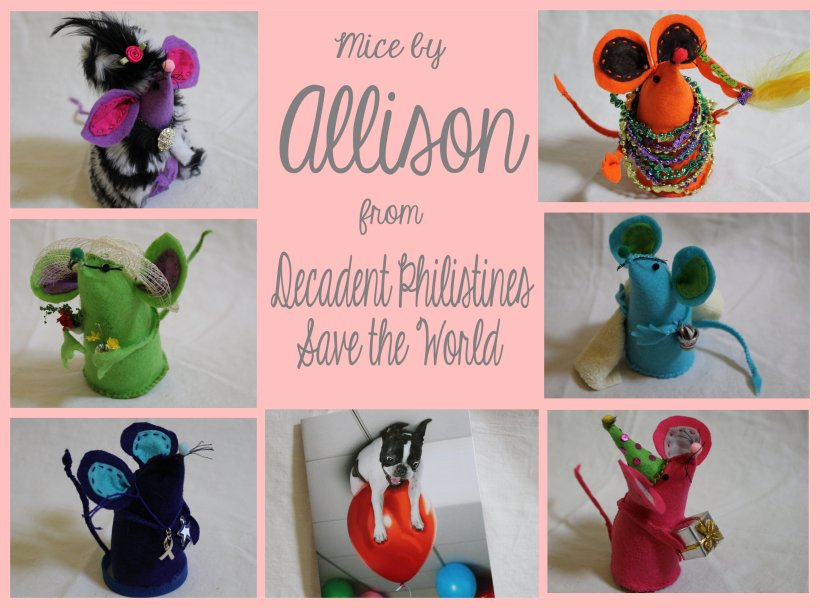
Allison’s mice are a perfect blend of sweet, touching and hilarious. Examples:
Duchess Emouska – who look a little like Cruella DeVille; she rocks zebra print
Mousy Gras – raise your hand if you know how she got all those beads
Dr. Pellet – the mousetroenterologist reminding us to help prevent colon cancer
Havarti Marti – she’s here for the party; we’re gonna get along fine

Allison always keeps me in stitches. Even her card made me laugh out loud.

Collage - Carrie
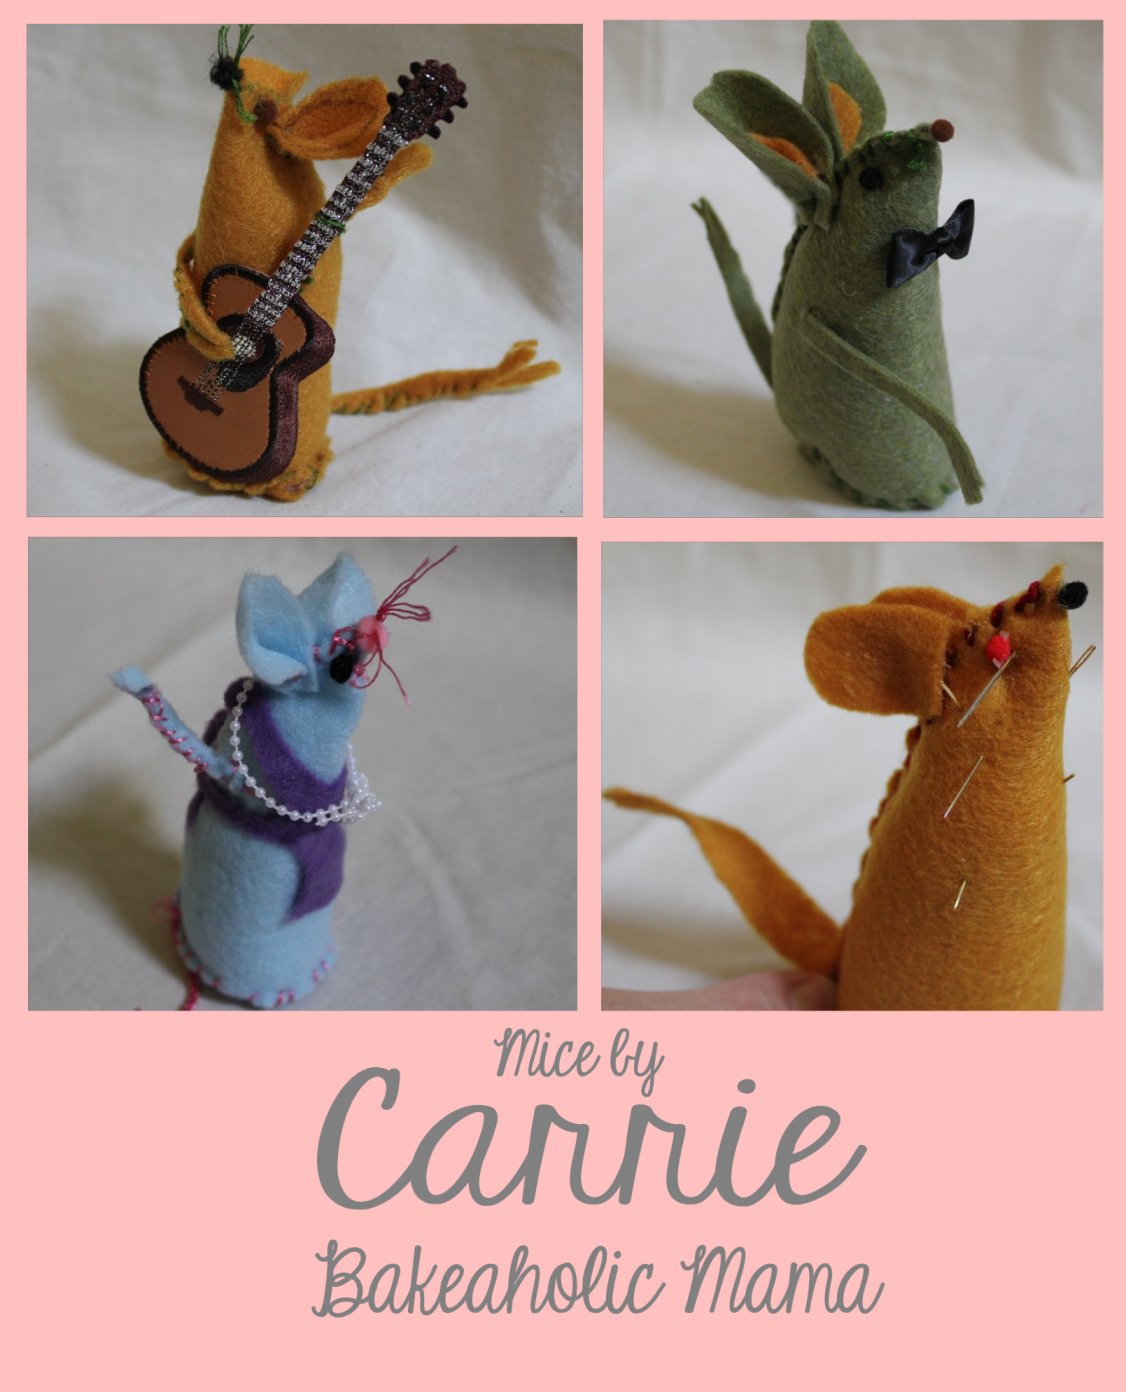
I don’t know who to feel sorrier for – Carrie or her Vlad the Impaler mouse. She had the week from hell and yet still made time to make these mice. There’s a lady mouse in pearls, a gentleman mouse in a bowtie, Little Willie who sings Texas classics on his guitar, and the mouse that was obviously the last straw. Yes – those are real sewing needles protruding from his body, and yes – she shipped it that way. I’d love to know what her post office thought. Not just for the voodoo-like use of needles, but for the toddler meltdown that went with shipping it. Despite it all, her mice are testimony to her perseverance. Thank you for hanging in there, Carrie. I am completely charmed.

Collage - Megan
Sweet Megan. She writes the blog Country Cleaver. In her blog archives, you’ll find the story about how she chose the name for her blog. It involved a photo shoot in which she did her best June Cleaver impersonation. She channeled her Country Cleaver persona into this sweet little mouse, complete with a stylish apron and pearls. I’m guessing she loves Nutella and salmon, although not at the same time. I’m also pretty sure she’s addicted to Downton Abbey and all things Royal. Her dream man can wield an ax and wear flannel like a boss. She’s lovely and has her act together, just like Megan.

Collage - Monica
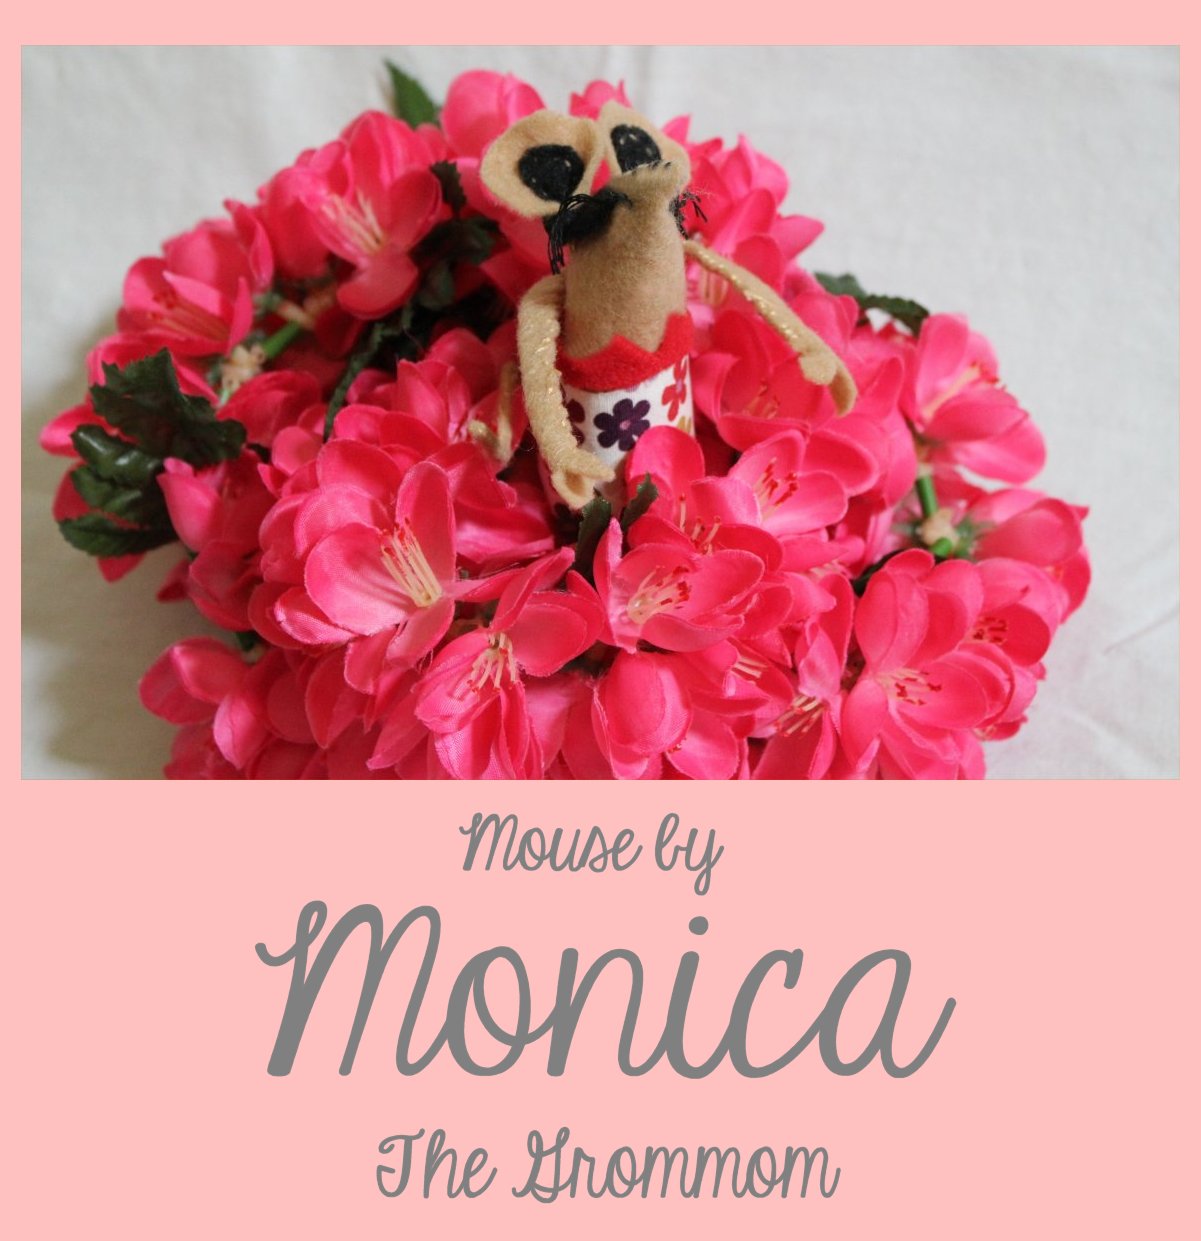
Meet Leilani. She is the Spirit of Aloha, and she traveled the furthest to be here. She is sporting the latest in swimwear from the great state of Hawaii and bears the traditional greeting of a lei. This cutie is the creation of Monica, the Grommom, who shares her life homeschooling four adorable surfer dudes (groms) without seeming to rub our noses in the fact that she lives in paradise. Her tropical flair brings sunshine into our lives and her iPhone shots of sunsets and beaches inspire us. Monica is a doll, and so is her sweet mouse.

Collage - Beka
Beka of Kvetchin’ Kitchen is many things – smart, funny, strong – but I had no idea she was a crafter. She is responsible for most uses of the hashtag #AllTheSwears on Twitter while #TMP2013 was being chatted about. Girlfriend has hidden talents, and felt mice is one of them. Who knew? Beka made five mice, but one got ripped to shreds by her cats. Such a shame. We could have created a killer Walking Dead diorama for him. But let’s celebrate the survivors – a mustached gentleman with an engagement ring at the ready, a sweetie holding a pink rose who I suspect is about to say “Yes!”, a Mouscasso portrait (very creative) and The Birthday Queen, complete with royal crown & scepter.

Collage - Katie
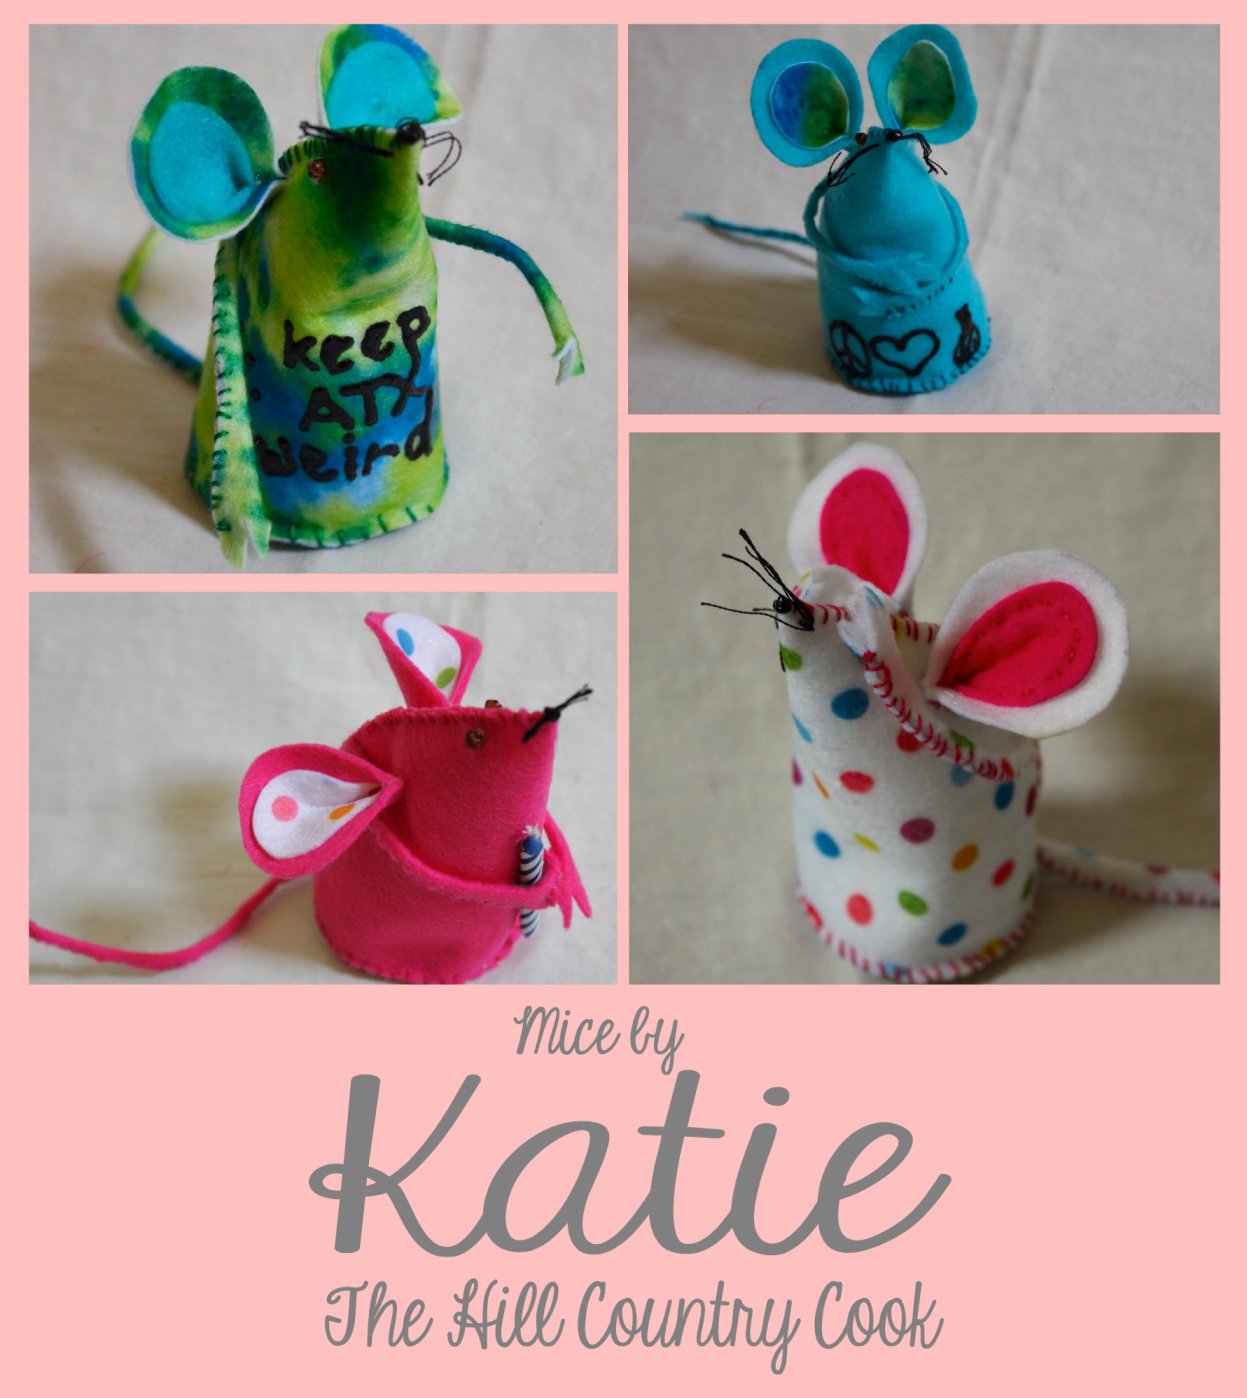
I think it takes a fellow Texan to understand why a tie-dyed “Keep Austin Weird” mouse named Leslie would make me furiously happy, and Katie from The Hill Country Cook is just that Texan. Her mice are so reflective of her personality – fun & fabulous. There is a polka dot “Surprise!” mouse, a little sweetie hugging a birthday candle, and a trademarked Peace, Love & Baking mouse. Those symbols on the bottom of the blue mouse are a peace sign, a heart and a whisk. Peace, Love & Baking is how Katie ends each blog post, so it’s only fitting that one of her mice bears her emblem. Also stashed in Katie’s box – a mylar birthday banner & a party horn. Party on, Katie!

Collage - Madeline
I think it’s safe to say that Madeline surprised us all. We had no idea she was a closet crafter. Check out her mice. There is a sweet gray mouse in an apron with buttons, a daring hot pink lady bringing the bling, a sweetheart of a purple mouse embellished with red heart buttons (five hearts representing the fact that we both come from families with five girls), and the most adorable little aviator mouse complete with flight wings and a tiny toy airplane. Wow. Just wow.

Collage - Kat
Of course Kat, our resident fashionista, would go full-on glamorpuss. She created not one but SIX fearless females she calls the “Cougar Cocktail Conga Mice”. Here it is in Kat’s own words: “They’re all named Tammy. Naturally, they’ll paint your nails, tease your hair and cover you in rhinestones. It’s just how they operate.” Only Kat would send All The Tammys. It’s like ZsaZsa Gabor had a box of mice babies, and they are priceless! All is forgiven for the great Cilantro Apron Deception, Kat. All is forgiven. PS – they came with hooch!

Collage - Mads
Next up was Mads’ two mouse besties – Mildred & Sophie. They’re the Thelma & Louise of mice. Mildred just turned 50, and just like me she likes to stir up mischief and enjoys a good Bloody Mary. Her BFF Sophie is more inclined to pink fruity cocktails and riding in convertibles. Together, they are unstoppable and despite a few incidents involving glue they still look marvelous. Must be all that sunshine and beautiful weather on the California coast. Real Mousewives?

Collage - Anne
Anne of From My Sweet Heart blog is known for her beautiful desserts. Each of her sweet creations is a masterpiece and each will have you licking your computer screen. It should be no surprise then that she would channel that same artistic ability into felt mice, but we were still surprised. Just look at her beautiful works of art – there is a sweet berry-laden Flour Power mouse, a pie maker wielding a spatula, a cookie baker complete with cookie jar and slotted spatula, a rolling pin baker who loves her job, a sweet pink donut mouse (a girl after my own heart), a hot pink party mouse, and a sweet cotton candy confection that is as sweet as her treat. From My Sweet Heart in mouse form. Bravo, Anne. Bravo!

So much love. So much fun. So much anticipation followed by so much squeeing. And so many back stories – both for the mice and for all the secrecy, the glue gun & sewing needle injuries, and the swearing. Apparently there was a LOT of swearing. Beka’s two cats even brought violence and drama to the mix. RIP Unknown Soldier. You will not be forgotten.

To all the ladies who helped make my 50th birthday one for the record books, thank you a MILLION times over. Words can’t express not only how much I feel loved, but how much I love each of them in return. Some day we’ll all get together, and when we do it will look like one of those rugby tussles where all the sweaty men tackle each other and roll around on the ground. Except that we’ll be laughing instead of sweating. Everyone knows women don’t sweat – they mist.

PS – Special thanks to Kirsten, whom I suspect was the ringleader in all of this, but who is too modest to take the credit. Blame. No, credit. It was ALL amazing. I never saw any of this coming, so either she is a Super Sneak, or I am a mullet. Please refrain from voting out loud. Thank you.

PPS – I have no idea how I’m going to display all these mice, but rest assured that they will not be hidden away and forgotten. If I have to ask The Complete Package build a wall of shelves in my sewing room, so be it. (Right, honey? Right pookie bear? Right snoogie oogums? Right sugar booger? Honey? Hello?)

Advertisement

37 Comments

Filed under Blogger Collaborations, Craft Projects, Things I Love

Photo Tutorial: How to Make Felt Mice and The One That Got Away

Felt Mouse Tutorial - 1Header with Text

You asked for it; you got it. Following my post on the felt mouse invasion we launched upon my sister’s new home in the country, some of you requested a step-by-step tutorial on how to make them. Here’s my attempt. If you have any questions at the end of this, leave a comment and I’ll do my best to clarify.

To start, print my mouse pattern on an 8.5″ x 11″ standard sheet of paper.

Felt Mouse Tutorial - Printed Pattern

There are two patterns on the page – one for a large mouse and one for a small. Cut the page in half, and then you can decide if you’d like to make a large or small meeska buddy. For this tutorial, I’m using the large.

Felt Mouse Tutorial - Pattern Cut in Half

Carefully cut out the pattern pieces. I like to cut just outside the line since it will be trimmed off as I cut the felt. I’m a visual person & this helps me somehow.

Felt Mouse Tutorial - Cut Out Pattern Pieces

Next, you will need:
1 felt square in the color of your choice for the body
1 felt square (or piece of one) in a contrasting color for ears
embroidery thread (also called floss) that matches the body color
quilt batting or cotton balls for stuffing
an embroidery needle with a sharp point
black beads or buttons for eyes (2 per mouse)
small black pompom for nose (1 per mouse)
black embroidery thread for whiskers
sharp scissors & clear craft glue

I decided on a pale grey felt for this tutorial because it photographs well. For the ears, I chose black to show off the stitching. So, let’s get started.

First, fold your body felt so that it’s wide enough to fit the main pattern piece.

Felt Mouse Tutorial - Place Body Pattern on Fold

The long straight edge on the left should lay directly on the edge of the fold. You can pin the pattern pieces down if it helps, or simple hold tight and cut along the arched edge of the pattern. Sharp scissors are a must for me.

Felt Mouse Tutorial - Body Cut on Fold

At this point, I like to go ahead and cut out all the pieces. I’m a process girl – cut all the pieces, stitch all the pieces, connect all the pieces.

Felt Mouse Tutorial - Pattern Pieces Cut Out

If you’re not a certified anal retentive like me, you can cut & work one piece at a time. It’s really a matter of whatever you’re comfortable with. Once you’re ready to sew, the first step is to pick a thread color that matches the body.

Felt Mouse Tutorial - Pick a Thread That Matches the Body Color

I chose this nice grey shade; it’s a great match. Did you notice the spool? It’s actually a foam wine cork. Can we sidetrack for a minute? I want to show you how I reorganized my embroidery thread. I was inspired by a bag of horribly tangled embroidery thread and some heavy cursing (don’t ask).

Felt Mouse Tutorial - My Organized Thread Box

After untangling all my embroidery thread, I grabbed my jar of foam corks and a sharp paring knife. First, I cut a slit in the top of each cork; then I cut out a shallow “V” notch at the top of the slit.

Felt Mouse Tutorial - Corked Embroidery Thread

Using a strip of blue painter’s tape, I secured one end to the side of the cork. I then wrapped then entire skein of embroidery thread around the cork, leaving approximately 1 1/2 to 2″ as a ‘tail’ to tuck into the slit on top. The ‘V’ helps you find the slit in the top of the cork (because corks tend to self-heal when cut) and the deep slit holds the thread firmly in place. Once all your thread is corked, they can be easily stored in a metal tin or plastic tub with a lid. I used this metal tin because it was big enough to lay all the corks flat, which made it easier to see which colors I have. It also gave me enough room to store a pin cushion, extra packages of needles, a pair of scissors and a small embroidery hoop. I love it.

Felt Mouse Tutorial - My Embroidery Box

Now back to the mice! I like to use an embroidery needle with a nice deep hole because I’m turning 50 in March and it would take me all day to thread a smaller needle – even with reading glasses. Here’s a snap of what I’m talking about, in case you decide to pick some up at your local craft store.

Felt Mouse Tutorial - Embroidery Needle With Deep Eye

That deep, wide hole makes it easy to thread embroidery thread through the eye of the needle. It’s especially handy if you’re using all 6 strands at once. Did I just lose the beginners? Let me clarify. Embroidery thread is made up of 6 strands of thread twisted together. If you want bold stitching, you use all 6 threads. If not, you can separate out threads to use as many as you like. For stitching up these mice, I used 3 threads (except for the whiskers, when I used all 6). It helps to cut the length of thread you want to use BEFORE trying to separate threads. I like to work with a piece about 18″ long most of the time.

So, starting with a needle threaded with 3 strands of your embroidery thread, grab the body felt, fold it in half (just as you did when you cut it) and let’s start at the bottom (or wide) end. I use a straight stitch for this.

Felt Mouse Tutorial - Evenly Spaced Stitches are Key

Unless you’re planning to fashion a costume for your mouse, it’s important to keep your stitches evenly spaced. It makes a big difference in how the finished mouse looks. Just take your time. When you reach the tip of the nose, tie a good knot, then run your needle through the felt into the cavity of the body. Cutting the thread inside the mouse hides any loose ends when it’s knotted. I do this to all the pieces to make the finished part neater. When done, it will look like this:

Felt Mouse Tutorial - Body - Stitched on the Curved Side

If you have a bag of quilt batting (fluffy filler) lying around the house, grab it. If not, you can use cotton balls. They’re much cheaper than a bag of quilt batting, and you won’t need many to stuff a mouse. I find that 6-10 cotton balls are usually enough to stuff a large mouse. First, I like to stretch them out and fluff them up a little. It makes for a less lumpy mouse.

Felt Mouse Tutorial - Stuffing - Cotton Ball Stretched Out

Grab a cotton ball ‘strip’ and gently stuff it down into the nose. If it helps, you can close your scissors and use the pointy end to gently push the cotton into the tip of the nose. Then add additional cotton until the mouse is filled.

Felt Mouse Tutorial - Stuff Lightly With Cotton Balls or Batting

When I first started, I overstuffed my mice to the point that they were too firm. I didn’t think much of it until I tried to sew on the other body parts. If your mouse is overstuffed with filler, you’ll have a hard time running your needle through the body to attach other pieces. Plus, I’ve found that a less-stuffed mouse just looks better. When I’m happy with how stuffed my mouse is, I like to form a ring of cotton to put at the very bottom.

Felt Mouse Tutorial - Stuffing - Finish with a Cotton Coil

That little cotton ring forms a base so your mouse will sit up properly when he’s done. Now grab your circle you cut for the bottom and let’s put it into place.

Felt Mouse Tutorial - Bottom - Placing the Bottom Panel

Grab your needle and thread and stitch the bottom onto the mouse. As usual, if you start your knot inside the body cavity it won’t show when it’s finished.

Felt Mouse Tutorial - Bottom - Hide Knot Inside Before Stitching

Watch your stitching so it’s evenly spaced again. This part is going to show.

Felt Mouse Tutorial - Attaching the Bottom

When you’re done, tie a good knot to secure it and trim the loose threads at the end off. If you start and end at the ‘spine’ seam, you won’t have to worry about the knot showing. We’re going to cover it with the tail later.

Felt Mouse Tutorial - Parts - Prepped & Ready to Assemble

And now you’re ready to assemble the other body parts. Try not to notice that some of mine are already finished in the background of that photo. We’ll get to all of those in a minute. For now, let’s start with the ears. Grab one of your ‘outside’ pieces and center the contrasting center piece on top.

Felt Mouse Tutorial - Matching Ear Pieces

Feel free to move the inside color around until it’s centered and you’re happy with the way it looks. If it overhangs the outside color at the bottom edge, just trim off the excess felt. Once you’re happy with it, grab your needle and stitch it down. I love to use the body color so it shows up as contrast stitching on the ear. Again, I like to start with my knot on the back side so it doesn’t show.

Felt Mouse Tutorial - Ear - Hiding the Starting Knot

I’m not sure what this stitch is officially called, but I like to run my needle past the next stitch, then come back to make each ‘loop’. Why? Because it allows me to barely run my needle through the depth of the grey felt so my stitches aren’t as noticeable on the back of each ear.

Felt Mouse Tutorial - Ear - Detail Stitch Shown

If you’re not concerned about the back of the ears, just do a regular stitch to secure it. You’re using embroidery thread in the body color, so it’s not a big deal. Again, I’m anal retentive and I tend to get hung up on little details like that. I apologize. Here’s what it looks like when it’s done:

Felt Mouse Tutorial - Ear - Finished Detail Stitch

You don’t need to worry about tying a knot at the end, because we’re going to immediately fold the ear in half at the bottom edge and stitch it closed.

Felt Mouse Tutorial - Fold Ear in Half at Bottom Edge

Stitch across the straight edge at the bottom of the ear, just as you did when you sewed the body together, then tie a knot to secure it. All done!

Felt Mouse Tutorial - Finished Ear

Now do the same to the other ear, and we’re ready to stitch them onto the body. I like to start by placing the first ear (facing forward, of course) about 1″ from the tip of the nose, and about 1/3″ to 1/2″ from the seam of the ‘spine’. Then stitch it down (be careful not to go through the mouse and out the other side or you’ll sew your mouse shut); knot it and snip off the end. Like this:

Felt Mouse Tutorial - Attaching the First Ear

To make sure I get the second ear in the correct position, I line it up like this:

Felt Mouse Tutorial - To Place 2nd Ear - Line Up with First

You can pin it into place if that helps. Just make sure you reach inside the mouse body to make sure you’re not pinning or sewing all the way through the other side. Once both ears are attached, you can pry them open and move them up or down a little until you like how they look.

Felt Mouse Tutorial - The Ears Are On

Ready to make a tail? Me, too! Grab your tail piece and make sure you have enough thread in your needle. I hate to start a piece and have to stop and tie knots in the middle. Once I start a piece, I like to go to the end without stopping. I know! I told you I have issues! Don’t be like me. Just grab your tail (heehee)… I mean grab your mouse tail, and fold it in half at the bottom edge. We’re going to sew it up just like we did the body.

Felt Mouse Tutorial - Fold Tail in Half & Start Stitching at Base

Do you have a problem with your nails getting brittle and splitting and breaking off in the winter? I do. Drives me crazy. Anywho, stitch up your mouse tail until you get as close to the tip as possible. You’ll see what I mean when you get there.

Felt Mouse Tutorial - Fold Tail in Half & Stitch Edge to Tip

The more narrow that tail gets, the tougher it is to stitch it shut. When it’s done, it should look something like this:

Felt Mouse Tutorial - Finished Tail

Now grab your mouse body, and we’ll attach it at the ‘spine’ seam.

Felt Mouse Tutorial - Attaching the Tail

I find it easier to flip him upside down.

Felt Mouse Tutorial - Tail - Line Up Tail w Base - Tail Pointing to Head

And now your tail is attached. Here’s the bonus to all that tail stitching – it gives it enough structure to bend and shape the tail any way you want, which gives your mouse more personality. You can thank me later. So now you’re ears and tail are on. Congratulations! You’re almost finished.

Felt Mouse Tutorial - Almost There

Let’s move on to arms. I think the arms are what makes these mice so adorable. And versatile. A mouse with arms can do just about anything. More on that later. For now, grab an arm piece and we’ll stitch it up just like we did the tail – starting at the flat end. Stop when you get to the part where the palm flares, and secure with a strong knot. I like to run the thread back down through the arm before I cut it so the knot doesn’t show.

Felt Mouse Tutorial - Tuck the Thread Tail Down Into Arm

Here’s where I just get crazy stupid excited. I LOVE making these arms and hands. It adds so much personality to your mouse. And it’s seriously fun. Grab your scissors, and let’s start cutting fingers for your mouse.

Felt Mouse Tutorial - Hand - Cutting the First Finger

Using sharp scissors, remove little curved triangles to form 4 fingers.

Felt Mouse Tutorial - Hands - Trim Triangles Out to form Fingers

Gah! Isn’t that adorable? I just love these little mouse hands.

Felt Mouse Tutorial - Finished Arm

When both hands are done, we’re ready to stitch the arms on. I like to attach them both at the same time by pinching them together on the ‘spine’ seam.

Felt Mouse Tutorial - Arms - Attaching to Body at the Spine

I really stitch these down well, so I’ll go over it twice before I knot it off. Here’s what I mean when I say arms give these mice such character.

Felt Mouse Tutorial - One Body Down - One Face To Go

Felt Mouse Tutorial - Yo - Can a Mouse Get a Face Here

Felt Mouse Tutorial - Papa Can You See Me

See? They don’t even have faces yet, and they’re starting to come to life. This must be what being an animator feels like. Please say you’re just as crazy about this as I am so I don’t feel like a total craft geek. Please.

Maybe we should just move on to faces. Every mouse needs whiskers. For this, I use all 6 strands of the embroidery thread. Tying a knot about 1″ from the end, I pull the needle through the end of the snout (about 1/4″ from the tip). The knot stops the whiskers from pulling all the way through.

Felt Mouse Tutorial - Sewing Whiskers Onto Snout

Once it’s through, cut the second side to the same length as the first (1″). To secure them, I use a toothpick and apply a small dab of clear craft glue at the base of both sides of the whiskers. Tip: just as wax is used by men to keep handlebar mustaches in line, so goes Chapstick for wee little mousetaches – keeps those whiskers separated & stylish.

Next, we’ll place the eyes. If I’m not sure where I want to put them, I grab a few straight pins with the balls on the end. I just keep jabbing the mouse in the head until I like how it looks. If you need to, mark the spot with a pencil.

Felt Mouse Tutorial - Testing Eye Placement With Pins

I buy shiny round beads for the eyes and tiny pompoms for noses. (They love me at Hobby Lobby.) Once I sew them down, I hit them with a dab of clear craft glue just to make sure they’re securely attached.

Felt Mouse Tutorial - Beady Eyes & PomPom Nose

You’re done! Now you’re free to embellish your mouse any way you see fit. For this one, I created a flower from an antique button. I thought it would be sweet to have her holding a flower, since she’s making new friends here.

Felt Mouse Tutorial - Finished Mouse - Hello Cutie

It almost looks like a bridal bouquet. Which is an insight into how my mind works. Now that I’ve seen her and thought ‘bridal bouquet’, there’s a good chance I’ll end up making a wedding dress and veil for her. Because in my mind, more is more; and more is better.

And that brings me to The One That Got Away from Sister #4.

My Big Sister and I started this mouse project separately, but there came a time during the summer when Mom decided to visit and Big Sis decided to join us. At that time, we committed to combining the mouse tribes into one big happy family and finish it together so we could tag them and box them up in one tidy bundle. We made the last few mice together while sipping cocktails and chatting around the living room coffee table.

And that’s where Grandpa FisherMouse came to life. He was the very last mouse I crafted, and I fell so head-over-heels for him, I told the girls I wasn’t sure I could turn loose of him. I mean… could you?

Felt Mouse Tutorial - Grandpa FisherMouse - Basket Side

I just love him. He has a fishing net with a few small fish in it. And a fishing pole with one on the hook (and there’s a bobber on the line). He even has a fishing vest with teeny tiny buttons and a trout basket.

Felt Mouse Tutorial - Grandpa FisherMouse - Vest Close-Up

This is where that anal retentive attention to detail comes into play. Sometimes I can’t stop myself. He has a little print bandana, a black felt hat, and I even braided a band to go around the hat. He reminds me of the movie ‘A River Runs Through It’ – which may be why I’m obsessed with him. There’s a slight chance it might be tied to my deep and abiding love of Robert Redford, Brad Pitt and the great state of Montana. Maybe-ish. Whatever – he’s mine (my preciousss).

Felt Mouse Tutorial - Grandpa FisherMouse

Sorry, Sister #4. I love ya’ and all, but you’re not getting this one. :)
Maybe I should make him a canoe out of toothpicks & popsicle sticks…

55 Comments

Filed under Craft Projects, Family Stuff

We love meeces to pieces.

I have four sisters. I am #2 of five. This fall, Sister #4 and her husband built a new house in the country, so for Thanksgiving the entire family gathered to celebrate the holiday at their new place. Being the mischievous crafters we are, Big Sis and I decided to break in the new house with an invasion. Of mice. Don’t panic. This collection won’t require pest control; just some of #4’s time. You see, before everyone left for home – these were hidden all over her new house.

House Mice - The Full Line-Up

This might very well be the first time she’s seen the entire line-up. At last count, one or two still hadn’t been found (4 weeks later). Heh heh. I think everyone in the family is laughing except for her. From what I’ve heard, Baby Sister got pretty creative with hiding places. Those last few may never be found.

I’m sharing this with you because it has been almost torturous to keep this to myself for this long. Our little project started this summer when Big Sis and I found a photo of felt mice on Pinterest which got us thinking. What if we made all types of mice and gave them themes or specific rooms to hide in?

Enter the Kitchen Mouse:

House Mouse - Breakfast Over Easy

Her apron, bottle cap skillet and toothpick wire whisk inspired a legion of others – all hand crafted with love and attention to detail. For instance, Big Sis created the Country Mouse complete with overalls, a bucket & straw in his mouth. Perhaps he could sit on a windowsill overlooking their back meadow.

House Mice - The Country Mouse

Sister #4 loves embroidery, so I made her a Crafting Mouse.

House Mice - The Crafter

And since they are voracious readers and the new living room is filled with big beautiful book shelves, Big Sis upped the ante with a Book Worm Mouse.

House Mice - The Book Worm

I responded with The Artist Mouse, because while our brother-in-law is a fire captain by trade, he is a painter at heart and has a new art studio at the house to show for it. Every studio should have a mascot. Right?

House Mice - The Artist

For fun, Big Sis added a few colorful hippie mice.

House Mice - The Hippie Sisters

And I pulled together a teal sweetie pie bearing flowers as a housewarming gift…

House Mice - The Florist

and this little Glamor Puss for their granddaughter, Zoey. This mouse is a diva.

House Mice - The Glamor Girl

Not to be outdone, Big Sis went for broke with the Racy Lingerie Mouse. She’s the floozy of the bunch. It was hidden in #4’s undies drawer.

House Mice - Racy Lingerie Mouse

She followed up with some really psychedelic party mice.

House Mice - The Funky Bunch

I thought we needed a mouse nesting in laundry lint to hide behind the dryer,

House Mice - Dust Bunny

and this one for the pantry. I call him Mr. Beans.

House Mice - Mr. Beans

And there were more. Twenty-two mice in total. All bearing sweet little tags that said “Congratulations on your new home. We’re so happy we could SQUEAK!” I don’t know which mouse was found first, but I do know it made cleaning up after a house full of company a lot more fun. And we had a blast making them.

House Mice - The Whole Gang

Rumor has it they are now populating a Christmas tree. Enjoy your new friends, Sister #4. Congrats on your new home. We can’t wait to visit again.

Until then… leave a light on.

House Mice - The Watcher

38 Comments

Filed under Craft Projects, Family Stuff